To install a laundry tub drain pipe, first, assemble all necessary tools and materials. Then, follow these steps: position the drain pipe in the desired location, mark the area for cutting, cut the pipe, remove any burrs or rough edges, connect the drain pipe to the main plumbing line, and secure the connections with a rubber coupling and stainless steel clamps.
Introducing a laundry tub drain pipe requires careful installation to ensure proper functionality and prevent potential water damage. By following a few straightforward steps, you can connect the drain pipe to the existing plumbing system and effectively manage wastewater from your laundry area.
This article provides a concise guide on how to install a laundry tub drain pipe, ensuring a seamless and hassle-free process for homeowners. By adhering to these instructions, you can easily connect your laundry tub to the main drain line and maintain a functional and efficient laundry space.
Proper Preparation For Installing A Laundry Tub Drain Pipe
Installing a laundry tub drain pipe is an essential task to ensure proper drainage and prevent any leaks or water damage. However, before you dive into this project, it’s crucial to make sure you have everything you need and that the area is clear and accessible. This guide will walk you through the important steps to take in preparation for installing a laundry tub drain pipe, so you can tackle the task with confidence.
Checking the necessary tools and materials
Before you begin the installation process, it’s essential to gather all the necessary tools and materials to complete the project efficiently. Here’s a quick checklist of items you’ll need:
- Adjustable wrench
- Hacksaw
- Teflon tape
- Pipe cutter
- Pipe fittings (such as elbows and connectors)
- Plumber’s putty
- Bucket
- Gloves
Having these tools and materials ready and easily accessible will save you time and ensure a smooth installation process.
Ensuring the area is clear and accessible
Next, it’s crucial to clear the work area around your laundry tub to have easy access during the installation. Make sure to remove any objects or obstacles that may hinder your movement or limit your visibility. Additionally, ensure that there is sufficient lighting in the area, as this will help you work more effectively and avoid any potential mishaps.
If you’re working in a cramped space, consider moving the tub if possible to create a more accessible workspace. Clearing the area and ensuring it is well-lit will allow you to work safely and efficiently.
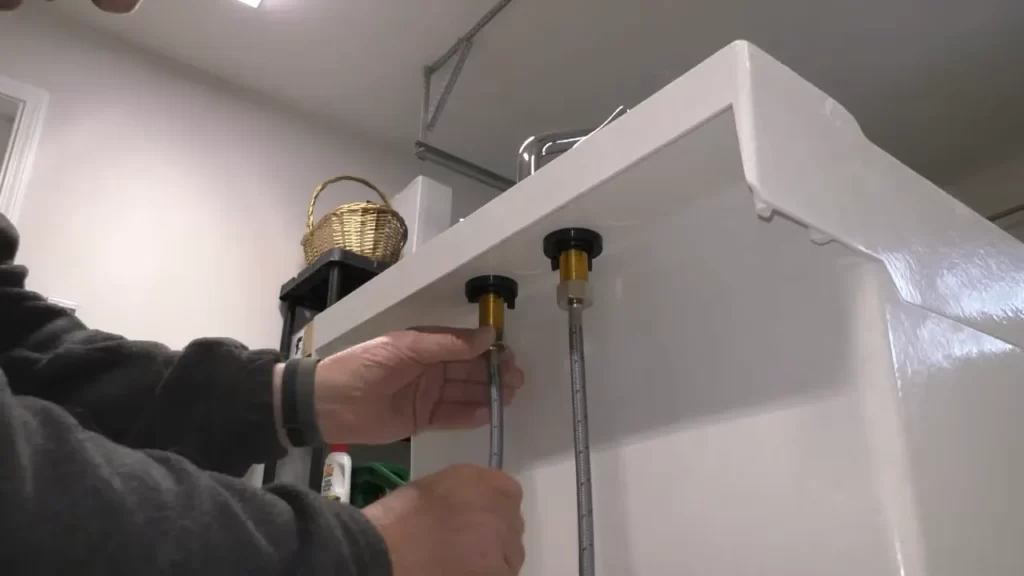
Shutting off the water supply
Before you start disconnecting any pipes or fittings, it’s crucial to shut off the water supply to your laundry tub. This step is essential to prevent any water flow during the installation, which could lead to leaks or damage. You can find the shut-off valve near the water supply lines behind the washing machine.
Rotate the valve clockwise to turn off the water supply. Once the water supply is shut off, turn on a faucet in the sink to release any remaining water pressure in the pipes. This will help ensure a smooth and hassle-free installation process.
By properly preparing for installing a laundry tub drain pipe, you’re setting yourself up for success. Checking the necessary tools and materials, ensuring the area is clear and accessible, and shutting off the water supply are crucial steps to take before diving into the installation process. Once you have completed these preparation tasks, you’ll be ready to move on to the actual installation of the drain pipe, which will be covered in the next section of this guide.
Removing The Old Drain Pipe
When it comes to installing a new laundry tub drain pipe, one of the first steps is removing the old drain pipe. This is an important part of the process as it allows you to start fresh and ensure that your new plumbing system functions efficiently. In this section, we will look at two key aspects of removing the old drain pipe: removing the P-trap and any connected pipes, and detaching the existing drain pipe from the laundry tub.
Removing the P-trap and any connected pipes
The P-trap is a curved pipe that helps prevent sewer odors from entering your home by trapping a small amount of water. Before removing the drain pipe, it’s important to disconnect the P-trap and any other pipes connected to it. Here’s a step-by-step guide on how to do it:
- Start by placing a bucket or a towel underneath the P-trap to catch any water that may spill out during the process.
- Using a pair of pliers or a pipe wrench, loosen the slip nuts that connect the P-trap to the vertical drain pipe and the horizontal pipe from the laundry tub. Be sure to hold the other end of the P-trap to prevent it from falling.
- Once the slip nuts are loose, carefully remove the P-trap by pulling it downwards. Empty any remaining water from the trap into the bucket.
- If there are any additional pipes connected to the P-trap, such as a tailpiece from the sink or a cleanout plug, use the pliers or pipe wrench to disconnect them as well.
Detaching the existing drain pipe from the laundry tub
Once the P-trap and connected pipes have been removed, it’s time to detach the existing drain pipe from the laundry tub. Follow these steps:
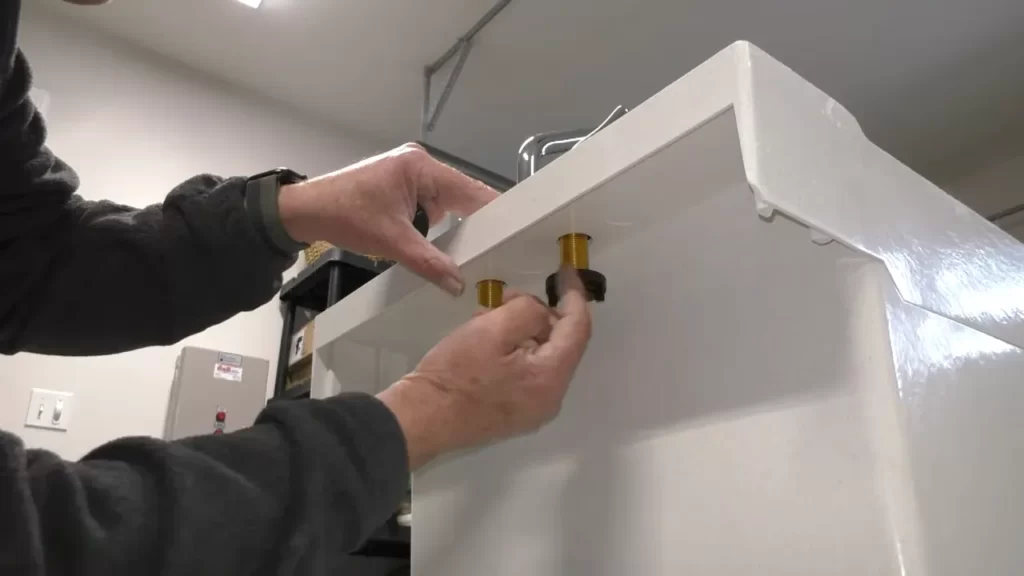
- Inspect the drain pipe to identify the type of connection it has with the laundry tub. It might be connected using a slip joint nut, a compression nut, or a threaded connection.
- If the drain pipe is connected with a slip joint nut or a compression nut, use pliers or a pipe wrench to loosen the nut. Turn it counterclockwise until it is loose enough to slide off the threaded end of the drain pipe.
- If the drain pipe has a threaded connection, use a pair of pliers or a pipe wrench to loosen it by turning it counterclockwise. Once it’s loose, you can unscrew it completely.
- Gently pull the existing drain pipe away from the laundry tub. If it’s stuck, you may need to apply some force or use a utility knife to cut through any caulk or sealant that is holding the pipe in place.
By following these steps and removing the P-trap and any connected pipes, as well as detaching the existing drain pipe from the laundry tub, you will be ready to install the new drain pipe and ensure a smooth and efficient plumbing system for your laundry area.
Installing The New Drain Pipe
Once you have removed the old drain pipe, it is time to install the new one to ensure proper drainage of your laundry tub. This step-by-step guide will walk you through each stage of the installation process, from choosing the correct type and size of drain pipe to connecting the P-trap and other pipes.
Choosing the Correct Type and Size of Drain Pipe
Before you start installing the new drain pipe, it is important to choose the right type and size for your laundry tub. The type of drain pipe you select will depend on the material of your laundry tub and your local plumbing codes. Common options include PVC, ABS, and copper pipes. Consider consulting a plumber or researching local regulations to ensure compliance.
Next, you need to determine the size of the drain pipe. The size is usually measured by its diameter, and standard options include 1.5 inches or 2 inches. The size you choose will depend on the flow rate and volume of water that will be drained from your laundry tub. If you are uncertain, it is always best to opt for a larger size to prevent clogging.
Attaching the New Drain Pipe to the Laundry Tub
Begin by attaching the new drain pipe to the laundry tub. Depending on the type of pipe you choose, you may need to use PVC glue or other adhesive to secure the connection. Follow the manufacturer’s instructions for the specific adhesive and allow sufficient time for it to dry and harden.
If you are working with PVC pipes, you can use a hacksaw or PVC pipe cutter to cut the pipe to the desired length. Ensure that the cut is clean and smooth, as rough edges can cause leaks.
| Materials | Tools |
|---|---|
| PVC or ABS drain pipe | Hacksaw or PVC pipe cutter |
| PVC glue or adhesive | Measuring tape |
| Pipe fittings (elbows, connectors) | Adjustable wrench |
Connecting the P-trap and Other Pipes
Once the new drain pipe is securely attached to the laundry tub, it is time to connect the P-trap and other pipes. The P-trap is an essential component that prevents sewer gases from entering your home. It is typically shaped like a “P” and is connected to the drain pipe and the main sewer line or septic tank.
Using pipe connectors and elbows, connect the P-trap to the drain pipe. Ensure that all connections are tight and secure by using an adjustable wrench.
Check for any leaks by running water into the laundry tub and observing the connections. If you notice any leaks, tighten the connections or replace any faulty parts.
Once you have confirmed that there are no leaks, you can proceed to connect the other pipes, such as the main sewer line or septic tank. Again, use appropriate connectors and elbows, ensuring a tight and secure connection.
You have now successfully installed the new drain pipe for your laundry tub. Remember to test the drainage system regularly to ensure proper functioning. If you encounter any issues or are unsure about any step in the installation process, it is advisable to consult a professional plumber.
Testing The Drainage System
Once you have successfully installed the laundry tub drain pipe, it is important to test the drainage system to ensure that everything is working as it should. This step is crucial as it allows you to identify any potential issues such as leaks or blockages that may arise and address them promptly. Follow the steps below to test your laundry tub drain pipe effectively.
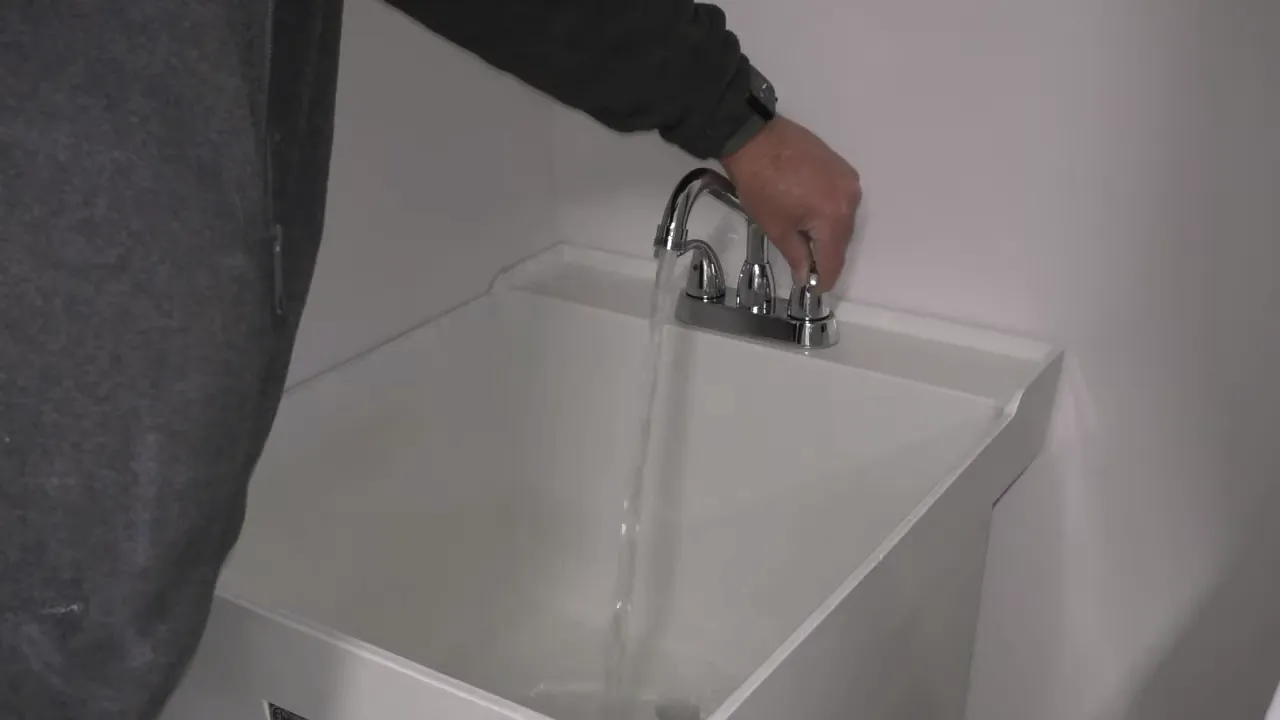
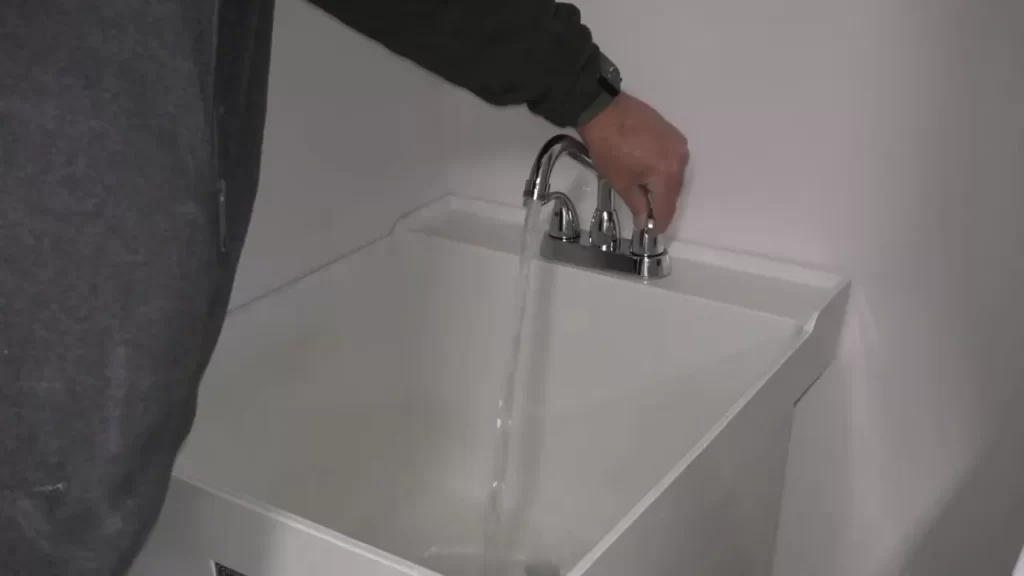
Running water through the drain pipe
To begin testing the drainage system, start by running water through the drain pipe. Turn on the faucet connected to the laundry tub and let the water flow freely. As the water runs down the drain, observe how quickly it is being drained. Ideally, the water should be drained without any delays or backups. Pay attention to any unusual gurgling sounds or slow draining, as these could be indications of potential issues in the system.
Checking for leaks or blockages
Once you have tested the flow of water through the drain pipe, it is time to check for any leaks or blockages. Inspect the entire length of the pipe, including the joints and connections. Look out for any signs of water dripping or pooling around these areas. If you spot any leaks, tighten the connections or consider using plumbing tape to seal them. Additionally, inspect for any blockages that may be restricting the flow of water. Clear away any debris or foreign objects that could be causing the blockage.
Making adjustments if necessary
In some instances, you may need to make adjustments to the drain pipe to ensure optimal performance. If the water flow is slow or if there are persistent leaks, you might need to recheck the alignment of the pipe. Ensure that the pipe has a slight slope towards the main drain to encourage proper drainage. Consider using a level to ensure that the pipe is positioned correctly. Additionally, check the diameter of the pipe to ensure it is the appropriate size for the amount of water that will be draining through it.
By following these steps and testing the drainage system thoroughly, you can ensure that your laundry tub drain pipe is working efficiently. Remember to address any issues promptly to prevent further damage or inconvenience. A well-functioning drainage system will not only make your laundry tasks easier but also prevent water damage and potential plumbing emergencies.
Helpful Tips For Installing A Laundry Tub Drain Pipe
Installing a laundry tub drain pipe may seem like a daunting task, but with the right tips and guidance, it can be a straightforward process. Properly aligning and securing the pipes, using plumber’s tape for an extra seal, and consulting a professional when unsure about any steps, are crucial elements to ensure a successful installation. In this article, we will delve deeper into these helpful tips, providing you with the knowledge and confidence to install your laundry tub drain pipe effectively.
One of the most important aspects of installing a laundry tub drain pipe is ensuring proper alignment and secure connections between the different sections of the pipe system. Neglecting this step can lead to leaks and other plumbing issues down the line.
Here are some essential tips for correctly aligning and securing your laundry tub drain pipe:
- Start by measuring and cutting the pipe sections to the desired length, ensuring they fit snugly together.
- Use pipe connectors or couplings to join the different sections of the pipe system securely. Make sure to tighten them properly using a wrench or pliers.
- Check the alignment of the pipes at each connection point to ensure they are straight and in line with each other. This step is crucial in preventing any potential blockages or disruptions in the flow of water. Adjust the pipe angles as necessary.
- Consider using pipe hangers or brackets to provide additional support and keep the pipes in place. This extra measure can prevent any sagging or movement that could lead to stress on the connections.
When installing a laundry tub drain pipe, achieving a sturdy and watertight connection is essential to prevent leaks. Plumber’s tape, also known as Teflon tape, can be a valuable tool in creating an additional seal between pipe threads.
Here’s how to use plumber’s tape effectively:
- Before connecting the pipes, clean the threaded ends thoroughly to ensure they are free from debris or dirt.
- Starting at the base of the threads, wrap the plumber’s tape tightly in a clockwise direction. Ensure that the tape covers all the threads evenly.
- Continue wrapping until you reach the top of the threads, overlapping the tape slightly for better sealing.
- Once the tape is applied, attach the pipes together as usual, making sure to tighten them securely. The tape will act as an extra barrier against leaks.
While installing a laundry tub drain pipe can be a manageable DIY project for many, it’s important to recognize your limits and seek professional assistance if you’re unsure about any steps or encounter unexpected difficulties. Consulting a licensed plumber can save you time, money, and potential headaches in the long run.
If you’re unsure about any aspect of the installation process, don’t hesitate to reach out to a professional. They have the expertise and knowledge to guide you through the process or even handle the installation entirely if needed.
Remember, it’s always better to be safe than sorry when it comes to your plumbing system. Engaging a professional ensures that the laundry tub drain pipe is installed correctly, minimizing the risk of leaks or any other potential problems down the line.
Frequently Asked Questions
How Do You Install A Wash Basin Drain?
To install a wash basin drain, follow these steps: 1. Position the drain assembly in the sink’s drain hole. 2. Tighten the locknut to secure the drain in place. 3. Connect the drainpipe to the drain assembly. 4. Apply plumber’s putty around the drain flange to create a watertight seal.
5. Test for leaks by running water through the basin.
How Do You Connect A Bathroom Sink Drain Pipe?
To connect a bathroom sink drain pipe, first, attach the tailpiece to the sink drain. Then, connect the P-trap to the tailpiece and the vertical drain pipe. Ensure all connections are tight and secure. Lastly, check for any leaks and make necessary adjustments.
What Size Is Laundry Tub Drain Pipe?
The laundry tub drain pipe typically measures 1. 5 inches in diameter, allowing for efficient water drainage.
How Do You Hook Up A Drain Pipe?
To hook up a drain pipe, first, gather the necessary materials and tools. Then, align the pipe’s edges, ensuring a snug fit. Connect the pipes by using PVC primer and cement. Tighten the connections using adjustable wrenches or pliers. Finally, test the drain for leaks and make necessary adjustments if needed.
Conclusion
Installing a laundry tub drain pipe may seem like a daunting task, but with the right guidance, it can be a straightforward process. By following the step-by-step instructions outlined in this blog post, you can successfully complete the installation yourself, saving both time and money.
Remember to take measurements accurately, use the correct tools, and ensure proper connections. With a little patience and attention to detail, you’ll have a fully functional laundry tub drain pipe in no time. Happy plumbing!