To install a laundry shoot, measure and cut an opening in the desired location, attach the shoot frame and door, and secure it in place with screws. Use a saw to cut an opening in the wall for the shoot, ensuring it’s at a convenient height for use.
Attach the shoot frame and door to the opening, making sure they align properly and are secure. Overall, installing a laundry shoot requires measuring, cutting, and securing the necessary components to create a functional and convenient access point for disposing of dirty laundry.
Planning The Installation
Planning the installation of a laundry shoot is an essential step before getting started with the actual construction. Proper planning not only ensures a smooth installation process but also helps in determining the best location for the shoot and making efficient use of the available space. In this article, we will guide you through the planning phase of installing a laundry shoot, covering important aspects such as assessing the space requirements, choosing the ideal location, and measuring the available space.
Assessing the Space Requirements
Assessing the space requirements is the first step towards a successful laundry shoot installation. You need to evaluate the available space and ascertain if it meets the necessary criteria for installation. Consider the following points:
- The shoot requires vertical clearance that extends from the floor of the upper level to the bottom of the shoot opening on the lower level. Ensure that there are no obstructions such as plumbing or wiring that could interfere with the shoot.
- Check if the space is wide enough to accommodate the shoot and allow for easy passage of clothes. A cramped shoot may cause clothes to get stuck, leading to blockages and other inconveniences.
- Ensure that the space is structurally sound and can bear the weight of the shoot, especially if it needs to pass through multiple levels.
Choosing the Ideal Location
Choosing the ideal location for your laundry shoot is crucial for its functionality and convenience. Consider the following factors when deciding on the location:
- Opt for a central location that provides easy access from different rooms, such as bedrooms and bathrooms, to maximize convenience.
- Consider the noise factor. Avoid installing the shoot near bedrooms or living areas where the noise of clothes falling into the shoot may disturb occupants.
- Check the proximity to your laundry area. The shoot’s lower opening should be easily accessible for easy collection and transferring of laundry to the washing machine.
Measuring the Available Space
Measuring the available space accurately is crucial to ensure a proper fit for your laundry shoot. Use the following steps to measure the available space:
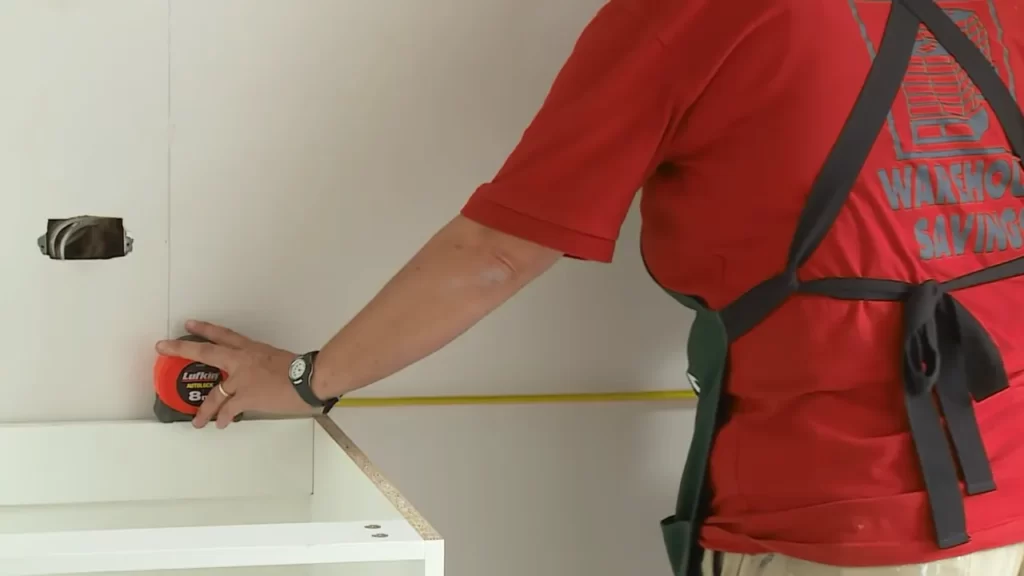
- Measure the vertical distance from the floor of the upper level to the desired height of the bottom opening of the shoot on the lower level. Take into consideration any obstructions such as ceiling height variations or beams.
- Measure the width of the shoot opening required to comfortably accommodate your laundry needs. Consider the bulkiness of clothes and aim for an opening that allows easy passage without obstruction.
- Measure the depth required for the shoot to extend through the floors. Allow for additional space to account for the shoot assembly and any necessary brackets or supports.
By measuring the available space accurately, you can ensure a smooth installation process and avoid any surprises or complications along the way.

Gathering Materials And Tools
Before you start installing a laundry shoot in your home, it’s important to gather all the necessary materials and tools. By preparing ahead of time, you can ensure a smooth and efficient installation process. In this section, we will discuss the essential materials and tools you’ll need for the installation.
Essential Materials for the Installation
When it comes to installing a laundry shoot, there are a few key materials that you’ll need to have on hand. These materials will help you construct the shoot unit and the necessary ductwork to complete the installation.
Shoot Unit
The shoot unit is the main component of a laundry shoot. It’s responsible for safely transporting your laundry from different floors of your home. To create a sturdy shoot unit, you’ll need the following materials:
- Shoot frame
- Shoot door
- Shoot liner
- Shoot cover
- Shoot release mechanism
Ductwork
The ductwork is what connects the shoot unit to your laundry room or basement. It ensures that the laundry can flow smoothly through the shoot and into the designated collection area. To complete the ductwork, you’ll need:
- Duct pipes
- Duct elbows
- Duct clamps
- Duct tape
- Duct connector
Tools Required for the Installation
To successfully install a laundry shoot, you’ll need a few tools to assist you. These tools will help you measure, cut, and secure the necessary materials for the installation.
- Drill
- Saw
- Tape measure
With a drill, you can make holes for screws and attachments when assembling the shoot unit. A saw will come in handy for cutting the shoot liner, shoot frame, and duct pipes to the desired length. Lastly, a tape measure is essential for precise measurements to ensure a proper fit for all components of the laundry shoot.
By gathering all the essential materials and tools mentioned above, you’ll be well-prepared for a successful laundry shoot installation. In the next section, we will discuss the step-by-step process of installing the shoot unit and connecting the ductwork.

Preparing The Installation Site
Before you can install a laundry shoot in your home, it is important to properly prepare the installation site. This involves clearing the area, marking the spot, and removing any obstacles that may hinder the installation process. By following these steps, you will ensure a smooth and successful installation of your laundry shoot.
Clearing the Area
The first step in preparing the installation site is to clear the area where the laundry shoot will be installed. Remove any items that may be in the way, such as furniture, decorations, or storage bins. This will provide you with a clear space to work and make it easier to determine the best location for your laundry shoot.
Marking the Spot
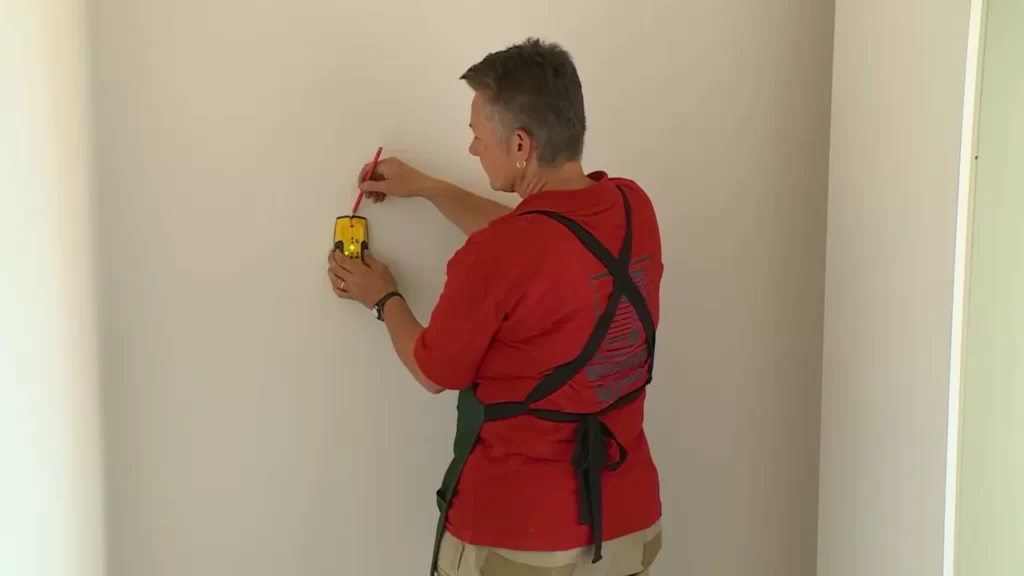
Once the area is clear, it is time to mark the spot where the laundry shoot will be installed. Measure the height and width of the space to ensure that the laundry shoot will fit properly. Use a measuring tape and a pencil to mark the measurements on the walls or floor. This will serve as a guide during the installation process.
Removing Obstacles
In order to ensure a smooth installation of the laundry shoot, it is important to remove any obstacles that may hinder the process. This includes electrical wires, plumbing pipes, or HVAC ducts that may be in the way. If necessary, consult with a professional to safely relocate these obstacles before proceeding with the installation.
By following these steps and properly preparing the installation site, you will be well on your way to installing a convenient and efficient laundry shoot in your home. Clearing the area, marking the spot, and removing obstacles are important tasks that will contribute to a successful installation process. Once the site is prepared, you can move on to the next steps of installing your laundry shoot.

Installing The Shoot Unit
Assembling the Shoot Components
Before you can install a laundry shoot in your home, you need to first assemble the shoot components. This ensures that you have all the necessary parts and that they are ready for installation. Follow these steps to assemble the shoot components:
- Gather all the shoot components, including the shoot unit, shoot door, shoot frame, and any additional accessories.
- Refer to the manufacturer’s instructions for guidance on how to assemble the shoot unit. Ensure that you follow the instructions carefully to avoid any potential issues during installation.
- Attach the shoot frame to the shoot unit, ensuring that it aligns properly and securely.
- Install the shoot door onto the shoot frame, making sure it opens and closes smoothly.
Securing the Shoot to the Wall
Once you have assembled the shoot components, you can proceed to secure the shoot to the wall. This step is essential to ensure the stability and safety of the laundry shoot. Follow these steps to secure the shoot to the wall:
- Choose a suitable location on the wall where you want to install the shoot unit. Ensure that it is easily accessible and strategically placed for convenience.
- Hold the shoot unit against the wall in the desired location and use a level to ensure it is vertically straight.
- Mark the screw hole locations on the wall using a pencil or a marker.
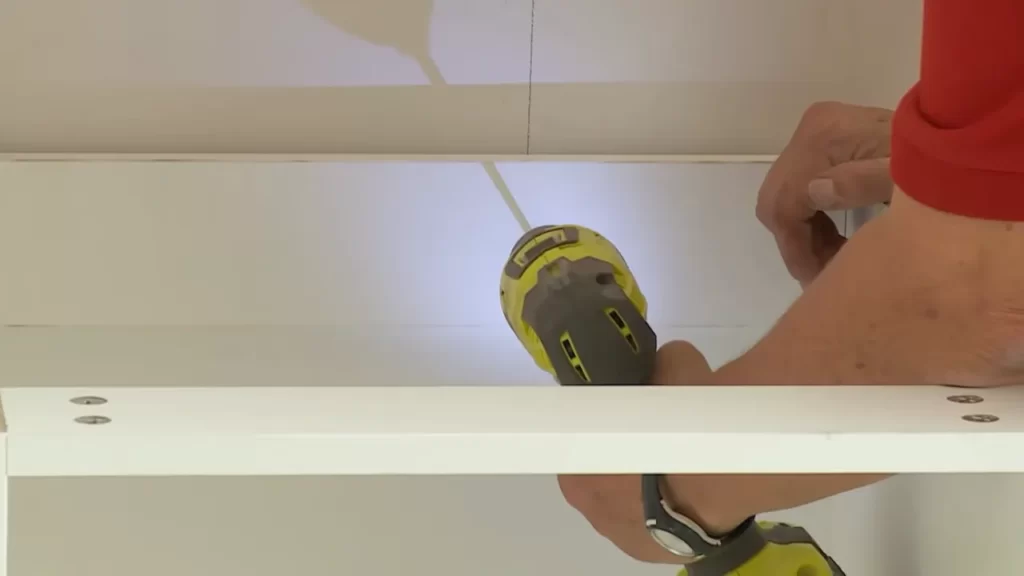
- Drill pilot holes into the marked locations to make it easier to screw in the shoot unit.
- Align the shoot unit with the pilot holes and use screws or anchors, depending on your wall type, to secure it firmly in place.
Connecting the Shoot to the Upper Floor
Connecting the shoot to the upper floor is the final step in installing a laundry shoot. This step requires careful planning and precision to ensure a seamless connection. Follow these steps to connect the shoot to the upper floor:
- Determine the location on the upper floor where the shoot will open. This can be a hallway closet or any other suitable spot.
- Create an opening in the ceiling/floor at the specified location. Ensure that the opening is large enough to accommodate the shoot and that it is properly aligned with the shoot unit.
- Carefully connect the shoot unit to the opening, ensuring that it fits securely and tightly.
- Use screws or brackets to secure the shoot unit to the upper floor, ensuring that it is stable and safe for use.

Setting Up The Ductwork
Installing a laundry shoot can make your laundry routine much more convenient and efficient. One of the key steps in the installation process is setting up the ductwork, which will allow clothes to be easily transported from the upper floors to the laundry area. In this section, we will discuss how to measure and cut the duct sections, connect the ductwork pieces, and secure the ductwork.
Measuring and Cutting the Duct Sections
The first step in setting up the ductwork is to accurately measure and cut the duct sections. This will ensure that the clothes can smoothly travel through the chute without any obstructions. To begin, you will need to measure the distance from the opening on the upper floor to the laundry area.
Once you have measured the distance, it’s time to cut the duct sections accordingly. Use a measuring tape and a marker to mark the measurements on the duct sections. Make sure to use a sharp cutting tool, such as a duct knife or tin snips, to cut through the sections. Take your time and make precise cuts to ensure a proper fit.
Connecting the Ductwork Pieces
After cutting the duct sections, it’s time to connect them to create a seamless chute for the laundry. Use duct tape or sheet metal screws to securely connect the ductwork pieces. It’s important to ensure a tight connection to avoid any leaks or loose sections. If necessary, use foil tape to seal any gaps between the duct sections for added protection.
Securing the Ductwork
Once the ductwork is connected, it’s crucial to secure it properly to prevent any movement or instability. Use sturdy metal hangers or brackets to support the ductwork and keep it in place. Make sure to place the hangers or brackets at regular intervals along the length of the chute for maximum stability.
Additionally, consider insulating the ductwork to minimize heat loss and reduce noise. Insulation can be wrapped around the duct sections before securing them in place. This will not only improve the energy efficiency of your laundry shoot but also provide a quieter laundry experience.
By following these steps, you can successfully set up the ductwork for your laundry shoot. Remember to take accurate measurements, make precise cuts, and secure the ductwork properly for a functional and efficient chute. The next section will discuss how to install the laundry shoot door and complete the installation process.
Insulating And Finishing The Installation
Insulating and finishing the installation of your laundry chute are essential steps to ensure its functionality and appearance. By properly insulating the ductwork and adding finishing touches, you can optimize the efficiency and visual appeal of your laundry shoot.
Insulating the Ductwork
Insulating the ductwork is crucial to prevent heat loss and noise transfer. To insulate the ductwork, follow these steps:
- Measure the length and diameter of the ductwork.
- Choose the appropriate insulation material, such as fiberglass or foam.
- Wrap the insulation around the ductwork, ensuring a tight fit.
- Secure the insulation using insulation tape or adhesive.
Securing the Insulation
Securing the insulation is important to prevent it from shifting or coming loose over time. To secure the insulation, consider the following:
- Inspect the entire length of the ductwork to ensure the insulation is intact.
- Apply additional insulation tape or adhesive to any areas that may need reinforcement.
- Check for any gaps or openings in the insulation and seal them properly.
- Test the insulation’s stability by gently tugging on it to make sure it holds in place.
Finishing Touches for a Seamless Look
Adding finishing touches will not only give your laundry chute a polished appearance but also ensure a seamless integration with your home’s interior. Consider the following finishing touches:
- Sand and smooth any rough edges or surfaces on the chute opening. Use sandpaper or a file to achieve a clean finish.
- Paint or stain the chute opening to match the surrounding walls or the overall aesthetic of the room.
- Install a trim or molding around the chute opening to enhance its visual appeal.
- Ensure the chute door or cover operates smoothly and securely, providing easy access to the chute when needed.
By insulating the ductwork, securing the insulation, and adding the finishing touches, you not only optimize the performance and energy efficiency of your laundry chute but also create a seamless look that blends seamlessly with your home’s design.
Testing And Troubleshooting
Once you have successfully installed your laundry shoot, it is important to conduct a test run to ensure proper functionality. This will allow you to identify any issues or potential problems before regular use. In this section, we will guide you through the process of conducting a test run, ensuring proper functionality, and troubleshooting common issues that may arise.
Conducting a Test Run
Before using your laundry shoot for its intended purpose, it is crucial to conduct a test run to confirm that everything is in working order. Here are the steps to follow:
- Clear the area around the laundry shoot entrance and exit. Remove any obstructions or objects that may hinder the process.
- Identify a few items that you can use for testing. It is recommended to choose different types of clothing, such as shirts, pants, and towels, to ensure a variety of sizes and weights.
- Open the laundry shoot entrance and carefully place the test items inside, one by one. Ensure that none of the items get stuck or jammed during the process.
- Go to the designated laundry shoot exit and check if the items have arrived safely. Verify that they are not damaged or tangled in any way.
- Repeat the process a few times to make sure the laundry shoot operates smoothly and consistently.
Ensuring Proper Functionality
After conducting a successful test run, it is important to ensure that your laundry shoot functions properly. Here are some key points to consider:
- Check the alignment of the laundry shoot entrance and exit. They should be perfectly aligned to ensure smooth transfer of items.
- Inspect the chute for any signs of wear or damage. Any sharp edges or loose parts should be addressed and repaired.
- Make sure the laundry shoot is securely attached to the wall or floor. Loose fittings can cause instability and possible malfunctions.
- Consider the weight capacity of your laundry shoot. Avoid overloading it with heavy items to prevent damage or blockages.
- Regularly clean and maintain the laundry shoot to prevent the accumulation of lint or other debris, which can cause clogs or airflow issues.
Troubleshooting Common Issues
Despite proper installation and regular maintenance, it is possible to encounter some issues with your laundry shoot. Here are a few common problems and their possible solutions:
| Problem | Solution |
|---|---|
| The laundry shoot is jammed or items get stuck. | Check for any obstructions or debris inside the chute. Use a long pole or hook to remove any blockages carefully. If the issue persists, consider contacting a professional for assistance. |
| The laundry shoot makes loud noises during operation. | Inspect the chute for loose parts or screws. Tighten them if necessary. Lubricate the moving parts with a silicone-based lubricant to reduce friction and noise. |
| Items don’t slide smoothly through the laundry shoot. | Apply a small amount of talcum powder or silicone spray to the inside of the chute. This will help reduce friction and ensure easier movement of items. |
By following these guidelines for testing, ensuring proper functionality, and troubleshooting common issues, you will be able to enjoy the convenience and efficiency of your laundry shoot without any complications.
Finalizing The Installation
Congratulations! You’re almost there in completing the installation of your new laundry shoot. Before you can start enjoying the convenience it brings, there are a few final steps you need to take. In this section, we’ll cover how to clean up the work area, celebrate your newly installed laundry shoot, and provide maintenance tips to ensure its longevity.
Cleaning up the Work Area
Now that the installation is complete, it’s time to tidy up the work area. Here are a few steps you can follow to ensure a clean and organized space:
- Remove any tools or equipment that were used during the installation process.
- Vacuum or sweep the area to remove any dust or debris.
- Wipe down the walls and floor with a damp cloth or mop to eliminate any remaining dirt or grime.
By keeping the work area clean, you’ll not only have a more pleasant space to do your laundry, but you’ll also reduce the chances of any accidents or obstructions in the future.
Celebrating your Newly Installed Laundry Shoot
Take a moment to celebrate your hard work and the convenience of having a laundry shoot in your home. Here are a few ideas to mark this milestone:
- Invite friends or family over for a small gathering to show off your new laundry shoot.
- Treat yourself to a well-deserved evening of relaxation.
- Share your success on social media and inspire others to install a laundry shoot in their homes.
Remember, installing a laundry shoot is not only a practical addition to your home but also a significant improvement that adds value to your property.
Maintenance Tips for Longevity
To ensure your laundry shoot lasts for years to come, it’s important to perform regular maintenance. Here are some tips to keep in mind:
| Tips | Description |
|---|---|
| Regularly clean the shoot | Remove any lint or debris that may accumulate in the shoot to prevent blockages. |
| Inspect the shoot door | Regularly check the door for any signs of wear or damage. If necessary, replace the door to ensure it functions properly. |
| Keep children supervised | Make sure children are aware of the dangers associated with a laundry shoot and never let them play near it unsupervised. |
| Avoid overloading the shoot | Be mindful of the weight and volume of clothes you drop into the shoot to prevent any strain or damage to the system. |
By following these maintenance tips, you’ll maximize the lifespan of your laundry shoot and continue to enjoy its convenience for years to come.
With the installation completed, the work area cleaned, and the maintenance tips in mind, you can now fully enjoy the convenience and efficiency of your newly installed laundry shoot. Happy laundering!
Frequently Asked Questions For How To Install Laundry Shoot
How Hard Is It To Install A Laundry Shoot?
Installing a laundry shoot is a moderately difficult task that requires planning, cutting a hole in the floor, and securing the chute. It’s best to consult a professional to ensure proper installation and safety.
Is It Easy To Install A Laundry Chute?
Yes, installing a laundry chute is easy. It requires basic carpentry skills and can be done quickly. Simply cut an opening in the desired location, secure the chute in place, and connect it to the upper and lower floors. It’s a convenient way to streamline the laundry process.
How Much Does It Cost To Install A Laundry Shoot?
The cost of installing a laundry shoot varies depending on several factors such as materials, size, and labor. On average, it can range from $500 to $2000. Proper research and consultation with professionals will give you a more accurate estimate.
How Do I Add A Laundry Shoot To My House?
To add a laundry shoot to your house, follow these steps: 1. Choose a suitable location, preferably near a bathroom or laundry room. 2. Measure the space and consider any obstacles or structural changes needed. 3. Determine the chute size and select a suitable material, such as PVC piping.
4. Install the chute by cutting holes in the walls and connecting the sections securely. 5. Finish the installation with proper insulation, fire protection, and a closing mechanism.
Conclusion
Installing a laundry shoot can greatly simplify your daily chore routine. By following the step-by-step guide provided in this blog post, you can easily create a convenient and efficient way to transport your dirty clothes from the upper floors to the laundry room.
With a few tools and materials, anyone can tackle this DIY project and enjoy the benefits of a laundry shoot in their home. So, why wait? Start the installation process today and make laundry day a breeze!
