
Installing kitchen backsplash mosaic tile is a straightforward process that involves preparing the surface, applying adhesive, placing the tile, and grouting. Doing it yourself can save you money and give your kitchen a stunning, personalized look.
Introducing a mosaic tile backsplash to your kitchen can add a touch of elegance and creativity. Not only does it protect your walls from splatters and stains, but it also enhances the overall aesthetic of your kitchen. However, if you’re considering installing a kitchen backsplash mosaic tile, you might be wondering about the step-by-step process.
We will guide you through the installation process, from prepping the surface to grouting the tiles, so that you can achieve a beautiful and functional kitchen backsplash.
Assessing Your Needs And Budget
Assessing Your Needs and Budget is a critical first step in any kitchen backsplash installation project. Before you dive into the exciting world of mosaic tile designs and color schemes, it’s essential to take a step back and consider what you truly need from your backsplash and how much you’re willing to invest. This will help you make informed decisions throughout the process and ensure that you’re satisfied with the end result.
Measure the area for backsplash installation
Measuring the area where you plan to install your kitchen backsplash is the foundation of a successful installation. By accurately measuring the length and height of the space, you can determine the quantity of mosaic tiles required and estimate the overall cost. Use a tape measure to get precise measurements, paying attention to any obstructions such as outlets or cabinets that may affect the size and shape of the backsplash.
Determine the type of backsplash material you want
Choosing the right backsplash material is a crucial decision that will impact both the appearance and functionality of your kitchen. Mosaic tiles are a popular choice due to their versatility, durability, and stunning visual appeal. However, there are various other materials available, such as ceramic, glass, stone, and metal. Each material has its unique characteristics, so consider factors like durability, maintenance requirements, and style to ensure you make the right selection for your needs.
Set a realistic budget for the project
Setting a realistic budget is essential to avoid unexpected costs and keep your kitchen backsplash installation within your financial limits. Take into account not only the cost of the mosaic tiles but also the adhesive, grout, tools, and additional materials that may be required. Researching the average prices of mosaic tiles and related supplies can help you establish a baseline budget. Be mindful of quality, as investing in higher-quality materials may save you money in the long run by reducing the need for future repairs or replacements.
By assessing your needs and budget before starting your kitchen backsplash installation project, you can ensure a smoother and more enjoyable experience. Remember to measure the area, choose the right material, and set a realistic budget. Armed with this information, you’ll be ready to move on to the next phase of your kitchen transformation.
Gathering The Materials And Tools
Before you dive into installing a kitchen backsplash mosaic tile, it’s essential to gather all the necessary materials and tools. This step will not only save you time but also ensure a smooth and efficient installation process. In this section, we will guide you on selecting the right mosaic tiles for your kitchen backsplash, choosing the appropriate grout and adhesive, and collecting the necessary tools for the installation process.
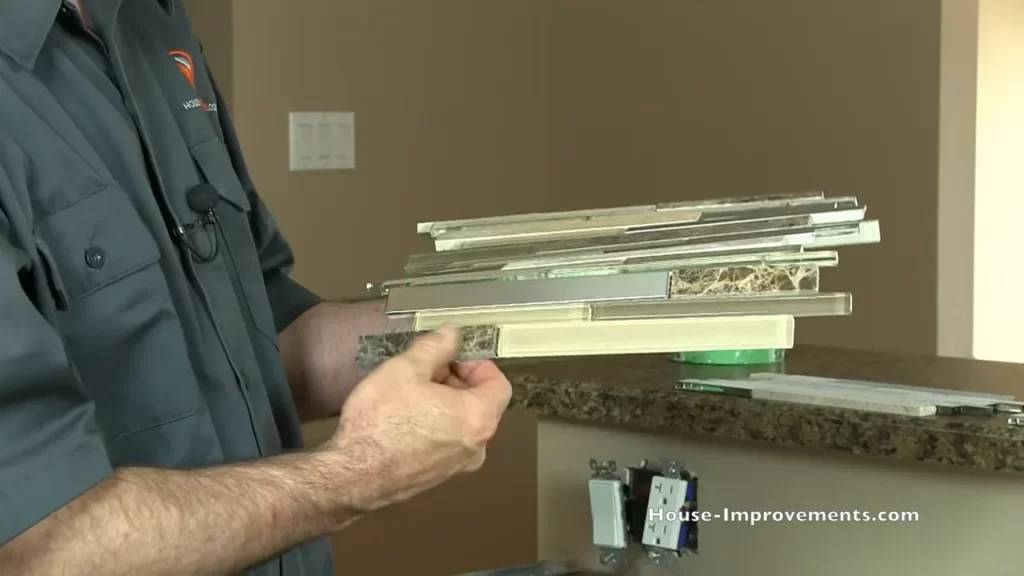
Selecting the right mosaic tiles for your kitchen backsplash
When it comes to selecting the perfect mosaic tiles for your kitchen backsplash, there are a few factors to consider. First, think about the overall style and color scheme of your kitchen. Do you want to add a pop of color or go for a more neutral look? Consider the existing countertop, cabinets, and flooring to ensure a cohesive design.
Moreover, the material of the mosaic tiles is crucial. Popular options include ceramic, glass, porcelain, and natural stone. Each material has its own unique properties and maintenance requirements. For instance, a glass mosaic tile can add a reflective and modern touch, while a natural stone mosaic tile offers a rustic and earthy feel.
To make an informed decision, visit a local home improvement store or browse online to explore a wide range of mosaic tile options. Don’t be afraid to ask for samples or consult with a knowledgeable salesperson who can guide you based on your preference, budget, and the overall look you want to achieve.
Choosing the appropriate grout and adhesive
Once you have selected the right mosaic tiles, it’s time to consider the grout and adhesive. These elements play a crucial role in the longevity and overall appearance of your kitchen backsplash.
The grout acts as a filler between the tiles, providing stability and preventing moisture from seeping behind the backsplash. Consider the color of the grout and whether you want it to blend in or contrast with the mosaic tiles. It’s worth noting that lighter-colored grout tends to show less dirt and stains.
Similarly, the adhesive you choose will determine the strength and durability of your backsplash. Opt for a high-quality adhesive specifically designed for your tile material. Some adhesives are better suited for certain materials, so it’s essential to read the manufacturer’s recommendations.
Collecting the necessary tools for the installation process
To ensure a successful installation, it’s crucial to have the right tools on hand. Here is a list of the essential tools you will need:
| Tools | Description |
|---|---|
| Tape measure | To accurately measure the backsplash area and determine the amount of tile needed. |
| Tile cutter or wet saw | For cutting tiles to fit around outlets or corners. |
| Grout float | To apply grout evenly and smoothly. |
| Notched trowel | To spread adhesive on the wall before placing the tiles. |
| Sponge or cloth | To wipe away excess grout and clean the tiles. |
| Bucket | To mix grout. |
| Level | To ensure the tiles are properly aligned and leveled. |
| Pencil or marker | To mark the layout and cutting lines on the tiles. |
| Protective gloves and goggles | To ensure safety during the installation process. |
Make sure you have all the necessary tools before starting the installation process. This will help you work efficiently and avoid any unnecessary delays.
By gathering the right materials and collecting the essential tools, you are now ready to embark on the kitchen backsplash mosaic tile installation journey. In the next section, we will guide you through the preparation and installation process.
Remember, attention to detail and careful planning will result in a stunning kitchen backsplash that adds both functionality and style to your space.
Removing Existing Backsplash Or Wall Coverings
When it comes to installing a new kitchen backsplash, the first step you need to take is removing the existing backsplash or wall coverings. This is an essential task to ensure a smooth and even surface for your new mosaic tile backsplash. In this section, we will guide you through the process of understanding the steps to safely remove old tiles or wallpapers and patching and smoothing the wall surface before installing the new backsplash.
Understanding the steps to safely remove old tiles or wallpapers
Before you begin removing the existing backsplash or wall coverings, it’s crucial to understand the steps involved to ensure a safe and efficient process. Follow these steps:
- Start by protecting your countertop and surrounding area with a drop cloth or plastic sheeting.
- Using a hammer and bolster chisel, gently tap the chisel at a low angle against the grout joints to loosen the tiles.
- Once the tiles are loose, carefully pry them off the wall using a flat pry bar or putty knife.
- If you encounter stubborn tiles or wallpapers that are difficult to remove, apply a heat gun or wallpaper steamer to soften the adhesive.
- Continue removing the tiles or wallpapers until the entire backsplash or wall covering is cleared.
- Finally, clean the wall surface using a mild detergent or adhesive remover to remove any residual adhesive or grout.
Patching and smoothing the wall surface before installing the new backsplash
Once the old tiles or wallpapers have been successfully removed, it’s important to patch and smooth the wall surface before installing the new backsplash. Follow these steps:
- Inspect the wall surface for any holes, cracks, or imperfections.
- Use spackling compound or filler to repair any damaged areas.
- Sand the patched areas with fine-grit sandpaper to achieve a smooth finish.
- Clean the wall thoroughly to remove dust and debris.
- Apply a primer to the wall surface to ensure proper adhesion of the new mosaic tile backsplash.
By following these steps to remove the existing backsplash or wall coverings and patching and smoothing the wall surface, you will achieve a clean and prepared surface ready for the installation of your new kitchen backsplash mosaic tile.
Ensuring A Properly Prepped Surface
Installing a kitchen backsplash mosaic tile adds a beautiful touch to your space and protects the walls from any moisture damage or stains. However, before you can start placing those gorgeous tiles, it is absolutely essential to ensure that the surface is properly prepped. By following these simple steps, you can create a smooth and strong foundation for your backsplash, ensuring a successful installation.
Cleaning and Degreasing the Wall to Ensure Good Adhesion
Before applying any primer or tiles, it is crucial to thoroughly clean and degrease the wall surface. This step ensures good adhesion and removes any contaminants that might hinder the bonding process. To clean the wall, follow these steps:
- Begin by removing any switch plates or outlet covers that may be on the wall.
- Using a mild detergent or dish soap mixed with warm water, scrub the wall using a sponge or soft cloth. Ensure that all dirt, grease, and other residues are thoroughly removed.
- Rinse the wall with clean water to remove any soap residue.
- Dry the wall completely using a clean, lint-free cloth or towel.
Applying a Suitable Primer to Promote Strong Bond and Prevent Moisture Damage
Once the wall is clean and dry, the next important step is to apply a suitable primer. A primer creates a strong bond between the wall and the tile adhesive, ensuring that your backsplash stays in place for years to come. Additionally, it helps prevent moisture damage, especially in areas near sinks or stovetops. Here’s how to apply the primer:
- Choose a primer specifically designed for the type of wall surface you have. There are different primers available for painted walls, drywalls, or other materials.
- Using a paintbrush or a roller, apply a thin and even coat of primer onto the wall surface. Make sure to cover the entire area where you’ll be installing the backsplash.
- Allow the primer to dry completely as per the manufacturer’s instructions. This usually takes a few hours.
- Inspect the primer-coated wall for any missed spots or unevenness. If necessary, apply a second coat, following the same application and drying process.
Once the primer is dry, you have successfully prepped your wall for the kitchen backsplash mosaic tile installation. It’s important to note that following these steps ensures a strong bond between the wall and the tiles, preventing any future issues or damage. Now, you’re all set to enjoy the process of transforming your kitchen with a stunning and functional backsplash!
Creating A Layout And Design Plan
Deciding on the tile pattern and layout for your backsplash is an important step in the installation process. By carefully planning and visualizing how your kitchen backsplash will look, you can ensure that the end result is both visually appealing and harmonious with your overall kitchen decor. In this article, we will guide you through the process of creating a layout and design plan for your kitchen backsplash mosaic tile installation.
Deciding on the tile pattern and layout for your backsplash
When it comes to choosing a tile pattern and layout for your kitchen backsplash, the possibilities are virtually endless. You can opt for a classic subway tile pattern, a herringbone arrangement, or even a bold and intricate mosaic design. The key is to select a pattern that complements your kitchen’s style and complements the overall aesthetic of your home. Here are a few popular tile patterns you may consider:
| Tile Pattern | Description |
|---|---|
| Subway | A timeless and popular choice, subway tiles are rectangular in shape and can be laid horizontally, vertically, or in a herringbone pattern. |
| Herringbone | This pattern creates a zigzag effect by laying rectangular tiles in a 45-degree angle. |
| Chevron | Similar to the herringbone pattern, but with a V-shaped design. Chevron adds a touch of elegance and sophistication to your kitchen. |
| Mosaic | A mosaic design involves arranging small tiles to create intricate patterns or images. This pattern allows for a lot of creativity and customization. |
Marking reference lines and measuring for accurate placement of tiles
Before you begin the installation process, it is crucial to mark reference lines and measure for accurate tile placement. This step ensures that your backsplash will be level and symmetrical. Here’s a step-by-step guide to help you measure and mark reference lines for your kitchen backsplash:
- Start by finding the center point of your wall where the backsplash will be installed. Measure and mark this point.
- Use a level to draw a vertical reference line from the center point down to the countertop. This line will serve as a guide for the first row of tiles.
- Measure the height of the tiles you will be using, including the grout line. Subtract this measurement from the height of your backsplash area to determine how many rows of tiles you will need.
- Measure and mark the height of each row, starting from the bottom and working your way up. Ensure that each mark is level with the reference line.
- Repeat this process horizontally, marking reference lines for the width of your backsplash area, taking into account the width of the tiles and grout lines.
- Once all reference lines are marked, use a straightedge to connect the marks and create a grid-like pattern on your wall. This grid will serve as a visual guide for tile placement.
By following these steps and taking the time to create a layout and design plan for your kitchen backsplash mosaic tile installation, you can ensure a beautiful and professionally finished result. Next, we will guide you through the process of preparing the surface and selecting the right adhesive for your tiles.
Applying The Adhesive And Setting The Tiles
When it comes to installing a kitchen backsplash mosaic tile, one of the most crucial steps is applying the adhesive and setting the tiles. This process requires precision and the right techniques to ensure a seamless and professional-looking result. Follow these instructions to master the art of applying adhesive and setting the tiles, and create a stunning backsplash that adds style and elegance to your kitchen.
Mixing the adhesive according to the manufacturer’s instructions
The first step in this process is to mix the adhesive according to the manufacturer’s instructions. Read the instructions carefully to determine the required ratio of adhesive and water. Use a bucket or a mixing container that allows you to mix the adhesive thoroughly without any lumps. Following the manufacturer’s recommendations ensures that the adhesive has the right consistency for proper adhesion.
Using a trowel to apply adhesive evenly on the wall
Once you have mixed the adhesive, it’s time to apply it on the wall using a trowel. Begin by starting at the bottom of the backsplash area and work your way up. Hold the trowel at a 45-degree angle and apply a thin layer of adhesive on the wall. Use the notched side of the trowel to create ridges in the adhesive. These ridges will help the tiles adhere better to the wall.
Make sure to apply the adhesive evenly and consistently across the entire backsplash area. Take your time and work in small sections to prevent the adhesive from drying out before you can set the tiles. If needed, use a straightedge to ensure that the adhesive is applied in a straight and level manner.
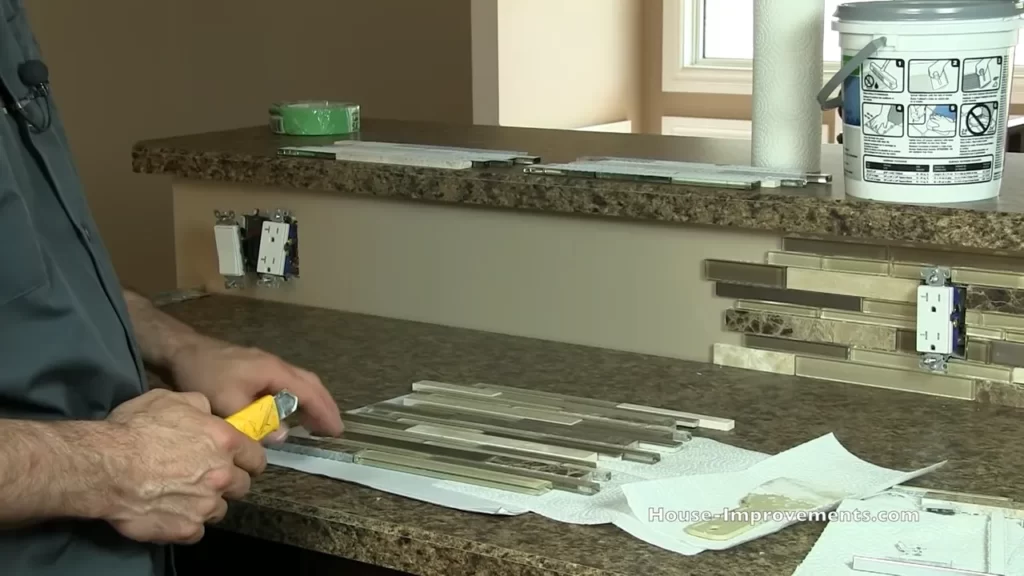
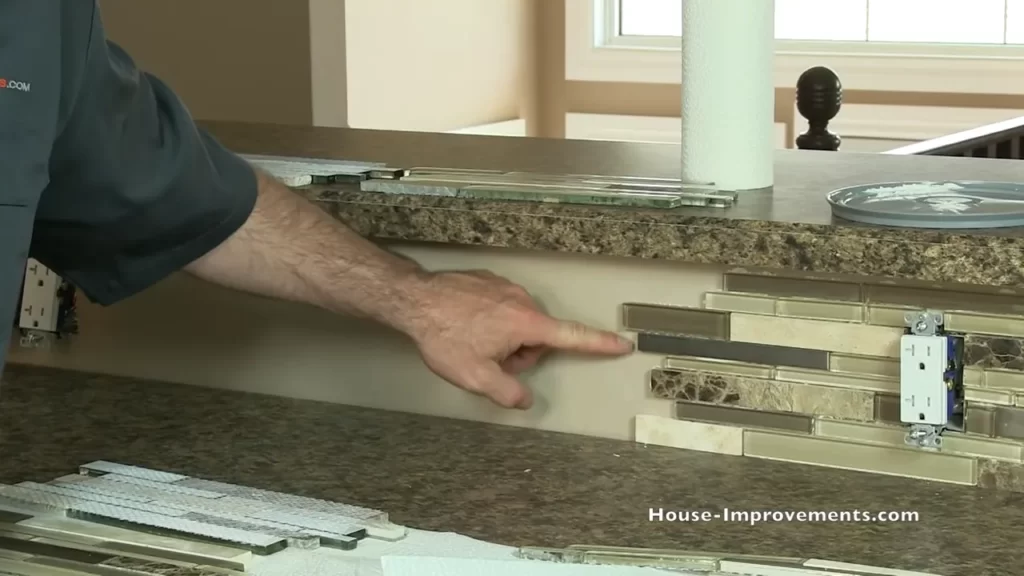
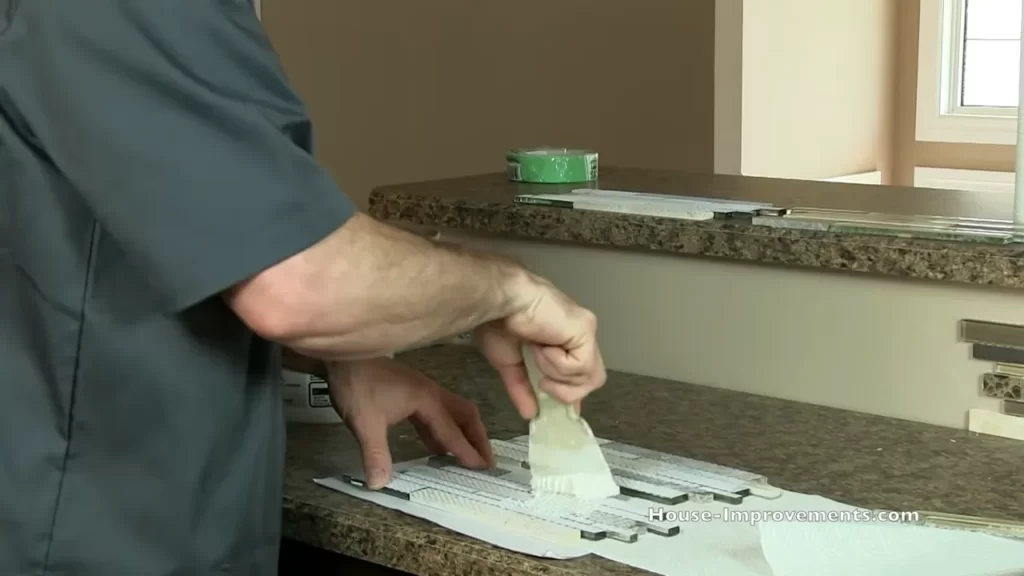
Affixing the mosaic tiles onto the adhesive, following the layout plan
With the adhesive in place, it’s time to affix the mosaic tiles onto the wall. Start by following the layout plan you created beforehand. This plan will guide you in properly arranging the tiles, ensuring a balanced and aesthetically pleasing design. Place the tiles onto the adhesive, pressing them firmly to ensure good adhesion.
Work in small sections, applying adhesive and setting tiles simultaneously, to prevent the adhesive from drying out. As you progress, use tile spacers to maintain consistent spacing between the tiles. This will create even grout lines and a polished final result.
Continue affixing the tiles onto the adhesive, following your layout plan, until the entire backsplash area is covered. Take breaks as needed, but try to complete the installation in one session to maintain a consistent appearance.
Once all the tiles are in place, allow the adhesive to dry according to the manufacturer’s instructions. This typically takes 24 to 48 hours. Once dry, you can proceed to the next step: grouting the tile and finishing your kitchen backsplash mosaic tile installation.
Grouting And Finishing The Backsplash
Preparing the grout mixture and applying it over the tiles
After successfully placing the mosaic tiles on your kitchen backsplash, it’s time to move on to the next crucial step – grouting and finishing. Grouting not only fills the spaces between the tiles but also provides a sturdy foundation for the entire backsplash. Here’s how you can prepare the grout mixture and apply it over the tiles for a seamless and professional-looking finish.
To begin, gather the following materials and tools:
- Grout mix
- Grout float
- Bucket
- Water
- Sponge
Now, you’re ready to prepare the grout mixture. Follow these steps:
- In a clean bucket, pour the grout mix.
- Add water gradually to the grout mix, following the manufacturer’s instructions. Stir the mixture until it reaches a thick, paste-like consistency.
- Allow the grout mixture to rest for a few minutes before using it. This will help the grout ingredients to blend together effectively.
Once your grout mixture is ready, it’s time to apply it over the tiles:
- With a grout float, scoop a generous amount of grout mixture onto the float’s surface.
- Hold the float at a 45-degree angle and apply the grout diagonally across the tiles, pressing firmly as you move along.
- Ensure that you apply the grout mixture evenly, filling all the gaps between the tiles. Use the edge of the float to scrape off any excess grout.
- Continue this process until the entire backsplash is grouted.
Cleaning excess grout and smoothing the surface for a professional finish
With the grout applied, it’s time to clean up any excess grout and achieve a smooth, professional finish. Follow these steps to ensure your kitchen backsplash shines:
- Wait for the grout to dry partially, following the manufacturer’s recommended time. This usually takes about 10-15 minutes.
- Fill a bucket with clean water.
- Dampen a sponge in the water and gently wipe it over the tiles, removing any residual grout on the surface. Rinse the sponge regularly to avoid smearing grout on the tiles.
- Once you’ve removed most of the excess grout, switch to a clean, damp sponge and go over the tiles again to ensure a thorough cleaning.
- To achieve a seamless finish, use a grout finishing tool or your finger to smooth out any rough edges or irregularities in the grout lines.
- Allow the grout to cure for 24-48 hours before applying any sealant or polishing the tiles. This will ensure a durable and long-lasting backsplash.
Follow these simple steps to grout and finish your kitchen backsplash mosaic tile installation. With a little patience and attention to detail, you’ll have a beautiful and polished backsplash that complements your kitchen decor. Remember to regularly clean and maintain your backsplash to keep it looking its best for years to come!
Sealing The Grout For Long-Lasting Protection
Understanding the importance of grout sealing
A crucial step in the process of installing a mosaic tile backsplash in your kitchen is sealing the grout lines. Grout, the material used to fill the gaps between tiles, is porous and can absorb stains, liquids, and dirt over time. Sealing the grout helps to create a protective barrier, preventing moisture and contaminants from penetrating the surface and preserving the overall appearance of your backsplash.
Choosing the appropriate sealer and applying it to the grout lines
When it comes to choosing a sealer for your kitchen backsplash grout, it’s important to consider the specific needs of your mosaic tiles. There are different types of sealers available, such as penetrating sealers and surface sealers. Penetrating sealers are absorbed by the grout and provide long-lasting protection, while surface sealers create a protective layer on top of the grout.
In order to determine the appropriate sealer for your backsplash, you can consult with your local home improvement store or the manufacturer of your mosaic tiles. They can provide guidance on the best sealer for your specific tile material and offer recommendations on the application process.
Once you have selected the appropriate sealer, it’s time to apply it to the grout lines. Before starting, make sure to thoroughly clean the grout lines to remove any dirt, debris, or residue. A mix of mild soap and warm water can be used for this initial cleaning process. Allow the grout lines to dry completely before proceeding with the sealer application.
Applying the sealer to the grout lines
Now that the grout lines are clean and dry, it’s time to apply the sealer. Follow these steps to ensure an effective application:
- Protect the surrounding areas of your backsplash by covering the tiles with painter’s tape or plastic sheeting.
- Shake or stir the sealer according to the manufacturer’s instructions to ensure an even distribution.
- Using a small brush or applicator bottle, apply the sealer directly onto the grout lines. Be careful not to get any sealer on the tiles themselves.
- Work in small sections, applying the sealer in a back-and-forth motion along the grout lines.
- Allow the sealer to sit for the recommended amount of time specified by the manufacturer.
- After the recommended dwell time, use a clean cloth or sponge to wipe away any excess sealer from the tile surface. Make sure to clean off any sealer haze or residue.
- Repeat the application process if necessary, following the manufacturer’s instructions.
Once you have completed the sealer application process, allow the grout to dry completely before exposing it to water or any other substances. This drying time may vary depending on the sealer used, so make sure to follow the manufacturer’s guidelines.
By taking the time to seal the grout lines of your kitchen backsplash mosaic tile, you are ensuring long-lasting protection and preserving the beauty of your installation. This additional step will help to keep your backsplash looking fresh and clean for years to come.
Regular Maintenance And Cleaning Tips
Tips for Cleaning and Maintaining Your Mosaic Tile Backsplash
Regular maintenance and cleaning are essential to keep your kitchen backsplash mosaic tile looking fresh and beautiful. By following a few simple tips, you can ensure that your tile stays in excellent condition for years to come. In this section, we will discuss important cleaning and maintenance practices to keep your backsplash looking its best.
Protecting the Grout from Stains and Damage
One of the most crucial aspects of maintaining your mosaic tile backsplash is to keep the grout clean and protected. Grout can easily become stained, discolored, or damaged, which can affect the overall appearance of your backsplash. Here are some effective ways to protect your grout:
- Regularly clean the grout using a mixture of warm water and mild dish soap. Dip a soft brush or sponge into the mixture and gently scrub the grout lines to remove any dirt or grime.
- Avoid using harsh chemicals or abrasive cleaners on the grout, as they can cause damage. Stick to gentle cleansers to ensure the grout stays intact and undamaged.
- Apply a grout sealer every six months to prevent staining and discoloration. The sealer creates a protective barrier that repels liquids and makes cleaning easier.
- Immediately wipe up any spills or splatters on the grout to prevent them from absorbing and causing permanent stains. Prompt action is essential to minimize the risk of staining.
- When cooking, make sure to use a splatter screen or backsplash guard to minimize direct contact between the grout and potential staining agents.
- Avoid placing hot pans or pots directly on the grout, as extreme temperatures can cause it to crack or become discolored. Always use a trivet or hot pad to protect the grout.
By following these tips, you can protect the grout in your mosaic tile backsplash and maintain its original beauty for years to come. Don’t neglect the importance of regular cleaning and protection.
Remember, a clean grout line enhances the overall aesthetics of your backsplash and keeps it looking fresh and inviting.
Common Issues And Solutions
Installing a kitchen backsplash mosaic tile can be an exciting project that can completely transform the look of your kitchen. However, like any home improvement project, it can come with its fair share of challenges. In this section, we will address some of the common issues that may arise during the backsplash installation process and provide you with practical solutions to overcome them.
Addressing common problems during the backsplash installation process
1. Poor adhesion
Poor adhesion is one of the most common issues encountered during backsplash installation. It can result in tiles falling off the wall over time, leading to an unsightly and unstable backsplash. To ensure proper adhesion, follow these steps:
- Clean and prepare the wall surface by removing any dirt, grease, or old adhesive.
- Apply a high-quality adhesive or thin-set mortar to the wall using a notched trowel.
- Press each mosaic tile firmly into the adhesive, ensuring full contact.
- Use tile spacers to maintain consistent spacing between the tiles.
- Allow the adhesive to dry according to the manufacturer’s instructions before proceeding with grouting.
2. Grout issues
Grouting can be a tricky part of the backsplash installation process, but it is crucial for providing a finished and polished look. Here are some common grout issues and their solutions:
- Uneven grout lines: If your grout lines appear uneven, it may be due to improper application. Use a grout float to ensure consistent pressure while filling the gaps between the tiles. Remove excess grout with a damp sponge.
- Cracked grout: Cracks can occur in the grout as it dries, especially if the mixture was too dry. Mix the grout according to the manufacturer’s instructions, ensuring a proper balance of water and dry mix.
- Stained grout: Stains can occur on the grout if it is not sealed properly. Apply a grout sealer after the grout has fully cured, following the manufacturer’s recommendations.
3. Tile placement challenges
Properly placing the mosaic tiles without any mistakes is essential for achieving a flawless backsplash. Here’s how to troubleshoot common tile placement issues:
- Crooked tiles: If the tiles appear crooked, it may be due to uneven adhesive or improper alignment. Use a level to ensure the tiles are straight and adjust the alignment accordingly.
- Inconsistent tile spacing: Inconsistent spacing between tiles can result in an unprofessional look. Use tile spacers to maintain consistent spacing and check for any discrepancies as you progress.
- Misaligned patterns: If your mosaic tiles have a pattern or design, pay close attention to the alignment to avoid a disjointed look. Take your time to place the tiles carefully and make adjustments as needed.
By addressing these common problems and implementing the solutions provided, you can overcome the challenges that may arise during the kitchen backsplash mosaic tile installation process. Remember to always follow the manufacturer’s instructions and take your time to ensure a beautiful and long-lasting backsplash.
Frequently Asked Questions
Answering common queries about kitchen backsplash installation
If you’re considering installing a kitchen backsplash mosaic tile, you may have some questions about the process. To help you out, we’ve compiled a list of frequently asked questions and expert advice to ensure smooth and successful installation. Read on to find the answers to your queries.
What materials do I need for kitchen backsplash tile installation?
Before you begin the installation process, it’s essential to gather all the necessary materials. Here’s a handy list of items you’ll need:
| Materials | Tools |
|---|---|
|
|
Should I prepare the wall before installing the backsplash?
Yes, preparing the wall is crucial for a successful backsplash installation. Here’s what you need to do:
- Clean the wall surface thoroughly to remove any dirt, grease, or residue.
- Fill any cracks or holes with spackling paste and smoothen it with sandpaper.
- Prime the wall with a suitable primer to ensure better adhesion of the tile.
How do I ensure proper tile placement and alignment?
Proper tile placement and alignment play a significant role in achieving a professional finish. Follow these expert tips for accurate placement:
- Start by measuring the area and marking the center point horizontally and vertically.
- Use a level and draw a straight and level horizontal guideline at the center point.
- Apply tile adhesive within the guideline area, working in small sections.
- Use tile spacers to maintain an even gap between tiles.
- Regularly check the alignment using a level to ensure the tiles are straight.
How do I ensure a clean and polished grout finish?
Obtaining a clean and polished grout finish is achievable by following these steps:
- After the adhesive dries, remove the tile spacers gently.
- Prepare the grout according to the manufacturer’s instructions.
- Apply the grout using a grout float, pressing it into the gaps.
- Remove excess grout with a damp sponge, working diagonally across the tiles.
- Allow the grout to cure for the recommended time before applying a grout sealer.
By following these guidelines and tips, you’ll be well on your way to a successful kitchen backsplash mosaic tile installation. Remember to exercise patience and attention to detail for a stunning final result!
Frequently Asked Questions
Where Do You Start A Mosaic Tile Backsplash?
To start a mosaic tile backsplash, begin at the bottom center of the wall and work your way up and out. Ensure the surface is clean and dry, then apply adhesive using a trowel. Press tiles into the adhesive, leaving a small gap between each one.
Continue until the desired area is covered, then allow the adhesive to dry and grout the tiles.
What Is The Best Adhesive For Mosaic Tile Backsplash?
The best adhesive for a mosaic tile backsplash is a thin-set mortar. It provides a strong bond, is water-resistant, and ensures the tiles stay in place. Apply the mortar directly to the wall, then press the tiles into it. Allow it to dry before grouting the mosaic.
How Do You Stick Mosaic Tiles To The Wall?
To stick mosaic tiles to the wall, follow these steps: 1. Prepare the wall by cleaning and repairing any damaged areas. 2. Apply a thin layer of adhesive or mortar to the wall using a notched trowel. 3. Press the mosaic tiles firmly into the adhesive, spacing them evenly.
4. Use tile spacers to maintain consistent gaps between tiles. 5. Let the adhesive dry completely before grouting the tiles.
How Do You Edge A Mosaic Tile Backsplash?
To edge a mosaic tile backsplash, carefully measure and mark the desired edge shape. Use a wet saw to cut the tile along the marked lines. Smooth the cut edges with a tile file or sandpaper. Apply adhesive to the back of the cut tiles and press them onto the edge of the backsplash.
Grout the tiles and wipe away any excess.
Conclusion
To summarize, installing a kitchen backsplash mosaic tile can be a transformative DIY project that adds a touch of personality and elegance to your space. With the right tools and techniques, you can achieve stunning results. Remember to measure accurately, prepare the surface properly, and follow the step-by-step installation process.
With these tips in mind, you’ll be on your way to creating a beautiful backsplash that enhances your kitchen’s style and functionality. Get started and enjoy the satisfaction of a job well done!