
To install a Kerdi shower kit, first, ensure that the installation area is clean and dry. Then, apply waterproofing membrane, such as Kerdi, to the shower walls and floor using thinset mortar and a trowel, pressing the membrane firmly into place to ensure a secure bond.
Understanding The Kerdi Shower System
What is a Kerdi shower kit?
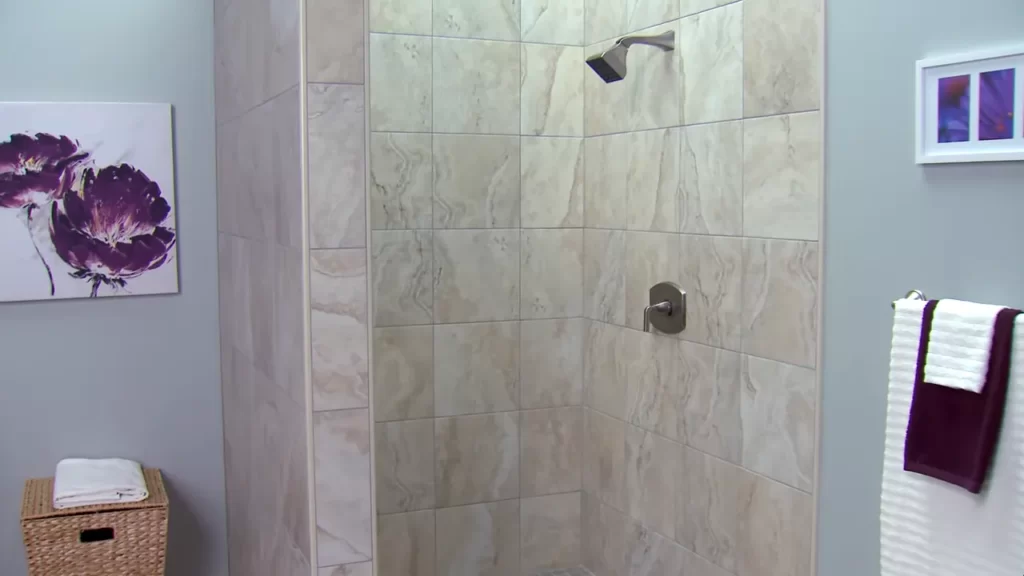
A Kerdi shower kit is a complete system designed for the installation of a watertight shower in your bathroom. It is a popular choice among homeowners and professional contractors due to its high-quality materials and ease of use.
The Kerdi shower kit includes all the components you need to create a waterproof and vapor-tight shower area. It consists of a pre-formed shower tray, a waterproofing membrane, and various accessories like shower curb, drain, and pipe seals. Whether you are remodeling your bathroom or building a new one, a Kerdi shower kit provides a reliable and efficient solution for achieving a long-lasting, leak-free shower.
Benefits of using a Kerdi shower kit
Using a Kerdi shower kit offers several advantages over traditional shower installation methods. Here are some key benefits:
- Waterproof and leak-free: The primary advantage of a Kerdi shower kit is that it creates a completely waterproof and leak-free shower area. The waterproofing membrane, made of a durable and pliable material, is applied to the walls and floor, ensuring no water seeps into the underlying structure. This prevents common issues such as water damage, mold growth, and rot, giving you peace of mind.
- Time and cost-saving: Installing a Kerdi shower kit is a relatively quick and straightforward process. The pre-formed shower tray eliminates the need for traditional pan linings, saving time and effort. Additionally, the waterproofing membrane can be easily cut and applied, reducing installation time. As a result, using a Kerdi shower kit can help you save on labor costs.
- Flexibility and design possibilities: The Kerdi system allows for greater flexibility in shower design. The shower tray and prefabricated elements can be customized to fit any size or style of shower. Whether you prefer a walk-in shower or a corner shower, the Kerdi shower kit can be adapted to suit your requirements. This opens up a world of design possibilities for your bathroom.
- Reliable and long-lasting: Kerdi shower kits are designed to withstand the test of time. The materials used in the system are of high quality and are resistant to wear and tear. The waterproofing membrane acts as a protective barrier, ensuring the shower remains watertight even with regular use. With proper installation and maintenance, a Kerdi shower kit can provide you with a durable and long-lasting shower.
Overall, the use of a Kerdi shower kit offers a range of benefits, from superior waterproofing to flexibility in design. Whether you are a DIY enthusiast or a professional contractor, the Kerdi shower system provides a reliable and convenient solution for creating a beautiful and functioning shower in your bathroom.
Preparing For Installation
In order to ensure a successful installation of the Kerdi shower kit, it is crucial to properly prepare the area beforehand. This involves gathering the necessary tools and materials, measuring and preparing the shower area, as well as ensuring proper subfloor and wall construction. By following these steps, you can create a solid foundation for your Kerdi shower kit installation, setting yourself up for a hassle-free and beautiful shower space.
Gathering the necessary tools and materials
Before you begin the installation process, it’s essential to gather all the tools and materials you will need. A well-prepared toolbox will ensure a smooth and efficient installation. Here is a list of items you should have on hand:
| Tools | Materials |
|---|---|
|
|
Measuring and preparing the shower area
Accurate measurements are crucial to ensure a proper fit and a watertight installation. Before beginning the installation, take your time to measure the shower area carefully. Here is a step-by-step guide to help you:
- Measure the length and width of the shower area, ensuring precision.
- Mark the measurements on the subfloor and walls using a pencil or marker.
- Use a level to verify that the walls are plumb and the subfloor is level. If any adjustments are needed, make them at this stage.
- Ensure that the shower drain is positioned correctly and that the drainpipe is in good condition. Replace or repair any damaged parts if necessary.
Following these steps will ensure that your shower area is properly prepared and ready for the Kerdi shower kit installation.
Ensuring proper subfloor and wall construction
Proper subfloor and wall construction is vital to support the weight of the Kerdi shower kit and ensure its durability. Follow these guidelines to ensure proper construction:
- For the subfloor, make sure it is stable, dry, clean, and level. Ensure that there are no loose or squeaky floorboards. If there are any issues, address them before proceeding.
- Ensure that the walls are smooth, clean, and free from any debris. Repair any damaged areas and make sure they are structurally sound.
- If needed, install cement backer boards on the walls to provide a solid surface for the Kerdi shower kit installation.
- Apply a layer of thin-set mortar to the subfloor and walls, using a trowel or notched trowel to create an even surface.
By adhering to these guidelines, you can ensure that your subfloor and walls are properly constructed, providing a sturdy foundation for your Kerdi shower kit installation.
Waterproofing The Shower Area
Applying the Kerdi membrane to the shower floor
The first step in waterproofing your shower area is to apply the Kerdi membrane to the shower floor. This membrane acts as a barrier, preventing water from seeping into the underlying structure and causing damage. Here’s how you can do it:
- Clean and prepare the shower floor: Before applying the membrane, make sure the shower floor is clean and free of any debris. This will ensure proper adhesion of the membrane.
- Measure and cut the Kerdi membrane: Measure the dimensions of your shower floor and cut the Kerdi membrane accordingly. Remember to leave a few inches of overlap on each side to ensure complete coverage.
- Apply thinset mortar: Using a notched trowel, apply a layer of thinset mortar to the shower floor. Make sure to create a smooth and even layer.
- Install the Kerdi membrane: Carefully place the Kerdi membrane on the shower floor, starting from one corner and working your way towards the drain. Press the membrane firmly into the thinset mortar, ensuring good adhesion.
- Seal the seams: Once the membrane is in place, use a Kerdi trowel or a flat trowel to seal the seams. Apply a layer of thinset mortar over the seams and smooth it out.
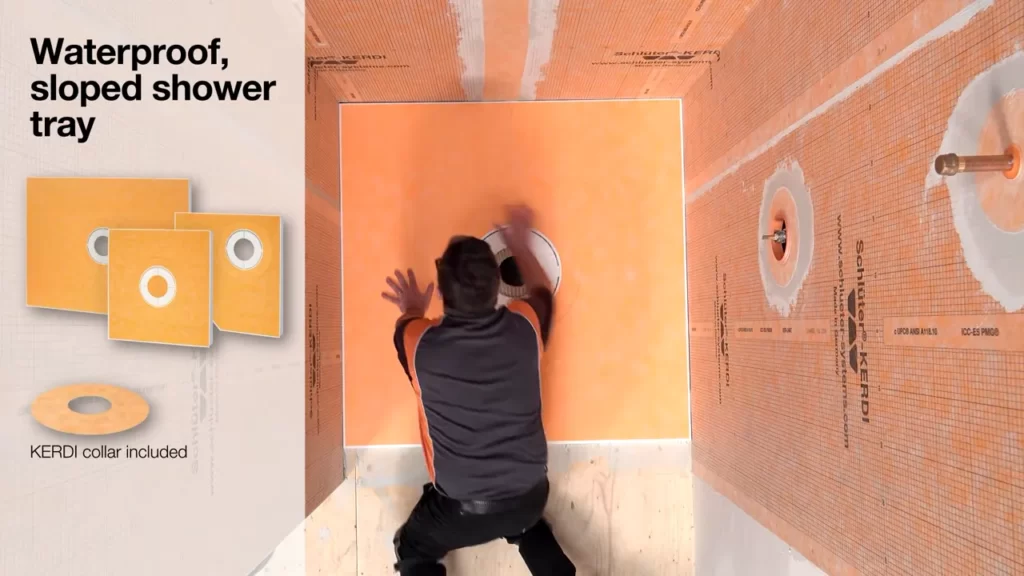
Installing and sealing the Kerdi shower tray
Now that the shower floor is waterproofed, the next step is to install and seal the Kerdi shower tray. Follow these steps:
- Prepare the shower drain: Ensure that the shower drain is properly fitted and securely connected to the plumbing system. Make sure there are no leaks before proceeding.
- Apply thinset mortar: Apply a layer of thinset mortar around the shower drain, creating a slope towards the drain for proper water drainage. Use a trowel to smooth out the mortar.
- Place the Kerdi shower tray: Carefully place the Kerdi shower tray over the mortar, ensuring that it fits snugly against the walls. Press down firmly to ensure proper adhesion.
- Seal the edges: Use the waterproofing tape provided with the Kerdi shower tray to seal the edges. Apply a layer of thinset mortar over the tape, ensuring complete coverage.
- Check for leaks: Once the tray is installed and sealed, check for any leaks by running water into the shower. Ensure that water drains properly without any seepage.
Waterproofing the walls with Kerdi membrane
In addition to waterproofing the shower floor and tray, it’s important to waterproof the walls to fully protect your shower area. Here’s how you can do it:
- Clean and prepare the walls: Just like the shower floor, ensure that the walls are clean and free of any dirt or debris. This will ensure proper adhesion of the Kerdi membrane.
- Measure and cut the Kerdi membrane: Measure the dimensions of your shower walls and cut the Kerdi membrane accordingly. Leave some overlap to ensure complete coverage.
- Apply thinset mortar: Using a trowel, apply a layer of thinset mortar to the shower walls. Make sure to create an even layer, ensuring proper adhesion of the membrane.
- Install the Kerdi membrane: Carefully place the Kerdi membrane on the shower walls, starting from the bottom and working your way up. Press the membrane firmly into the thinset mortar, smoothing out any wrinkles.
- Seal the seams: To ensure complete waterproofing, use the Kerdi trowel or a flat trowel to seal the seams. Apply a layer of thinset mortar over the seams and smooth it out.
By following these steps, you can effectively waterproof the shower area using a Kerdi shower kit. This will not only protect your bathroom from water damage but also ensure a durable and long-lasting shower installation.
Building The Shower Base
Building a solid and level base for your shower is essential for ensuring long-lasting and leak-free installation. In this section, we will guide you through the process of creating a mortar bed for the shower base, ensuring proper slope for drainage, and installing the shower drain.
Creating a mortar bed for the shower base
A mortar bed provides a stable and sturdy foundation for your shower base. Follow these steps to create a mortar bed:
- Clean and prep the subfloor: Start by removing any contaminants, debris, or old flooring material from the subfloor. Ensure that the subfloor is clean, level, and dry.
- Create a waterproofing barrier: Apply a waterproofing membrane, such as Schluter Kerdi, over the subfloor and extend it up the walls at least 6 inches. This will protect the subfloor from moisture and prevent leaks.
- Mix the mortar: Prepare a batch of mortar according to the manufacturer’s instructions. Use a mixture of sand and cement to achieve the desired consistency.
- Spread the mortar: Spread the mortar evenly over the waterproofing membrane using a trowel. Ensure that the mortar bed is level and smooth, with a slightly sloped surface towards the drain to aid in proper drainage.
- Let it cure: Allow the mortar bed to cure for the recommended time specified by the mortar manufacturer. This typically takes 24 to 48 hours, but refer to the product instructions for accurate curing time.
Ensuring proper slope for drainage
Proper slope is crucial for efficient drainage in your shower. Follow these guidelines to ensure proper slope:
- Check the building code requirements for your area to determine the minimum slope required for shower drainage. This is typically around 1/4 inch per foot.
- Use a long, straight edge or level to check the slope of the mortar bed. Place the level across the floor, parallel to the walls, and ensure that it shows a gradual decline towards the drain.
- Make any necessary adjustments by adding or removing mortar to achieve the desired slope. It’s essential to maintain a consistent slope throughout the entire shower base.
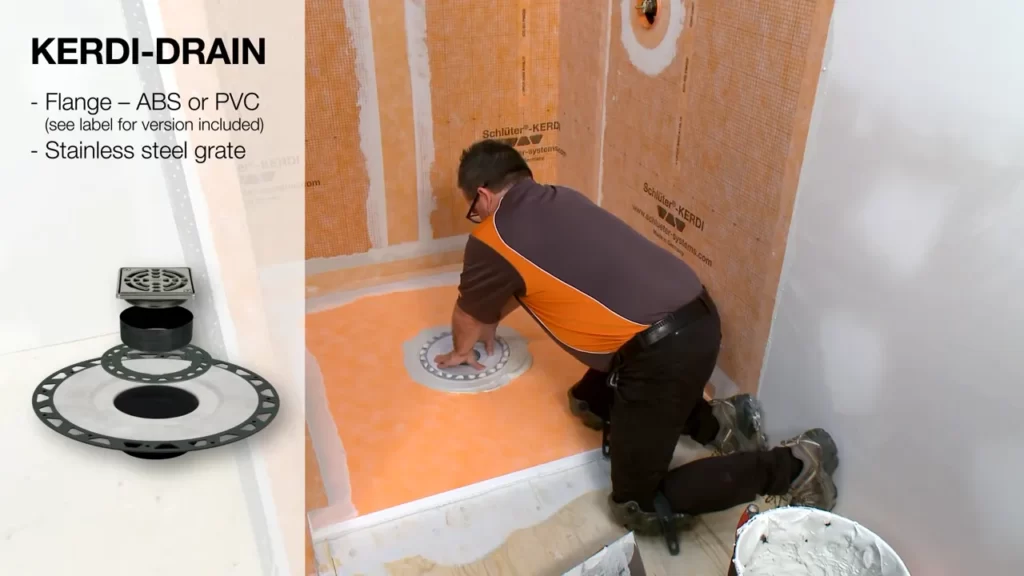
Installing the shower drain
The shower drain is a vital component that ensures proper drainage of water. Here’s how to install the shower drain:
- Position the drain: Place the drain assembly in the center of the shower base, aligning it with the pre-marked location.
- Connect the drain to the waste pipe: Attach the drain body to the waste pipe using appropriate plumbing techniques and tools. Ensure a secure connection to prevent any leaks.
- Tighten the drain flange: With the drain body in place, tighten the drain flange to secure it to the shower base. Follow the manufacturer’s instructions for the specific drain assembly you are using.
- Test for leaks: Before proceeding with further installation, perform a water test to ensure the drain is properly installed and doesn’t leak. Fill the shower base with water and observe for any signs of leakage around the drain area.
Once you’ve completed these steps, you have successfully built the shower base for your Kerdi shower kit. Ensure that the mortar bed is fully cured and the drain is securely installed before moving on to the next steps of your shower installation process.
Constructing The Shower Walls
Constructing the Shower Walls
Before diving into the process of installing the Kerdi Shower Kit, it is crucial to understand the key steps involved in constructing the shower walls. By following these steps correctly, you will ensure a solid foundation for the waterproofing phase and ultimately a leak-free shower.
<h3 id=”framing-the-shower-walls”>Framing the shower walls</h3>
The first step in constructing the shower walls is framing. This involves creating a sturdy structure that will support the weight of the tiles and provide a solid base for the Kerdi membrane. Here’s a breakdown of the framing process:
- Measure and mark the desired height for the shower walls.
- Cut and install the wall studs according to the measurements, ensuring they are plumb and level.
- Add horizontal blocking between the studs for added stability.
- Note: Ensure the opening for the shower drain is framed correctly according to the specific instructions provided by the manufacturer.
<h3 id=”preparing-the-walls-for-waterproofing”>Preparing the walls for waterproofing</h3>
Once the framing is complete, it’s time to prepare the walls for waterproofing. This involves the following steps:
- Clean the walls thoroughly, removing any dust, debris, or grease that could hinder the adhesion of the Kerdi membrane.
- Repair any visible cracks or imperfections in the walls to ensure a smooth surface.
- Apply a layer of primer to the walls. This will improve adhesion and ensure a proper bond with the Kerdi membrane.
- Allow the primer to dry according to the manufacturer’s instructions before proceeding to the next step.
<h3 id=”attaching-the-kerdi-membrane-to-the-walls”>Attaching the Kerdi membrane to the walls</h3>
Now that the walls are properly framed and prepared, it’s time to focus on the waterproofing process. This requires attaching the Kerdi membrane to the walls. Here’s a step-by-step guide:
- Start by cutting the Kerdi membrane to the desired size, leaving a few inches of overlap on all sides.
- Apply a thin layer of thin-set mortar to the wall using a trowel, covering an area slightly larger than the size of the membrane.
- Press the Kerdi membrane firmly into the mortar, ensuring full coverage and eliminating any air bubbles or pockets.
- Repeat the process for each section of the wall, slightly overlapping the edges of the membrane for a secure and watertight seal.
- Use a seam roller to firmly press down on the overlaps, further enhancing the bond between the Kerdi membrane and the walls.
With the Kerdi membrane securely attached to the walls, you have successfully completed the construction phase of installing the Kerdi Shower Kit. Now, you can proceed with confidence to the next steps in the installation process.

Installing The Kerdi Shower Tray
Once you have prepared the subfloor and laid the Kerdi membrane, the next step in installing your Kerdi shower kit is setting the Kerdi shower tray in place. This crucial step ensures a secure and leak-proof base for your shower.
Setting the Kerdi shower tray in place
To begin, carefully place the Kerdi shower tray in the designated shower area. Make sure that the tray is level with the surrounding floor and aligned with the drain. Use a level to double-check its positioning.
If necessary, you can adjust the height of the tray by adding or removing mortar beneath it. This will ensure a stable and even surface to work with.
Connecting the drain to the plumbing
Once the tray is in place, it’s time to connect the drain to the plumbing. Apply PVC cement to the inside of the drain and connect it to the PVC pipe, securely fastening them together. Make sure the connection is tight to prevent any potential leaks.
Be sure to follow the manufacturer’s instructions for your specific drain system, as the process may vary slightly.
Securing the tray to the subfloor
Now that the tray is set in place and the drain is connected, the final step is to secure the tray to the subfloor. This ensures that the tray remains in place and provides a solid foundation for your shower.
Using a suitable adhesive, evenly apply it to the subfloor beneath the tray. Be generous with the adhesive, as it will ensure a strong bond. Carefully press the tray down onto the subfloor, making sure it is fully adhered.
Once the tray is secured, allow the adhesive to dry according to the manufacturer’s instructions before proceeding with the rest of the installation process.
With the Kerdi shower tray now set in place and secured, you’re one step closer to the shower of your dreams. The next steps will involve waterproofing the walls and floor with the Kerdi membrane, followed by the installation of the shower walls and fixtures. Stay tuned for our next blog post for detailed instructions on these vital steps!
Waterproofing The Shower Walls
When it comes to installing a Kerdi shower kit, one of the most crucial steps is waterproofing the shower walls. This ensures that your shower remains leak-free and protects the underlying structure from water damage. In this article, we will guide you through the process of waterproofing the shower walls using the Kerdi membrane, ensuring a durable and long-lasting installation.
Applying the Kerdi membrane to the walls
The first step in waterproofing your shower walls is applying the Kerdi membrane. This thin, pliable sheet acts as a barrier, preventing water from penetrating through to the underlying surface. To apply the membrane, follow these steps:
- Start by cleaning the walls to ensure they are free from dust, dirt, and any contaminants that may affect adhesion.
- Measure and cut the Kerdi membrane to the appropriate size for each wall, leaving a few inches of overlap at the corners and seams.
- Apply a generous amount of Kerdi waterproofing adhesive to the wall using a trowel or a paintbrush. Make sure to spread it evenly, covering the entire surface where the membrane will be applied.
- Press the Kerdi membrane firmly onto the adhesive, starting from the bottom and working your way up. Smooth out any wrinkles or air bubbles as you go, ensuring good adhesion. Overlap the membrane at the corners and seams.
- Once the membrane is in place, use a trowel or a flat tool to embed it into the adhesive, ensuring a strong bond between the membrane and the wall.
Ensuring proper overlap and seam sealer
Proper overlap and seam sealing are crucial to creating a watertight barrier. The Kerdi membrane comes with pre-cut slits that allow for easy overlapping. Follow these steps to ensure proper overlap and seam sealing:
- Apply a generous amount of Kerdi waterproofing adhesive to the area where the membranes overlap.
- Fold back one side of the membrane and press it firmly onto the adhesive of the adjacent membrane.
- Repeat the process for all overlapping areas, ensuring a tight bond between the membranes.
- Once the membranes are properly overlapped, apply a generous amount of Kerdi seam sealer over the seams. This ensures that any potential water penetration points are sealed, further enhancing the waterproofing capabilities of the Kerdi membrane.
Sealing penetrations and transitions
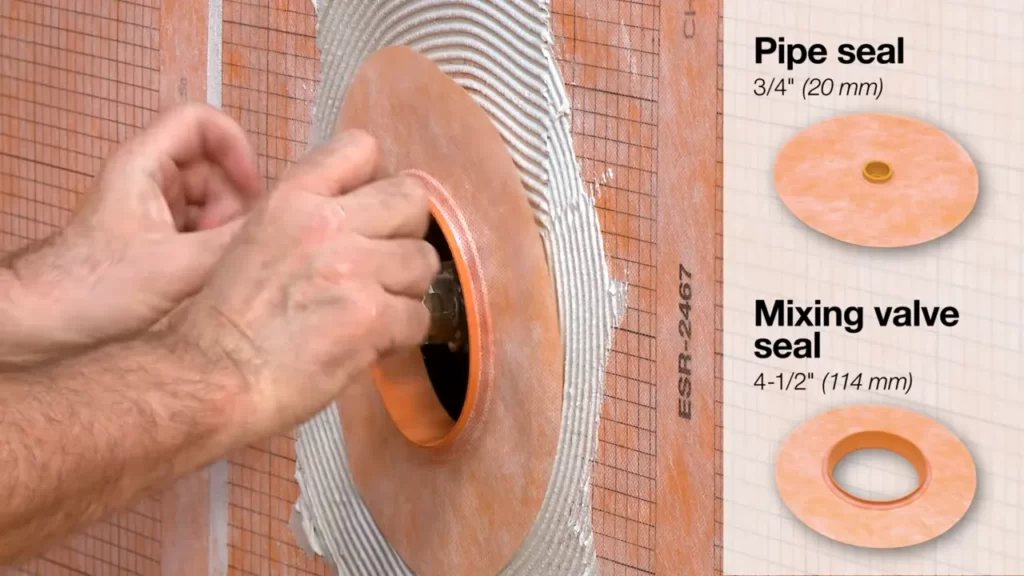
In addition to the walls, it is essential to seal any penetrations and transitions in the shower area. These include areas where the membrane meets the shower valve, pipes, drains, and corners. Follow these steps to properly seal these areas:
- Apply a layer of Kerdi waterproofing adhesive around the penetration or transition area.
- Place a piece of Kerdi membrane over the adhesive, ensuring full coverage.
- Press the membrane firmly onto the adhesive, smoothing out any wrinkles or air bubbles.
- Repeat the process for all penetrations and transitions, ensuring a watertight seal.
By following these steps for applying the Kerdi membrane, ensuring proper overlap and seam sealer, and sealing penetrations and transitions, you can achieve a fully waterproofed shower environment. This will give you peace of mind, knowing that your shower walls are protected and that water will not cause any structural damage.
Tiling The Shower Area
Once you have properly prepared the substrate and installed the Kerdi shower kit, it’s time to move on to tiling the shower area. This step is crucial in ensuring a waterproof and aesthetically pleasing finish. In this section, we will guide you through the process of choosing the right tiles, preparing them and laying them out, and finally installing them on the shower walls and floor.
Choosing the right tiles for the shower
When it comes to selecting tiles for your shower, there are a few factors to consider. Firstly, you want to choose tiles that are suitable for wet areas. Porcelain and ceramic tiles are popular choices due to their water-resistant properties. Additionally, consider the size and style of the tiles. Larger tiles can create a seamless and spacious look, while smaller tiles can provide intricate detail and texture. Finally, don’t forget about slip resistance. Look for tiles with a textured surface or a high coefficient of friction to ensure safety in the shower.
Preparing the tiles and layout
Before you start installing the tiles, it’s essential to properly prepare them and plan out the layout. Start by inspecting each tile for any defects or imperfections. Remove any stickers or residue on the back of the tiles. Then, lay out the tiles in the desired pattern and arrangement to get a visual representation of how they will look on the shower walls and floor. This will help you make any necessary adjustments before permanently installing the tiles.
Installing the tiles on the shower walls and floor
Now that you have chosen the tiles and prepared the layout, it’s time to start installing them. Begin with the walls by spreading thin-set adhesive on the back of each tile using a notched trowel. Press each tile firmly into place, making sure to maintain even spacing between them. Continue this process until all the shower walls are tiled. For the shower floor, follow the same steps, starting from the drain and working your way outwards. Be mindful of any slope requirements for proper water drainage.
Throughout the tiling process, it’s crucial to periodically check for level and plumb to ensure the tiles are straight and aligned. Additionally, regularly clean off any excess adhesive or grout to maintain a neat and professional finish. Once the tiles are installed and the adhesive has dried, you can proceed with grouting and sealing to complete the tiling process and achieve a beautiful, long-lasting shower.
Finishing Touches
Finishing Touches
Once you have successfully installed the Kerdi shower kit and achieved a watertight and durable base, it’s time to focus on the finishing touches. This phase involves installing the shower fixtures and accessories, grouting and sealing the tiles, and ensuring proper cleaning and maintenance of the Kerdi shower kit.
Installing the shower fixtures and accessories
After completing the waterproofing process, it’s time to install the shower fixtures and accessories to enhance the functionality and aesthetics of your shower. Follow these steps to ensure a smooth installation:
- Begin by carefully reading the manufacturer’s instructions for each fixture or accessory.
- Start with the showerhead installation. Use Teflon tape on the threads to create a secure seal.
- Next, install the shower handle. Connect the plumbing according to the manufacturer’s guidelines.
- Attach any additional fixtures such as soap dishes or shelves, making sure to secure them properly.
- Double-check all connections for leaks and tighten them if necessary.
Grouting and sealing the tiles
Grouting and sealing the tiles not only provides a polished look to your shower but also helps prevent water damage and mold growth. Here’s how to do it:
- Begin by selecting a high-quality grout suitable for your tile material and shower environment.
- Mix the grout according to the manufacturer’s instructions, ensuring a smooth and consistent consistency.
- Apply the grout using a rubber grout float, pressing it into the joints at a 45-degree angle.
- Remove excess grout with the float and wipe away any residue with a damp sponge.
- Allow the grout to cure for the recommended time before sealing it.
- Choose a suitable tile sealer and apply it evenly to the grout lines, following the manufacturer’s instructions.
- Allow the sealer to dry completely before using the shower.
Cleaning and maintaining the Kerdi shower kit
Proper cleaning and maintenance are crucial for preserving the longevity and appearance of your Kerdi shower kit. Follow these steps to keep it in top condition:
- Regularly clean the shower walls and floor with a non-abrasive cleaner and a soft sponge or cloth.
- Avoid using harsh chemicals or abrasive materials that could damage the waterproofing membrane.
- Inspect the grout lines and tiles for any signs of damage or wear. Replace any cracked or broken tiles and regrout as needed.
- Prevent mold and mildew growth by ensuring proper ventilation in the bathroom and using a squeegee to remove excess water after each use.
- If you notice any leaks or water damage, address them promptly to prevent further issues.
By following these guidelines for installing the shower fixtures and accessories, grouting and sealing the tiles, as well as cleaning and maintaining the Kerdi shower kit, you can ensure a beautiful and functional shower that will stand the test of time.
Troubleshooting And Tips
Installing a Kerdi shower kit can be a rewarding project that ensures your bathroom remains waterproof and protected. However, like any installation process, issues can arise that may require troubleshooting. In this section, we will discuss common issues that may occur during the installation process and provide valuable tips to ensure a successful installation. We’ll also address frequently asked questions that many homeowners have about Kerdi shower kits. Let’s dive in!
Common issues during installation
While installing a Kerdi shower kit is relatively straightforward, there are a few common issues that some homeowners may encounter. By being aware of these challenges, you can tackle them head-on and achieve a flawless installation. Here are a few common issues to watch out for:
| Issue | Solution |
|---|---|
| The shower pan is not level | Use a leveling compound to adjust the pan’s slope. |
| Water leaks through corners | Ensure proper overlapping and sealing of Kerdi membrane on corners. |
| Inadequate adhesion of the Kerdi membrane | Apply a suitable adhesive as recommended by the manufacturer. |
| Improperly cut membrane pieces | Double-check your measurements and use a sharp utility knife for precise cuts. |
Tips for a successful installation
To ensure a successful installation of your Kerdi shower kit, here are some valuable tips to keep in mind:
- Prepare the surface: Clean and level the shower area before applying the Kerdi membrane.
- Follow the instructions: Carefully read and understand the installation instructions provided by the manufacturer.
- Use the right tools: Invest in high-quality tools, such as a trowel and a notched trowel, for seamless application.
- Take your time: Rushing the installation process can lead to mistakes. Take the necessary time to ensure proper application.
- Test for leaks: Before proceeding with the tile installation, perform a water test to ensure there are no leaks.
Frequently asked questions about Kerdi shower kits
Here, we address some frequently asked questions that homeowners often have regarding Kerdi shower kits:
- Q: Can I install a Kerdi shower kit myself?
- A: Yes, with the right tools and some DIY skills, you can install a Kerdi shower kit yourself.
- Q: Can I tile directly over the Kerdi membrane?
- A: Yes, the Kerdi membrane is specifically designed to be tiled over without the need for additional waterproofing layers.
- Q: How long does it take for the Kerdi membrane to dry?
- A: The drying time of the Kerdi membrane depends on various factors, such as temperature and humidity. It is best to consult the manufacturer’s instructions for specific drying times.
By troubleshooting common issues, following these helpful tips, and having a clear understanding of Kerdi shower kits, you can confidently complete your installation and enjoy a leak-proof and beautiful shower for years to come.
Frequently Asked Questions
Can You Install Kerdi-Board Directly On Studs?
Yes, Kerdi-board can be directly installed on studs.
How Do You Attach Kerdi To Drywall?
Attach KERDI to drywall by following these steps: 1. Prepare the drywall’s surface by cleaning it thoroughly. 2. Apply a thin layer of thin-set mortar on the drywall. 3. Press KERDI firmly onto the mortar, ensuring good adhesion. 4. Smooth out any air bubbles or wrinkles.
5. Allow the mortar to cure before proceeding with tile installation.
Do You Need Cement Board With Kerdi Membrane?
Yes, you need cement board with KERDI membrane. The cement board provides a stable surface for the KERDI membrane to adhere to, ensuring a secure and waterproof installation.
What Kind Of Thinset Do You Use For A Schluter Shower Pan?
Use a Schluter-approved thinset for installing a Schluter shower pan.
Conclusion
Installing a Kerdi shower kit is a straightforward process that can transform your bathroom into a modern and functional space. By following the step-by-step instructions provided in this guide, you can easily achieve a flawless installation. With its waterproofing properties and durability, the Kerdi shower kit is an excellent choice for any homeowner.
So, why wait? Start your bathroom renovation project today and enjoy a beautiful shower that will stand the test of time.