
To install an inner tube, begin by deflating the tire and removing the wheel from the bicycle. Then, use tire levers to carefully remove one side of the tire from the rim.
Next, insert the inner tube into the tire and work it into place evenly. After that, reposition the tire onto the rim, making sure the tube is not pinched or twisted. Finally, inflate the tire to the recommended pressure and ensure it is seated properly on the rim before reattaching the wheel to the bicycle.
Follow these steps for a successful inner tube installation.
Factors To Consider When Selecting An Inner Tube
When it comes to installing an inner tube, there are several factors that you need to consider to ensure a smooth and safe ride. Whether you are replacing a damaged tube or upgrading to a better quality one, it is crucial to choose the right inner tube that matches your tire size, valve type, and tube material. Let’s delve deeper into each of these factors.
Tire Size
One of the first things you need to determine when selecting an inner tube is the tire size it is designed for. The size of the tube must correspond to the size of your tire to ensure a proper fit and optimal performance. You can find the tire size measurements imprinted on the sidewall of your tire. It typically consists of three numbers, such as 26 x 2.1 or 700 x 25c.
The first number represents the diameter of the tire in inches or the ISO diameter code for metric sizes. The second number indicates the tire width in inches, while the letter ‘c’ denotes a narrower tire width commonly used in road bikes. Make sure to choose an inner tube that matches these measurements precisely to ensure compatibility.
Valve Type
The valve type is another important consideration when selecting an inner tube. The valve is the entry point through which you inflate the tube. There are primarily two types of valves used in inner tubes: Schrader valves and Presta valves. Schrader valves are commonly found on car tires and are characterized by their larger size and threaded stem.
On the other hand, Presta valves are slimmer and longer with a threaded top that needs to be opened before inflation. To ensure compatibility, you need to choose an inner tube with a valve type that matches your rim and pump. Most standard bicycle rims are compatible with both valve types, but certain high-performance rims may only accommodate Presta valves. Ensure that you select the right valve type to prevent any fitting issues.
Tube Material
Tube material is the next factor to consider when selecting an inner tube. The most common materials used for inner tubes are butyl rubber and latex. Butyl rubber tubes are known for their durability and affordability, making them a popular choice for everyday riding. They offer good puncture resistance and retain air pressure for a longer period of time. On the other hand, latex tubes are incredibly lightweight and provide a more supple ride.
They offer excellent rolling efficiency and are often preferred by professional riders for their superior performance. However, latex tubes are more expensive and require more frequent inflation due to their higher air permeability. Consider your riding style, desired performance, and budget when choosing between these materials.
In conclusion, selecting the right inner tube is crucial for a safe and enjoyable ride. By considering the tire size, valve type, and tube material, you can ensure compatibility and choose an inner tube that meets your specific needs. Remember to always follow the manufacturer’s recommendations and guidelines for optimal performance.
Tools Needed For Inner Tube Installation
When it’s time to install an inner tube in your tire, having the right tools on hand can make the process much easier and more efficient. Here are three essential tools that you’ll need:
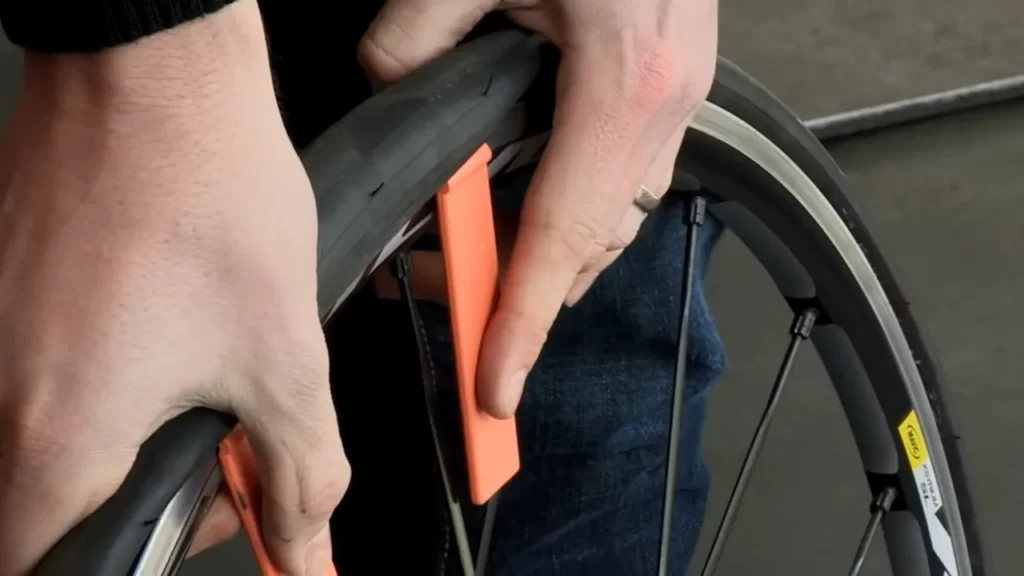
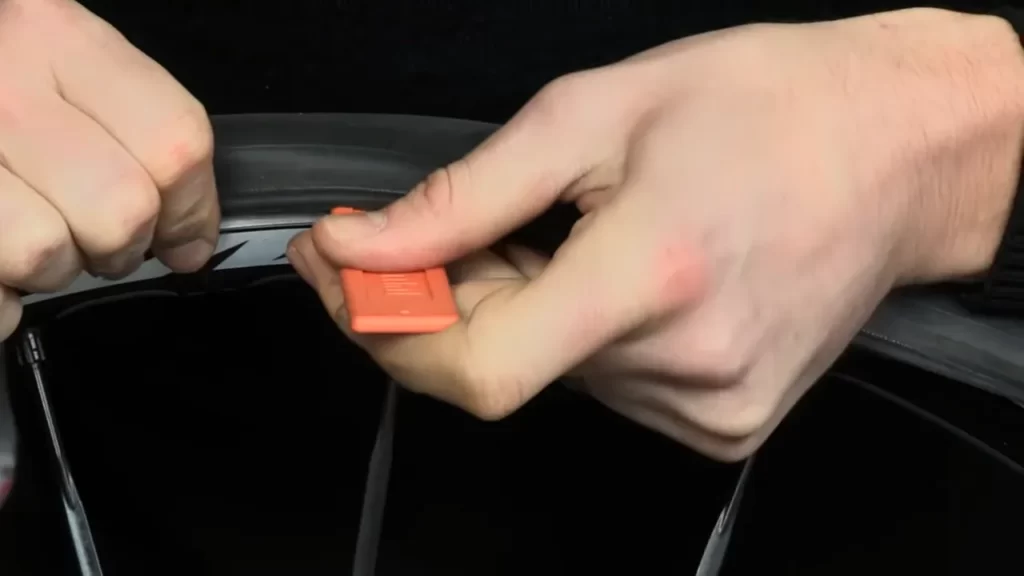
Tire Lever
To remove the tire from the wheel and access the inner tube, you’ll need a reliable tire lever. This tool is typically made of strong, durable material such as plastic or metal, and it helps you pry the tire off the rim without causing any damage. The tire lever provides the leverage needed to loosen the tire from the wheel and slide it off, allowing you to access the inner tube.
Pump
Having a pump is essential for properly inflating the inner tube. There are several types of pumps available, including floor pumps, hand pumps, and CO2 inflators. Floor pumps are ideal for home use, as they provide a consistent and powerful airflow. Hand pumps, on the other hand, are compact and portable, making them great for on-the-go use. CO2 inflators use compressed gas cartridges to quickly inflate the tube, making them a popular choice among cyclists looking for convenience.
Patch Kit (Optional)
Although not necessary, having a patch kit on hand can be a lifesaver when you unexpectedly get a puncture. Patch kits usually include patches, glue, and sandpaper to help repair small holes in the inner tube. To use the patch kit, you’ll need to locate the hole in the tube, clean it with sandpaper, apply glue, and then attach the patch. This simple process can save you time and money by allowing you to repair the tube rather than replacing it entirely.
Removing The Wheel And Deflating The Tire
Introductory Paragraph:
In this section, we will guide you through the process of removing the wheel and deflating the tire when installing an inner tube. These two steps are crucial before you can proceed with replacing the inner tube successfully. By following these instructions, you will be able to remove the wheel safely, loosen the nuts or quick release, and deflate the tire efficiently. So, let’s get started!
Loosening the Nuts or Quick Release
Before you can remove the wheel, you need to start by loosening the nuts or quick release mechanism that holds the wheel in place on your bicycle. Here’s how you can do it:
- Locate the nuts or quick release mechanism on either side of the wheel axle.
- Using a wrench or your fingers, loosen the nuts counterclockwise (lefty-loosey) to release the tension on the axle. If your bicycle uses a quick release, simply flip the lever open to release the wheel.
- Once the nuts or quick release lever is sufficiently loosened, you can move on to the next step of removing the wheel.
Removing the Wheel
Now that you have loosened the nuts or quick release, it’s time to remove the wheel from your bicycle. Follow these steps:
- Support the bicycle securely to ensure it doesn’t tip over while you remove the wheel.
- Grasp the wheel firmly with both hands, one on each side of the axle.
- With a smooth motion, pull the wheel straight out of the dropout slots or frame fork.
- Set the removed wheel aside in a safe place to prevent any damage or accidents.
Deflating the Tire
With the wheel removed, the next step is to deflate the tire fully. Here’s how you can do it:
- Position yourself so you can easily access the tire valve.
- Locate the small plastic or metal cap covering the valve and remove it.
- With your thumb or a tool, press the valve core for a few seconds to release the air from the tire.
- Make sure to keep pressing the valve core until you no longer hear any hissing sound, indicating that all the air has been released.
- Once the tire is completely deflated, you are ready to proceed with replacing the inner tube.
By following these steps to loosen the nuts or quick release, remove the wheel, and deflate the tire, you have completed the initial stages of installing an inner tube. The next section will cover inserting the new inner tube and reassembling the wheel. Stay tuned!
Removing The Pinch Flat Or Damaged Inner Tube
Identifying the Pinch Flat or Damage
Before we dive into the process of removing the pinch flat or damaged inner tube, it’s crucial to identify such issues accurately. The telltale sign of a pinch flat is a pair of parallel punctures on the inner tube caused by the tube getting pinched between the rim and the tire during a hard impact or underinflation. On the other hand, damage to the inner tube can manifest as holes, cuts, or tears caused by sharp objects or debris on the road.
Removing the Valve Cap and Valve Nut
The first step in the process is removing the valve cap and valve nut. These are the components securing the inner tube to the valve stem. Unscrew the valve cap by turning it counterclockwise to release any air pressure remaining in the tube. Then, use a wrench to loosen and remove the valve nut. Keep them aside in a safe place, as you will need them when installing the new inner tube.
Deflating the Tube Completely
Once the valve cap and valve nut are removed, it’s time to deflate the tube completely. One way to achieve this is by pressing on the tube with your fingers to expel the air. Alternatively, you can use a tire lever or a similar tool to gently pry open the tire bead from the rim, allowing the air to escape. Ensure that the tube is completely empty of air before proceeding to the next step.
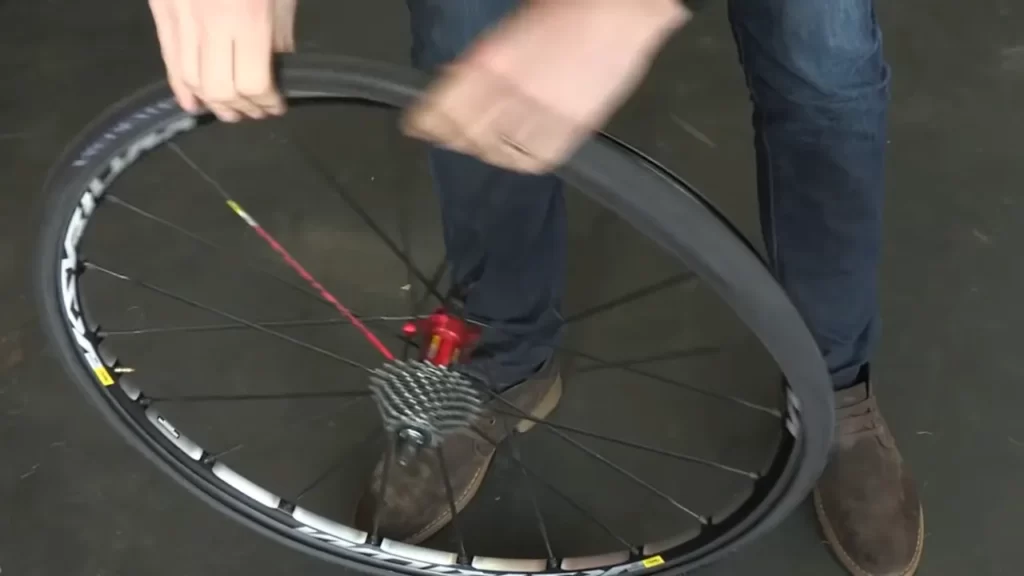
Loosening the Bead of the Tire
To remove the tire from the rim, you’ll need to loosen the bead of the tire all around the rim. Starting at one side of the tire, use your hands to push the tire bead away from the rim. Work your way around the circumference of the tire, until the entire bead is loose. This step may require some effort, especially if the tire is tight or stubborn. Alternatively, you can use a tire lever to help pry the tire bead over the rim.
And there you have it! By following these steps, you can successfully remove a pinch flat or damaged inner tube from your tire. Remember to inspect the tire and rim for any debris or sharp objects that may have caused the damage in the first place. Once you’ve completed the removal process, you’ll be ready to install a new inner tube and get back on the road with confidence.
Installing The New Inner Tube
Once you have identified the cause of your flat tire and removed the old inner tube, it’s time to install a new one. Follow these steps to ensure a smooth and successful installation.
Placing a Small Amount of Air in the New Tube
Before inserting the new inner tube into the tire, it’s important to give it a slight inflation. This not only helps in preventing any pinching or folding of the tube but also assists in aligning the tube properly later on. Grab your bike pump and attach it to the valve of the new tube. Inflate the tube just enough so that it takes shape but is still easy to handle.
Inserting the Valve into the Rim
Now it’s time to position the new inner tube inside the tire. Start by inserting the valve into the valve hole in the rim. The valve should be pointing towards the center of the wheel. Slowly push the tube into the tire, ensuring that it fits smoothly all the way around the rim. Take your time and make sure the tube is not twisted or caught between the rim and the tire.
Aligning the Tube Properly
Once the tube is inserted, check for proper alignment. Gently push the valve up into the tire while giving the tube a gentle squeeze. This will help to ensure that the tube is positioned evenly inside the tire and not bunched up in any way. Additionally, check the alignment of the tire itself to ensure that it is seated evenly on the rim.
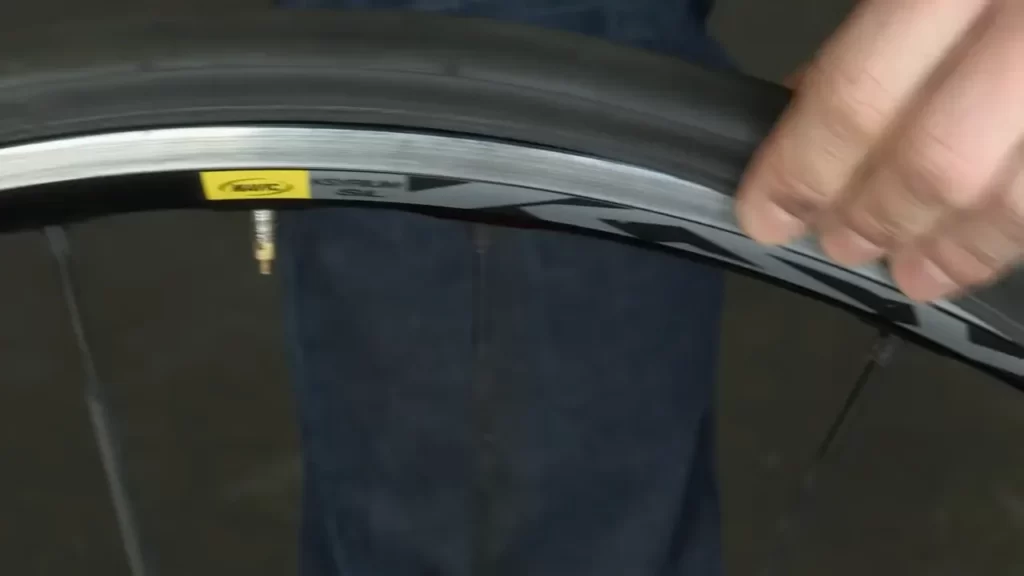
Putting the Tire Back onto the Rim
Now it’s time to put the tire back onto the rim. Starting opposite the valve, use your hands to push the tire over the rim. Take care not to use any tools that could damage the inner tube. Work your way around the tire, pushing it back onto the rim until it is fully seated. Double-check that the tube is not pinched or caught between the tire and the rim.
Once the tire is fully on the rim, inflate it to the recommended pressure. This information can usually be found on the side of the tire or in the manufacturer’s instructions. It’s a good idea to use a pressure gauge to ensure that the tire is inflated to the correct pressure.
By following these steps, you can successfully install a new inner tube in your bike tire. Remember to double-check everything before taking your bike out for a ride. Happy cycling!
Inflating And Mounting The Tire
When it comes to installing an inner tube, inflating and mounting the tire properly are crucial steps in the process. These steps ensure that your tire is properly aligned, with the correct pressure, and that the wheel is securely mounted back onto the bicycle. In this section, we will guide you through each step, so you can confidently perform these tasks.
Inflating the Tube to the Correct Pressure
Proper tire pressure is essential for a smooth and safe ride. Underinflated tires can result in sluggish performance, increased rolling resistance, and higher risk of flats. On the other hand, overinflated tires can lead to a harsh ride and diminished traction.
To inflate your inner tube to the correct pressure:
- Refer to the sidewall of your tire or the manufacturer’s guidelines for the recommended pressure range.
- Attach the pump nozzle to the valve stem of the inner tube.
- Inflate the tube gradually, periodically checking the pressure with a pressure gauge.
- Once the desired pressure is reached, remove the pump nozzle and tightly close the valve.
Remember to frequently check your tire pressure to ensure it remains within the recommended range.
Checking for Proper Alignment
Proper alignment is essential for optimal performance and longevity of your tire. Misalignment can lead to uneven wear, compromised handling, and increased risk of accidents.
To check for proper alignment:
- Spin the wheel and observe the distance between the tire and the brake pads or frame.
- Ensure that the tire sits centrally within the frame or fork, with equal clearance on both sides.
- If the tire appears misaligned, loosen the wheel nuts or quick-release lever.
- Adjust the position of the wheel by gently pushing or pulling it until it aligns properly.
- Tighten the wheel nuts or quick-release lever securely.
By regularly checking and maintaining proper alignment, you can optimize the performance and safety of your bicycle.
Mounting the Wheel Back onto the Bicycle
Once you have inflated the tube and ensured proper alignment, it’s time to mount the wheel back onto the bicycle.
To mount the wheel:
- Align the wheel with the dropouts on the frame or fork.
- Insert the axle into the dropouts, ensuring it fits securely.
- If your bicycle has quick-release levers, tighten them until they provide sufficient clamping force. If you have wheel nuts, tighten them evenly using a wrench.
- Ensure that the wheel spins freely and that the brake calipers do not rub against the rim.
Once the wheel is securely mounted, give it a final check to ensure proper installation and alignment. Now you’re ready to hit the road with confidence!
Pinch Flats
One of the most common issues cyclists face when installing inner tubes is pinch flats. These pesky little punctures occur when the tube gets pinched between the rim and the tire, causing it to puncture. Pinch flats are often a result of improper tire pressure or improper installation. In this section, we will discuss how to identify pinch flats and how to adjust tire pressure to prevent them.
Identifying Pinch Flats
Pinch flats are easy to identify as they leave a distinctive puncture pattern on the inner tube. Unlike other types of punctures that create small holes, pinch flats create two parallel punctures on opposite sides of the tube, resembling a snake bite or a pinch mark. These punctures are often larger in size compared to other punctures and are typically located close to the rim.
Adjusting Tire Pressure
Proper tire pressure is crucial in preventing pinch flats. When the tire pressure is too low, there is a higher risk of the tube getting pinched between the rim and the tire. On the other hand, if the tire pressure is too high, the tube may become overly stretched and prone to punctures caused by sharp objects on the road.
To adjust tire pressure, follow these steps:
- Refer to your bike’s owner’s manual or the sidewall of your tire to find the recommended tire pressure range.
- Using a pressure gauge, check the current tire pressure. If it’s below the recommended range, add air using a bicycle pump. If it’s above the recommended range, release air by pressing the valve stem with a sharp object or by depressing the valve core.
- After adjusting the tire pressure, squeeze the tire with your hands to check if it feels firm yet slightly yieldable. You should not be able to easily press the tire down to the rim with your fingers, but it should have a bit of give when you apply pressure.
- If the tire feels too hard or too soft, adjust the pressure accordingly until it reaches the optimal level.
By ensuring the tire pressure is within the recommended range for your specific bike and riding conditions, you can significantly reduce the risk of pinch flats and enjoy a smoother cycling experience.
Valve Installation Problems
One of the common challenges you may encounter when installing an inner tube is valve installation problems. Proper valve installation is crucial for the functionality and performance of the tube. In this section, we will address two important aspects to consider: ensuring the valve is properly inserted and adjusting the valve nut.
Ensuring the Valve is Properly Inserted
Before you begin the installation process, it is essential to ensure that the valve is properly inserted into the rim. Incorrect valve insertion can lead to air leakage and deflation, causing frustration and potentially damaging the tube.
To ensure the valve is properly inserted, follow these simple steps:
- Insert the valve into the valve hole on the rim.
- Tighten the valve nut by hand until it is secure, but avoid over-tightening.
- Check for any misalignment or crookedness in the valve stem. If you notice any, adjust it until it appears straight.
- Inspect the seal between the valve and the rim. It should be tight and secure without any visible gaps.
By ensuring the valve is properly inserted, you minimize the risk of air leakage and enhance the overall performance of your inner tube.
Adjusting the Valve Nut
Another important aspect of valve installation is adjusting the valve nut. The valve nut acts as an additional securing mechanism to prevent the valve from loosening during rides. Here are the key steps to follow:
- Ensure the valve nut is finger-tight to provide initial security.
- Use a wrench or a pair of pliers to tighten the valve nut slightly. Be careful not to overtighten, as this can damage the valve or the valve stem.
- Test the valve for any play or movement by gently pushing and pulling it. If you notice any excessive play, tighten the nut a bit more.
By adjusting the valve nut appropriately, you maintain a secure valve and reduce the risk of air leakage during your rides.
In conclusion, valve installation problems can be easily resolved by taking the necessary steps to ensure the valve is properly inserted and the valve nut is adjusted correctly. By following these guidelines, you will ensure a smooth and reliable inner tube installation, allowing you to enjoy your rides without any valve-related issues.
Tire Bead Issues
Checking for Proper Tire Bead Seating
Before you install an inner tube, it is crucial to check for proper tire bead seating. The tire bead is the edge of the tire that sits firmly against the rim. If the tire bead is not seated correctly, it can lead to air leaks and even cause the tire to come off the rim while riding. To ensure the tire bead is properly seated, follow these steps:
- First, inflate the tire to the recommended pressure. Use a tire pressure gauge to ensure you have the right amount of air in the tire.
- Once inflated, inspect the tire bead. Carefully examine the entire circumference of the tire bead. Look for any spots where the tire bead appears to be bulging outward or doesn’t sit evenly against the rim.
- If you notice any irregularities, gently deflate the tire by pressing the valve stem to release air. Then, use your hands to push and manipulate the tire bead into its proper position. Apply even pressure along the circumference of the tire bead to ensure it seats evenly against the rim.
- Repeat the inflation process and recheck the tire bead seating. If it appears to be properly seated and there are no bulges or uneven spots, you are ready to proceed with installing the inner tube.
Adjusting the Bead for Proper Fit
Sometimes, the tire bead may require additional adjustments to ensure a proper fit. If you encounter difficulty installing the inner tube or notice the tire bead doesn’t sit snugly against the rim, follow these steps to adjust the bead:
- Deflate the tire completely by pressing the valve stem to release all the air.
- Gently lift one side of the tire bead away from the rim using tire levers or your hands. Be careful not to damage the tire or inner tube.
- Inspect the rim for any debris or foreign objects that could prevent the tire bead from seating properly. Remove any obstructions using a clean cloth or brush.
- Apply a small amount of tire lubricant to the tire bead and rim interface. This will help reduce friction and facilitate easier bead seating.
- Using your hands or tire levers, work the tire bead back onto the rim. Start at the valve stem and gradually move in both directions until the tire bead is fully seated. Take your time and avoid using excessive force, as this can damage the tube or tire.
- Once the tire bead is properly seated, inflate the tire to the recommended pressure and check for any leaks.
By following these steps, you can ensure that your inner tube is installed properly and securely. Remember to always take your time and exercise caution when working with tires and tubes to prevent any potential issues down the road.
Frequently Asked Questions
How Do You Put On An Inner Tube?
To put on an inner tube, follow these steps: 1. Deflate the tube and remove the tire from the rim. 2. Place one side of the tube into the tire, aligning the valve with the valve hole. 3. Push the other side of the tube into the tire, making sure it sits evenly inside.
4. Carefully inflate the tube, ensuring it doesn’t twist or bulge. 5. Put the tire back on the rim and inflate it fully before riding.
How Do You Attach An Inner Tube To A Bike?
To attach an inner tube to a bike, follow these steps: 1. Deflate the tire completely. 2. Remove the wheel from the bike. 3. Locate the valve on the inner tube and align it with the valve hole on the rim.
4. Starting at the valve, tuck the inner tube into the tire, ensuring it is evenly distributed. 5. Carefully insert the tire lever to lift the bead of the tire over the rim, all the way around. 6. Inflate the tube, checking for any bulges or pinches, and then re-attach the wheel.
How Do You Put A Tube Back On A Tire?
To put a tube back on a tire, follow these steps: 1. Deflate the tube completely. 2. Align the valve stem with the valve hole in the rim. 3. Insert the tube into the tire, making sure it’s evenly distributed.
4. Start evenly seating the tire onto the rim, working your way around. 5. Inflate the tube gradually, checking for proper alignment as you go.
Can You Put An Inner Tube On Without Removing The Wheel?
Yes, you can put an inner tube on without removing the wheel.
Conclusion
Installing an inner tube is a simple process that can significantly extend the life of your tires. By carefully following the steps outlined in this guide, you can ensure a smooth and hassle-free installation. Remember to always prioritize safety, use the proper tools, and double-check for any signs of damage or wear.
With proper maintenance and regular inspections, you can enjoy a longer lifespan for your inner tubes and a smoother ride for your bicycle. Happy riding!