To install a high loop for a dishwasher, simply connect the drain hose to the underside of the countertop or sink. This installation prevents backflow of water into the dishwasher.
Installing a high loop for your dishwasher is a straightforward process that helps prevent water backflow into the dishwasher. By connecting the drain hose to the underside of the countertop or sink, you create a loop that ensures water flows in the correct direction and does not contaminate your dishes.
We will guide you through the step-by-step process of installing a high loop for your dishwasher, ensuring a hassle-free and efficient installation. So, let’s get started with the installation process and keep your dishwasher working optimally.
The Importance Of A High Loop For Dishwasher
Installing a high loop for your dishwasher is not just an optional step; it is an essential component that plays a crucial role in maintaining the cleanliness and functionality of your kitchen. A high loop is a simple yet effective solution to prevent contaminated water from entering your dishwasher, comply with building codes, and avoid drainage issues. In this article, we will explore the importance of a high loop for a dishwasher, its benefits in preventing contamination, complying with building codes, and avoiding drainage problems.
Preventing Contamination: How a high loop prevents dirty water from entering the dishwasher
When it comes to keeping your dishwasher clean, preventing contamination is of utmost importance. A high loop serves as a barrier that prevents dirty water from flowing back into the dishwasher. This is achieved by looping the dishwasher drain hose up to the underside of the kitchen sink countertop, creating a “U” shape. As a result, gravity works in your favor, preventing water from flowing back and effectively keeping your dishwasher free from any contaminants. By maintaining this high loop, you ensure that only fresh, clean water is used during each dishwasher cycle, leading to spotless dishes and a hygienic kitchen environment.
Compliance with Building Codes: Understanding the requirement for a high loop in many jurisdictions
Not only does a high loop contribute to the cleanliness of your dishwasher, but it also plays a significant role in complying with building codes. Many jurisdictions require the installation of a high loop to ensure proper plumbing practices and prevent cross-contamination. Compliance with these building codes is crucial, as it ensures the safety and well-being of your household, while also providing reassurance during property inspections or potential future home sales. By understanding and adhering to these requirements, you demonstrate your commitment to maintaining a high standard of sanitization and professionalism in your kitchen.
Avoiding Drainage Issues: How a high loop can help prevent drain clogs and backups
Drainage issues can be a nightmare to deal with, causing inconvenience and potential damage to your home. Fortunately, by installing a high loop, you can significantly reduce the risk of drain clogs and backups. The elevated position of the high loop ensures that water naturally flows downward, preventing potential blockages that could lead to a frustrating and messy situation. With a high loop in place, you can enjoy worry-free use of your dishwasher, knowing that your drainage system remains clear and efficient.
By understanding the importance of a high loop for your dishwasher, you can ensure the cleanliness, compliance, and long-term functionality of your kitchen. Prevent contamination, comply with building codes, and avoid drainage issues by implementing this simple but crucial step in the installation process. Don’t overlook the significance of a high loop – it’s an investment in the cleanliness and efficiency of your kitchen.
Essential Tools For The Job
When it comes to installing a high loop for your dishwasher, having the right tools can make all the difference. With the right tools at your disposal, you’ll be able to tackle the job with ease and ensure a proper installation. Here are the essential tools you’ll need:
Screwdriver
A screwdriver is an indispensable tool for installing a high loop for your dishwasher. It will come in handy when you need to loosen or tighten screws during the installation process. Make sure you have a screwdriver with different types and sizes of tips, such as a Phillips head and a flathead.
Adjustable Wrench
An adjustable wrench is a must-have tool when it comes to installing a high loop for your dishwasher. This versatile tool can be adjusted to fit different sizes of nuts and bolts, making it perfect for securing connections. Having an adjustable wrench in your toolbox will make your installation process smoother and more efficient.
Pliers
Pliers are another essential tool that you’ll need for installing a high loop for your dishwasher. They can come in handy when you need to grip and twist pipes or fittings during the installation. Make sure to have both slip-joint pliers and needle-nose pliers, as they serve different purposes and can be useful in different situations.
Level
A level is crucial for ensuring that your high loop is installed correctly and properly aligned. By using a level, you can ensure that your high loop is perfectly horizontal, which is important for the proper functioning of your dishwasher. Before securing the high loop in place, check its alignment with a level to make any necessary adjustments.
By having these essential tools at your disposal, you’ll be on your way to installing a high loop for your dishwasher with ease. Now that you know what tools you need, you can confidently tackle this project and enjoy the benefits of a properly installed high loop.
Required Materials For Installation
When installing a dishwasher, it is important to have all the required materials on hand to ensure a smooth and successful installation. By gathering the necessary tools and components beforehand, you can save time and avoid any delays in the process. In this section, we will discuss the essential materials needed for installing a high loop for a dishwasher.
Dishwasher High Loop Kit
A dishwasher high loop kit is a crucial component in redirecting the dishwasher drain hose to prevent backflow. This kit typically includes a high loop bracket, screws, and detailed instructions for installation. The high loop bracket ensures that the dishwasher drain hose is positioned above the sink drain or disposal, effectively preventing the dirty water from flowing back into the dishwasher.
Hose Clamp
A hose clamp is necessary to secure the dishwasher drain hose tightly in place. This clamp prevents any leaks or disconnections that may occur during operation. It is essential to choose a high-quality hose clamp that can withstand the pressure and vibrations caused by the dishwasher’s drainage process. Ensure that the hose clamp is the correct size for the dishwasher drain hose to ensure a secure fit.
Dishwasher Drain Hose
The dishwasher drain hose is a vital part of the installation process, as it channels the dirty water from the dishwasher to the sink drain or disposal. It is important to choose a drain hose that is compatible with your dishwasher model and meets the required length. The drain hose should be made of durable materials that can withstand high temperatures and the chemicals used in dishwashing. Before installation, make sure the drain hose is clean and free from any blockages or kinks.
By having these required materials ready, you can proceed with confidence and efficiency when installing a high loop for your dishwasher. Remember to follow the manufacturer’s instructions carefully and double-check all connections to ensure a proper and leak-free installation.

Step 1: Disconnect The Power And Water Supply
Before you begin installing a high loop for your dishwasher, it is important to disconnect the power and water supply to ensure safety and prevent any accidents. This step-by-step guide will walk you through the process of disconnecting the power and shutting off the water supply to your dishwasher.
Turning off the dishwasher power supply
The first task is to turn off the power supply to your dishwasher. This will help you avoid any electrical shocks or damages during the installation process. Follow these simple steps to disconnect the power:
- Locate the circuit breaker box in your home. It is usually situated in the basement or utility room.
- Open the circuit breaker box and find the switch that controls the power to your dishwasher.
- Switch off the power by flipping the switch to the “off” position. Ensure that it stays in the “off” position throughout the installation process.
Shutting off the water supply to the dishwasher
Now that the power supply is disconnected, it’s time to shut off the water supply to your dishwasher. This will prevent any water leaks or flooding while you work on the installation. Follow the steps below to shut off the water supply:
- Locate the shut-off valve that is connected to the water line supplying your dishwasher. It is usually located under the kitchen sink or in the basement near the dishwasher.
- Rotate the valve handle clockwise until it is fully closed. This will stop the flow of water to your dishwasher.
- To ensure that the water supply is completely shut off, run the dishwasher for a few seconds to see if any water is still coming into the dishwasher. If water continues to flow, you may need to tighten the shut-off valve further.
By following these simple steps, you have successfully disconnected the power and water supply to your dishwasher. This ensures the safety and allows for a smooth installation of the high loop. Now that you’re ready, let’s move on to the next step of the installation process.
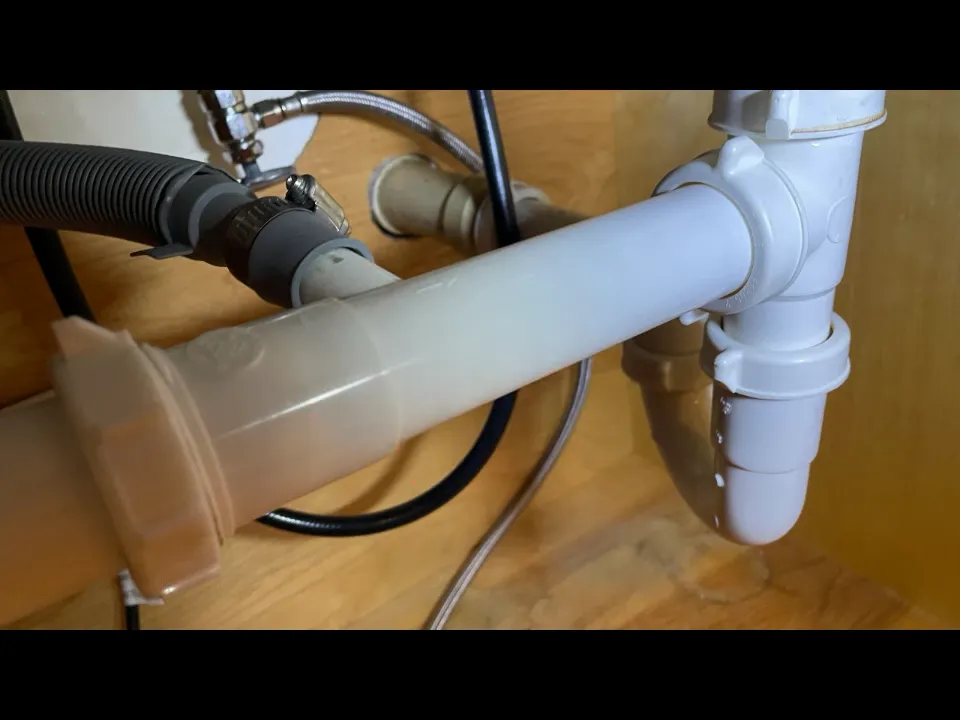
Step 2: Locate The Dishwasher Drain Hose
Locating the dishwasher drain hose is the second step in installing a high loop for your dishwasher. The drain hose is an essential component that ensures proper drainage of water from the dishwasher to the plumbing system. It is crucial to identify the drain hose and assess its positioning before proceeding further with the installation process.
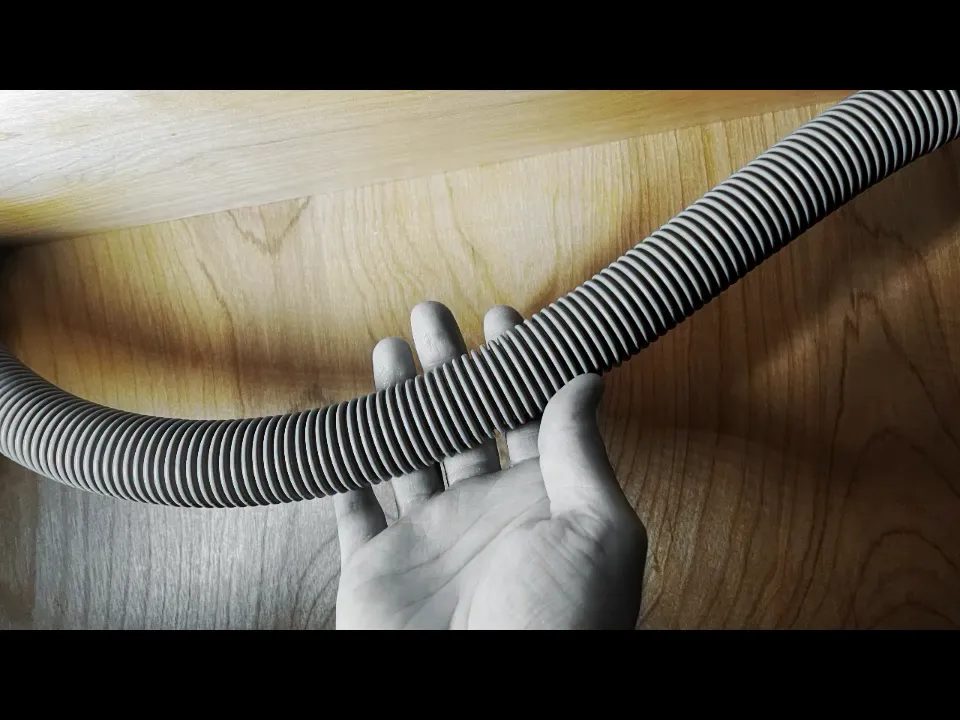
Identifying the dishwasher drain hose at the back of the appliance
The dishwasher drain hose is typically located at the back of the appliance, near the bottom. It is usually made of flexible, durable material such as plastic or rubber. The drain hose connects the dishwasher’s drain pump to the plumbing system or garbage disposal unit.
To identify the dishwasher drain hose, follow these steps:
- Move the dishwasher slightly away from the wall, creating enough space for you to access the back of the appliance.
- Ensure the dishwasher is unplugged and the water supply is turned off to avoid any accidents.
- Inspect the back of the dishwasher for a hose that is connected to the drain pump.
- Feel the hose to confirm its flexibility and material, usually plastic or rubber.
Once you have identified the dishwasher drain hose, proceed to the next step, which involves assessing its positioning.
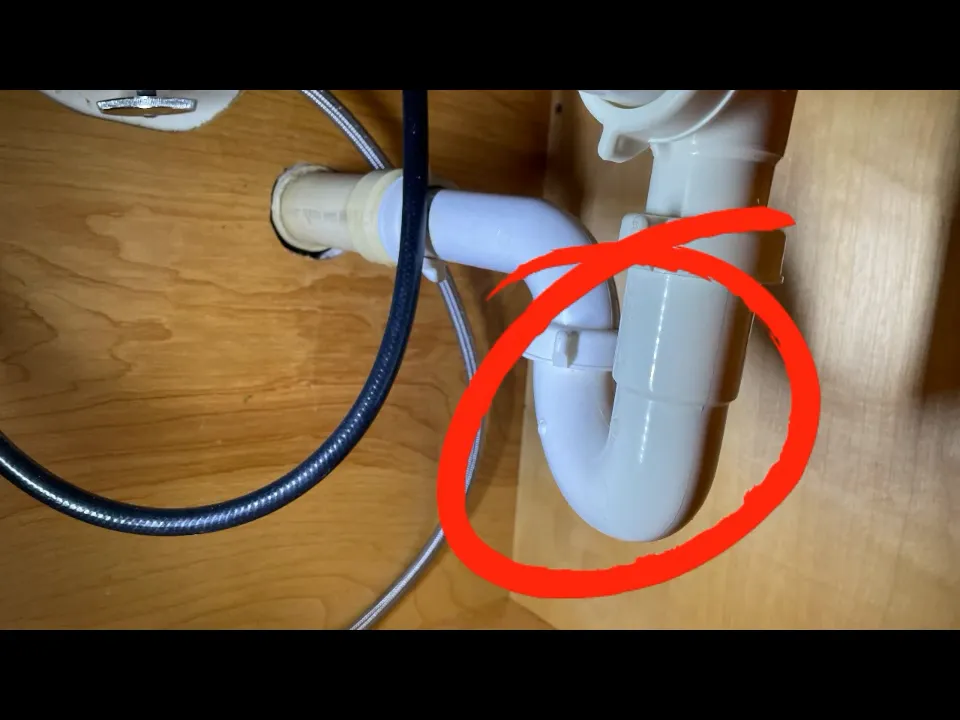
Assessing the positioning of the existing drain hose
Assessing the positioning of the existing drain hose is crucial to determine whether it needs to be modified for the high loop installation. The high loop prevents backflow by raising the drain hose above the level of the sink’s overflow rim, preventing dirty water from flowing back into the dishwasher.
To assess the positioning of the existing drain hose, follow these steps:
- Examine the path of the drain hose from the dishwasher to its connection point.
- Check if the drain hose is already looped up near the sink or garbage disposal unit.
- If the drain hose is already looped, measure the height of the loop to ensure it is above the sink’s overflow rim.
- If the drain hose does not have a high loop or if the loop is below the sink’s overflow rim, further modifications will be required.
Assessing the positioning of the existing drain hose helps determine the necessary modifications required in the next steps of the installation process. It ensures that the high loop functions effectively in preventing backflow and maintaining optimal dishwasher drainage.
Step 3: Attach The High Loop
Installing the high loop kit on the wall or cabinet behind the dishwasher
Once you have gathered all the necessary tools and materials to perform the installation process, it’s time to move on to the next step: attaching the high loop. The high loop is an important component of your dishwasher’s drainage system as it prevents the water from flowing back into the dishwasher and potentially causing damage. Follow the steps below to correctly install the high loop on the wall or cabinet behind the dishwasher.
- Start by locating the U-shaped tube that comes with the high loop kit. This is the main component that will serve as the high loop.
- Choose a suitable location on the wall or cabinet behind the dishwasher to install the high loop. Ensure that it is within reach and not obstructed by any other objects.
- Hold the U-shaped tube up against the wall or cabinet and make sure it is level. It should be positioned in a way that allows the tube to slope upward and then downward.
- Using a pencil, mark the spots where the screws will go to secure the high loop in place.
- Set the U-shaped tube aside for now and grab the provided screws and brackets.
Securing the high loop kit using screws and the provided brackets
Now that you have marked the spots where the screws will go, it’s time to secure the high loop in place using the screws and brackets provided in the kit. Follow the steps below to complete this part of the installation process.
- Insert the screws through the holes in the brackets.
- Position the brackets over the marked spots on the wall or cabinet.
- Tighten the screws to secure the brackets in place.
- Once the brackets are securely attached, slide the U-shaped tube into the brackets. Ensure that it fits snugly and is positioned correctly, with one end of the tube higher than the other.
- Double-check that the high loop is level and the tube is sloping upward and then downward.
- Make any necessary adjustments to the position of the high loop or brackets.
- Ensure that all connections are tight and secure.
By following these steps and securing the high loop properly, you can ensure that your dishwasher drains efficiently and reduces the risk of any potential water damage. This is a crucial step in the installation process, so make sure to take your time and double-check your work. With the high loop in place, you can enjoy your dishwasher knowing that it is functioning exactly as it should.
Step 4: Re-Route The Dishwasher Drain Hose
Disconnecting the existing drain hose from the sink or garbage disposal
When installing a high loop for your dishwasher, you will first need to disconnect the existing drain hose from the sink or garbage disposal. This step is crucial to ensure that the dishwasher’s wastewater is rerouted properly. Follow these simple instructions to disconnect the drain hose:
1. Turn off the power supply to the dishwasher to ensure safety.
2. Locate the drain hose connection point. In most cases, it will be attached to the sink or garbage disposal.
3. Using an adjustable wrench, loosen the hose clamp that secures the drain hose to the connection point.
4. Once the clamp is loose, carefully remove the drain hose from the sink or garbage disposal.
5. Be prepared for any water that may be trapped inside the hose or connection point. Have a bucket or towel ready to catch any water that may spill out.
6. With the existing drain hose disconnected, you’re now ready to reroute it to include the newly installed high loop.
Rerouting the drain hose to include the newly installed high loop
To properly reroute the drain hose and incorporate the newly installed high loop, follow these steps:
1. Assess the location of the high loop. The high loop should be installed as close to the bottom of the countertop as possible. This will prevent any backflow from the sink or disposal into the dishwasher.
2. Measure the length needed for the new drain hose path. Ensure that the hose is long enough to reach the high loop and have adequate slack to connect back to the sink or disposal. Cut the drain hose if necessary, using a utility knife or pipe cutter.
3. With the drain hose ready, position it in a U-shape under the sink or through the cabinet. Make sure it reaches the high loop location without any kinks or bends that could obstruct the flow of water.
4. Secure the drain hose to the cabinet or wall using zip ties or clamps. Ensure it is well supported and won’t sag or come loose during operation.
5. Once the drain hose is securely routed and positioned, connect it to the high loop. Ensure the hose is pushed all the way onto the high loop fitting to prevent any leaks.
6. Finally, connect the other end of the drain hose back to the sink or garbage disposal. Tighten the hose clamp to secure it in place.
By following these steps, you will successfully reroute the drain hose to include the newly installed high loop. This essential step will help prevent any potential contamination and ensure the proper functioning of your dishwasher. Remember to double-check all connections for leaks before turning on the power supply and using the dishwasher again.
Step 5: Secure The Drain Hose
Once you have connected the dishwasher drain hose to the high loop, it is crucial to ensure that the connection is secure. This will prevent any leaks or spills, and help maintain the efficiency of your dishwasher. Here are the necessary steps to follow in order to adequately secure the drain hose.
Connecting the dishwasher drain hose to the high loop
To properly connect the dishwasher drain hose to the high loop, you will need a hose clamp. This clamp will provide a tight and secure fit, ensuring that the drain hose stays in place. Follow these steps to connect the drain hose:
- Place the dishwasher drain hose on top of the high loop. Ensure that it extends upwards, creating a loop that is higher than the sink drain.
- Slide the hose clamp onto the end of the drain hose.
- With the hose clamp positioned at the end of the hose, tighten it using a screwdriver. Make sure it is secure enough to hold the hose in place, but not too tight to cause damage.
Using a hose clamp to secure the connection
A hose clamp is an essential tool for keeping the connection between the dishwasher drain hose and the high loop secure. Follow these steps to use a hose clamp correctly:
- Position the hose clamp just above the connection between the dishwasher drain hose and the high loop.
- Tighten the hose clamp by turning the screw with a screwdriver. Gradually tighten it until you achieve a secure and snug fit.
- Check the connection for any signs of looseness or leaks. If needed, adjust the position of the clamp and retighten it.
By following these steps and using a hose clamp to secure the connection, you can ensure that the drain hose stays in place and prevents any potential leaks. This will provide peace of mind and allow your dishwasher to function optimally.
Remember, a secure drain hose connection is vital for the proper functioning of your dishwasher. Taking the time to secure it will help prevent any unwanted spills or leaks, keeping your kitchen clean and your dishwasher running smoothly. So don’t overlook this important step in the installation process!
Step 6: Test The Installation
After completing the installation of a high loop for your dishwasher, it’s crucial to test the setup to ensure everything is functioning as it should. This step will help you identify any potential issues and make necessary adjustments before using the dishwasher regularly.
Restoring Power and Water Supply to the Dishwasher
Before running the test cycle, it’s important to restore both the power and water supply to the dishwasher. Start by ensuring that the dishwasher is properly plugged into a suitable power outlet. Double-check that the circuit breaker responsible for the dishwasher is turned on and providing electricity.
Next, turn on the water supply valve to allow water to flow into the dishwasher. Make sure there are no leaks or drips around the water connection area. If you notice any issues, tighten the connections or replace any defective parts if necessary. Once the power and water supply are restored, you can move on to the next step.
Running a Test Cycle to Ensure Proper Drainage and Functioning
To confirm that the high loop installation is working correctly, run a test cycle on the dishwasher. Follow the manufacturer’s instructions to start the test cycle, which typically involves selecting a specific program on the dishwasher panel.
During the test cycle, pay close attention to the dishwasher’s drainage system. Monitor the water as it flows through the high loop and into the drainage pipe. Make sure there are no leaks or signs of water backing up into the dishwasher. If you notice any issues, address them promptly to prevent any potential damage.
Additionally, listen for any unusual noises during the test cycle, as this could indicate a problem with the dishwasher’s functioning. The dishwasher should operate smoothly, without any loud or grinding noises. If you do hear anything concerning, consult the manufacturer’s troubleshooting guide or contact a professional for assistance.
Once the test cycle is complete and you have confirmed that the dishwasher is draining properly and functioning as expected, congratulations! You have successfully installed a high loop for your dishwasher. Now you can start using your dishwasher with confidence, knowing that it is set up correctly to prevent any backflow issues that could contaminate your clean dishes.
Regular Inspection
Checking for any signs of sagging or kinks in the drain hose
Regular inspection of your dishwasher’s high loop is crucial to ensure effective drainage and prevent any potential plumbing issues. One of the primary things to check for during your inspection is any signs of sagging or kinks in the drain hose. These issues can hinder the proper flow of water, leading to the accumulation of debris or even flooding. Taking the time to examine the drain hose thoroughly can help you identify and address any potential problems before they escalate into more significant concerns.
- Start by locating the drain hose, which is typically located at the back of the dishwasher. It may be connected to the garbage disposal or the sink’s drainage pipe.
- Inspect the entire length of the hose, looking for any visible signs of sagging or kinks. Sagging can occur when the hose is not properly supported, causing water to pool and impede the draining process. Kinks, on the other hand, restrict the flow of water and can eventually lead to blockages.
- If you notice any sagging in the drain hose, you will need to provide additional support. Install brackets or use zip ties to secure the hose to the underside of the countertop or the back of the cabinet. This will help lift the hose and maintain the high loop.
- In case you find any kinks in the hose, carefully straighten them out to ensure a smooth flow of water. Avoid using excessive force to prevent damaging the hose or any other components.
- Remember to check the connection points of the drain hose as well. Ensure they are tight and properly sealed to prevent leaks.
Re-adjusting or re-securing the high loop if necessary
Another crucial aspect of your regular inspection is to check if the high loop is correctly positioned or if it requires readjustment or re-securing. The high loop is designed to prevent backflow and cross-contamination, so it must be installed correctly to ensure optimal performance.
- Inspect the high loop location, which is typically formed by securing the drain hose to the underside of the countertop or the back of the cabinet.
- Ensure that the high loop is positioned at least 20 inches above the drain outlet or below the sink’s rim. This prevents water from the sink or disposal unit from flowing back into the dishwasher.
- If you notice that the high loop has shifted or become loose, carefully reposition it and secure it using brackets or zip ties as necessary. This will help maintain the required elevation of the drain hose.
- Once you have re-adjusted the high loop, perform a quick test run of the dishwasher to ensure that water flows and drains smoothly without any issues.
Regularly inspecting your dishwasher’s high loop for any signs of sagging or kinks in the drain hose, as well as re-adjusting or re-securing the high loop if necessary, is essential for maintaining the proper functioning of your dishwasher and preventing potential plumbing problems. By being proactive and addressing any issues that arise during your inspections, you can save yourself from the headaches and expenses associated with water damage and repairs.
Cleaning And Unclogging
Regular cleaning and maintenance of your dishwasher is crucial to ensure its optimal performance and prevent any clogs or debris buildup. In this section, we will discuss how you can prevent debris buildup by regularly cleaning the dishwasher and its drain filter, as well as addressing any clogs or obstructions in the drain hose promptly.
Preventing debris buildup by regularly cleaning the dishwasher and its drain filter
Regularly cleaning your dishwasher and its drain filter is the first step in preventing debris buildup and maintaining its efficiency. Over time, food particles, grease, and other residues can accumulate in the dishwasher, causing clogs and impeding its performance. By following these steps, you can keep your dishwasher clean and prevent any potential issues:
- Remove any leftover food particles: Before running the dishwasher, make sure to scrape off and discard any large food particles that may be stuck on the dishes or in the dishwasher racks.
- Wipe down the interior: Using a damp cloth or sponge, wipe down the interior of the dishwasher, paying particular attention to the sides, door, and bottom. This will help remove any grease or residue that may have accumulated.
- Clean the drain filter: Locate the drain filter, which is typically located at the bottom of the dishwasher. Remove the filter and rinse it under running water to remove any debris. If necessary, use a soft brush or toothbrush to scrub away stubborn residue. Ensure the filter is completely dry before placing it back in the dishwasher.
By incorporating these simple steps into your routine, you can effectively prevent debris buildup and ensure your dishwasher operates smoothly.
Addressing any clogs or obstructions in the drain hose promptly
Even with regular cleaning, it is possible for clogs or obstructions to occur in the dishwasher’s drain hose. These can lead to drainage issues and affect the overall performance of the dishwasher. Addressing these problems promptly is essential. Here’s what you can do:
- Inspect the drain hose: Check the drain hose for any kinks, bends, or visible obstructions. If you spot any issues, carefully straighten the hose or remove the obstruction to restore proper water flow.
- Use a drain cleaner: If you suspect a clog in the drain hose, you can try using a mild drain cleaner specifically designed for dishwashers. Follow the manufacturer’s instructions and ensure thorough rinsing afterward to avoid any residue.
- Call for professional help if needed: If you are unable to resolve the clog or obstruction on your own, it’s best to seek the help of a professional dishwasher technician. They have the expertise and tools to diagnose and fix any complex issues.
By taking proactive steps to address any clogs or obstructions in the drain hose, you can maximize the lifespan of your dishwasher and ensure it continues to deliver excellent performance.
Professional Assistance
When it comes to installing a high loop for your dishwasher, it is important to ensure that the job is done correctly to prevent any potential issues. While some installation tasks can be handled by a competent DIY enthusiast, there may be instances where professional assistance is required. Knowing when to seek professional help for complex installation or repair issues can save you time, effort, and potential headaches in the long run.
Knowing when to seek professional help for complex installation or repair issues
While installing a high loop for a dishwasher is generally a straightforward process, it can become complex in certain situations. If you are unsure about the technical aspects, such as plumbing connections or electrical wiring, it may be best to reach out to a professional for assistance. Additionally, if you encounter unexpected challenges during the installation, professional help can ensure the job is completed correctly.
Contacting a licensed plumber for expert guidance and assistance
When faced with a complex installation or repair issue, it is essential to engage the services of a licensed plumber. A licensed plumber has the necessary expertise and knowledge to assess the situation, provide expert guidance, and ensure that the installation is carried out to code. They will understand the specific requirements for your dishwasher model and can troubleshoot any problems that may arise. By seeking professional assistance, you can have peace of mind knowing that the job is being handled by an experienced and qualified professional.
In conclusion, while some dishwasher installation tasks can be carried out by homeowners, there may be instances where professional assistance is vital. Knowing when to seek help and contacting a licensed plumber ensures that your high loop installation is done correctly, preventing potential issues and allowing your dishwasher to function efficiently. Don’t hesitate to reach out to a professional if you are unsure or encounter complexities during the installation process.
Frequently Asked Questions
Is A High Loop Necessary For Dishwasher?
Yes, a high loop is necessary for a dishwasher. It prevents backflow of dirty water into the clean water supply, ensuring hygienic dishwashing.
Is A Dishwasher High Loop Better Than An Air Gap?
A dishwasher high loop is generally considered better than an air gap. It helps prevent backflow of dirty water into the dishwasher, minimizing the risk of contamination.
How Far Can A Dishwasher Be From The Drain?
A dishwasher can typically be placed up to 10 feet away from the drain. The distance may vary based on the specific model and plumbing setup, so it’s important to consult the manufacturer’s guidelines or a professional plumber for precise recommendations.
Where Do You Drill A Hole In A Dishwasher Drain Hose?
Drill a hole in the dishwasher drain hose near the top, just below the sink. Position the hole to allow for proper drainage and avoid any leaks.
Conclusion
Installing a high loop for your dishwasher is a simple yet crucial step to prevent dirty water from flowing back into your appliance. By following the step-by-step guide in this blog post, you can ensure the correct installation of a high loop, enhancing the efficiency and longevity of your dishwasher.
Don’t overlook this important aspect and enjoy a cleaner and more efficient dishwashing experience.