
To install a hand held shower diverter, follow these steps: detach the existing showerhead from the shower arm, apply plumber’s tape to the threaded end of the shower arm, connect the diverter valve to the shower arm using a wrench, attach the showerhead to the diverter valve, and turn on the water to test for any leaks. Installing a hand held shower diverter can greatly enhance your showering experience and provide added convenience.
Whether you want to switch between a fixed showerhead and a hand held showerhead, or simply want to have both options available, installing a diverter is a fairly straightforward process. In this guide, we will walk you through the steps for installing a hand held shower diverter, allowing you to easily switch between different shower functions.
By following these simple instructions, you can enjoy the benefits of a versatile and customized shower system in no time.
Understanding The Importance Of A Hand Held Shower Diverter
Why a Hand Held Shower Diverter is Essential for Your Bathroom
A hand held shower diverter is a crucial component for any bathroom setup. It allows you to switch between a traditional showerhead and a hand held showerhead, providing flexibility and convenience during your daily bathing routine. Understanding the importance of a hand held shower diverter will help you make an informed decision when it comes to your bathroom renovations or upgrades.
The Benefits of Having a Hand Held Shower Diverter
Having a hand held shower diverter in your bathroom offers a range of benefits that can enhance your showering experience. Let’s take a closer look:
1. Versatility:
A hand held shower diverter gives you the option to choose between a fixed showerhead and a hand held showerhead. This versatility allows you to easily switch between different water flow types, making it suitable for various tasks such as rinsing off soap, washing pets, or even cleaning your shower enclosure. With just a flick of the diverter switch, you can customize your shower to fit your specific needs.
2. Accessibility:
For individuals with limited mobility or physical disabilities, a hand held shower diverter can greatly improve accessibility and convenience. The ability to hold and direct the water spray can make showering easier and more comfortable, reducing the risk of slips or falls. It also allows caregivers to assist with bathing tasks more efficiently.
3. Massage and Relaxation:
Many hand held showerheads come equipped with adjustable spray settings, including massage and pulsating options. These features help create a spa-like experience right in your own bathroom. The targeted water pressure can relieve muscle tension and promote relaxation, providing you with a soothing and rejuvenating bathing experience.
4. Water Conservation:
Using a hand held shower diverter can contribute to water conservation efforts. By easily redirecting the flow of water to a hand held showerhead, you can minimize water usage by focusing the spray precisely where it’s needed. This is especially beneficial for tasks that require less water, such as rinsing off shampoo or conditioner.
5. Easy Installation:
The installation of a hand held shower diverter is typically straightforward, making it an accessible DIY project for many homeowners. With just a few basic tools and some simple instructions, you can upgrade your shower setup in no time. However, if you’re unsure about the installation process, it’s always recommended to consult a professional plumber to ensure proper installation and avoid any potential leaks.
In conclusion, the importance of a hand held shower diverter cannot be overstated. Its versatility, accessibility, massage and relaxation features, water conservation benefits, and easy installation make it an essential addition to any bathroom. Consider incorporating a hand held shower diverter into your bathroom design to enhance your bathing experience and make your daily routine a more enjoyable one.

Preparing For Installation
Before you can install a hand-held shower diverter, it’s important to properly prepare for the installation process. This involves gathering the necessary tools and materials, as well as shutting off the water supply and removing the existing shower head. By following these steps, you can ensure a successful installation without any hiccups along the way.
Gathering the necessary tools and materials
To begin the installation process, you’ll need to gather the following tools and materials:
- Hand-held shower diverter kit
- Adjustable wrench
- Plumber’s tape
- Teflon tape
- Screwdriver
- Bucket
- Cloth or rag
With these tools and materials on hand, you’ll be well-prepared to tackle the installation process.
Shutting off the water supply
Before you can remove the existing shower head, it’s crucial to shut off the water supply to your bathroom. This will prevent any accidental leaks or water damage during the installation process. Here’s how you can do it:
- Locate the main water shut-off valve in your home. This is typically found near the water meter or in the basement.
- Turn the valve clockwise to shut off the water supply.
- Once the water supply is shut off, turn on the faucet in your bathroom to drain any remaining water from the pipes. You can also place a bucket under the shower head to catch any dripping water.
By shutting off the water supply and draining the pipes, you can proceed with the installation process safely and effectively.
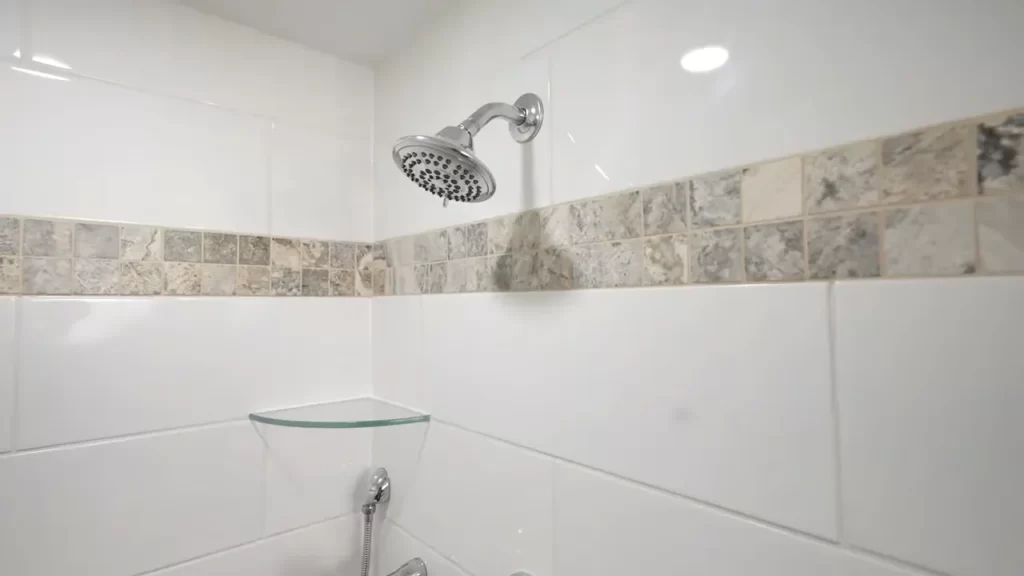
Removing the existing shower head
Now that the water supply is shut off, it’s time to remove the existing shower head. Follow these steps:
- Wrap an adjustable wrench around the shower arm, the pipe that extends from the wall.
- Turn the wrench counterclockwise to loosen and remove the shower head.
- Once the shower head is removed, use a cloth or rag to clean any debris or leftover plumber’s tape from the shower arm.
With the existing shower head removed, you’re one step closer to installing your hand-held shower diverter.
Installing The Hand Held Shower Diverter
Step 1: Applying plumber’s tape to the shower arm
Before you begin installing the hand held shower diverter, it’s important to ensure a proper seal and prevent any leaks. Start by applying plumber’s tape to the shower arm. The plumber’s tape, also known as Teflon tape, is a thin white tape that helps create a watertight seal. Simply wrap the tape around the threads of the shower arm in a clockwise direction.
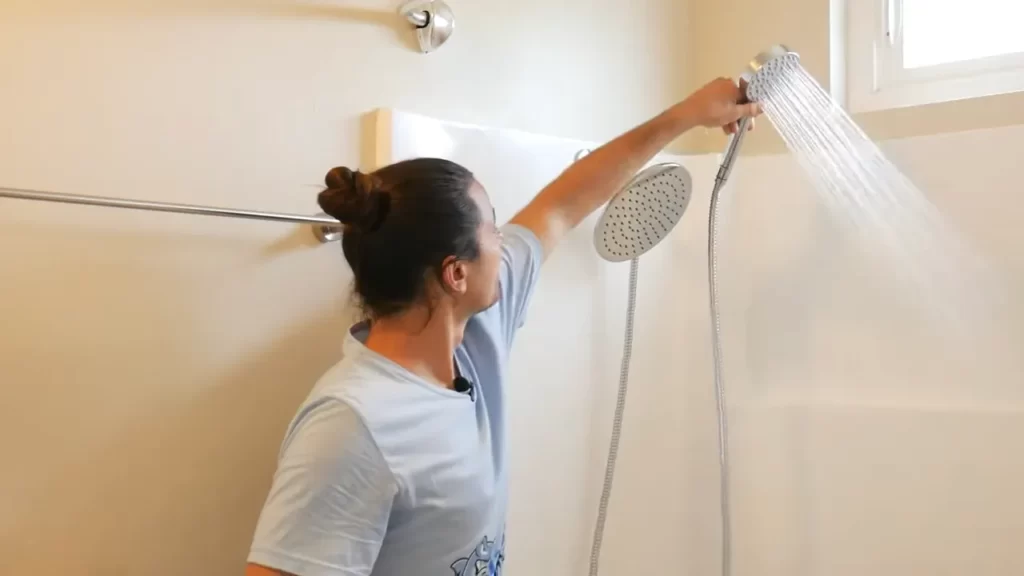
Step 2: Attaching the hand held shower diverter to the shower arm
Once you have applied the plumber’s tape, it’s time to attach the hand held shower diverter to the shower arm. The diverter is a small piece that allows you to switch between the regular shower head and the hand held shower head. Attach the diverter firmly to the shower arm by screwing it on in a clockwise direction. Make sure it is secure and tightly sealed to prevent any water leaks.
Step 3: Attaching the hand held shower head to the diverter
Now that the diverter is in place, it’s time to attach the hand held shower head. The hand held shower head typically comes with a hose that connects to the diverter. Begin by attaching one end of the hose to the diverter and twisting it in a clockwise direction until it is securely fastened. Then, attach the other end of the hose to the hand held shower head by twisting it in a clockwise direction as well. Ensure that all connections are tight to avoid any potential leaks.
In conclusion, installing a hand held shower diverter is a fairly simple process that can greatly enhance your showering experience. By following these three steps, you’ll be well on your way to enjoying the convenience and versatility of a hand held shower head. Remember to use plumber’s tape for a tight seal, attach the diverter securely to the shower arm, and connect the hand held shower head with a tight and secure hose connection. With these steps completed, you can now enjoy the luxury of a hand held shower diverter in your bathroom.
Testing And Troubleshooting
In the process of installing a hand held shower diverter, it is important to test and troubleshoot to ensure everything is working properly. This step is crucial to avoid any leaks or issues with water flow once the installation is complete. In this section, we will discuss how to check for leaks and proper water flow, as well as troubleshoot common issues that may occur during the installation process.
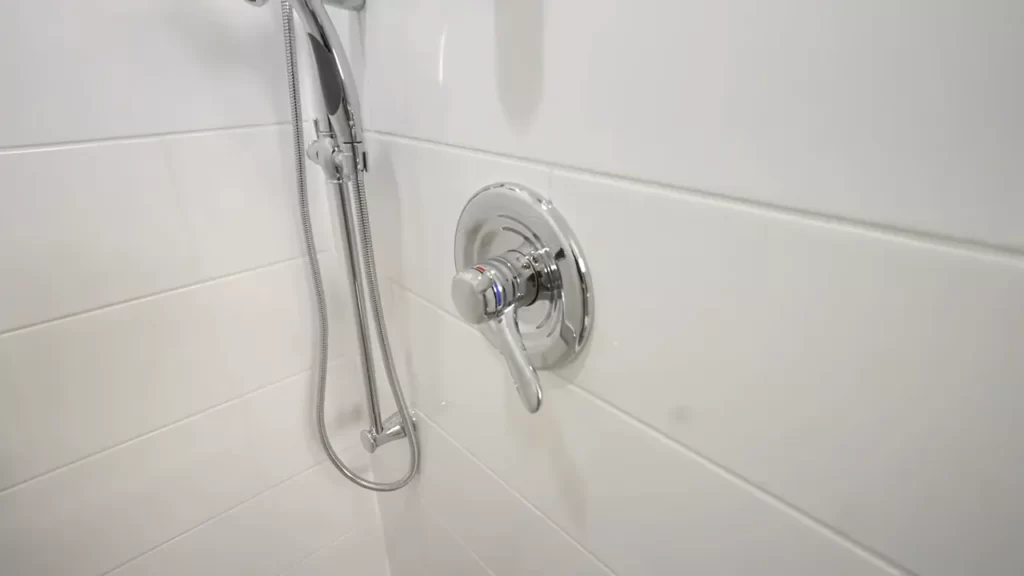
Checking for leaks and proper water flow
Once the hand held shower diverter is installed, it is important to check for any leaks or issues with water flow. Follow these steps to ensure everything is in working order:
- Start by turning on the water supply and allowing the water to flow through the diverter.
- Carefully inspect the connections and joints for any signs of leaks. Look for water drips or puddles around the connections.
- If you notice any leaks, tighten the connections using a wrench. Be careful not to overtighten, as this can damage the fittings.
- Test the hand held shower function by turning the diverter lever or knob. Ensure that the water is diverted from the main showerhead to the hand held showerhead properly.
- If the water flow seems weak or uneven, remove the hand held showerhead and clean any debris or mineral deposits that may be blocking the flow. Rinse the showerhead thoroughly before reinstalling.
Troubleshooting common issues during installation
While installing a hand held shower diverter, you may encounter some common issues. Here are troubleshooting steps to resolve these problems:
Low water pressure:
If you experience low water pressure after installing the hand held shower diverter, try these troubleshooting steps:
- Check if there are any clogs or debris in the diverter valve or the showerhead. Remove any obstructions and clean the parts thoroughly.
- Ensure that the water supply valves are fully open. Sometimes, they may be partially closed or restricted.
- If the problem persists, consider consulting a plumber to check for any issues with the water supply system.
Inconsistent water temperature:
If you are experiencing inconsistent water temperature when using the hand held shower diverter, try these troubleshooting steps:
- Check if the hot and cold water supply lines are connected properly. Make sure they are tightly secured and not crossed.
- Adjust the temperature regulator on your shower diverter if it is equipped with one. This can help balance the water temperature.
- If the problem persists, there may be an issue with your plumbing system. Consider seeking professional assistance to diagnose and resolve the problem.
Leaking connections:
If you notice leaking connections during or after the installation of a hand held shower diverter, follow these troubleshooting steps:
- Ensure that the connections are properly tightened. Use a wrench to gently tighten the fittings without overtightening.
- Check if there are any worn or damaged washers or seals. Replace them if necessary.
- If the leak persists, consider applying plumber’s tape or pipe joint compound to the threads of the connections for a more secure seal.
By following these testing and troubleshooting steps, you can ensure that your hand held shower diverter is installed correctly and functions properly. Taking the time to check for leaks, proper water flow, and address any common installation issues will help you avoid future problems and enjoy a satisfying shower experience.
Tips For Maintenance And Care
Cleaning and maintaining the hand held shower diverter
Proper cleaning and maintenance are essential to keep your hand held shower diverter in top condition. By following these tips, you can ensure that your diverter functions optimally and lasts for a long time:
- Regular cleaning: It is important to clean the hand held shower diverter at least once a month to prevent the buildup of mineral deposits and other contaminants. Use a soft cloth or sponge soaked in a mixture of mild soap and warm water to gently wipe the surface of the diverter. Avoid using abrasive cleaners or scrub brushes that can scratch the finish.
- Removing mineral deposits: Over time, mineral deposits can accumulate on the diverter, affecting its performance. To remove these deposits, soak a cloth or sponge in a solution of equal parts white vinegar and water. Apply the solution to the affected area and let it sit for a few minutes. Then, use a soft brush or toothbrush to scrub away the deposits. Rinse thoroughly with water afterward.
- Checking for leaks: Regularly inspect the diverter for any signs of leaks. If you notice water dripping from the diverter or detect a decrease in water pressure, it may indicate a leak. To fix a leak, you may need to replace the rubber washer or O-ring inside the diverter. Refer to the manufacturer’s instructions for guidance or consider seeking professional assistance.
Extending the lifespan of your hand held shower diverter
By taking a few simple steps, you can extend the lifespan of your hand held shower diverter and ensure consistent performance. Consider the following tips:
- Avoid excessive force: When using the diverter, handle it gently and avoid applying excessive force. Pulling or twisting the diverter too hard can cause damage to the internal mechanism.
- Maintain a consistent water pressure: Fluctuations in water pressure can put stress on the diverter and reduce its lifespan. If you notice significant changes in water pressure, consider installing a pressure regulator to stabilize the flow.
- Use a shower head filter: Installing a shower head filter can help to reduce the amount of sediment and other impurities that can accumulate in the diverter. This can prolong its lifespan and prevent clogs.
- Store properly: When not in use, make sure to properly store the hand held shower diverter. Hang it in a secure and dry location to prevent any damage or corrosion.
Following these maintenance and care tips can go a long way in keeping your hand held shower diverter in excellent condition. Regular cleaning, checking for leaks, and correctly storing the diverter will help to ensure optimal performance and longevity.
Frequently Asked Questions
Can I Add A Hand Held Shower To An Existing Shower Head?
Yes, you can add a handheld shower to an existing shower head with ease.
Do You Need A Diverter Valve For A Handheld Shower?
Yes, you need a diverter valve for a handheld shower. It allows you to switch between a fixed showerhead and the handheld option easily, enhancing convenience and providing versatile showering experiences. So, a diverter valve is necessary for proper functionality.
How Do You Install A Hand Held Shower Holder?
To install a hand held shower holder, follow these steps: 1. Locate a suitable spot on the shower wall. 2. Use a drill to make holes for the screws. 3. Attach the holder to the wall with the provided screws.
4. Adjust the holder to the desired position. 5. Test the holder to ensure it securely holds the hand held shower.
How Do You Divert Water From Shower Head To Handheld?
To divert water from a shower head to a handheld, ensure that your shower head has a diverter valve. Turn the valve to redirect water flow to the handheld. Enjoy the convenience of a handheld shower while preserving water pressure in your shower head.
Conclusion
To sum up, installing a handheld shower diverter can greatly enhance the functionality and convenience of your shower. By following the step-by-step instructions provided in this blog post, you can easily complete this DIY project on your own. Remember to carefully choose the right diverter for your needs and ensure proper installation to prevent any leaks or damages.
Enjoy the flexibility and versatility of a handheld shower diverter and take your showering experience to the next level.