To install grab bars on porcelain tile, mark the position of the bars, drill holes using a diamond-tipped drill bit, insert wall anchors, and attach the grab bars using screws. Installing grab bars on porcelain tile requires careful positioning, precise drilling, and secure attachment.
Whether you have a porcelain tile shower or bathroom walls, grab bars add an extra layer of safety and support. However, it’s crucial to follow the correct installation process to ensure durability and stability. We will guide you through the steps of installing grab bars on porcelain tile.
By following these steps, you can enjoy the benefits of added safety and support in your bathroom without damaging the tile surface. So, let’s get started with the installation process.
Factors To Consider
Installing grab bars on porcelain tile can be a challenging task, but with the right knowledge and preparation, you can ensure a secure and sturdy installation. There are several factors you should consider to make sure the grab bars are suitable for your needs and properly installed. Paying attention to the length and size, weight capacity, and material and finish of the grab bars will help you make an informed decision and achieve a successful installation.
Length and Size
Choosing the right length and size of grab bars is crucial for their effectiveness and user convenience. The grab bars should be long enough to provide ample support and leverage for users, while also fitting comfortably in the space where they will be installed. Consider the size of the area where the grab bars will be placed, ensuring that there is enough room for a person’s hand to grip firmly.
It’s recommended to measure the space carefully and select grab bars that are slightly shorter than the available area. This will allow for proper installation and ensure that the grab bars are securely attached to the porcelain tile.
Weight Capacity
Another important factor to consider is the weight capacity of the grab bars. The weight capacity determines the maximum amount of weight the bars can support without compromising their stability. It’s essential to choose grab bars that can handle the weight of the intended users.
Keep in mind that weight capacity can vary depending on the specific model and manufacturer. Ensure that the grab bars you choose meet or exceed the weight requirements of the users who will rely on them for stability and support.
Material and Finish
The material and finish of the grab bars play a significant role in their durability, longevity, and overall appearance. Stainless steel is a popular choice for grab bars as it offers excellent strength and resistance to corrosion. Other options include brass, chrome, and bronze, each with its own unique benefits and aesthetic appeal.
Consider the style of your bathroom and choose a material and finish that complements the existing fixtures and decor. Additionally, ensure that the material and finish are compatible with porcelain tile, taking into account any special considerations for installation or maintenance requirements.
Remember, when installing grab bars on porcelain tile, it’s essential to carefully consider the factors mentioned above. By selecting the appropriate length and size, weight capacity, and material and finish, you can ensure a secure and visually pleasing installation that provides the necessary support and stability for the users.
Tools
Tape Measure
One of the essential tools you’ll need to install grab bars on porcelain tile is a tape measure. This handy tool allows you to accurately measure the space where you want to install the grab bars, ensuring a perfect fit. It’s important to take precise measurements to ensure the grab bars are securely mounted and in the ideal position for user convenience and safety. A tape measure with both metric and standard measurements will come in handy for this task.
Drill
Another crucial tool you’ll need is a drill. You’ll use this to create holes in the porcelain tile to secure the grab bars. Make sure you choose a drill that’s suitable for drilling into tile, such as a high-quality diamond drill bit. Using the correct drill bit will prevent the tile from cracking or chipping during the installation process. Additionally, having a drill with adjustable speed settings will allow you to control the drilling process more effectively, ensuring cleaner and safer holes for mounting the grab bars.
Level
A level is an indispensable tool for installing grab bars on porcelain tile. It helps you ensure that the grab bars are mounted straight and level, providing stability and safety. By placing the level against the grab bars during the installation process, you can easily adjust their position to make sure they are perfectly horizontal or vertical, depending on your preference. Installing grab bars that are not level can compromise their functionality and aesthetic appeal. Therefore, it’s crucial to have a level on hand to achieve a professional-looking installation.
Screwdriver
A screwdriver is necessary to fasten the grab bars securely onto the porcelain tile. Before purchasing a screwdriver, double-check the screw heads of the grab bars to determine whether you’ll need a flat-head or a Phillips-head screwdriver. It’s advisable to use a screwdriver that fits the screw heads snuggly to avoid damaging them or stripping the screws. Having both a flat-head and Phillips-head screwdriver in your toolkit ensures you’re prepared for any type of screw used in the installation process.
Pencil
A simple yet essential tool for marking the precise spots where the grab bars will be installed is a pencil. With a pencil, you can carefully mark the hole locations on the porcelain tile before drilling. This step is important to ensure accuracy and prevent any mistakes during the installation process. The pencil marks will guide you while drilling, making it easier to position the grab bars correctly. Remember to use a pencil that is easily visible against the tile to ensure accurate marking.
Materials
When it comes to installing grab bars on porcelain tile, having the right materials is crucial. Not only will the right materials ensure a secure installation, but they will also help to protect your tile from damage. In this section, we will discuss the materials you will need to successfully install grab bars on porcelain tile.
Grab Bars
To begin with, you will obviously need the grab bars themselves. Choose grab bars that are specifically designed for bathroom use and come with a non-slip surface for added safety. The length and style of the grab bars will depend on your personal preference and the needs of the individuals using them. Make sure to measure the space where you plan to install the grab bars to ensure that you choose the right size.
Mounting Hardware
In addition to grab bars, you will need the appropriate mounting hardware. This typically includes screws, washers, and brackets. It is important to choose hardware that is specifically designed for bathroom use and can support the weight of the grab bars. Stainless steel hardware is a popular choice because it is durable and resistant to corrosion.
Wall Anchors
If your bathroom walls are not made of solid wood or studs, you will also need wall anchors. Wall anchors provide extra support and stability by distributing the weight of the grab bars more evenly. There are a variety of wall anchors available, including toggle bolts and hollow wall anchors. Choose the type of wall anchors that are most suitable for your specific wall material.
Silicone Caulk
Lastly, you will need silicone caulk to seal the edges of the grab bars and prevent water from seeping behind them. Silicone caulk is a waterproof sealant that is specifically designed for use in wet areas such as bathrooms. Choose a color that matches your tile for a seamless and professional finish.
By ensuring that you have all the necessary materials before starting the installation process, you can ensure a smooth and successful installation of grab bars on your porcelain tile.
Measuring And Marking
Determining the Optimal Placement
Determining the optimal placement for grab bars is an essential first step in ensuring their proper installation on porcelain tiles. The location of the grab bars should be carefully considered, taking into account factors such as the individual’s height, reach, and mobility needs. It is important to identify areas where additional support is required, such as near the toilet, bathtub, or shower. By assessing the user’s specific requirements, you can choose the most suitable placement for the grab bars.
Taking Accurate Measurements
Taking accurate measurements is crucial to ensure the grab bars are properly installed on porcelain tiles. Incorrect measurements can result in uneven or unstable attachments, compromising their safety and effectiveness. To accurately measure for the grab bars, use a tape measure and measure the distance between the desired mounting points. Make sure to account for any obstructions or fixtures that may interfere with the installation process. For a secure fit, measure multiple times and compare the measurements to ensure accuracy.
Once you have determined the optimal placement and taken accurate measurements, you are ready to proceed with the installation process. Following these steps will help you install grab bars on porcelain tiles successfully.
Protecting The Tile
Using Painter’s Tape
One of the most important steps to follow when installing grab bars on porcelain tile is to protect the tile from any accidental damage. Painter’s tape is a popular tool that can help you achieve this.
Start by cleaning the area where you will be installing the grab bars. Use a mild soap and water solution to remove any dirt or debris from the tile surface. Once the area is clean, allow it to dry completely before proceeding.
Next, apply painter’s tape along the edges of the tiles where the grab bars will be installed. This will create a barrier between the tile and any tools or hardware that may come into contact with it during the installation process. Make sure to press the tape firmly against the tile to ensure it adheres properly.
Painter’s tape is designed to be easily removed without leaving behind any residue or damaging the tile. However, it’s always a good idea to test a small inconspicuous area of the tile first to make sure the tape is not causing any damage before proceeding with the entire installation.
Placing a Drop Cloth
In addition to using painter’s tape, another way to protect the porcelain tile is by placing a drop cloth or a thick towel under the area where you will be working. This will act as an additional layer of protection, preventing any tools or hardware from accidentally scratching or chipping the tile surface.
Before placing the drop cloth, ensure that the area is clean and free of any debris. Lay the cloth flat on the section of the tile you will be working on, making sure it covers the entire area. Use tape or clips to secure the cloth in place, ensuring it does not move or shift during the installation process.
By taking the extra step to protect the tile with a drop cloth, you can have peace of mind knowing that your porcelain tiles are safeguarded against any potential damage that may occur during the grab bar installation.
Choosing The Installation Method
When it comes to installing grab bars on porcelain tile, choosing the right installation method is crucial. The installation method you choose will determine the strength and stability of the grab bars, ensuring the safety of those who rely on them. Two commonly used installation methods for grab bars on porcelain tile are stud mount and wall anchors. Let’s take a closer look at each of these methods.
Stud Mount
The stud mount method is considered one of the most secure and sturdy options for installing grab bars on porcelain tile. It involves attaching the grab bars directly to the wall studs using screws. Wall studs are the vertical supports within the wall framing that provide a solid foundation for mounting heavy objects.
Here’s a step-by-step guide on how to install grab bars using the stud mount method:
- Locate the wall studs using a stud finder tool. Mark their positions on the porcelain tile.
- Measure and mark the desired height and location for the grab bar on the wall.
- Using a drill with a masonry bit, pre-drill holes through the porcelain tile and into the wall studs.
- Insert the provided screws through the flange holes of the grab bar and into the pre-drilled holes.
- Tighten the screws using a screwdriver or drill until the grab bar is securely attached to the wall studs.
- Double-check the stability of the grab bar by applying pressure in different directions.
- If the grab bar feels solid and doesn’t move, your installation using the stud mount method is complete.
Note: It’s essential to use screws specifically designed for this type of installation, as they are typically longer and more durable to anchor the grab bar securely to the wall studs. Additionally, make sure to follow the manufacturer’s guidelines and weight limitations for the specific grab bar model you are installing.
Wall Anchors
If wall studs are not conveniently located or accessible, using wall anchors can be an effective alternative method for installing grab bars on porcelain tile. Wall anchors provide additional support and stability by distributing the weight across a larger area of the wall surface.
Here’s a step-by-step guide on how to install grab bars using wall anchors:
- Measure and mark the desired height and location for the grab bar on the wall.
- Choose the appropriate type and size of wall anchors suitable for porcelain tile and the weight capacity required for your grab bar.
- Using a masonry bit, pre-drill holes through the porcelain tile and into the wall behind it, according to the specifications of the chosen wall anchors.
- Insert the wall anchors into the pre-drilled holes, ensuring they are flush with the surface of the porcelain tile.
- Attach the grab bar flange to the wall anchors using the provided screws or bolts.
- Tighten the screws or bolts until the grab bar is securely attached to the wall anchors.
- Check the stability of the grab bar by applying pressure in different directions.
- If the grab bar feels rock-solid without any wobbling, your installation using wall anchors is complete.
Remember to carefully read and follow the manufacturer’s instructions for the specific wall anchor type you are using to ensure proper installation and maximum safety.
Now that you have a clear understanding of the stud mount and wall anchor installation methods, you can confidently proceed with installing grab bars on your porcelain tile, providing enhanced safety and accessibility in your bathroom or any other area where grab bars are needed.
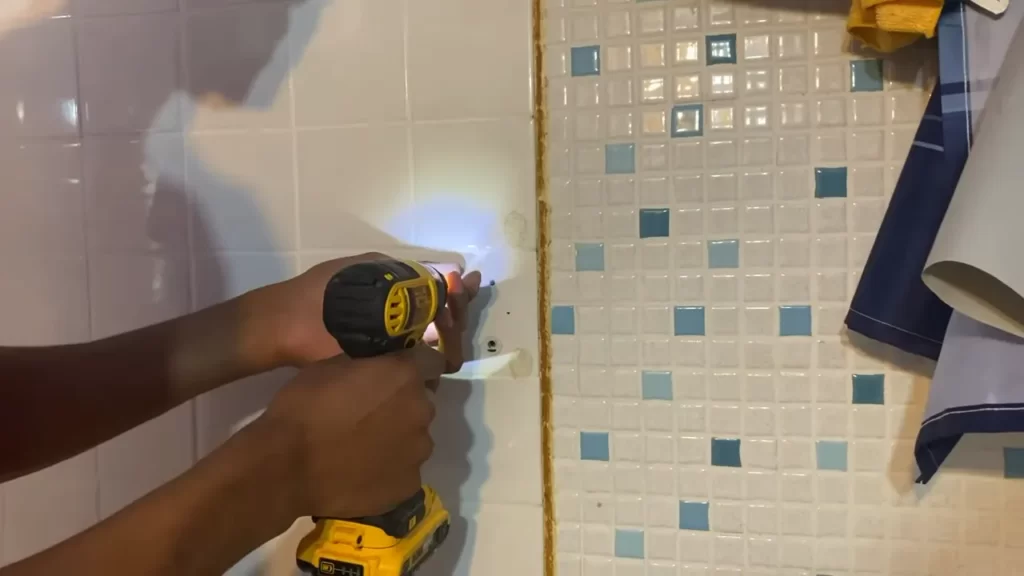
Drilling Holes
When it comes to creating a safe and accessible bathroom, installing grab bars on porcelain tile can be a game-changer. These sturdy bars provide stability and support, making it easier for people of all ages and abilities to navigate the bathroom safely. One essential aspect of installing grab bars on porcelain tile is drilling holes at the appropriate locations to secure the bars firmly. In this guide, we will walk you through the process of drilling holes on porcelain tile, ensuring a secure and reliable installation.
Identifying the Mounting Points
To begin the drilling process, you first need to identify the ideal mounting points for your grab bars on the porcelain tile. Take a careful look at the area where you want to install the grab bar and determine the best position for both functionality and safety. You should consider the individual’s needs and the most accessible spots within the bathroom.
It is essential to choose mounting points that offer proper structural support. These are typically found near wall studs or in areas where a solid backing is installed behind the tile. Once you have determined the mounting points, mark them using a pencil or temporary adhesive tape, ensuring accuracy for a secure grab bar installation.
Using a Tile Drill Bit
Now that you’ve identified the mounting points, it’s time to move on to drilling the holes. To effectively drill through porcelain tile, you will need a specialized tile drill bit. These bits are designed with a carbide or diamond tip, offering excellent durability to cut through the hard surface of the tile.
When using a tile drill bit, it is crucial to apply gentle pressure and let the bit do the work. Start by creating a small pilot hole at each marked mounting point to guide the drill bit. Gradually increase the drill speed and steady pressure, allowing the bit to penetrate the tile surface. Be patient during this process, as rushing can cause the tile to crack or chip.
As you drill, remember to keep the drill bit perpendicular to the tile surface to ensure straight and accurate holes. This will help maintain the structural integrity of the tile while providing a secure anchor for the grab bars.
Once the drilling is complete, gently remove any debris or dust from the holes. You can use a vacuum cleaner or compressed air to clean the area thoroughly, ensuring a proper fit for the grab bar anchors.
By following these steps and using the right tools, you can successfully drill holes for grab bars on porcelain tile. Remember to take your time, prioritize accuracy, and prioritize safety during the installation process. With securely installed grab bars, you’ll have a bathroom that promotes accessibility and peace of mind.
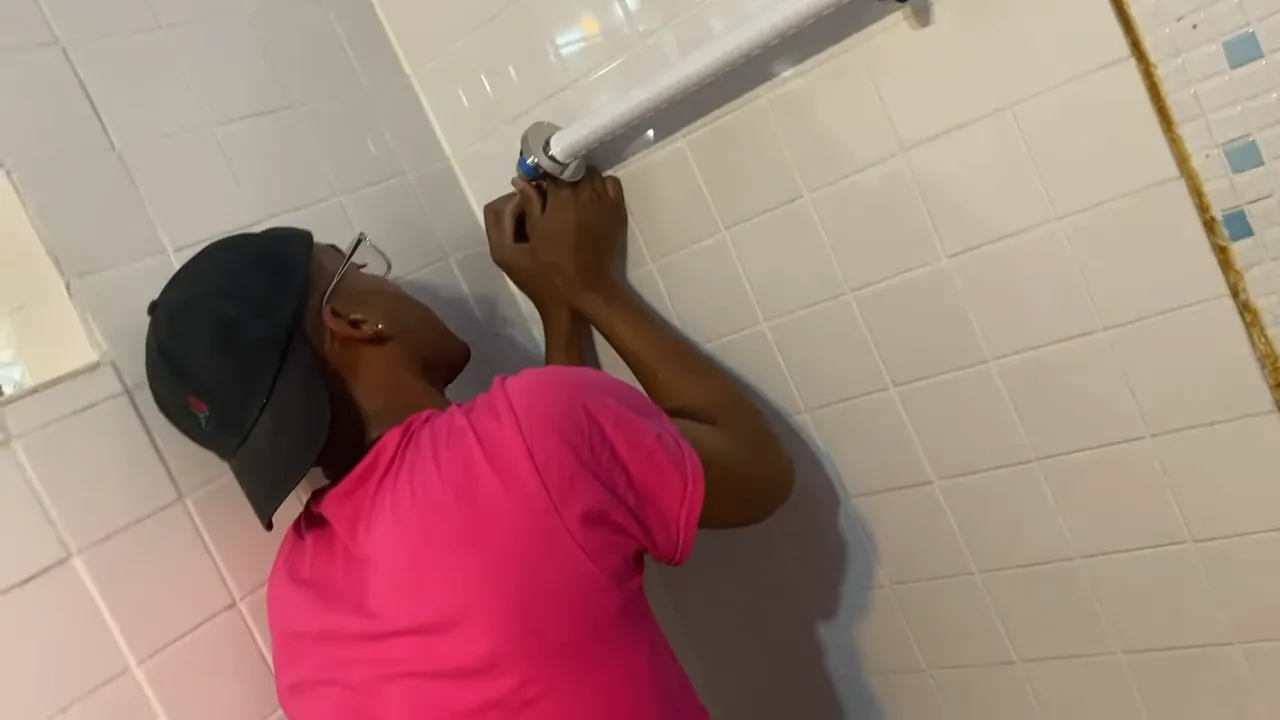
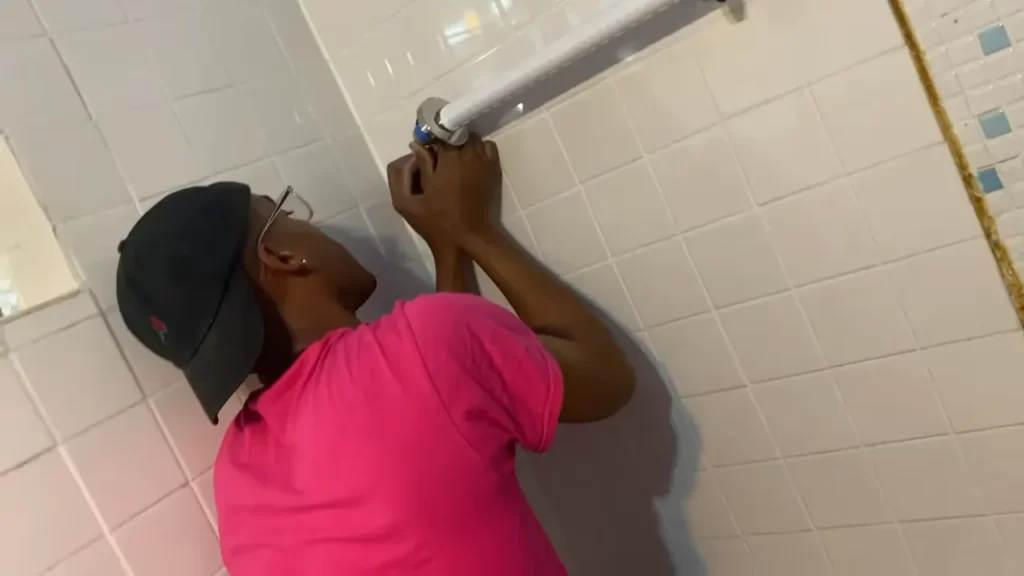
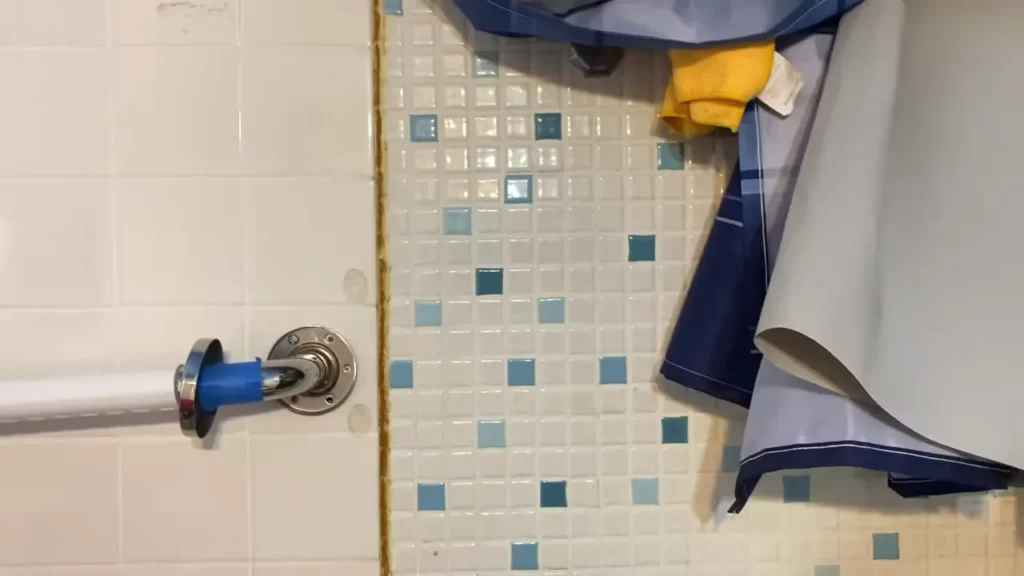
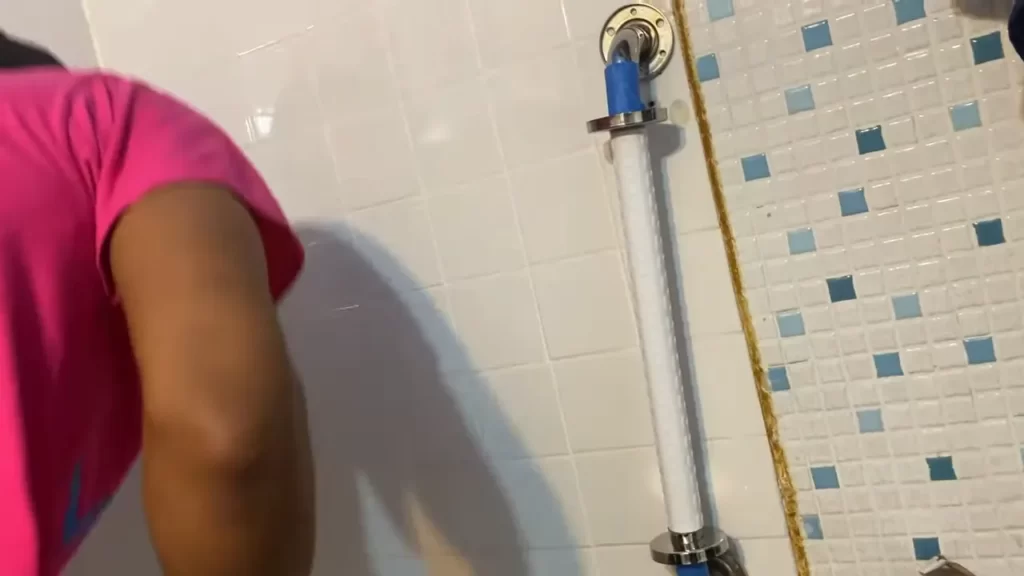
Attaching The Grab Bar
Attaching the grab bar is the final step in the installation process and ensures that it is securely fastened to the porcelain tile surface. This step is crucial for providing stability and support when using the grab bar. Here’s how you can attach the grab bar to your porcelain tile:
Inserting Wall Anchors (if necessary)
If your grab bar requires additional support, you may need to use wall anchors to ensure its stability. Wall anchors provide extra strength and prevent the grab bar from coming loose over time. Here’s how to insert wall anchors:
- Choose a suitable location for the wall anchors, ideally near the mounting brackets. Mark the spots on the porcelain tile surface.
- Drill holes into the marked spots using a masonry drill bit. Be sure to use a bit that is slightly smaller than the wall anchors to create a snug fit.
- Insert the wall anchors into the drilled holes, tapping them gently with a hammer if needed. Ensure that they are flush with the surface of the tile.
Securing the Mounting Brackets
After inserting the wall anchors, it’s time to secure the mounting brackets. Mounting brackets provide the base for attaching the grab bar and play a crucial role in its stability. Follow these steps to secure the mounting brackets:
- Place the mounting brackets over the wall anchors, aligning them with the pre-drilled holes.
- Insert screws through the holes in the mounting brackets and into the wall anchors.
- Tighten the screws using a screwdriver or drill, ensuring that the mounting brackets are securely fastened to the porcelain tile.
Once the mounting brackets are securely attached, it’s time to connect the grab bar. Here are the steps to follow:
- Align the grab bar with the mounting brackets, ensuring that it is level and centered.
- Slide the grab bar onto the mounting brackets, allowing it to rest securely.
- Check the grab bar for any wobbling or instability. If necessary, adjust the position and tighten the screws on the mounting brackets.
By following these steps, you can successfully attach grab bars to porcelain tile surfaces, providing added safety and support in areas where it is needed most.
Checking For Sturdiness
Before installing grab bars on porcelain tile, it is crucial to ensure that you have a solid and secure attachment. This step-by-step guide will walk you through the process of checking for sturdiness, ensuring a safe installation of your grab bars.
Ensuring a Secure Attachment
1. Start by assessing the area where you plan to install the grab bar. Look for a sturdy and solid section of the wall or tile that can handle the weight and pressure that may be exerted on the grab bar. Avoid areas with loose tiles or weak grout.
2. Once you have identified a suitable location, determine the type and size of the grab bar you will need. Measure the length of the bar and the distance between the mounting brackets to ensure a proper fit.
3. Assess the wall material behind the porcelain tile. If you have access to the back of the wall, such as in an unfinished area or through a removable panel, inspect the structure for any signs of weakness or damage. Ensure that the wall has adequate support and can withstand the weight of the grab bar and any additional force that may be applied.
Testing the Grab Bar
1. Before permanently attaching the grab bar, conduct a thorough test to ensure its sturdiness. Hold the grab bar firmly and apply pressure in different directions, mimicking the movements and force that may occur during actual use. Check for any signs of movement, flexing, or loosening of the grab bar or its mounting brackets.
2. If the grab bar passes the initial test, continue testing by exerting more force. This can be done by gently pulling or pushing on the grab bar with increasing intensity, ensuring that it remains securely fastened to the wall or tile without any noticeable movement.
3. Lastly, perform a weight-bearing test by applying your full body weight gradually onto the grab bar. Ensure that it remains secure and stable throughout the test. If there are any signs of instability or failure, reevaluate the installation location or consult a professional for assistance.
Conclusion
Checking for sturdiness is a critical step in the installation process for grab bars on porcelain tile. By ensuring a secure attachment and conducting thorough testing, you can have confidence in the safety and reliability of your grab bar. Remember to follow the manufacturer’s instructions and consult a professional if needed. With proper installation, you can enhance bathroom safety and accessibility for yourself or your loved ones.
Sealing The Gaps
Sealing the gaps around grab bars is an essential step to ensure they are not only securely installed but also watertight. Properly sealing the gaps will prevent water from seeping into the walls, protecting the integrity of your porcelain tile. In this section, we will explore the important steps involved in sealing the gaps when installing grab bars on porcelain tile.
Using Silicone Caulk
One of the most effective materials for sealing gaps is silicone caulk. It’s durable, flexible, and resistant to moisture, making it ideal for bathroom applications. Here’s how to use silicone caulk to seal the gaps:
- Clean the gaps thoroughly using an all-purpose cleaner and a rag. Ensure there is no dirt, dust, or debris left, as it can affect the adhesion of the caulk.
- Prepare the silicone caulk by cutting the tip of the caulk tube at a 45-degree angle. The size of the opening should be slightly smaller than the width of the gaps you need to seal.
- Insert the caulk tube into a caulking gun and apply steady pressure to dispense the caulk into the gaps. Start from one end of the gap and work your way to the other end. Be careful not to apply too much caulk at once, as it can be difficult to control and smoothen later.
- Use a caulk smoothing tool or your finger to evenly spread the caulk along the gap. Dip your finger in water to prevent sticking, and run it smoothly over the caulk to create a neat finish.
Smoothing and Removing Excess Caulk
After applying the silicone caulk, it’s important to smooth it out to achieve an even and professional look. Here are the steps to smooth and remove excess caulk:
- Moisten a sponge or cloth with water and gently wipe the excess caulk off the surface. Take care not to remove the caulk from the gaps.
- Once you’ve removed the excess caulk, use a caulk smoothing tool or your finger again to go over the gaps. This step will further smoothen the caulk and remove any imperfections.
- Wait for the caulk to dry according to the manufacturer’s instructions. Usually, it takes around 24 hours for the caulk to fully cure, so avoid using the grab bars during this time.
Following these steps to seal the gaps around your grab bars on porcelain tile will not only ensure a secure installation but also protect against water damage. By using silicone caulk and properly smoothing and removing excess caulk, you’ll achieve a professional and water-resistant finish.
Regular Cleaning
Using Mild Soap and Water
When it comes to regular cleaning of grab bars installed on porcelain tile, it is essential to use mild soap and water. This simple combination can effectively remove dirt, grime, and any build-up without causing any damage to the porcelain tile or the grab bars themselves.
To clean the grab bars, start by mixing a small amount of mild soap with warm water in a bucket or basin. Use a soft, non-abrasive cloth or sponge to dip into the soapy water and gently wipe down the grab bars. Make sure to cover all areas, including the underside and any crevices where dirt might accumulate.
After wiping down the grab bars with the soapy solution, rinse them thoroughly with clean water to remove any soap residue. This step is critical as any lingering soap can leave a slippery residue on the bars, posing a safety hazard.
Avoiding Harsh Chemical Cleaners
It is important to avoid using harsh chemical cleaners when cleaning grab bars on porcelain tile. These cleaners can contain strong acids or abrasive ingredients that may cause discoloration, etching, or pitting on both the grab bars and the tile surface.
Instead, stick with mild soap and water as mentioned earlier. Harsh chemicals can not only damage the appearance of the porcelain tile but also compromise its structural integrity, making it more prone to cracking or chipping.
Remember, safety is the main reason for installing grab bars in the first place, and using gentle cleaning methods ensures both the longevity of the bars and the safety of the users.
Inspecting For Damage
When installing grab bars on porcelain tile, it is essential to start by inspecting the surface for any damage. By taking the time to thoroughly check for loose mounting and assess the condition of the tile, you can ensure a secure and long-lasting installation. In this guide, we will walk you through the process step-by-step, providing expert tips and advice along the way.
Checking for Loose Mounting
Before installing grab bars on porcelain tile, it is crucial to check for any signs of loose mounting. Start by examining the area where the grab bar will be installed, looking for any cracks or gaps between the tile and the wall. If you notice any loose or unstable areas, it is important to address them before proceeding with the installation.
One way to check for loose mounting is by gently applying pressure to the tile in question. If it moves or feels insecure, it is likely due to loose mounting. To address this issue, you can use a high-quality adhesive specifically designed for porcelain tile. Apply the adhesive to the back of the tile, making sure to cover the entire surface. Press the tile firmly against the wall and hold it in place for the recommended drying time.
Repairing or Replacing as Needed
In some cases, inspecting the porcelain tile may reveal damage that cannot be fixed with adhesive alone. If you come across cracked or chipped tiles during your inspection, it is essential to repair or replace them before installing grab bars. This will ensure a secure and stable base for the grab bar installation.
If the damage is minor, you may be able to repair the tile using a porcelain filler. Simply follow the manufacturer’s instructions to mix and apply the filler, filling in the cracks or chips. After allowing the filler to dry completely, sand the area until it is smooth and level with the surrounding tile.
However, if the tile is significantly damaged or beyond repair, it is necessary to replace it. This may involve carefully removing the damaged tile using a grout saw or chisel and then replacing it with a new tile of the same size and color. Alternatively, you can hire a professional to handle the tile replacement process.
Frequently Asked Questions
Can You Install Grab Bars On Porcelain Tile?
Yes, you can install grab bars on porcelain tile. It is important to use the correct tools and techniques to prevent damage to the tile. Seek professional assistance or follow proper instructions to ensure a safe and secure installation.
How Do You Install Grab Bars On Tile Without Studs?
To install grab bars on tile without studs, you can use adhesive anchors specifically designed for tile. Clean the surface, apply the adhesive, and attach the grab bar. Ensure proper drying time and test the bar for stability before use.
Can Grab Bars Be Installed Over Tile?
Yes, grab bars can be installed over tile. They are specifically designed to be mounted on a variety of surfaces, including tile. Make sure to use proper tools and techniques for installation to ensure a secure and safe grip.
How Do You Secure Grab Bars To A Ceramic Tile Shower?
To secure grab bars to a ceramic tile shower, follow these steps: 1. Start by identifying the desired location for the grab bar. 2. Use a stud finder to locate the studs behind the wall. 3. Mark the position of the studs on the tile.
4. Drill pilot holes through the tile and into the studs. 5. Install the grab bar using screws or anchors designed for tile installations.
Conclusion
Installing grab bars on porcelain tile can be a daunting task, but with the right techniques and tools, it can be accomplished successfully. By following the step-by-step instructions provided in this blog post, you can ensure the stability and safety of your grab bars.
Remember to choose the appropriate location, use the correct adhesive, and give sufficient drying time for the best results. With these tips in mind, you can confidently install grab bars on porcelain tile, providing support and comfort for years to come.