
To install a grab bar in a tile shower, first, locate the studs in the wall using a stud finder. Then, mark the position of the bar and drill pilot holes into the tile and studs.
After that, attach mounting brackets to the wall, aligning them with the pilot holes. Finally, secure the grab bar to the brackets using screws.
Preparing For Installation
Installing a grab bar in a tile shower is an important safety measure that can provide stability and support to prevent slips and falls. Before you begin the installation process, it’s crucial to thoroughly prepare to ensure a successful outcome. This section will guide you through the steps of gathering the necessary tools and materials, as well as assessing and selecting the ideal location for the grab bar.
Gathering the Necessary Tools and Materials
Before you start installing the grab bar in your tile shower, make sure you have all the required tools and materials ready. This will ensure a smooth and efficient installation process without any interruptions. Here’s a checklist of what you’ll need:
| Tools | Materials |
|---|---|
|
|
Assessing and Selecting the Ideal Location for the Grab Bar
The location of the grab bar is crucial for ensuring its effectiveness and convenience. Assess the shower area carefully and consider the following factors before determining the ideal location:
- User Height and Reach: Take into account the height and reach of the primary users of the grab bar. It should be easily accessible for support.
- Stud Placement: Look for the wall studs behind the tile that will provide the necessary strength and support for the grab bar. You can use a stud finder to locate them.
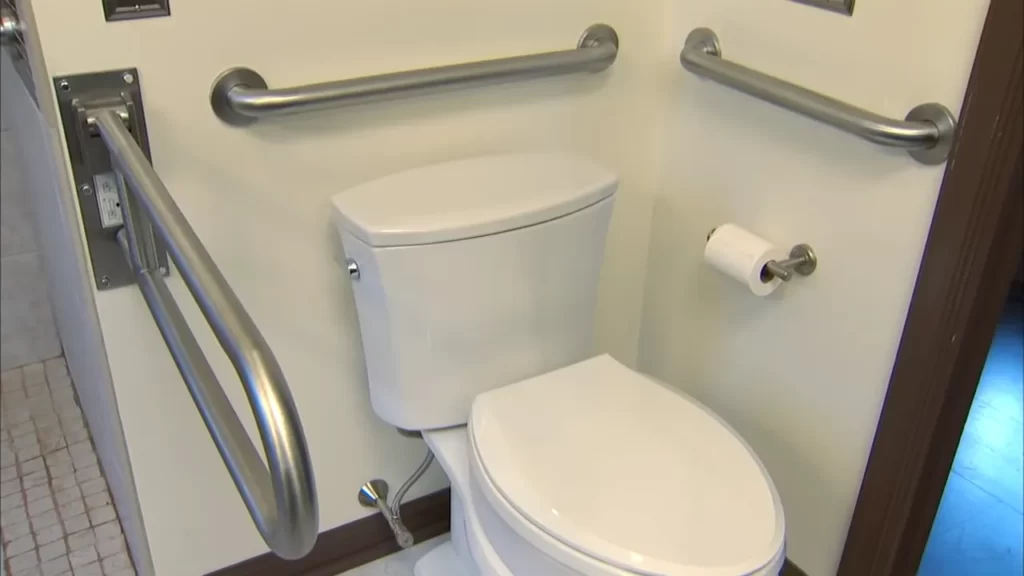
- Balance and Stability: Choose a location that offers a stable and balanced support, such as near the entry or exit of the shower or where the user may anticipate the need for support.
- Tiles and Grout: Consider the placement of the grab bar in relation to the tiles and grout lines. Avoid placing it directly on a grout line, as it may weaken the installation over time.
Once you have assessed these factors, mark the ideal location for the grab bar using a pencil and masking tape. Ensure the marked spot aligns with a wall stud for added strength and stability.
By following these steps to gather the necessary tools and materials, as well as assessing and selecting the ideal location for the grab bar, you’re well on your way to a successful installation. The next section will guide you through the process of securely installing the grab bar in your tile shower.
Measuring And Marking The Placement
When it comes to installing a grab bar in a tile shower, measuring and marking the placement is a crucial step that ensures the bar is positioned correctly for optimal support and safety. This involves determining the height and position of the grab bar and marking the exact points for drilling. In this article, we will guide you through the process, ensuring you follow the correct steps to install a grab bar in your tile shower.
Determining the Height and Position of the Grab Bar
Before you begin the installation, it’s important to determine the correct height and position of the grab bar. This will ensure it is most effective for the user and meets safety standards.
- Start by considering the height of the primary user. The grab bar should be installed at a height where it can be easily reached while standing in the shower.
- Typically, a height of 33 to 36 inches from the shower floor is recommended for most individuals. However, it’s important to consider the specific needs of the user. For taller individuals, a higher placement may be necessary.
- Once you have determined the height, locate the studs in the shower wall. These studs will provide the necessary support for the grab bar.
- Using a stud finder, carefully mark the positions of the studs on the wall.
Marking the Exact Points for Drilling
Now that you have determined the height and located the studs, it’s time to mark the exact points for drilling the grab bar. This will ensure precision during the installation process.
- Measure and mark the centerline: Using a measuring tape, find the centerline of the grab bar and mark it on the wall. This will help you position the bar accurately.
- Place the bar against the wall: Hold the grab bar against the wall, aligning it with the centerline you marked. Make sure it is level and in the desired position.
- Mark the mounting hole positions: With the grab bar in position, use a pencil to mark the exact points where the mounting holes will be drilled.
- Double-check the alignment: Before proceeding, double-check the alignment of the grab bar to ensure it is level and positioned correctly. This will prevent any issues during the installation.
By following these steps and accurately measuring and marking the placement, you are now ready to move on to the next phase of the installation process. Stay tuned for our next article on how to successfully drill and secure the grab bar into your tile shower!
Drilling And Installing The Grab Bar
Installing a grab bar in your tile shower can be a simple yet important step towards enhancing safety and accessibility. The process may involve drilling into the tile and securing the grab bar firmly to the wall. In this section, we will discuss the crucial steps of drilling and installing the grab bar. By following these instructions, you can ensure a secure and stable grab bar that will help prevent slips and falls while using the shower.
Choosing the Appropriate Drill Bit and Size
The first step in drilling and installing a grab bar is selecting the right drill bit and size for the job. Choosing the appropriate drill bit is essential to prevent damage to the tile surface. To determine the right size, measure the diameter of the screws that came with the grab bar. It is recommended to use a masonry drill bit with a carbide tip, as it is designed to cut through the ceramic tile effectively.
Drilling Holes into the Tile
Once you have chosen the correct drill bit and size, it’s time to proceed with drilling holes into the tile. To prevent the tile from cracking or splintering, it is crucial to go slow and steady. Using a low speed setting on your drill machine, start drilling at a 90-degree angle. Apply gentle pressure and let the drill do the work. It may be helpful to mark the drilling spot on the tile with a pencil or tape to ensure accuracy.
Inserting Wall Anchors for Enhanced Stability
To provide additional stability for the grab bar, wall anchors are used. After drilling the holes into the tile, remove any debris and insert the wall anchors into the holes. The wall anchors will provide a secure base for the screws to hold onto, ensuring that the grab bar is firmly attached to the wall. Make sure the wall anchors are flush with the tile surface to ensure a smooth and secure installation.
Mounting the Grab Bar to the Wall
After inserting the wall anchors, it’s time to mount the grab bar to the wall. Position the grab bar over the wall anchors and align the screw holes. Insert each screw into the anchors and tighten them with a screwdriver or drill, ensuring that the grab bar is snug against the wall. Double-check the stability of the grab bar by giving it a firm tug to ensure it can support weight without loosening.
By following these instructions, you can successfully drill and install a grab bar in your tile shower. Taking these safety measures will provide peace of mind and make your showering experience more secure. Remember to always consult the manufacturer’s instructions for specific guidance and use appropriate safety precautions throughout the installation process.
Frequently Asked Questions
How Do You Secure Grab Bars To A Ceramic Tile Shower?
To secure grab bars to a ceramic tile shower, follow these steps: 1. Start by marking the precise locations for the grab bars on the shower wall. 2. Use a drill equipped with a tile bit to create holes at the marked spots.
3. Fill the holes with a suitable adhesive, such as epoxy or silicone caulk. 4. Insert the grab bar brackets into the adhesive-filled holes. 5. Finally, secure the grab bars tightly to the brackets.
How Do You Install Grab Bars On Tile Without Studs?
To install grab bars on tile without studs, use hollow wall anchors or toggle bolts for a secure hold. First, mark the desired location on the tile. Then, drill holes through the tile and into the wall. Insert the anchor or toggle bolt into the holes and tighten.
Finally, attach the grab bar to the anchors or bolts. Make sure to follow the manufacturer’s instructions for proper installation.
Can You Install Grab Bars On Porcelain Tile?
Yes, you can install grab bars on porcelain tile. Ensure proper installation by using a suitable anchor system designed for tile. The grab bar should be securely attached to ensure stability and safety.
Where Should Grab Bars Be Placed In Shower?
Grab bars in the shower should be placed in accordance with safety guidelines. They should be installed vertically and horizontally, with one near the entrance, one for balance, and one for support. The bars should be installed securely onto the shower wall to prevent accidents and provide stability.
Conclusion
Installing a grab bar in a tile shower is a simple yet essential step in ensuring safety and accessibility for individuals of all ages and abilities. By following the step-by-step guide outlined in this blog post, you can easily mount a grab bar that provides stability and support while showering.
Remember to use the right tools, measure accurately, and consult a professional if needed. Adding a grab bar not only enhances the functionality of your bathroom but also promotes independence and confidence for you and your loved ones.