
To install a grab bar in a ceramic tile shower, mark the desired location for the bar, drill pilot holes, attach a mounting bracket to the tile, and secure the grab bar to the bracket using screws. This installation process ensures a safe and sturdy grab bar that can provide support and stability in the shower.
Installing a grab bar in a ceramic tile shower is a practical and essential safety measure for people of all ages. Whether you have mobility issues or simply want to prevent slipping accidents, a grab bar can provide the necessary support and stability.
In this guide, we will demonstrate an easy and effective method for installing a grab bar in your ceramic tile shower. By following these steps, you can ensure a secure and reliable installation that will give you peace of mind every time you shower.
Preparing For Installation
Choosing the Right Grab Bar
When it comes to installing a grab bar in a ceramic tile shower, one of the most crucial steps is selecting the right grab bar. You want to ensure that the grab bar you choose is not only sturdy and durable but also matches the aesthetic of your shower. There are a few factors to consider when choosing the right grab bar for your ceramic tile shower:
– Length: Measure the length of the wall where you plan to install the grab bar to determine the ideal size. Grab bars typically range from 12 inches to 48 inches in length.
– Weight Capacity: Make sure to check the weight capacity of the grab bar to ensure that it can support the weight of the person using it. It is recommended to choose a grab bar with a weight capacity of at least 250 pounds.
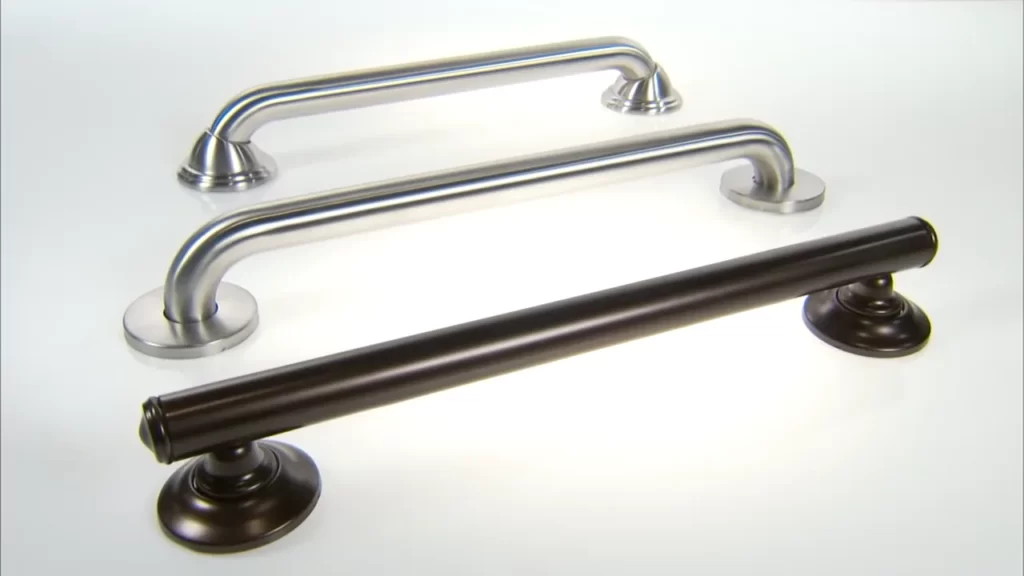
– Finish: Consider the finish of the grab bar that will complement the overall style of your shower. Popular finishes include chrome, brushed nickel, and oil-rubbed bronze.
Determining the Ideal Location
Determining the ideal location for installing the grab bar is crucial for its effectiveness. Here are some tips to help you identify the perfect spot:
– Height: The height of the grab bar should be determined based on the needs of the user. Generally, the grab bar should be installed at a height that allows the user to maintain a comfortable and secure grip while standing or sitting.
– Accessibility: Consider the accessibility of the grab bar when deciding its location. It should be easily reachable and within arm’s reach of the user.
– Stud Location: Locate the wall studs behind the ceramic tiles as they provide the necessary support for the grab bar. Use a stud finder to determine the exact position of the studs before drilling.
Gathering the Necessary Tools and Materials
Before you start the installation process, gather all the necessary tools and materials to ensure a smooth and efficient installation. Here is a list of items you will need:
– Grab Bar: Choose the grab bar with the specifications and finish that you determined in the previous steps.
– Tape Measure: Use a tape measure to accurately measure the length and height for proper installation.
– Stud Finder: Use a stud finder to locate the wall studs behind the ceramic tiles, as they provide the solid support needed for the grab bar.
– Level: A level is essential to ensure that the grab bar is installed straight and level.
– Pencil: Use a pencil to mark the precise locations where you need to drill the pilot holes.
– Drill and Drill Bits: You will need a drill to create pilot holes and install the grab bar securely.
– Screwdriver: A screwdriver will be required to tighten the screws and secure the grab bar in place.
Now that you have gathered all the necessary tools and materials, you are ready to move on to the next step of the installation process.
Measuring And Marking
The Measuring and Marking process is a crucial step in installing a grab bar in a ceramic tile shower. By correctly measuring the height and placement of the grab bar and marking the desired location on the shower wall, you ensure that it will be installed accurately and securely. In this section, we will discuss how to measure the height and placement of the grab bar, how to mark the desired location on the shower wall, and the importance of using a level to ensure accuracy.
Measuring the Height and Placement of the Grab Bar
When installing a grab bar in a ceramic tile shower, it is essential to determine the appropriate height and placement for optimal use. Start by considering the individual who will be using the grab bar – their height and any specific needs or preferences they may have.
To begin, stand inside the shower and extend your arm at a comfortable angle. Take note of the height at which your hand naturally falls – this will serve as a starting point for measuring the height of the grab bar. It is generally recommended to install the grab bar at a height between 33 to 36 inches from the shower floor. However, this height can be adjusted based on personal preference and accessibility requirements.
Marking the Desired Location on the Shower Wall
Once you have determined the desired height of the grab bar, the next step is to mark the location on the shower wall where it will be installed. First, locate the wall stud behind the tile to ensure proper support and stability. This can be done by using a stud finder or tapping along the wall to find a solid and sturdy section.
Once the stud is located, mark its center using a pencil or marker. From there, measure and mark the desired height of the grab bar on the wall, ensuring it aligns with the height determined earlier.
To ensure proper centering and alignment, it is recommended to use a tape measure or level to mark the location accurately. Place the level vertically or horizontally against the wall, lining it up with the mark you made for the height of the grab bar. This will help you ensure that the grab bar is installed level and straight.
Using a Level to Ensure Accuracy
Using a level is essential to ensure the accuracy and stability of the grab bar installation. It allows you to confirm that the bar is straight and level, avoiding any potential issues or discomfort for the user.
When placing the level against the wall, make sure that the bubble is centered between the lines. This indicates that the grab bar will be installed perfectly level. Adjust the position of the marked location if necessary, ensuring that it aligns with the level indicator.
Once you are confident with the marking and leveling, you can proceed to the next steps in the installation process, such as drilling the holes and attaching the grab bar securely to the wall.
By measuring the height and placement of the grab bar accurately and marking the desired location on the shower wall with precision, you ensure a safe and secure installation. Using a level helps guarantee that the grab bar is installed level and straight, enhancing its functionality and accessibility in the ceramic tile shower.
Drilling And Anchoring
When it comes to installing a grab bar in a ceramic tile shower, drilling and anchoring are crucial steps that you can’t afford to overlook. These steps provide the necessary stability and support, ensuring that the grab bar stays securely in place. In this section, we’ll guide you through the process of drilling and anchoring so that you can install your grab bar with confidence.
Selecting the Appropriate Drill Bit
The first step in drilling into ceramic tile is to select the appropriate drill bit. You’ll want to choose a carbide-tipped masonry bit, as this type of bit is specifically designed to handle the hard surface of the ceramic tile. It’s important to match the size of the drill bit to the diameter of the wall anchors that you’ll be using. This ensures a proper fit and prevents any unwanted movement or insecurity.
Drilling Pilot Holes in the Tile
Now that you have your drill bit selected, it’s time to start drilling pilot holes in the tile. It’s essential to mark the exact locations where you want to install the grab bar beforehand. Using a pencil or tape, mark the spots on the tile where the screws will go. This will serve as your guide during the drilling process.
Place the drill bit on the marked spot and apply gentle pressure. Start drilling at a low speed to prevent any cracking or chipping of the tile surface. As you drill, keep the bit perpendicular to the tile, maintaining a steady hand to ensure accuracy. It’s a good idea to periodically stop drilling and remove any debris that may accumulate in the hole.
Inserting Wall Anchors for Added Stability
To provide added stability and strength, wall anchors should be inserted into the pilot holes. These anchors ensure that the grab bar is securely attached to the wall, even when subjected to weight or pressure. There are several types of wall anchors available, such as plastic anchors, toggle bolts, or expansion anchors. Choose the type that best suits your needs and is compatible with the diameter of your pilot holes.
To insert the wall anchors, follow the manufacturer’s instructions carefully. Typically, you will need to gently tap the anchor into the hole until it is flush with the tile surface. Make sure it fits snugly and doesn’t wobble or move around. Once the wall anchors are in place, you can proceed to attach the grab bar, ensuring that the screws go through the grab bar and into the anchors for maximum stability.
By carefully selecting the appropriate drill bit, drilling pilot holes in the tile, and inserting wall anchors for added stability, you can confidently install a grab bar in your ceramic tile shower. This installation method not only ensures the safety and support you need but also preserves the integrity and beauty of your ceramic tile.
Mounting The Grab Bar
Mounting a grab bar in a ceramic tile shower can provide an extra layer of safety and support, making it easier and more secure for individuals to navigate the bathroom. When properly installed, a grab bar can help prevent slips and falls, particularly for those with limited mobility or balance issues. In this section, we will walk you through the step-by-step process of mounting a grab bar in a ceramic tile shower, ensuring that it is securely attached and level.
Aligning the Bar with the Pre-Drilled Holes
The first step in the installation process is to align the grab bar with the pre-drilled holes on the shower wall. Start by carefully measuring and marking the desired location for your grab bar. Using a level, ensure that the marks are straight and properly aligned. This step is crucial to ensuring that the bar will be securely attached and level.
Securing the Grab Bar to the Wall
Once you have aligned the grab bar, it’s time to secure it to the shower wall. Start by drilling holes into the marked locations on the ceramic tile, using a masonry bit that is suitable for drilling into tile. Be sure to wear protective eyewear and take caution while drilling to avoid damaging the tile or injuring yourself.
After drilling the holes, insert wall anchors that are specifically designed for tile installations. These anchors will provide extra support and stability when attaching the grab bar. Gently tap the wall anchors into the drilled holes using a hammer until they are flush with the tile surface.
Next, position the grab bar over the wall anchors, ensuring that the mounting holes on the bar align with the anchors. Insert the provided screws through the holes on the grab bar and into the wall anchors. Using a screwdriver or drill, tighten the screws until the grab bar is securely attached to the shower wall. It’s important to follow the manufacturer’s instructions regarding the recommended screw tightness.
Ensuring the Bar is Firmly Attached and Level
Once the grab bar is secured to the wall, it’s essential to ensure that it is firmly attached and level. Use a level to check if the bar is horizontally straight and adjust if necessary. Additionally, try applying slight pressure to the grab bar in different directions to test its stability. A properly mounted grab bar should feel sturdy and not move or shift when pressure is applied.
In conclusion, mounting a grab bar in a ceramic tile shower involves aligning the bar with the pre-drilled holes, securing it to the wall using appropriate anchors and screws, and ensuring that the bar is firmly attached and level. By following these steps, you can enhance the safety and accessibility of your shower, providing peace of mind and support for yourself or your loved ones.

Finishing Touches
Once you have successfully mounted your grab bar in a ceramic tile shower, there are a few important finishing touches to consider. These steps will not only enhance the overall appearance of the installation but also ensure its long-lasting functionality. In this section, we will walk you through how to conceal screws and mounting hardware, check for proper installation and stability, and clean and maintain the grab bar.
Concealing Screws and Mounting Hardware
After securely mounting the grab bar to the ceramic tile shower, you can take the extra step of concealing the screws and mounting hardware to achieve a seamless and polished look. Here are a few methods you can use:
- Bolt covers: Bolt covers are decorative caps that can be placed over the exposed screws. These covers are available in various colors and materials, allowing you to match them with your bathroom decor.
- Tile adhesive: Another option is to use tile adhesive to affix a small piece of matching tile over the mounting hardware. This effectively hides the screws while maintaining the overall aesthetic of your ceramic tile shower.
- Grout: If you prefer a more subtle approach, you can use grout to fill in the gaps around the mounting hardware. By carefully applying grout, you can seamlessly blend the grab bar with the surrounding tiles.
Checking for Proper Installation and Stability
Ensuring that your grab bar is properly installed and stable is crucial for its effective use. Here’s how you can check:
- Tug test: Give the grab bar a gentle tug in different directions to test its stability. It should not move or come loose from the wall.
- Weight test: If possible, apply some weight to the grab bar to see if it can support your body weight without any signs of weakness or instability.
- Appearance: Visually inspect the grab bar and its hardware to ensure that everything looks secure and properly aligned.
If you notice any issues or concerns during these checks, it’s important to fix them immediately. Your safety and stability should always be the top priority.
Cleaning and Maintaining the Grab Bar
Regular cleaning and maintenance of your grab bar will help prolong its lifespan and ensure its continued functionality. Here are a few tips to keep in mind:
- Mild cleanser: Use a mild cleanser and a soft cloth to regularly clean the grab bar, removing any dirt or grime that may accumulate over time.
- Avoid harsh chemicals: Avoid using harsh chemicals or abrasive cleaners that can damage the finish of the grab bar. Stick to gentle cleaning solutions to maintain its appearance.
- Frequent inspections: Periodically inspect the grab bar for any signs of wear, loose screws, or deterioration. If you notice any issues, address them promptly to prevent further damage or potential accidents.
By following these steps and incorporating them into your regular bathroom maintenance routine, you can ensure that your grab bar remains in excellent condition and continues to provide the necessary support and stability for years to come.
Frequently Asked Questions
How Do You Install Grab Bars On Tile Without Studs?
To install grab bars on tile without studs, use an adhesive specifically designed for tile. Clean the surface, mark the positions, apply the adhesive, and press the grab bars firmly into place. Allow the adhesive to cure before using the grab bars.
Can You Install Grab Bars On Porcelain Tile?
Yes, you can install grab bars on porcelain tile. It’s important to use the proper tools and techniques to avoid damaging the tile. Seeking professional assistance is recommended for a safe and secure installation.
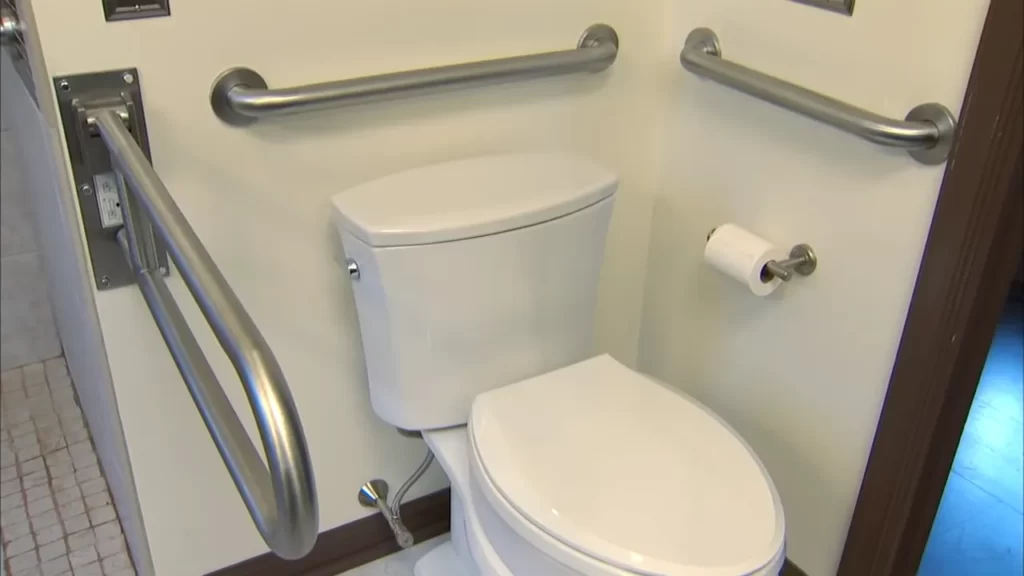
What Is The Proper Placement Of Grab Bars In Shower?
Proper placement of grab bars in the shower depends on individual needs and preferences. However, some common guidelines include installing bars vertically near the entrance and horizontally along the back wall. It’s important to position them at a height that is convenient for users to grip and support themselves.
Additionally, bars should be securely anchored to the wall to ensure safety and stability.
What Is The Best Anchor For A Grab Bar In Tile?
The best anchor for a grab bar in tile is a stainless steel toggle bolt anchor. It provides secure support and stability, preventing the grab bar from coming loose. This type of anchor is designed to hold heavy loads and is easy to install in tile surfaces.
Conclusion
In closing, installing a grab bar in a ceramic tile shower is a simple process that can greatly enhance safety and accessibility for users. By following the steps outlined in this guide, you can ensure a secure and durable installation that will withstand the test of time.
Remember to choose the right grab bar for your needs and use the appropriate tools and materials throughout the process. With a little effort and attention to detail, you can enjoy a safer bathing experience for years to come.