To install a glass shower panel, measure the area, purchase a high-quality panel, prepare the installation site, and carefully follow the manufacturer’s instructions for installation. Adding a glass shower panel to your bathroom can enhance its aesthetic appeal and functionality.
Glass shower panels offer a modern and elegant look, while also creating an open and spacious feel in the bathroom. Installing a glass shower panel requires precise measurements and careful preparation of the installation site. This ensures a secure and proper fit.
By following the manufacturer’s instructions, you can easily and successfully install a glass shower panel to enhance the design and functionality of your bathroom space. We will guide you on how to install a glass shower panel, step by step.
Essential Tools And Materials Needed
Installing a glass shower panel can add a touch of elegance to your bathroom. Whether you’re looking to upgrade your old shower or starting from scratch, having the right tools and materials is essential for a successful installation. In this section, we will discuss the essential tools and materials you will need to complete the job.
Glass Shower Panel
The first and most crucial item you’ll need is the glass shower panel itself. It is important to choose a high-quality panel that fits the dimensions of your shower space. Measure the dimensions accurately using a measuring tape to ensure a perfect fit.
Measuring Tape
A measuring tape will be your best friend throughout this installation process. Use it to measure the dimensions of your shower space, including the height and width. Accurate measurements are crucial for a precise fit, so take your time and double-check your measurements before proceeding.
Level
A level is essential to ensure that your glass shower panel is installed straight and plumb. Before drilling any holes or attaching the panel, use a level to check the vertical and horizontal alignment. This will help prevent any potential issues and ensure a professional-looking installation.
Drill
A reliable drill is necessary for creating the necessary holes in the walls or tiles for attaching the glass panel. Choose a drill with enough power to penetrate the material without causing any damage. Make sure to use the appropriate drill bit for the type of material you are drilling into.
Screwdriver
Along with the drill, a screwdriver will be needed to secure the glass panel to the wall or floor. Depending on the type of fasteners your shower panel requires, you may need a Phillips or flat-head screwdriver. Keep in mind that some panels may come with their own installation hardware, so refer to the manufacturer’s instructions for guidance.
Anchors and Screws
Anchors and screws are essential for securely attaching the glass panel to the wall. Make sure to choose anchors and screws that are suitable for the type of material you are mounting to. This will ensure a strong and durable installation.
Caulk and Caulking Gun
After the glass panel is securely installed, you will need to seal the edges with caulk to prevent water leakage. A caulk gun will make the application process easier and more precise. Choose a high-quality caulk that is suitable for wet environments and matches the color of your shower panel for a seamless finish.
Safety Glasses and Gloves
Lastly, don’t forget about your safety! When working with glass, it’s important to protect your eyes with safety glasses. Additionally, wearing gloves will prevent any injuries while handling the glass panel or working with tools.
By having these essential tools and materials on hand, you will be well-prepared to install a glass shower panel in your bathroom. Remember to follow the manufacturer’s instructions for your specific panel and take your time to ensure a precise and professional-looking installation.

Measuring And Marking The Shower Area
One of the most important steps in installing a glass shower panel is accurately measuring and marking the shower area. This ensures a perfect fit and a seamless installation. In this section, we will guide you through the process of determining the height and width of the shower area, marking the placement of the glass shower panel, and ensuring accurate measurements for a flawless installation.
Determining the height and width of the shower area
The first step in installing a glass shower panel is to determine the height and width of the shower area. By accurately measuring these dimensions, you can ensure that the glass panel will fit perfectly and provide a tight seal.
- Start by using a measuring tape to measure the height of the shower area from the bottom to the top. Be sure to measure at multiple points to account for any variations in the wall.
- Next, measure the width of the shower area from one wall to the other. Again, measure at multiple points to ensure accuracy.
- Record the measurements for the height and width, and take the smallest measurement for each dimension. This will ensure that the glass panel will fit without any gaps or overlaps.
Marking the placement of the glass shower panel
Once you have determined the height and width of the shower area, it’s time to mark the placement of the glass shower panel. This step is crucial for ensuring that the panel is installed in the correct position and at the desired height.
- Using a pencil, mark the bottom of the shower area on each side wall. This will serve as a reference point for positioning the glass panel.
- Measure and mark the desired height of the glass panel on each side wall. Remember to account for any gaps or overlaps that may be necessary for proper installation.
- Connect the marks on each side wall to create a straight line. This will represent the placement of the glass panel.
Ensuring accurate measurements for a perfect fit
Accurate measurements are crucial for achieving a perfect fit when installing a glass shower panel. To ensure the best results, follow these tips:
- Double-check all measurements before proceeding with the installation.
- Use a level to ensure that the marks are straight and level.
- If necessary, make additional marks or adjustments to ensure a precise fit.
- Consider seeking professional help if you are unsure about any step of the process.
By following these guidelines for measuring and marking the shower area, you can ensure a smooth and successful installation of your glass shower panel. The next step is preparing the shower area for installation, which we will cover in the next section.
Removing The Old Shower Door/Panel
Before you can install a new glass shower panel, you’ll need to remove any existing shower door or panel. This step is crucial for ensuring a smooth and successful installation. Follow these steps to remove the old shower door or panel:
Step 1: Gather the necessary tools
Make sure you have all the tools you’ll need for the job. This typically includes a screwdriver, wrench, and a utility knife or scraper.
Step 2: Unscrew the door hinges
Using a screwdriver or wrench, carefully unscrew the hinges attaching the old shower door to the wall. Keep in mind that some shower doors may have multiple hinges, so be sure to remove all of them.
Step 3: Remove any screws or brackets
Once the hinges are removed, check for any additional screws or brackets holding the shower door or panel in place. Use your screwdriver or wrench to remove these as well.
Step 4: Detach the door or panel
With all the screws and brackets removed, carefully detach the old shower door or panel from the wall. Take your time to avoid any damage to the surrounding tile or walls.
Step 5: Clean the surface
After removing the old shower door or panel, it’s important to clean the surface thoroughly. Use a mild cleaning solution and a sponge or cloth to remove any residue or debris. This will ensure a clean and smooth surface for the new installation.
Step 6: Check for any repairs
While you have the old shower door or panel removed, take the opportunity to check for any repairs that may be needed. Look for cracks or damage to the surrounding tile or walls and address them before installing the new glass shower panel.
By following these steps to remove the old shower door or panel, you’ll be one step closer to installing your new glass shower panel. Remember to take your time and be cautious while removing the old door or panel, ensuring a clean and smooth surface for the next installation.
Mounting The Panel Hardware
Once you have chosen the perfect glass shower panel for your bathroom, it’s time to start the installation process. One of the most crucial steps in this process is mounting the panel hardware. Properly attaching the hinges or brackets to the wall and floor, ensuring proper alignment and level installation, as well as securing the hardware for stability are all essential for a successful shower panel installation.
Attaching the hinges or brackets to the wall and floor
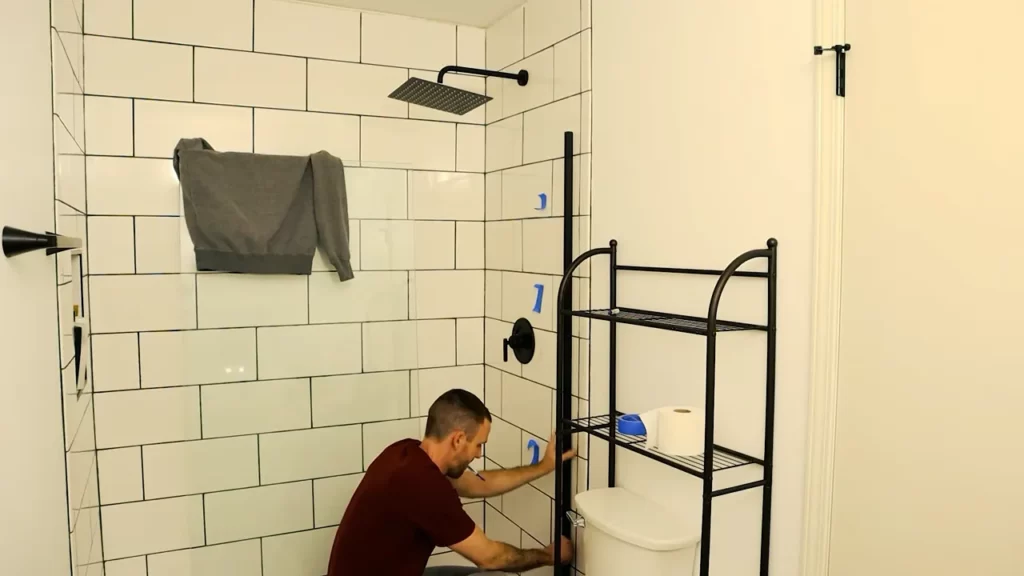
Before beginning the installation, ensure that you have all the necessary tools and equipment handy. This includes the hinges or brackets, screws, a drill, and a level. Start by locating the ideal position for the hinges or brackets on both the wall and the floor. Mark these positions with a pencil, ensuring they are level and aligned correctly.
Next, using a drill, carefully create pilot holes at the marked positions on the wall and the floor. Make sure the holes are the appropriate size for the screws that will be used to attach the hinges or brackets. This step will help prevent any damage to the wall or floor during the installation process.
Once the pilot holes are ready, it’s time to attach the hinges or brackets. Align them with the pilot holes on the wall and the floor, ensuring they are level. Use a screwdriver or a drill to securely fasten the hinges or brackets in place with the provided screws. Double-check the firmness of the attachment to ensure stability.
Ensuring proper alignment and level installation
Proper alignment and level installation of the glass shower panel are essential for both visual appeal and functionality. To ensure accurate alignment, use a level to check if the hinges or brackets are perfectly horizontal or vertical. Adjust them accordingly until they are level.
Additionally, it’s crucial to ensure that the glass shower panel is aligned properly with the hinges or brackets. Carefully lift the glass panel and slide it onto the installed hardware, making sure it aligns perfectly. You may need an extra pair of hands to assist in holding the panel in place while aligning it.
Securing the hardware for stability
Securing the hardware is crucial to ensure the stability and longevity of your glass shower panel. Once the glass panel is aligned and in place, secure the hinges or brackets further by tightening the screws. Ensure that each screw is tightened enough to hold the panel firmly but not so much that it risks damaging the glass.
Double-check that all screws are securely tightened and there is no wobbling or instability in the installed glass panel. Any loose fittings should be immediately addressed and tightened.
By following these steps, you can successfully mount the panel hardware for your glass shower panel. With proper attachment, alignment, and stability, your shower panel will not only enhance the aesthetics of your bathroom but also provide a luxurious and enjoyable shower experience.

Installing The Glass Shower Panel
Installing the Glass Shower Panel
Installing a glass shower panel can be an exciting and transformative addition to your bathroom. It not only adds a touch of elegance, but also creates a spacious and luxurious feel. However, the installation process requires precision and care to ensure a secure and visually appealing result. In this article, we will guide you through the step-by-step process of installing a glass shower panel, focusing on lifting and positioning the panel, adjusting its alignment, and securing it to the hinges or brackets.
Lifting and carefully positioning the glass panel onto the hardware
The first step in installing the glass shower panel is to carefully lift and position it onto the hardware. This can be a bit challenging, as the glass panel can be heavy and fragile. Follow these steps to ensure a smooth installation:
1. Gather the necessary tools: Before you start, make sure you have all the tools you need, such as a screwdriver, level, measuring tape, and protective gloves.
2. Prepare the area: Clear the space around the shower enclosure and remove any obstructions that may hinder the installation process. Place a soft cloth or blanket on the floor to protect the glass panel from scratches or breakage.
3. Lift the glass panel: With the help of another person, carefully lift the glass panel and position it onto the hardware, aligning it with any pre-drilled holes or brackets.
Adjusting the panel to align with the marked placement
Once the glass panel is in position, it’s important to ensure that it aligns perfectly with the marked placement for a seamless look. Here’s how you can adjust the panel:
1. Use a level: Place a level on top of the glass panel to check its alignment. If it’s not perfectly level, adjust the positioning by gently lifting and shifting the panel until it aligns with the marked placement.
2. Check the vertical alignment: Use the level to check the vertical alignment of the glass panel as well. Make any necessary adjustments by carefully repositioning the panel.
Securing the panel to the hinges or brackets
After aligning the glass panel, the final step is to secure it to the hinges or brackets. This will ensure stability and prevent any wobbling or movement. Follow these steps to secure the panel:
1. Use screws or bolts: Depending on the type of hardware used, secure the glass panel to the hinges or brackets using the provided screws or bolts. Ensure that the hardware is tightened securely, but be careful not to overtighten and risk damaging the glass.
2. Test the stability: Once the panel is secured, gently test its stability by giving it a slight push or tug. If it feels secure and doesn’t move excessively, you have successfully installed the glass shower panel.
Remember, if you are unsure about any step of the installation process, it’s best to consult a professional to avoid any accidents or damage. By following these guidelines, you can enjoy a beautifully installed glass shower panel that enhances the aesthetics and functionality of your bathroom.
Sealing And Finishing Touches
Once you have successfully installed your glass shower panel, it is important to focus on sealing and finishing touches to ensure a watertight seal and a neat appearance. This final step is crucial in preventing any water leakage and maintaining the overall aesthetic of your shower. In this section, we’ll guide you through the process of applying caulk along the edges of the glass panel, smoothing the caulk, and cleaning any excess for a flawless finish.
Applying caulk along the edges of the glass panel for a watertight seal
To begin, it’s essential to choose a high-quality silicone caulk that is specifically designed for use in bathrooms and showers. This type of caulk provides superior water resistance and durability.
Start by ensuring that the surface is clean and dry. Use a mild soap and water solution to remove any dirt or debris, and thoroughly dry the area before proceeding. This step will help the caulk adhere properly and create a strong seal.
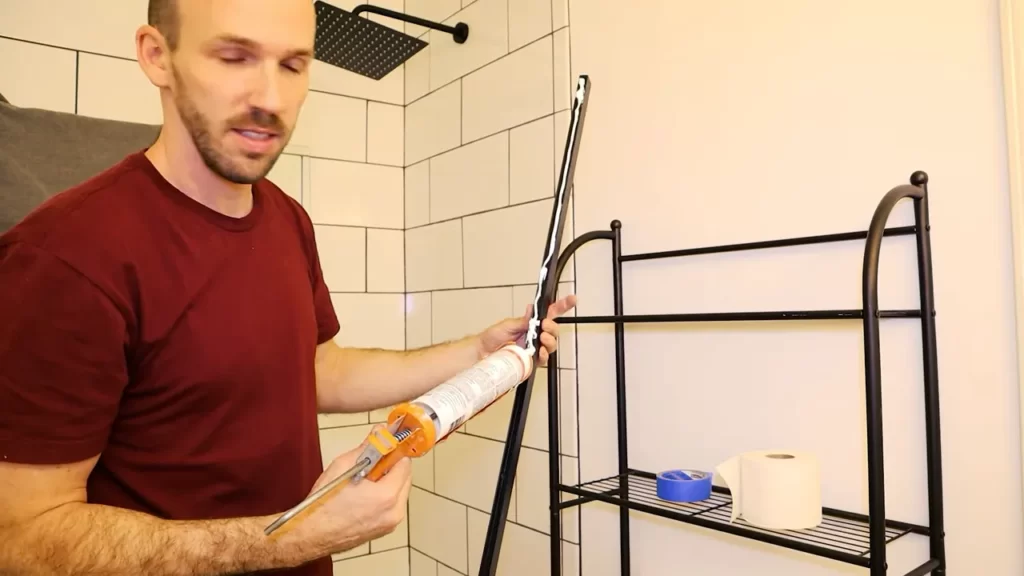
Next, load the caulk into a caulk gun and cut the tip of the tube at a 45-degree angle. Apply a continuous bead of caulk along the edges of the glass panel, making a uniform layer. Take care to fill any gaps or spaces between the glass and the surrounding tiles or walls.
Use steady pressure on the caulk gun, and maintain a consistent speed as you move along the edges. This will ensure a smooth and even application of the caulk.
Smoothing the caulk with a caulking tool or finger
Once the caulk is applied, it’s time to smooth it out for a professional finish. You can use a caulking tool or your finger for this step.
If you choose to use a caulking tool, hold it at a 45-degree angle and gently glide it along the caulk line to smooth and compress it. This will help create a watertight seal and remove any excess caulk.
If you prefer using your finger, dampen it slightly with water or rubbing alcohol. Then, run your finger along the caulk line with light pressure, smoothing out any unevenness or ridges. Be sure to work quickly before the caulk starts to set.
Cleaning any excess caulk for a neat appearance
Finally, after smoothing the caulk, it’s important to clean up any excess caulk to achieve a neat and tidy look.
You can use a damp cloth or sponge to gently wipe away any excess caulk along the edges of the glass panel and the surrounding surfaces. Take care not to disturb the freshly applied caulk or smudge it.
Alternatively, you can also use a caulk remover tool to remove any stubborn or dried caulk residue. This tool helps you scrape away the excess caulk without damaging the glass or other surfaces.
After cleaning, allow the caulk to cure according to the manufacturer’s instructions before using your shower. This will ensure that the seal is fully formed and ready to withstand the daily use and moisture of your shower.
By following these sealing and finishing techniques, you can confidently complete the installation of your glass shower panel, creating a sleek, watertight, and visually appealing addition to your bathroom.
Safety Considerations During Installation
Wearing safety glasses and gloves for protection
One of the essential safety considerations during the installation of a glass shower panel is to prioritize personal protection. To ensure your safety and prevent any potential hazards, it is imperative to wear safety glasses and gloves throughout the installation process.
Wearing safety glasses will shield your eyes from any flying debris or glass shards that may occur during the installation. These small fragments can cause serious eye injuries if they come into contact with your eyes, making safety glasses a crucial safety precaution.
Gloves should also be worn to protect your hands from cuts or lacerations. Glass panels are delicate and can easily break or fracture, posing a risk of injury. By wearing gloves, you can minimize the chances of injuring your hands and avoid any potential accidents.
Taking precautions while handling the glass panel
When it comes to handling the glass shower panel, it is vital to take extra precautions to avoid any accidents or damages. The glass panel is fragile and prone to breakage if mishandled. Follow these necessary precautions to ensure a safe and successful installation:
- Handle the glass panel with extreme care. Avoid applying excessive force or pressure that could cause it to break.
- Ensure the area where you are working is clear and free from any obstacles or clutter. This will prevent trips or falls that could potentially lead to accidents or damage to the glass panel.
- Use caution when transporting the glass panel to the installation area. Secure it properly to prevent any movement or sliding that could cause it to slip from your grip.
- If the glass panel is heavy or large, consider having another person assist you in the handling process. Having an extra pair of hands can help ensure that the panel is properly supported and prevent any accidents.
Avoiding accidents and injuries during the installation process
During the installation of the glass shower panel, it is essential to prioritize safety to avoid any accidents or injuries. By following these guidelines, you can ensure a smooth and safe installation process:
- Start by cleaning the installation area thoroughly to remove any dust, debris, or obstructions that could hinder the installation process.
- Use suitable lifting and positioning techniques to prevent straining your back or causing muscle injuries. Bend your knees and lift with your legs, keeping your back straight.
- Utilize appropriate tools and equipment to ensure a secure installation. This includes using a level to ensure the panel is correctly aligned and using suitable fasteners to secure it in place.
- If you encounter any difficulties or uncertainties during the installation, do not hesitate to seek professional assistance. It is better to call a professional than risk potential accidents or improper installation.
By following these safety considerations during the installation of your glass shower panel, you can ensure a successful and incident-free installation process while prioritizing your personal well-being.
Cleaning And Maintaining The Glass Shower Panel
Proper cleaning and maintenance are essential to keep your glass shower panel sparkling and in pristine condition. In this section, we will discuss the best methods to clean the glass, how to prevent water stains and soap residue buildup, and the importance of regular maintenance to extend the lifespan of your glass panel.
Proper cleaning methods to keep the panel sparkling
Keeping your glass shower panel sparkling requires the right cleaning techniques. Follow these steps to ensure a thorough and effective clean:
- Start by rinsing the glass panel with warm water to remove any loose dirt or debris.
- Mix a solution of equal parts white vinegar and water in a spray bottle. Vinegar is a natural cleanser that will help remove soap scum and hard water stains.
- Spray the solution onto the glass panel and let it sit for a few minutes to allow the vinegar to work its magic.
- Using a soft sponge or microfiber cloth, scrub the glass gently in circular motions. Be sure to pay extra attention to areas with stubborn stains or buildup.
- Rinse the glass thoroughly with warm water, ensuring that all the cleaning solution is removed.
- Finish off by using a squeegee to remove any excess water and prevent streaks.
Preventing water stains and soap residue buildup
To prevent water stains and soap residue buildup on your glass shower panel, it’s important to implement a few preventive measures. Consider the following tips:
- After each use, use a squeegee to remove excess water from the glass surface. This will prevent water droplets from drying and leaving unsightly stains.
- Avoid using harsh, abrasive cleaners, as they can scratch the glass and make it more prone to buildup.
- Consider applying a protective coating or sealant specifically designed for glass shower panels. These coatings create a barrier that repels water and helps prevent stains and buildup.
- Regularly check and clean the showerhead and faucets to ensure they are not spraying water onto the glass panel directly, which can lead to hard water stains.
- Use a mild, non-abrasive soap or shower cleaner specifically formulated for glass surfaces when cleaning the panel. This will help prevent soap residue buildup.
Regular maintenance to extend the lifespan of the glass panel
Regular maintenance plays a crucial role in extending the lifespan of your glass shower panel. Follow these recommendations to keep your glass panel in optimal condition:
- Inspect the panel regularly for any signs of damage, such as cracks or chips. If you notice any damage, it’s important to address it promptly to prevent further issues.
- Once a month, give the glass panel a deep clean using the proper cleaning methods mentioned above.
- Check the hinges, handles, and other hardware regularly to ensure they are functioning properly. Tighten any loose screws or replace any damaged hardware as needed.
- Avoid using abrasive materials or tools when cleaning, as these can scratch the glass and compromise its structural integrity.
- If your glass panel has a frame, inspect it for any signs of wear or damage. Clean the frame using a mild soap and water solution, and touch up any scratches or chips with matching paint or sealant.
By following these cleaning and maintenance practices, you can keep your glass shower panel looking its best and extend its lifespan for years to come.
Troubleshooting Common Issues
Addressing problems like misalignment or loose hardware
Misalignment and loose hardware are common issues when installing glass shower panels. These problems can lead to an unstable and unsafe shower enclosure. To address misalignment, carefully inspect the panel and track to ensure they are properly aligned. If you notice any gaps or unevenness, try adjusting the hardware or realigning the panel to achieve a perfect fit.
Loose hardware can also cause issues with the stability of the glass shower panel. Check all the screws, brackets, and hinges to ensure they are tightly secured. If you find any loose hardware, use a screwdriver or wrench to tighten them. It’s important to periodically check the hardware and make sure they remain secure to prevent any accidents.
Tips for fixing leaks or water seepage around the panel
Nobody wants a leaking shower, so it’s essential to address any leaks or water seepage around the glass shower panel. Here are some tips to fix this issue:
1. Check the silicone sealant: Inspect the silicone sealant around the edges of the panel. If you notice any cracks or gaps, carefully remove the old sealant and reapply a new bead of sealant. Ensure that you use a high-quality waterproof sealant to create a tight and secure seal.
2. Adjust the door sweep: If you have a hinged or sliding glass shower panel, check the door sweep at the bottom. Sometimes, improper alignment or wear and tear can cause water to seep through. Adjust the door sweep to ensure it creates a proper seal with the shower base or threshold.
3. Consider adding a drip rail: If you’re still experiencing leaks, consider installing a drip rail along the bottom edge of the glass panel. This accessory helps redirect water back into the shower, preventing it from escaping onto the bathroom floor.
Seeking professional help for complex issues
In some cases, you may encounter complex issues during the installation or troubleshooting process. It’s important to acknowledge your limitations and seek professional help to ensure the proper functioning and safety of your glass shower panel. Complex issues may include structural problems, extensive leaks, or hardware malfunctions that require specialized expertise.
Contact a professional glass installer or shower enclosure specialist who can diagnose and resolve the problem effectively. They have the knowledge, tools, and experience to handle complex issues and ensure a successful installation or repair. Remember, investing in professional assistance is a wise decision to avoid any further damage or potential hazards.
By addressing common issues like misalignment, loose hardware, leaks, or water seepage, you can ensure that your glass shower panel installation remains in top-notch condition for years to come. Remember to perform regular maintenance and address any problems promptly to maintain the beauty and functionality of your shower enclosure.
Frequently Asked Questions
How Do You Install A Shower Screen Panel?
To install a shower screen panel, follow these steps: 1. Measure the area and choose the right size panel. 2. Mark the holes for drilling on the wall or floor, ensuring they align with the panel. 3. Drill the marked holes and insert wall plugs.
4. Place the panel onto the plugs and secure with screws. 5. Finally, seal the edges with silicone for a watertight finish.
What Holds Shower Glass In Place?
Shower glass is held in place by brackets or clips, silicone adhesive, and metal channels. These components ensure stability and prevent the glass from moving or slipping.
How Do You Seal Frameless Glass Shower Panels?
To seal frameless glass shower panels, use silicone caulk. Clean the surfaces thoroughly, then apply a continuous bead of caulk along the seams. Smooth it with a caulk tool or finger, removing any excess. Let it dry completely before using the shower.
Can You Install Shower Glass Yourself?
Yes, you can install shower glass yourself. However, it requires careful consideration and skill. Ensure you have the necessary tools and follow proper installation guidelines to ensure a safe and secure installation.
Conclusion
To sum up, installing a glass shower panel is a straightforward task that can dramatically enhance the appearance of your bathroom. By following these step-by-step instructions and using the right tools, you can achieve a polished and professional finish. Remember to measure and plan carefully, secure the panel properly, and take safety precautions.
With a little time and effort, you can create a stunning glass shower that will add both style and functionality to your space. So, go ahead and give it a try!