
Installing a glass block shower wall involves carefully measuring and aligning the blocks to create a secure and visually appealing barrier. First, gather all necessary materials such as glass blocks, mortar, and a trowel.
Then, determine the desired layout and height of the wall. Next, apply mortar to the bottom row of blocks and adhere them to the shower floor. Continue stacking and aligning the blocks, ensuring they are level and plumb. Finally, seal the joints with mortar and clean the glass blocks for a finished look.
Planning Your Glass Block Shower Wall Project
Planning Your Glass Block Shower Wall Project
Installing a glass block shower wall can be a stunning addition to your bathroom, adding a touch of modern elegance and an open, spacious feel. But before you begin the installation process, it’s essential to plan your project carefully. In this section, we’ll explore the key steps to consider when planning your glass block shower wall project.
Determine the size and layout of your shower wall
The first step in planning your glass block shower wall project is to determine the size and layout of your shower wall. Consider the available space and the overall design of your bathroom. Do you want a standard-sized wall, or do you prefer a custom design that fits your unique needs? Measure the area where the shower wall will be installed, and be sure to account for any structural constraints or plumbing fixtures that may impact the layout.
Take accurate measurements and gather necessary materials
Once you’ve determined the size and layout of your shower wall, it’s time to take accurate measurements and gather the necessary materials. Precision is key when working with glass blocks, so make sure your measurements are spot-on. Consider using a digital measuring tool to ensure accuracy. Additionally, gather all the materials you’ll need for the installation process, including glass blocks, spacers, mortar, and a waterproofing system.
Create a design plan that complements your bathroom aesthetic
A glass block shower wall can serve as a focal point in your bathroom, so it’s essential to create a design plan that complements your overall aesthetic. Decide on the pattern or arrangement of the glass blocks, whether you prefer a vertical or horizontal layout, or perhaps a combination of both. Consider factors like privacy, natural light, and the style of your existing bathroom elements, such as tiles or fixtures. A well-thought-out design plan will ensure that your glass block shower wall enhances the beauty of your bathroom.
In conclusion, planning is the key to a successful glass block shower wall installation project. Determine the size and layout of your shower wall, take accurate measurements, gather necessary materials and create a design plan that complements your bathroom aesthetic. By following these steps, you’ll be well-prepared to embark on your glass block shower wall project and create a stunning addition to your bathroom.
Preparing The Bathroom For Installation
Before you can start installing a glass block shower wall, it is important to properly prepare the bathroom. This involves a few key steps to ensure a smooth and successful installation process. First, you need to remove any existing shower enclosure. This may include doors, panels, or even a full shower unit. By removing these elements, you create a blank canvas for your new glass block shower wall.
Next, you need to assess the structural integrity of the wall where the glass block shower wall will be installed. Ensure that the wall is strong and stable enough to support the weight of the glass blocks. If there are any signs of damage or weakness, it is crucial to address them before moving forward with the installation. A solid foundation will ensure the long-term durability and safety of your glass block shower wall.
Additionally, proper waterproofing is essential to prevent moisture damage in the shower area. Moisture can seep into the walls and flooring, leading to mold and other structural issues. To waterproof the shower area, you can use a combination of methods such as a vapor barrier, waterproof membranes, or specialized waterproofing products. Take the time to carefully apply these materials, ensuring that every surface is properly protected.
Remove any existing shower enclosure
Begin the preparation process by removing any existing shower enclosure in the bathroom. This may include doors, panels, or even a full shower unit. Take care to disconnect and remove each component, paying attention to any plumbing connections that may need to be disconnected. By removing the existing enclosure, you create a clean workspace for the installation of the glass block shower wall.
Ensure the wall is structurally sound and appropriate for installation
Once the existing shower enclosure is removed, it is important to evaluate the structural integrity of the wall where the glass block shower wall will be installed. A strong and stable wall is crucial for supporting the weight of the glass blocks and ensuring the long-term durability of the installation. Check for any signs of damage or weakness, such as cracks, water damage, or unevenness. Address any issues accordingly before proceeding with the installation.
Properly waterproof the shower area to prevent moisture damage
One of the most important steps in preparing the bathroom for a glass block shower wall installation is ensuring proper waterproofing. Moisture can seep into the walls and flooring, leading to mold growth, rot, and other structural problems. To prevent this, apply a waterproof barrier to all exposed surfaces in the shower area. This can be done using a vapor barrier, waterproof membranes, or specialized waterproofing products. Take care to follow the manufacturer’s instructions and ensure complete coverage to protect against moisture damage.
Installing The Glass Block Shower Wall
Installing a glass block shower wall can add a touch of elegance and modernity to your bathroom. Not only does it provide a stylish and functional enclosure, but it also allows natural light to permeate, creating a bright and spacious feel.
Start by marking the installation area on the wall
Before beginning the actual installation process, it is important to mark the area where the glass block shower wall will be installed. Use a measuring tape and a level to ensure accurate placement. Make careful measurements and mark the layout on the wall using a pencil or masking tape.
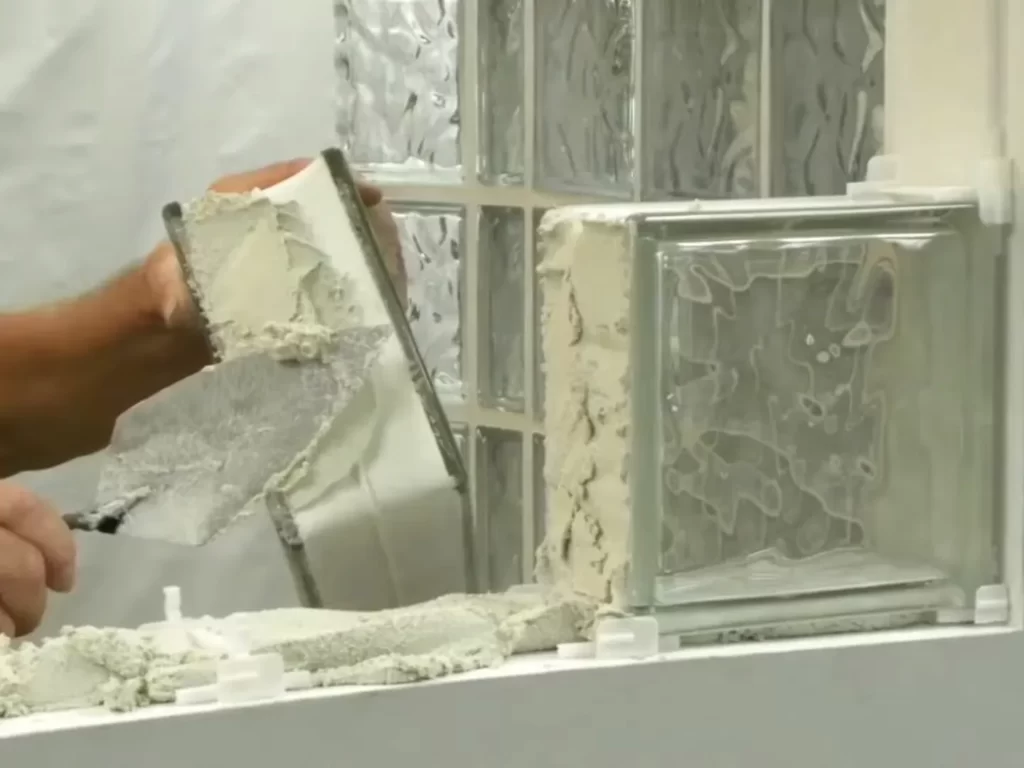
Prepare the mortar mix and apply it evenly
Next, it’s time to prepare the mortar mix. Follow the manufacturer’s instructions to ensure the correct consistency. Once the mortar mix is ready, apply it evenly on the marked installation area. Use a trowel to spread the mortar, ensuring it covers the entire surface.
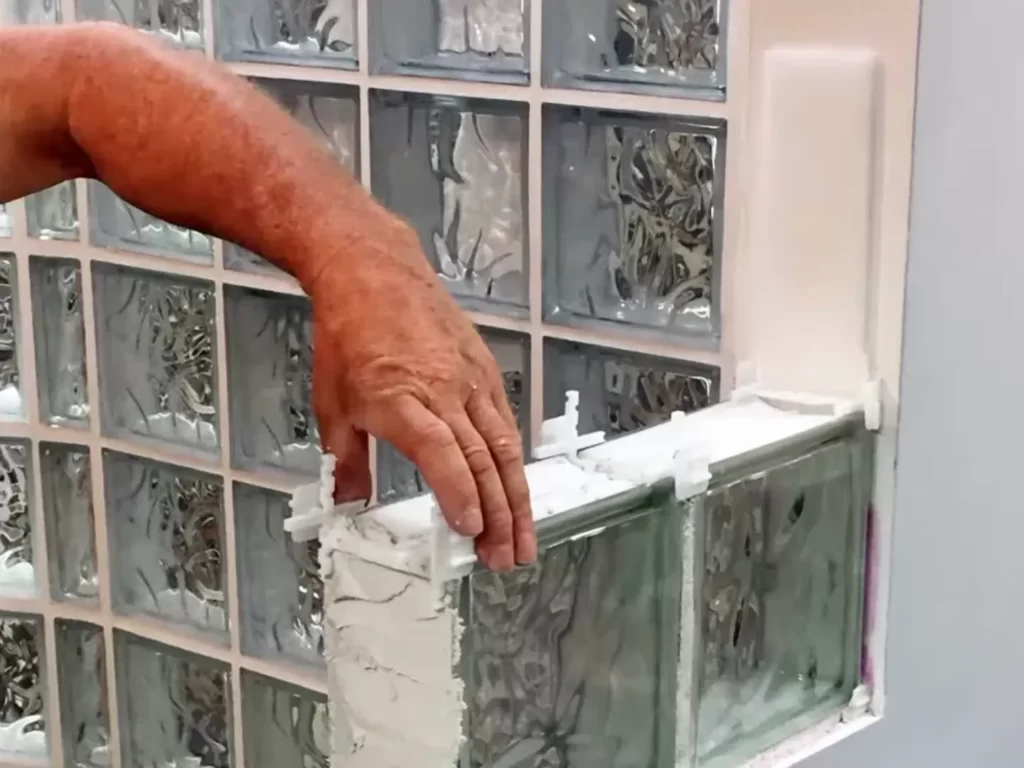
Carefully lay the glass blocks in the desired pattern
Now comes the exciting part – laying the glass blocks! Carefully place each block on the mortar bed in the desired pattern. Ensure that they fit snugly together, creating a sturdy and secure wall. Take your time with this step to achieve a visually appealing result.
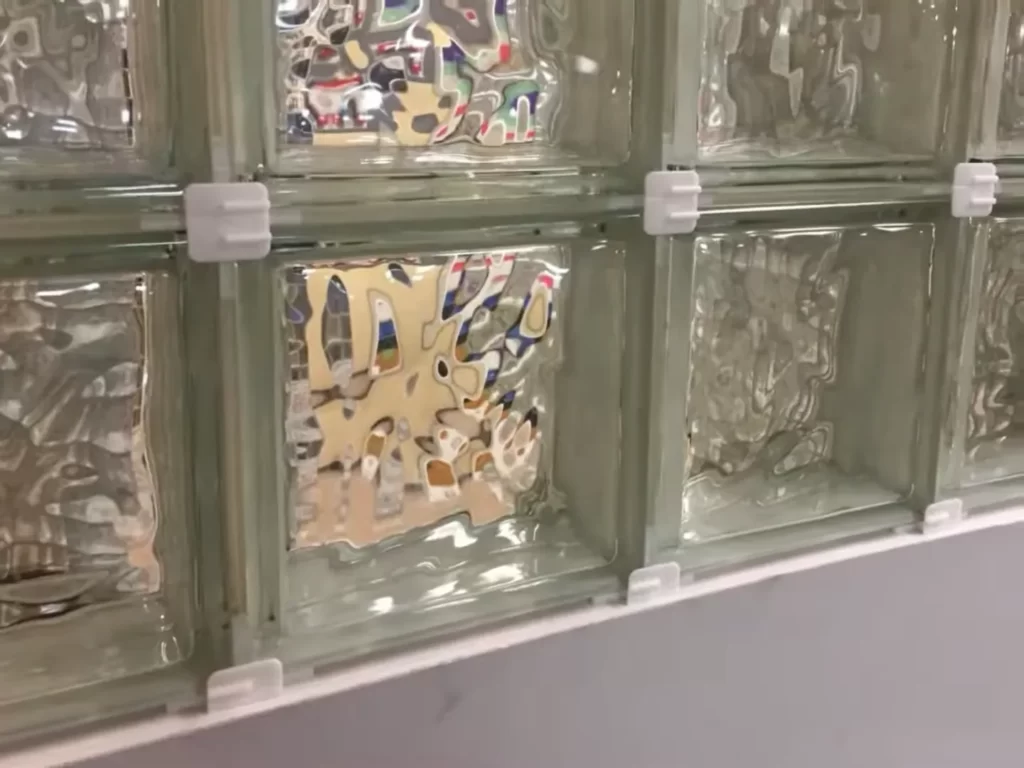
Use spacers to maintain consistent spacing between blocks
To ensure consistent spacing between glass blocks, use spacers. These small plastic or rubber pieces are placed between the blocks to maintain equal gaps. This step not only provides a polished look but also allows for proper mortar application.
Apply mortar to secure the blocks in place
Once the glass blocks and spacers are in place, it’s time to secure them with mortar. Apply mortar to the sides of each block, filling the gaps between them. Use a trowel to smooth the mortar, ensuring a seamless finish.
Allow sufficient curing time for the mortar to set
After completing the mortar application, it’s crucial to let it cure properly. Follow the manufacturer’s instructions to determine the required curing time. This ensures that the mortar sets completely, providing a strong and durable glass block shower wall.
In conclusion, installing a glass block shower wall requires careful planning and attention to detail. By following these steps, you can achieve a beautiful and functional addition to your bathroom that will impress both guests and family members alike.
Sealing And Finishing The Glass Block Shower Wall
Sealing and finishing your glass block shower wall is essential for both functionality and aesthetics. By properly sealing the joints and applying a protective coating, you can ensure the longevity and durability of your shower wall. Additionally, adding decorative finishing touches will enhance the overall visual appeal of your bathroom. In this section, we will guide you through the key steps to seal, protect, and beautify your glass block shower wall.
Clean any excess mortar from the surface of the glass blocks
After installing your glass block shower wall, it’s important to clean any excess mortar that may have accumulated on the surface of the glass blocks. This step not only improves the appearance of the wall but also prevents any residue from interfering with the sealing process. Using a soft cloth or sponge dampened with water, gently wipe away any mortar remnants, taking care not to scratch the glass. Be thorough in your cleaning to ensure a smooth and even finish for your sealant.
Apply a waterproof sealant to ensure long-lasting protection
Applying a waterproof sealant is a crucial step in protecting your glass block shower wall against moisture damage. The sealant acts as a barrier, preventing water penetration and reducing the risk of mold or mildew growth. Choose a high-quality silicone or urethane sealant specifically designed for glass blocks. Carefully apply the sealant along the joints between the glass blocks, using a caulking gun or a similar tool. Be sure to create a continuous solid seal, avoiding gaps or overlaps. Smooth the sealant with your finger or a caulking tool for a professional finish. Allow the sealant to dry completely before proceeding further.
Consider adding decorative finishing touches, such as colored glass or patterned designs
To elevate the visual appeal of your glass block shower wall, consider adding decorative finishing touches. These can range from incorporating colored glass blocks that complement your bathroom’s color scheme to choosing blocks with unique patterns or designs. Colored glass blocks can create a vibrant and personalized look, while patterned designs can add visual interest and texture to your shower wall. Take your time to explore different options and select the ones that best suit your style and preferences.
Allow the sealant to dry completely before using the shower
Before you can enjoy your newly sealed glass block shower wall, it’s crucial to allow the sealant to dry completely. This ensures that the sealant forms a strong bond and creates an effective barrier against water and moisture. Check the manufacturer’s instructions for the recommended drying time, as it may vary depending on the type of sealant used. Patience is key during this step to avoid compromising the integrity of the sealant. Once dry, you can confidently use your shower, knowing that your glass block wall is protected and ready to withstand daily use.
Maintaining And Cleaning Your Glass Block Shower Wall
Once you have successfully installed a beautiful glass block shower wall, it is important to understand how to properly maintain and clean it. By following these simple steps, you can ensure that your glass block shower wall remains sparkling and in excellent condition for years to come.
Regularly clean the glass blocks with a non-abrasive cleaner and soft cloth
Regular cleaning is crucial in keeping your glass block shower wall looking pristine. To clean the glass blocks, simply mix a non-abrasive cleaner with water according to the manufacturer’s instructions. Using a soft cloth or sponge, gently scrub the surface of the glass blocks, removing any dirt, soap scum, or residues that may have accumulated. Rinse thoroughly with clean water and wipe dry with a lint-free cloth.
Check for any cracks or loose blocks and repair as needed
Periodically inspect your glass block shower wall for any cracks or loose blocks. Cracks or loose blocks can compromise the structural integrity of the wall and lead to water leakage. If you notice any issues, it is important to address them promptly. Contact a professional if necessary for repair or replacement of the damaged blocks.
Prevent soap scum build-up by squeegeeing after each use
Soap scum can quickly build up on the surface of the glass blocks, detracting from their appearance. To prevent this, make it a habit to squeegee the glass blocks after each use. Simply run a squeegee across the glass surface, removing any water and soap residue. This quick step will help maintain the cleanliness and shine of your glass block shower wall.
Keep the shower well-ventilated to minimize mold and mildew growth
Mold and mildew thrive in damp environments, so keeping your glass block shower well-ventilated is essential in preventing their growth. After each shower, make sure to open a window or turn on an exhaust fan to improve air circulation. This will help to minimize moisture and decrease the likelihood of mold and mildew developing on your glass block shower wall.
By following these maintenance and cleaning tips, you can enjoy a beautifully maintained glass block shower wall that adds elegance and sophistication to your bathroom. With regular care and attention, your glass block shower wall will continue to be a focal point of your bathroom for years to come.
Enhancing The Look With Lighting And Accessories
Adding lighting and accessories to your glass block shower wall can take its aesthetic appeal to a whole new level. By strategically incorporating lighting and storage options, you can create a stunning visual effect while also enhancing the functionality of your shower space. In this section, we will explore some ideas on how to enhance the look of your glass block shower wall using lighting and accessories.
Install LED lights behind the glass blocks for a stunning visual effect
One way to elevate the beauty of your glass block shower wall is by installing LED lights behind the blocks. This creates a mesmerizing visual effect as the light shines through the translucent blocks, illuminating the shower space with a soft glow. Not only does this add a touch of elegance, but it also creates a soothing ambiance which can enhance your showering experience.
Add shelves or niches for storage and convenience
Another way to enhance the functionality of your glass block shower wall is by incorporating shelves or niches. These provide ample storage space for your shower essentials such as shampoo, conditioner, and body wash, keeping them within easy reach. By having designated storage areas, you can declutter the shower space and create a more organized and convenient bathing experience. Consider installing glass shelves or niches that complement the design of your glass block shower wall, providing a seamless and cohesive look.
Consider incorporating a custom-designed glass block bench or seating area
To take your glass block shower wall to the next level of luxury, consider adding a custom-designed glass block bench or seating area. This not only creates a spa-like atmosphere but also offers a practical seating option. You can relax and enjoy a rejuvenating shower while seated comfortably. The custom-designed glass block bench or seating area can be integrated seamlessly into the overall design of the shower wall, ensuring a cohesive and stylish look.
Tips And Tricks For A Successful Installation
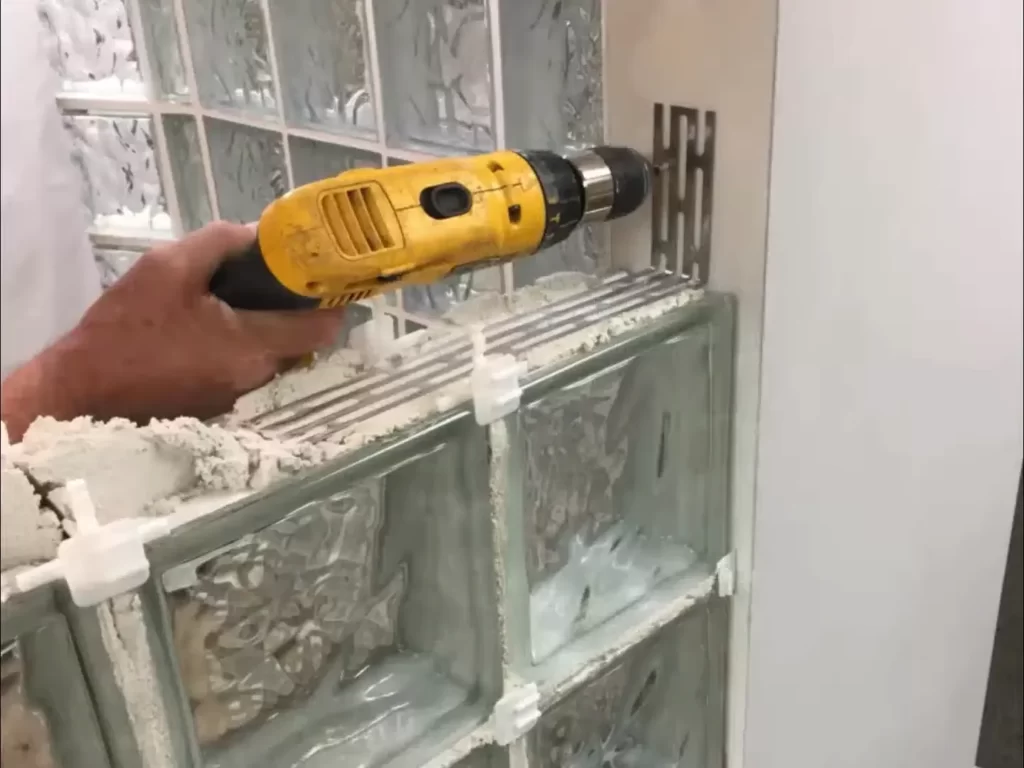
Use a level to ensure your glass blocks are straight and even
One of the most important steps in installing a glass block shower wall is ensuring that the blocks are straight and even. To achieve this, it is crucial to use a level during the installation process. This will help you determine if the blocks are properly aligned and will prevent any future issues with the stability of the wall.
Work in small sections to prevent the mortar from drying too quickly
When laying the glass blocks and applying mortar, it is vital to work in small sections. This prevents the mortar from drying out too quickly, allowing you enough time to properly position each block. Working in small sections also ensures that the mortar remains workable, giving you enough time to make any necessary adjustments before it sets.
Don’t rush the curing process – allow ample time for the mortar to set
While it may be tempting to move on to the next step of the installation process, it is essential not to rush the curing process. Allowing ample time for the mortar to set will ensure the stability and durability of your glass block shower wall. Be patient and follow the manufacturer’s instructions regarding the recommended curing time for the specific mortar you are using.
Seek professional assistance if you’re unsure about any step in the installation process
Installing a glass block shower wall may seem like a straightforward process, but it can be challenging if you are unsure about any step. If you find yourself uncertain or hesitant at any point during the installation process, it is always a good idea to seek professional assistance. Hiring a professional ensures that the installation is done correctly and minimizes the risk of any potential issues or mistakes.
Frequently Asked Questions
How Do You Install Glass Block In Shower Walls?
Install glass block in shower walls by following these steps: 1. Plan the layout and design of the walls. 2. Prepare the surface by removing any existing tiles or materials. 3. Apply mortar to the walls and lay the first row of glass blocks.
4. Continue stacking the blocks, making sure they are level and secure. 5. Finish by adding silicone sealant around the blocks for water resistance.
Is Silicone Or Mortar Better For Glass Block?
Silicone is better for glass block because it offers better flexibility, weather resistance, and a tight seal. Mortar may crack and shrink over time, compromising the stability. Silicone is a durable and long-lasting solution for glass block installations.
Can Glass Block Be Used As A Shower Wall?
Yes, glass block can be used as a shower wall. It provides a stylish and modern look to the bathroom while offering privacy and durability. With its easy maintenance and resistance to water and mold, glass block is a great choice for shower walls.
How To Build A Glass Block Partition Wall?
To build a glass block partition wall, follow these steps: 1. Prepare the necessary tools and materials. 2. Measure and mark the area where you want the wall. 3. Install the metal frame or track system. 4. Arrange the glass blocks within the frame, securing them with mortar or silicone.
5. Finish the wall by adding grout and sealing the joints.
Conclusion
To sum up, installing a glass block shower wall is a fantastic way to add both style and functionality to your bathroom. By following the simple steps outlined in this guide, you can achieve a professional-looking installation on your own.
Remember to measure accurately, prepare the surface properly, and apply the sealant thoroughly. With a touch of patience and careful attention to detail, your new glass block shower wall will become a stunning focal point in your bathroom. Start your project today and enjoy the benefits it brings!