To install frameless shower glass, measure the space accurately and hire a professional installer for a secure and precise installation. The frameless shower glass adds an elegant touch to any bathroom, providing a modern and open look that enhances the overall aesthetic.
This type of shower enclosure has become increasingly popular due to its seamless design, which eliminates the need for bulky frames and creates a sleek and streamlined appearance. When properly installed, frameless shower glass maximizes natural light and makes the bathroom feel more spacious.
If you want to upgrade your bathroom and create a luxurious shower experience, installing frameless shower glass is a great choice. By following the installation process, you can achieve a stunning and functional shower enclosure that will transform your bathroom into a stylish haven.
Understanding The Different Types Of Frameless Shower Glass
When it comes to designing your dream bathroom, one of the key elements to consider is the type of shower glass you want. Frameless shower glass is a popular choice for its sleek and modern look, and it can instantly elevate the overall aesthetic of your bathroom. However, with so many options available, it can be overwhelming to choose the right one for your space. To help you make an informed decision, let’s explore the different types of frameless shower glass:
Clear Glass
Clear glass is the most common and classic choice for frameless shower enclosures. It offers a clean and transparent look, allowing you to showcase your beautiful tile work and fixtures. Clear glass is perfect for bathrooms with sleek and minimalist designs, as it creates a sense of openness and spaciousness. Additionally, it allows natural light to flow through, making the bathroom feel brighter and more inviting.
Frosted Glass
Frosted glass is an excellent option if you value privacy in your shower area. This type of glass is translucent and has a textured surface that diffuses light, giving your bathroom a soft and ambient glow. Frosted glass offers a sense of seclusion without compromising on style. It is ideal for bathrooms that have windows or are in close proximity to other areas of the house.
Textured Glass
If you want to add a touch of uniqueness and visual interest to your shower enclosure, textured glass is the way to go. This type of glass features patterns, designs, or textures that can transform a dull bathroom into a captivating one. Textured glass comes in various styles and finishes, allowing you to customize the look according to your personal preference and overall bathroom theme. Whether you want a subtle ripple effect or a bold geometric design, textured glass can add depth and character to your shower space.
To summarize, the different types of frameless shower glass offer versatility in terms of style, privacy, and aesthetics. Clear glass provides a timeless and modern look, while frosted glass offers a balance between privacy and elegance. Textured glass introduces a unique design element that can elevate the overall ambiance of your bathroom. Consider your personal preferences and the overall style of your bathroom to select the perfect frameless shower glass that suits your needs.

Factors To Consider When Selecting Glass For Your Shower
Factors to Consider When Selecting Glass for Your Shower
When it comes to selecting the glass for your frameless shower, there are a few important factors to consider. These factors will not only impact the aesthetics of your shower, but they will also affect the functionality and safety. In this section, we will explore three key factors to consider when selecting glass for your shower: thickness of the glass, safety considerations, and privacy requirements.
Thickness of the Glass
One of the first factors to consider when selecting glass for your shower is the thickness. The thickness of the glass can vary, typically ranging from 3/8 inch to 1/2 inch. Thicker glass is generally more durable and resistant to breakage, providing an extra level of safety. However, thicker glass can also add weight to the shower doors, which may require additional support. On the other hand, thinner glass can create a sleek and modern look, but it may be more prone to breakage.
When selecting the thickness of the glass, it’s important to consider your unique needs and preferences. If you have children or pets in the house, opting for thicker glass could provide peace of mind and minimize the risk of accidents. Additionally, if your shower has larger panels or requires a longer span, thicker glass may be necessary to ensure structural integrity. It’s always a good idea to consult with a professional to determine the optimal thickness for your specific shower design.
Safety considerations
Safety is paramount when it comes to your shower glass. No one wants to encounter accidents or injuries caused by shattered glass. When selecting glass for your shower, there are a few safety considerations to keep in mind.
Firstly, tempered glass is the go-to choice for shower enclosures. Tempered glass is specially treated to be stronger and safer than regular glass. In the unlikely event of breakage, tempered glass shatters into small, circular pieces instead of sharp shards, reducing the risk of serious injuries.
Secondly, the edges of the glass need to be smooth and polished to prevent accidental cuts. Be sure to choose glass that has been properly finished and is free of any rough or sharp edges.
Lastly, consider the type of hardware you will be using with the glass. High-quality hardware that securely holds the glass panels in place is crucial for safety. Make sure to choose hardware that is specifically designed for frameless shower glass to ensure a secure and reliable installation.
Privacy requirements
Privacy is another important factor to consider when selecting glass for your shower. While frameless glass showers are known for their modern and open look, you may still desire some level of privacy.
One option to enhance privacy is using frosted or textured glass. These types of glass allow light to pass through while obscuring the view, providing both privacy and a touch of elegance to your shower enclosure. Another option is applying a privacy film to the glass panels. Privacy films come in various designs and patterns, allowing you to customize the level of privacy according to your preferences.
It’s essential to assess your privacy requirements and balance them with the overall aesthetic of your bathroom. Whether you value an open and seamless look or prefer a bit more seclusion, there are various glass options available to meet your specific needs.
In conclusion, selecting the right glass for your frameless shower is essential for both functionality and aesthetics. Consider factors such as the thickness of the glass, safety considerations, and privacy requirements to ensure a shower that not only looks stunning but also provides a safe and enjoyable bathing experience for years to come.
Measuring Your Shower Space
Taking Accurate Measurements
Before you start the installation process for frameless shower glass, it is crucial to take accurate measurements of your shower space. These measurements will ensure that the glass panels are the perfect fit, creating a seamless and elegant look for your bathroom. Here are the steps to follow when measuring your shower space:
- Start by measuring the height of your shower opening from the top of the threshold to the top of the wall.
- Measure the width of the opening at the top, middle, and bottom to account for any irregularities in the walls.
- Take note of any sloping or uneven floors in the shower area. These variations will need to be considered when ordering the glass panels.
Accounting for Any Customizations
While taking measurements, it is essential to account for any customizations you plan to include in your frameless shower glass installation. Customizations can range from special hardware finishes to notches for seating areas or shelves. By considering these factors ahead of time, you can ensure that your glass panels are tailored to your specific preferences.
If you are incorporating a seating area or built-in shelves, make sure to measure the desired heights and widths accurately. These measurements will determine the positioning and dimensions of the notches in the glass panels. Additionally, if you have chosen specific hardware finishes, take note of the measurements required for these custom fittings.
Remember, accuracy is key when measuring your shower space and accounting for customizations. Small errors in measurements can lead to ill-fitting glass panels and an unsatisfactory end result. Take your time, use precise measuring tools, and double-check your measurements before placing an order or starting the installation process.
Gathering The Necessary Tools And Supplies
Before you begin the installation process for frameless shower glass, it’s essential to gather all the necessary tools and supplies. Having everything ready beforehand will ensure a smooth and efficient installation, making your bathroom remodel project a breeze. In this section, we will go over the essential tools you’ll need, as well as the additional supplies that will help ensure a successful installation.
Essential tools for installation
- Glass cutter: A glass cutter is a must-have tool for cutting the glass panels to the desired size. Make sure to choose a high-quality cutter with a sharp blade for accurate and clean cuts.
- Level: A level is used to ensure that the shower glass panels are installed perfectly straight. This tool will help you achieve a professional-looking finish.
- Measuring tape: Accurate measurements are crucial when installing frameless shower glass. A measuring tape will help you accurately measure the dimensions of the shower area to ensure a precise fit.
- Electric drill: An electric drill with the appropriate drill bits is needed to create the necessary holes for mounting hardware and other fixtures.
- Caulking gun: A caulking gun is used to apply adhesive or silicone sealant to secure the glass panels and prevent water leakage.
- Screwdriver: A screwdriver is needed for tightening screws and bolts during the installation process.
Additional supplies needed for a smooth installation process
- Mounting hardware: Depending on the design and size of your shower glass panels, you will need mounting hardware such as brackets, clamps, and hinges. Ensure you have the appropriate hardware for the specific type of glass and the desired installation method.
- Waterproof sealant: To ensure water doesn’t seep through the gaps between the glass panels and the walls or floor, it’s crucial to use a high-quality waterproof sealant or silicone caulk. This will provide added protection against water damage.
- Glass cleaner and microfiber cloth: Having a glass cleaner and a microfiber cloth on hand will allow you to clean the glass panels thoroughly before installation, ensuring a pristine and crystal-clear finish.
- Protective gloves and goggles: Safety should always be a priority when working with glass and power tools. Wearing protective gloves and goggles will help prevent any potential injuries.
- Plastic sheeting or drop cloth: To protect your bathroom floor and walls from any accidental damage or debris during the installation process, it’s a good idea to lay down plastic sheeting or a drop cloth.
- Installation manual or instructions: Last but not least, be sure to have the installation manual or instructions provided by the manufacturer. Following the specific guidelines for your shower glass will ensure a successful and worry-free installation.
By gathering all the essential tools and supplies, you’ll be well-prepared to tackle the installation of frameless shower glass. Taking the time to gather everything you need in advance will save you time, frustration, and potential interruptions during the installation process. Once you have everything ready, you can move on to the next steps of installing your beautiful and modern frameless shower glass.
Pre-Installation Preparations
In this section, we will cover the pre-installation preparations necessary for a successful frameless shower glass installation. Proper cleaning and prepping of the shower area, as well as the removal of any existing shower doors or enclosures, are essential steps that should not be overlooked. By following these steps, you will ensure a smooth and efficient installation process, resulting in a beautiful and functional frameless shower glass.
Cleaning and Prepping the Shower Area
Before installing frameless shower glass, it is important to thoroughly clean and prep the shower area. This ensures a clean surface for the glass panels to adhere to and leaves you with a finished product that looks flawless. Here are some steps you can follow:
- Start by removing any dirt, grime, or soap scum from the shower walls, floor, and corners. Use a mild, non-abrasive cleaner and a soft cloth to gently scrub the surfaces.
- Rinse the walls, floor, and corners thoroughly to remove any residue from the cleaner.
- Inspect the shower area for any cracks, leaks, or damages. It is crucial to repair any issues before proceeding with the installation.
- Once the shower area is clean and repaired, dry it completely using a clean towel or cloth. Ensure there is no moisture left as it could affect the adhesion of the frameless shower glass.
- Lastly, make sure the shower area is well-ventilated to prevent any mold or mildew growth in the future. Proper ventilation helps in maintaining the longevity of the frameless shower glass.
Removing Any Existing Shower Doors or Enclosures
If you have any existing shower doors or enclosures in place, they will need to be removed before installing the frameless shower glass. This step ensures a clean slate for the installation and prevents any interference with the new glass panels. Here’s how you can remove the existing doors or enclosures:
- Carefully examine the existing doors or enclosures to determine the type of attachment they have. Different types of enclosures may require different removal methods.
- If the doors or enclosures are attached with screws, remove them using a screwdriver.
- For doors or enclosures attached with adhesive, gently pry them loose using a putty knife or any suitable tool. Be cautious not to damage the surrounding shower tiles or walls.
- Once the doors or enclosures are removed, clean the area to remove any adhesive residue. Use a suitable adhesive remover if necessary.
- Inspect the shower area for any damages caused during the removal process. Repair any issues before proceeding with the installation of the frameless shower glass.
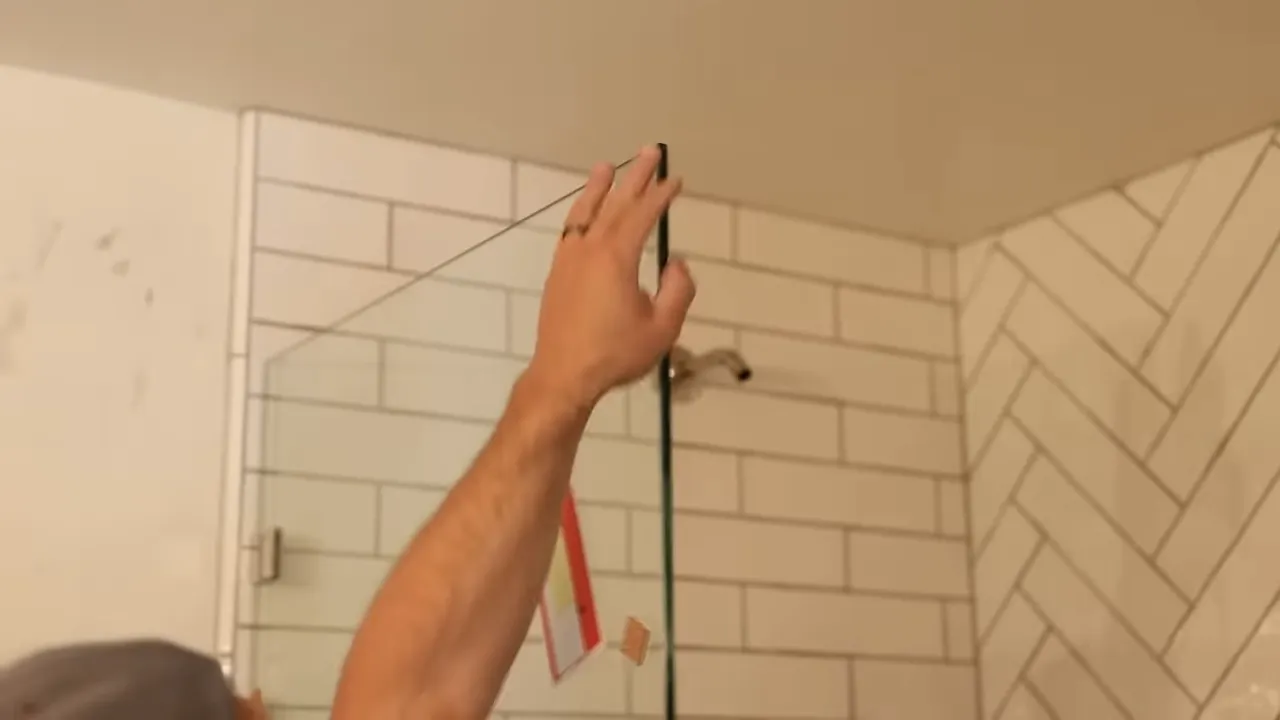
Installing The Glass Panels
When it comes to creating a sleek and modern look in your bathroom, installing frameless shower glass is the way to go. Not only does it add a touch of elegance, but it also allows the natural light to flow through, making your bathroom feel more spacious. In this guide, we will walk you through the process of installing the glass panels for your frameless shower, ensuring a seamless and watertight finish.
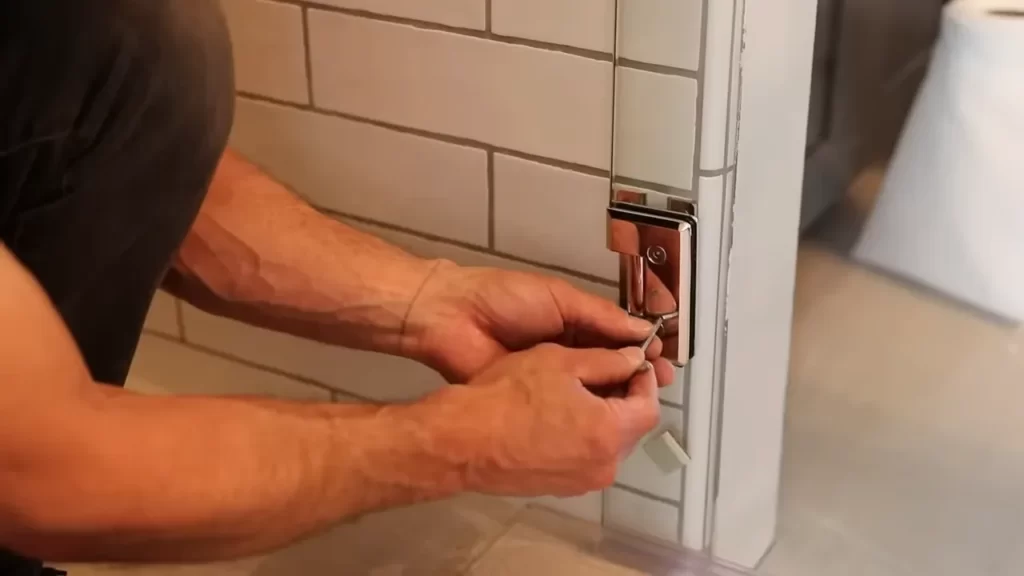
Attaching the hinges and brackets
Before installing the glass panels, it is important to first attach the hinges and brackets to the walls. These hardware components will hold the glass securely in place and allow for smooth opening and closing of the shower door. Here’s a step-by-step guide to get you started:
- Measure and mark the desired position of the hinges on the wall. Ensure that the hinges are plumb and level.
- Using a drill, create pilot holes for the screws that will secure the hinges to the wall.
- Attach the hinges to the wall using the screws provided, ensuring they are tightly secured.
- Repeat the same process for the brackets, making sure they are aligned with the hinges for a proper fit.
- Double-check the alignment of the hinges and brackets before proceeding.
Sealing the gaps to ensure a watertight installation
To ensure your frameless shower glass installation is watertight, it is crucial to seal any gaps between the glass and the surrounding surfaces. This will prevent water from leaking out and causing potential damage to your bathroom. Follow these steps to seal the gaps effectively:
- Apply a clear silicone caulk along the edges of the glass where it meets the walls and floor. Be generous with the caulk to create a strong seal.
- Smooth out the caulk using a caulk smoothing tool or your finger, ensuring there are no gaps or air bubbles.
- Allow the caulk to dry and cure according to the manufacturer’s instructions before using the shower.
By following these steps and taking the time to properly install and seal your frameless shower glass, you can enjoy a beautiful and functional addition to your bathroom. Remember to handle the glass panels with care and seek professional assistance if needed. With a little patience and attention to detail, you’ll have a stunning shower that adds value to your home and elevates your daily routine.
Securing And Leveling The Glass
Securing and leveling the glass is an essential step in the installation process of frameless shower glass. This ensures stability and safety, preventing any accidents or mishaps. There are two key aspects to consider when securing and leveling the glass panels: using shims to level the glass panels and anchoring the glass securely. Let’s explore each of these in detail:
Using Shims to Level the Glass Panels
Leveling the glass panels is crucial for achieving a seamless and professional finish. Shims come to the rescue when it comes to adjusting the glass panels to the desired position. Shims are thin wedges or strips, typically made of plastic or wood, which are placed between the glass and the wall or floor to ensure a level installation. The following steps outline the process of using shims:
- Carefully measure the gap between the glass panel and the wall or floor.
- Cut the shims to the appropriate size using a saw or utility knife.
- Insert the shims into the gap one by one, gradually leveling the glass panel as you go.
- Continue adjusting and adding shims until the glass panel is perfectly level.
Using shims to level the glass panels ensures that the weight is distributed evenly and prevents any undue stress on the glass, enhancing its durability in the long run.
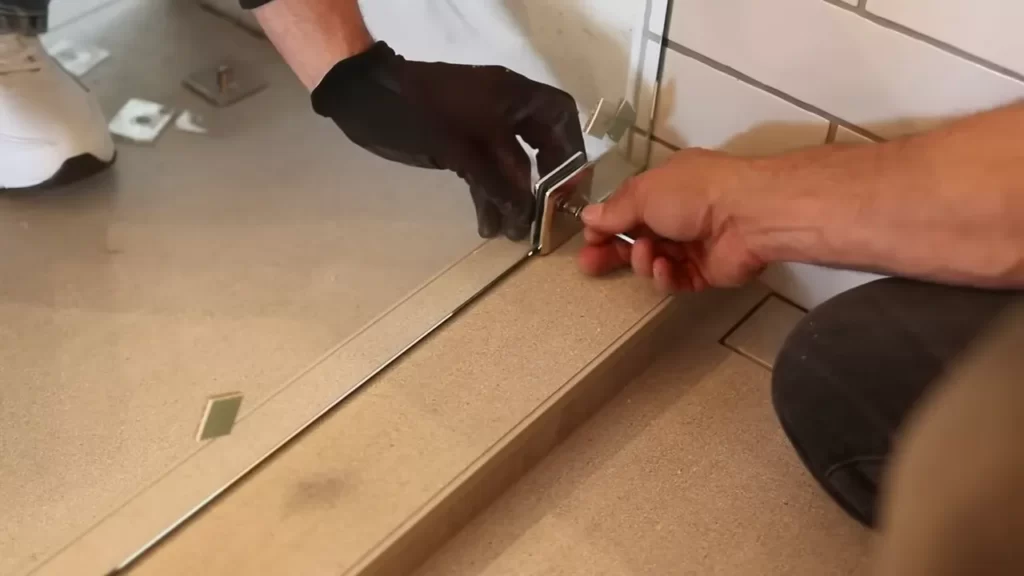
Anchoring the Glass Securely to Prevent Accidents
Securing the glass panels to the walls or floor is essential to prevent accidents or dislodging of the glass. Anchoring the glass provides stability and peace of mind. Here are some key considerations when anchoring the glass:
- Use high-quality anchors or brackets specifically designed for frameless shower glass.
- Attach the anchors securely to the wall or floor using appropriate screws or bolts.
- Ensure that the anchors are properly aligned to provide maximum support and stability.
- Following the manufacturer’s instructions, carefully attach the glass panels to the anchors.
- Double-check the tightness of the anchors to ensure a secure and stable installation.
By anchoring the glass securely, you not only prevent accidents but also enhance the overall aesthetics of the frameless shower glass, giving it a sleek and sophisticated look.
Applying The Finishing Touches
When it comes to installing frameless shower glass, applying the finishing touches is crucial to ensuring a professional and leak-free installation. In this section, we will discuss two important steps for achieving a pristine and polished look – adding seals and sweeps to prevent leaks, and cleaning and polishing the glass for a flawless finish.
Adding Seals and Sweeps to Prevent Leaks
To prevent any water leakage from your frameless shower glass, it is important to add seals and sweeps around the edges of the glass panels and the door. These seals help create a watertight barrier and ensure that your shower remains free from any unwanted leaks.
Here are a few simple steps to follow when adding seals and sweeps to your frameless shower glass:
- Clean the edges of the glass panels and the door using a mild soap solution and a cloth. Make sure to remove any dirt or debris that could affect the adhesion of the seals and sweeps.
- Measure the length of the edges that require sealing and cut the seals to fit accordingly. It’s important to measure twice before making any cuts to ensure a snug fit.
- Apply a thin bead of clear silicone adhesive along the edge of the glass panel or the door where the seal will be attached.
- Press the seal firmly onto the adhesive, ensuring it is aligned properly along the edge.
- Repeat the same process for the remaining edges that require sealing.
- Allow the adhesive to dry completely as per the manufacturer’s instructions before using the shower.
Cleaning and Polishing the Glass for a Pristine Finish
After successfully installing the seals and sweeps, it’s time to focus on cleaning and polishing the frameless shower glass for a crystal-clear and pristine finish. This step not only enhances the appearance of your shower but also helps maintain the glass’s longevity and durability.
Here are some tips to clean and polish your frameless shower glass effectively:
- Start by rinsing the glass with warm water to remove any loose dirt or soap residue.
- Prepare a mixture of equal parts water and white vinegar in a spray bottle.
- Spray the solution onto the glass and let it sit for a few minutes to break down any stubborn stains.
- Gently scrub the glass using a non-abrasive sponge or cloth. Avoid using harsh chemicals or abrasive materials that could scratch the glass surface.
- Rinse thoroughly with clean water to remove any residue.
- Buff the glass dry with a microfiber cloth to prevent water spots and achieve a streak-free finish.
- For an extra shine, you can use a glass cleaner specifically designed for frameless shower glass. Follow the instructions on the cleaner’s packaging for the best results.
By following these steps, you can ensure that your frameless shower glass is not only visually appealing but also properly sealed and maintained. Adding the appropriate seals and sweeps will prevent any leaks, while regular cleaning and polishing will keep the glass looking pristine for years to come.
Cleaning And Preventing Water Stains
Frameless shower glass not only adds a touch of elegance to your bathroom, but it also requires proper care and maintenance to keep it looking its best. One common issue that many homeowners experience is water stains on their shower glass. These stains can be unsightly and challenging to remove if not dealt with promptly. In this section, we will explore recommended cleaning products and techniques as well as a regular maintenance routine to ensure the longevity of your frameless shower glass.
Recommended cleaning products and techniques
When it comes to cleaning frameless shower glass, it is essential to use the right products and techniques to prevent any damage. Here are some recommendations:
| Product | Description |
|---|---|
| White vinegar | A natural and effective cleaner that helps remove water stains and soap scum. |
| Baking soda | A gentle abrasive that can be mixed with water or vinegar to create a paste for more stubborn stains. |
| Rubber squeegee | An essential tool for removing excess water and preventing water spots after each shower. |
To clean your frameless shower glass, start by mixing equal parts of white vinegar and water in a spray bottle. Spray the solution onto the glass, focusing on areas with water stains. Let it sit for a few minutes, then gently scrub the glass using a microfiber cloth or sponge. For tougher stains, create a paste using baking soda and water or vinegar and apply it to the affected areas. Scrub with a non-abrasive cloth or sponge, then rinse thoroughly. Finish by using a rubber squeegee to remove any remaining water and prevent future water spots.
Regular maintenance routine to ensure longevity
Preventing water stains and maintaining the pristine condition of your frameless shower glass goes beyond regular cleaning. Incorporating a simple maintenance routine into your bathroom cleaning schedule can greatly extend its longevity. Here are some tips:
- After each shower, use a rubber squeegee to remove excess water from the glass surfaces.
- Keep the shower area well-ventilated to prevent excessive moisture buildup.
- Periodically apply a clear glass protective coating to create a barrier against water stains and soap scum.
- Avoid using abrasive or harsh cleaners that can damage the glass surface.
- Regularly check and replace any worn-out or damaged seals to prevent water leakage.
By following these maintenance practices, you can enjoy sparkling clean and clear frameless shower glass for years to come. Remember, prevention is key when it comes to water stains, so make it a part of your regular cleaning routine.
Dealing With Minor Repairs And Damage
While installing frameless shower glass can elevate the look of your bathroom and create a luxurious bathing experience, it is not immune to minor repairs and damage. From small chips or scratches to loose hinges or brackets, addressing these issues promptly can help maintain the beauty and functionality of your frameless shower glass. In this section, we will guide you on how to handle these common problems effectively.
Repairing Small Chips or Scratches
If you notice small chips or scratches on your frameless shower glass, don’t panic! These can be easily repaired with a few simple steps.
- Start by cleaning the damaged area with a gentle glass cleaner and a soft, lint-free cloth. This will remove any dirt or debris that may interfere with the repair process.
- Next, apply a small amount of glass repair resin to the affected area. Ensure that you use a product specifically designed for glass repairs.
- Using a plastic putty knife or a similar tool, gently spread the resin over the chip or scratch, filling it completely. Make sure to follow the manufacturer’s instructions for proper application.
- Allow the resin to dry completely. This usually takes a few hours, but it’s best to refer to the product instructions for an accurate drying time.
- Once the resin is fully dry, use a glass polishing compound and a clean cloth to buff the repaired area. This will help restore the glass’s smooth and glossy finish.
In just a few easy steps, you can effectively repair small chips or scratches on your frameless shower glass, allowing it to regain its flawless appearance.
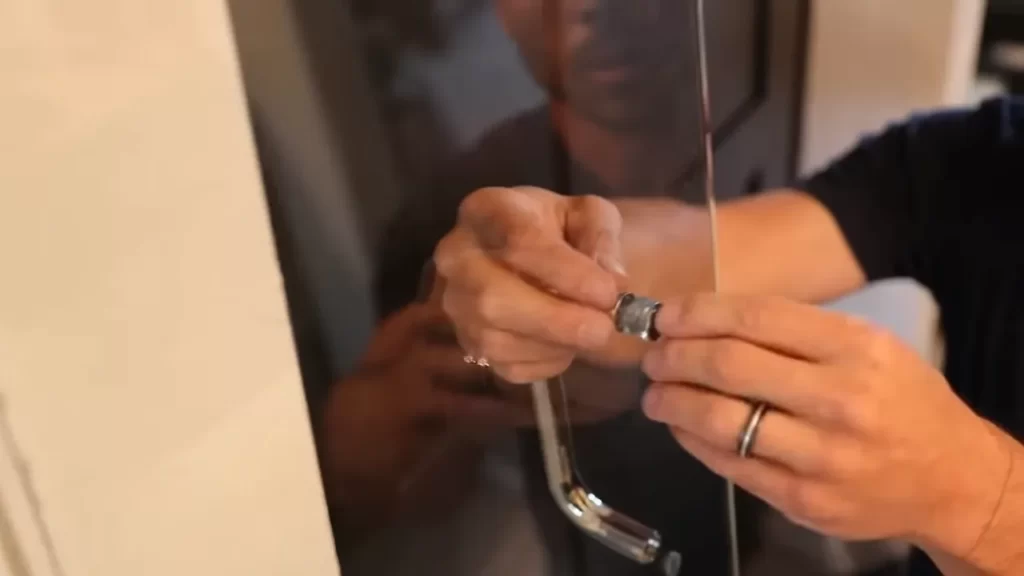
Addressing Issues with Loose Hinges or Brackets
If you notice that the hinges or brackets of your frameless shower glass have become loose, it is important to address this issue promptly to ensure the stability and safety of your shower enclosure.
To tighten loose hinges or brackets:
- Inspect each hinge or bracket carefully to determine the cause of the looseness. It could be due to normal wear and tear, improper installation, or the need for readjustment.
- Tighten any visible screws using an appropriate screwdriver. Ensure that they are properly secured, but be cautious not to overtighten, as this may cause damage.
- If the hinges or brackets still remain loose after tightening the screws, you may need to readjust them. Consult the manufacturer’s instructions or seek professional assistance to ensure proper realignment.
By promptly addressing issues with loose hinges or brackets, you can maintain the structural integrity of your frameless shower glass and prevent any potential safety hazards.
Preventing Mold And Mildew
Mold and mildew can be a common problem in bathrooms, especially in damp and humid environments like the shower area. Not only can they cause an unpleasant smell, but they can also lead to health issues if not properly addressed. Fortunately, there are steps you can take during the installation of frameless shower glass to prevent mold and mildew growth. In this section, we will discuss two crucial factors that play a significant role in preventing mold and mildew in your shower: proper ventilation and airflow, and the use of mold-resistant materials.
Proper Ventilation and Airflow in the Shower Area
Proper ventilation and airflow are essential for keeping your shower area mold and mildew-free. When moisture accumulates in an enclosed space, such as a bathroom, it creates an ideal environment for mold and mildew to thrive. To minimize the chances of mold and mildew growth, consider the following:
- Install an exhaust fan: An exhaust fan helps to remove excess moisture from the air, allowing it to circulate outside rather than settling in your shower area. This not only helps prevent mold and mildew but also reduces the chances of paint damage and the formation of condensation on your mirror and other bathroom fixtures.
- Keep windows open: If your bathroom has a window, try to keep it open while taking a shower or shortly afterward. Opening windows allows fresh air to circulate and helps to reduce humidity levels in the bathroom.
- Use a shower curtain: If you prefer using a shower curtain instead of a glass door, make sure it is made from a breathable material. This will allow air to flow freely and prevent moisture from becoming trapped behind the curtain.
Using Mold-Resistant Materials for a Healthier Bathroom Environment
Another important step in preventing mold and mildew growth in your shower area is using mold-resistant materials during the frameless shower glass installation process. Here are some options to consider:
- Choose mold-resistant grout: When tiling your shower walls or floor, opt for a grout that is specifically formulated to resist mold and mildew. This type of grout inhibits the growth of mold and makes it easier to keep the shower area clean.
- Apply a mold-resistant sealant: After installing the frameless shower glass, apply a mold-resistant sealant to the edges and joints. This sealant creates a barrier that helps to prevent moisture from seeping into the gaps and causing mold and mildew growth.
- Use mold-resistant paint: If you plan to paint the walls or ceiling in your bathroom, consider using a mold-resistant paint. This type of paint contains additives that inhibit the growth of mold and mildew, making it an excellent choice for moisture-prone areas like showers.
Taking these preventive measures during the installation of frameless shower glass can help you maintain a cleaner and healthier bathroom environment. By promoting proper ventilation and using mold-resistant materials, you can significantly reduce the chances of mold and mildew growth in your shower area, ensuring a refreshing and enjoyable experience every time you step in.
Frequently Asked Questions
How Hard Is It To Install A Frameless Shower Door?
Installing a frameless shower door is not overly difficult. With basic tools and some DIY experience, you can complete the installation in a few hours. Just follow the manufacturer’s instructions, ensure the area is properly measured, and be mindful of any leveling or sealing requirements.
Enjoy your sleek, modern shower!
How Do You Secure A Frameless Shower Door?
To secure a frameless shower door, follow these 5 guidelines: 1. Use high-quality hardware for proper installation. 2. Ensure the door is aligned correctly with the shower opening. 3. Apply a sealant to prevent water leakage. 4. Install support brackets or headers for stability.
5. Regularly check and tighten any loose screws or fittings.
How Do You Attach Shower Glass To The Wall?
To attach shower glass to the wall, follow these steps: 1. Measure and mark the desired placement on the wall. 2. Drill holes into the wall and insert anchors. 3. Apply silicone sealant to the edges of the glass panels.
4. Carefully position the glass against the wall and secure it with screws. 5. Clean any excess sealant and allow it to dry for 24 hours.
What Holds A Frameless Shower Screen?
The frameless shower screen is held in place by strong hinges and brackets securely attached to the wall and floor.
Conclusion
Installing frameless shower glass can be a challenging task, but with the right steps and tools, it becomes manageable. By following the step-by-step guide provided in this blog post, you can ensure a successful installation. Remember to measure accurately, use proper safety precautions, and enlist the help of a professional if needed.
With frameless shower glass, you’ll enjoy a modern and elegant addition to your bathroom that enhances the overall aesthetics and functionality. Don’t hesitate to embark on this DIY project and transform your shower space today!