To install frameless glass shower doors, measure the area for proper fit, purchase the necessary hardware and tools, and follow the manufacturer’s instructions precisely. Are you considering upgrading your shower with a modern and sleek look?
Frameless glass shower doors can be a great addition to your bathroom, providing a luxurious and spacious feel. Installing these doors may seem like a challenging task, but with the right tools and measurements, you can easily accomplish it. We will guide you through the step-by-step process of installing frameless glass shower doors, ensuring a seamless and elegant finish.
So, let’s get started on transforming your bathroom into a stylish and comfortable space with beautiful frameless glass shower doors.
Step 1: Measure Your Shower Space Accurately
When it comes to installing frameless glass shower doors, accurate measurements are crucial for a seamless fit. Before you begin the installation process, take the time to measure your shower space correctly. This will ensure that your frameless glass shower door fits perfectly, enhancing the overall aesthetics of your bathroom.
Determine the dimensions of your shower area
Start by determining the dimensions of your shower area. Measure the height and width of the opening to obtain accurate measurements. When measuring the height, use a tape measure to determine the distance from the bottom of the shower curb or base to the top of the opening. Be sure to measure at multiple points to account for any unevenness.
Next, measure the width of the opening by measuring from wall to wall at the top, middle, and bottom. Take note of the smallest measurement as this will be the width of your frameless glass shower door.
Use a table to track your measurements
Keeping track of your measurements is essential to ensure accuracy throughout the installation process. Consider using a table to record your measurements, making it easier to refer back to them during installation.
| Measurement | Height (in inches) | Width (in inches) |
|---|---|---|
| Top | 72 | 34 |
| Middle | 71.5 | 34.5 |
| Bottom | 72.2 | 34 |
By keeping your measurements organized in a table like the one above, you can quickly refer to the correct dimensions as needed.
Ensure your H3 headings adhere to HTML syntax
When structuring your blog post, it’s important to adhere to HTML syntax for your subheadings. Using H3 headings, such as the ones seen above, not only organizes your content but also improves your search engine optimization (SEO) by signaling to search engine crawlers how the information is structured.
Remember to use the <h3> tags around your subheadings to signify their importance and hierarchy within the content. This will ensure that your blog post is properly coded and can be easily understood by both humans and search engine algorithms.
Step 2: Select The Right Glass Shower Door
Choosing the perfect glass shower door can greatly enhance the overall look and functionality of your bathroom. With so many options available, it’s important to consider various factors before making a decision. In this step, we will explore the different aspects you need to keep in mind to select the right glass shower door for your space.
Consider the type of glass (clear, frosted, patterned)
The type of glass you choose for your frameless glass shower door can have a significant impact on the aesthetics and privacy of your bathroom. Let’s take a closer look at the three main options:
- Clear glass: Ideal for those who want to showcase intricate tile work and create a spacious feel in their shower. This option allows natural light to pass through, making your bathroom appear brighter and more open.
- Frosted glass: If privacy is a concern or you prefer a more subtle look, frosted glass is a great choice. It offers a blurred appearance that obscures the view while still allowing light to filter through.
- Patterned glass: For those looking to add a touch of personality and uniqueness to their bathroom, patterned glass is the way to go. This type of glass is available in various designs and textures, allowing you to make a bold statement.
Choose between hinged, sliding, or pivot door
Next, you’ll need to consider the type of door that best suits your needs and the available space in your bathroom. Here are the three main options:
- Hinged door: This type of door swings open and closed on hinges, much like a traditional door. Hinged doors offer a wide opening for easy access and are often preferred for larger shower enclosures.
- Sliding door: If space is a concern, sliding doors are an excellent choice. They operate on a track system, allowing for smooth and effortless opening and closing without taking up valuable floor space.
- Pivot door: Pivot doors rotate on a pivot to open and close. They provide a sleek and modern look and are well-suited for smaller shower enclosures where space-saving is essential.
Ensure the door has sufficient support and hardware
Lastly, it’s crucial to ensure that your chosen glass shower door has the necessary support and hardware to withstand daily use. Here are a few key elements to consider:
- Support: Make sure your shower enclosure can support the weight of the glass door. Consult with a professional if you have any doubts about the structural integrity of your bathroom walls.
- Hardware: Pay attention to the quality and durability of the hardware components such as hinges, handles, and seals. Opt for premium quality materials that guarantee long-lasting performance and functionality.
By carefully considering the type of glass, the door style, and the necessary support and hardware, you can choose a frameless glass shower door that not only matches your aesthetic preferences but also provides durability and functionality for years to come. In the next step, we will discuss the installation process itself.
Step 3: Prepare The Shower Area For Installation
Before you can install frameless glass shower doors, it is crucial to properly prepare the shower area. This step ensures a smooth and successful installation process. In this section, we will cover three important aspects of preparing the shower area: cleaning and removing any existing shower doors or panels, repairing or replacing any damaged tiles or surfaces, and ensuring the walls are level and free of any obstructions.
Clean and remove any existing shower doors or panels
Before beginning the installation, it is essential to remove any existing shower doors or panels. This step allows you to start with a clean slate and ensure that the frameless glass shower doors fit perfectly.
Here are the steps to follow when removing existing shower doors or panels:
- Carefully inspect the doors or panels for any visible screws or fasteners.
- Use a screwdriver or appropriate tool to remove the screws or fasteners.
- Gently lift the doors or panels off the tracks or hinges.
- Set aside the removed doors or panels in a safe area to avoid any damage.
- Thoroughly clean the shower area to remove any dirt, grime, or residue left behind.
Repair or replace any damaged tiles or surfaces
Ensuring that the tiles and surfaces in your shower area are in good condition is crucial for the installation of frameless glass shower doors. Any damaged tiles or surfaces can compromise the integrity of the installation and lead to future problems.
Follow these steps to repair or replace damaged tiles or surfaces:
- Inspect the shower area for any cracked, chipped, or loose tiles.
- If you find any damaged tiles, use a chisel or similar tool to carefully remove them.
- Clean the area where the damaged tiles were removed, ensuring it is free from debris.
- Apply adhesive or mortar to the cleaned area.
- Place the new tiles in the adhesive or mortar, ensuring they are properly aligned.
- Allow the adhesive or mortar to dry according to the manufacturer’s instructions.
- Once the tiles are securely in place, clean the area to remove any excess adhesive or mortar.
Ensure the walls are level and free of any obstructions
Having level walls is crucial for the proper installation of frameless glass shower doors. It ensures that the doors will hang correctly and function smoothly. Additionally, the walls should be free of any obstructions to ensure there is enough space for the door to swing and close without any issues.
Take the following steps to ensure the walls are level and free of any obstructions:
- Use a level tool to check the vertical and horizontal alignment of the walls.
- If any areas are not level, use a shim or similar material to adjust and level the wall.
- Check for any protruding nails, screws, or other obstructions on the walls.
- If you find any obstructions, remove or adjust them to create a smooth surface.
By thoroughly cleaning the shower area, repairing or replacing any damaged tiles or surfaces, and ensuring the walls are level and free of obstructions, you are now ready to proceed with the installation of your frameless glass shower doors.
Step 4: Install The Shower Door Hardware
Now that you have successfully prepared the shower area, leveled the shower curb, and installed the shower door panels, it’s time to move on to the next step – installing the shower door hardware. This includes marking the locations for drilling holes, installing the hinges or brackets, and mounting the handle and towel bar.
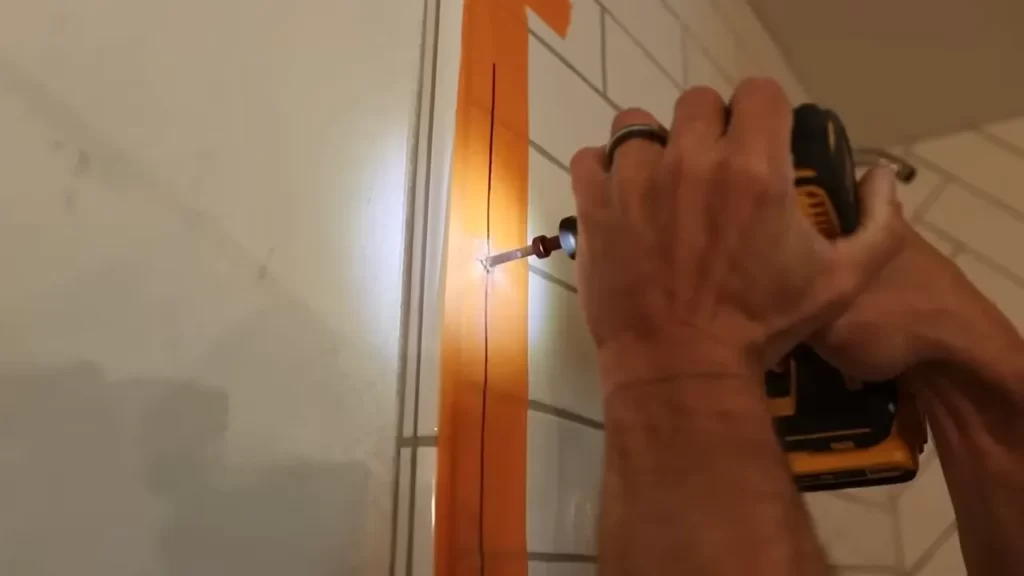
Mark the locations for drilling holes
The first task in installing shower door hardware is to mark the locations where you will drill the holes. This step is crucial to ensure that the hardware is properly aligned and securely attached to the shower door and wall. Here’s how you can do it:
- Place the hardware on the shower door at the desired height and position. Use a pencil or marker to mark the locations of the screw holes on the door.
- If you are installing a towel bar or handle, measure and mark the center point of the door where the hardware will be positioned.
- Wipe off any excess marks or dust from the door to prepare it for drilling.
Install the hinges or brackets
Once you have marked the locations for drilling, it’s time to install the hinges or brackets. These components play a crucial role in holding the shower door in place and allowing it to swing open and closed smoothly. Follow these steps to install them:
- Place the hinge or bracket over the marked screw holes on the shower door. Make sure the hardware is level and aligns with the marks.
- Using a screwdriver or drill, carefully attach the hinge or bracket to the door by inserting the screws through the holes and tightening them securely.
- Repeat the process for each hinge or bracket, ensuring they are evenly spaced and aligned.
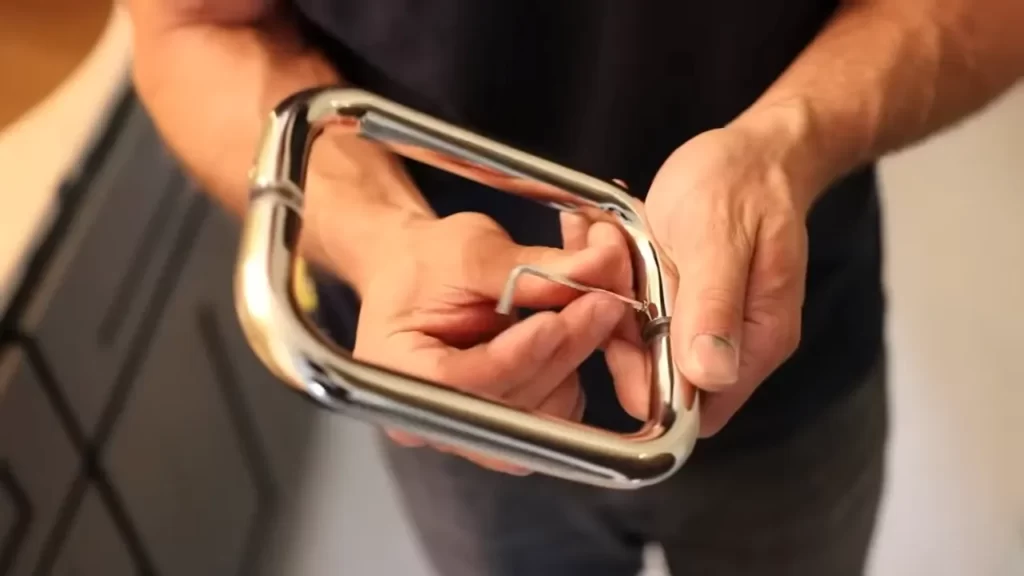
Mount the handle and towel bar
After installing the hinges or brackets, it’s time to mount the handle and towel bar. These components not only add functionality to your shower door but also serve as stylish accents. Here’s how you can mount them:
- Align the handle or towel bar with the marked center point on the shower door. Ensure it is level and centered.
- Using a screwdriver or drill, attach the handle or towel bar to the door by inserting the screws through the holes and tightening them securely.
- Check the handle or towel bar for any wobbling or loose screws. If needed, tighten them further to ensure a sturdy installation.
By following these steps, you can successfully install the shower door hardware. Remember to take your time and double-check your measurements and alignments to achieve a flawless installation. Once the hardware is in place, you’re one step closer to enjoying your beautiful frameless glass shower doors!
Step 5: Hang The Glass Panel Or Door
Now that you’ve prepared the shower opening, installed the hinges or brackets, and ensured the area is waterproofed, it’s time to hang the glass panel or door. This step requires precision and care to ensure a perfect fit and a secure installation. Follow these steps to hang your frameless glass shower door or panel:
Have Someone Assist You in Lifting and Positioning the Glass Panel
Frameless glass shower doors and panels can be heavy and delicate, making it important to have an extra set of hands for assistance. Enlist the help of a family member or friend to help lift and position the glass panel securely.
Secure the Panel Using the Hinges or Brackets
Place the glass panel onto the hinges or brackets that you previously installed. Carefully align the holes on the glass with the corresponding holes on the hardware. Once aligned, insert the screws provided with the hardware to secure the panel in place. Ensure that the screws are tightened firmly but not excessively, as overtightening may damage the glass.
Check for Proper Alignment and Adjust if Necessary
After securing the glass panel, check for proper alignment to ensure that it sits level and square. Use a level to verify that the panel is not slanted in any direction. If any adjustments are needed, loosen the screws slightly and make the necessary corrections. Once the panel is properly aligned, re-tighten the screws to secure it firmly in place.
It’s essential to take the time to ensure that each H3 heading adheres to HTML syntax:
- <h2>Step 5: Hang the Glass Panel or Door</h2>
- <h3>Have Someone Assist You in Lifting and Positioning the Glass Panel</h3>
- <h3>Secure the Panel Using the Hinges or Brackets</h3>
- <h3>Check for Proper Alignment and Adjust if Necessary</h3>
By following these steps, you will successfully hang your frameless glass shower door or panel, completing the installation process. Remember to always handle the glass with caution and seek professional assistance if needed. With your new frameless glass shower door, you can elevate the aesthetic appeal of your bathroom while enjoying a sleek and open bathing experience.
Step 6: Seal The Edges And Gaps
Now that you have successfully installed your beautiful frameless glass shower doors, it’s time to seal the edges and gaps to ensure a watertight enclosure. This step is crucial as it helps prevent water leakage and maintain the overall integrity of your shower door installation. In this section, we will walk you through the process of sealing the edges and gaps using silicone sealant and a caulking gun for precise application.
Apply silicone sealant along the edges of the glass and walls
Take a tube of high-quality silicone sealant that is specifically designed for glass surfaces. Cut the nozzle of the tube diagonally to create a small opening. This will allow for controlled application of the sealant along the edges of the glass and where it meets the walls.
To apply the sealant, squeeze the trigger of the caulking gun gently to release a steady flow of sealant. Starting from one corner, move the gun along the edge of the glass, applying a thin and even bead of sealant along the entire length. Repeat this step for the remaining edges of the glass.
Use a caulking gun for precise application
A caulking gun is a handy tool that allows for precise and controlled application of sealant. Hold the gun at a 45-degree angle and position the nozzle against the edge where you want to apply the sealant. Gently squeeze the trigger to release the sealant and move the gun smoothly along the edge in a continuous motion. This will ensure an even application and a professional-looking finish.
Smooth out the sealant for a clean and finished look
Once you have applied the sealant along the edges, it’s important to smooth it out for a clean and finished look. Dip your finger in a small bowl of water and run it along the bead of sealant, pressing gently to create a smooth surface. Wipe off any excess sealant using a damp cloth. This step will help blend the sealant seamlessly with the glass and walls, giving your shower enclosure a polished appearance.
By following these steps to seal the edges and gaps of your frameless glass shower doors, you are ensuring a watertight and visually appealing installation. Remember to allow the sealant to cure according to the manufacturer’s instructions before using your shower. This will guarantee long-lasting performance and an enjoyable showering experience.
Step 7: Test The Functionality And Make Adjustments
Once you have successfully installed your frameless glass shower doors, it is important to test their functionality and make any necessary adjustments to ensure a smooth and leak-free showering experience. This last step is crucial to ensure that your new shower doors perform as intended, providing you with both style and functionality in your bathroom.
Open and Close the Shower Door to Test its Smoothness
After the installation, the first thing you should do is test the smoothness of the shower door. Open and close it several times to assess its movement. Pay attention to any sticking points or resistance, as these may indicate an alignment issue or a need to lubricate the hinges. A smooth and effortless operation is essential for a superior shower experience.
Check for any Gaps or Leaks
Next, carefully inspect the edges and corners of the shower door to check for any gaps or leaks. Run your hand along the edges to feel for any air or water leaks. These can compromise the efficiency of your shower and potentially cause water damage to your bathroom floors. Ensure that there is a snug fit, with no visible gaps, between the glass door and the surrounding walls or other adjacent glass panels.
Make any Necessary Adjustments to Ensure Proper Functionality
If you detect any issues during the testing phase, it’s important to make the necessary adjustments promptly. Depending on the nature of the problem, you may need to realign the hinges, adjust the seals, or lubricate the moving parts. Take note of any areas that require improvement and refer to the manufacturer’s instructions or consult a professional if needed.
Remember, the goal is to have a perfectly functioning frameless glass shower door that not only enhances the aesthetic appeal of your bathroom but also provides a seamless and water-tight enclosure for your showers. By thoroughly testing the functionality and making any necessary adjustments, you can ensure that your new shower doors exceed your expectations.
Step 8: Clean And Maintain Your Frameless Glass Shower Door
Once you have successfully installed your frameless glass shower door, it is important to prioritize regular cleaning and maintenance to keep it looking pristine and to ensure its longevity. By following these simple steps, you can keep your frameless glass shower door in top condition.
Regularly clean the glass with a non-abrasive cleaner
To maintain the clarity and shine of your frameless glass shower door, it is crucial to clean it regularly using a non-abrasive cleaner specially formulated for glass. Avoid using harsh chemicals or abrasive materials, as they can damage the glass surface. Instead, opt for a mild glass cleaner that is safe for your frameless door. Apply the cleaner to a soft cloth or sponge and gently wipe the glass surface. Be sure to rinse off the cleaner thoroughly with warm water and dry the glass with a lint-free cloth to prevent streaks.
Wipe down the hardware to prevent water spots
Frameless glass shower doors often come with hardware components such as hinges, handles, and knobs. These metal elements can develop water spots due to exposure to moisture. To prevent water spots and keep the hardware looking polished, regularly wipe them down after each use. Use a damp cloth or sponge to remove any water droplets or residue. For stubborn spots, you can use a mild soap solution and a soft brush to gently scrub the metal. Ensure that you dry the hardware thoroughly to prevent the formation of water spots.
Inspect for any damage or wear and tear
Regularly inspect your frameless glass shower door for any signs of damage or wear and tear. Check the glass panels, hardware, and seals for any cracks, chips, or loose components. Addressing any issues promptly can prevent further damage and extend the lifespan of your shower door. If you notice any damage, consult a professional for repairs or replacements to ensure the safety and functionality of your frameless glass shower door.
By incorporating these cleaning and maintenance practices into your shower routine, you can enjoy the beauty and functionality of your frameless glass shower door for years to come. Remember, regular cleaning, wiping down the hardware, and inspecting for damage are essential steps to keep your shower door looking pristine and functioning smoothly.
Step 9: Enjoy Your Modern And Stylish Bathroom
Admire the sleek and contemporary look of your frameless glass shower door
Once you have successfully installed your frameless glass shower door, you can’t help but admire the sleek and contemporary look it brings to your bathroom. The absence of bulky frames instantly adds a touch of elegance and sophistication. The transparent glass panels allow light to flow in, creating a bright and airy atmosphere in your bathing space.
With its minimalist design and seamless edges, your new frameless glass shower door will effortlessly blend in with any decor style. Whether your bathroom is modern, traditional, or eclectic, this sleek addition is sure to enhance its overall aesthetics. Its clean lines and unobtrusive presence create a visually striking focal point that elevates the entire look of your bathroom.
Enjoy the open and spacious feel it brings to your bathroom
One of the key benefits of installing a frameless glass shower door is the sense of openness and spaciousness it brings to your bathroom. Unlike traditional shower doors with bulky frames that create visual barriers, frameless glass doors provide an unobstructed view of the entire space, making it appear larger and more expansive.
By removing the conventional frames, you’re left with an uninterrupted view of your beautifully tiled shower area. This visual continuity creates an illusion of depth, giving your bathroom a luxurious and inviting feel. Enjoy the freedom of moving around in your shower without feeling confined or enclosed.
Share your new bathroom upgrade with friends and family
Now that your frameless glass shower door is installed and your modern and stylish bathroom is complete, it’s time to share your exciting upgrade with friends and family.
Invite them to experience the beauty and functionality of your new shower space firsthand. Let them marvel at the sleek design and spacious feel, and bask in the compliments they shower upon you for making such a chic and forward-thinking choice.
Whether it’s hosting a small gathering or simply inviting someone over, take pride in showcasing your upgraded bathroom. Enjoy the joy of sharing your new sanctuary and receiving admiration for your tasteful design decision. It’s the perfect opportunity to inspire others to consider frameless glass shower doors for their own bathroom renovations.
https://www.youtube.com/watch?v=7JWl6sKsy0E&pp=ygUkSW5zdGFsbCBGcmFtZWxlc3MgR2xhc3MgU2hvd2VyIERvb3Jz
Frequently Asked Questions
Are Frameless Shower Doors Easy To Install?
Yes, frameless shower doors are easy to install. They come with clear instructions, and you can typically complete the installation process without professional help. The absence of frames makes it simpler to fit the doors into your bathroom space.
Does A Frameless Shower Door Need A Stud?
No, a frameless shower door does not require a stud for installation. The doors are typically supported by metal hinges or brackets that are attached directly to the surrounding walls. This allows for a clean, modern look without the need for additional structural support.
How Do You Secure A Frameless Shower Door?
To secure a frameless shower door, follow these steps: 1. Use high-quality hinges to ensure stability. 2. Install a sturdy glass panel with proper thickness. 3. Attach the door to the wall securely with metal clips or U-channels. 4. Seal the edges of the door with caulk to prevent water leakage.
5. Regularly inspect and tighten all fittings to maintain security.
What Holds A Frameless Shower Screen?
A frameless shower screen is held by strong brackets or hinges attached to the wall. These brackets support the glass panels and provide stability and security.
Conclusion
In a nutshell, installing frameless glass shower doors is a rewarding project that can transform your bathroom into a modern and luxurious space. By following the steps outlined in this guide, you can confidently tackle this DIY task and achieve stunning results.
From measuring and preparing the space to carefully installing the glass doors, you’ll be able to create a beautiful and functional shower enclosure that adds value to your home. So go ahead and take on this project with confidence – and enjoy the sleek and stylish appeal of your new frameless glass shower doors!