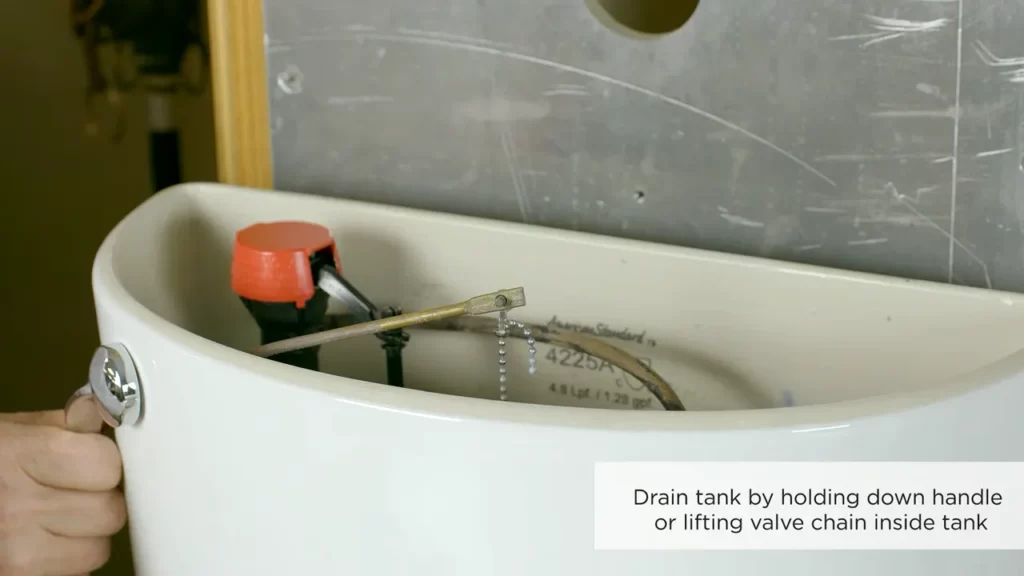
To install a flush valve seal, first, turn off the water supply to the toilet. Then, remove the tank lid and empty the tank by flushing the toilet.
Understanding The Flush Valve Seal
What is a flush valve seal and its importance?
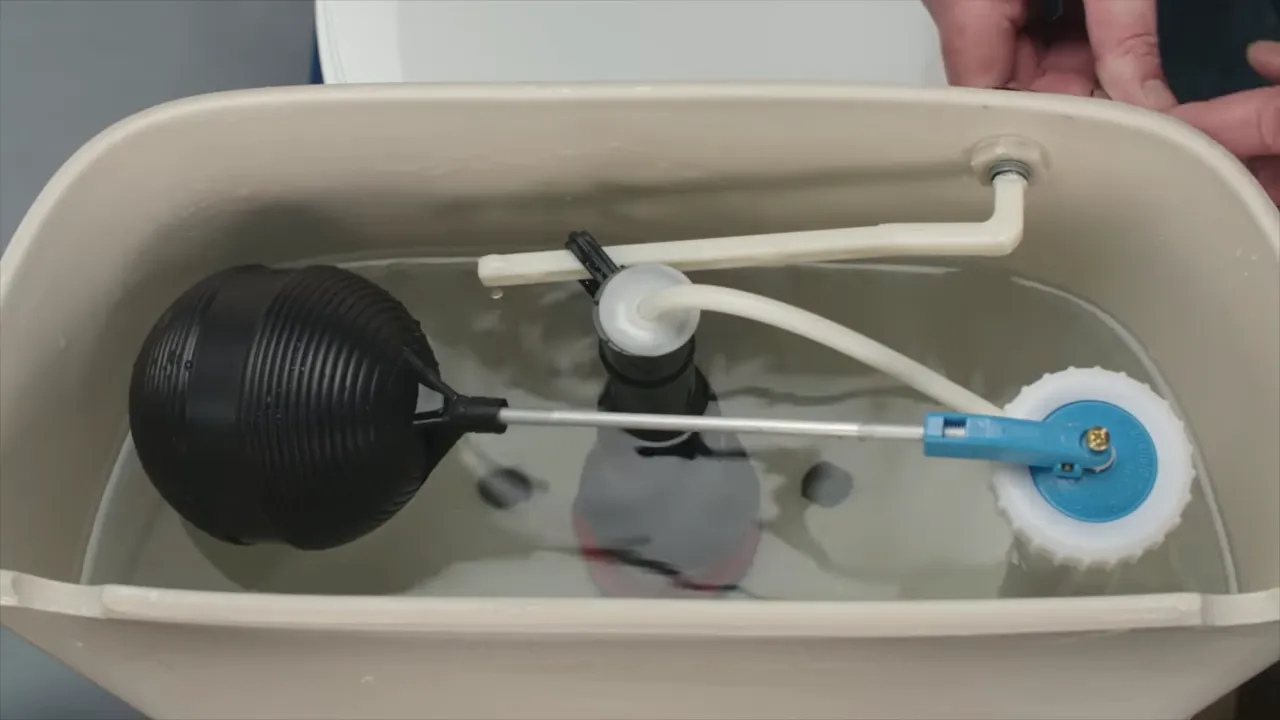
Understanding the flush valve seal is crucial when it comes to maintaining the functionality of your toilet. The flush valve seal, also known as the flush valve gasket or flapper, is a vital component that ensures the efficient operation of your toilet’s flush system. This small but essential seal is located at the bottom of the tank and forms a watertight seal between the tank and the bowl.
The main function of the flush valve seal is to control the flow of water from the tank into the bowl during flushing. When you activate the flush lever on your toilet, the flush valve seal lifts, allowing water to rush into the bowl, creating a powerful siphon and removing waste. Once the flushing is complete, the seal drops back into place, preventing any further water from entering the bowl.
Not only does the flush valve seal play a crucial role in the flushing process itself, but it also helps to conserve water. A faulty or worn out flush valve seal can result in leaks, leading to continuous water flow and unnecessary wastage. By ensuring that your flush valve seal is in optimum condition, you can save both water and money in your household.
Installation Procedure
Step 1: Gather the necessary tools
Before proceeding with the installation, make sure you have the required tools readily available. You will need the following:
- Adjustable wrench
- Screwdriver
- Flush valve seal replacement
Step 2: Turn off the water supply
Prior to replacing the flush valve seal, it is essential to shut off the water supply to the toilet. Locate the water shut-off valve, usually located behind or to the side of the toilet, and turn it clockwise until it is fully closed. This will prevent any water from flowing into the tank while you work.
Step 3: Empty the tank
Flush the toilet to drain the water from the tank. Ensure that the tank is completely empty before proceeding with the installation.
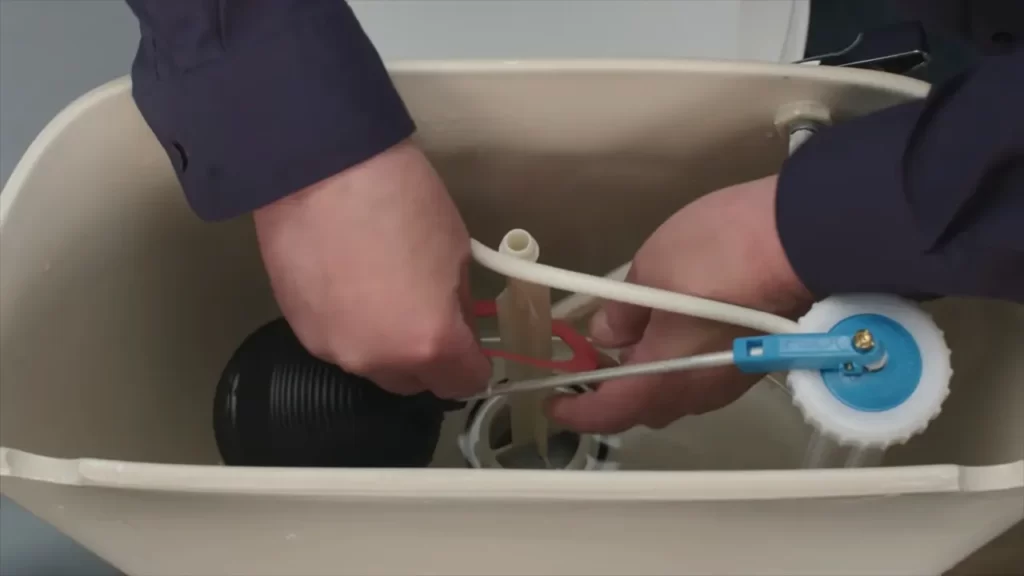
Step 4: Remove the old flush valve seal
Using an adjustable wrench or pliers, loosen and remove the nut securing the flush valve seal to the bottom of the tank. Carefully lift the old seal off and discard it.
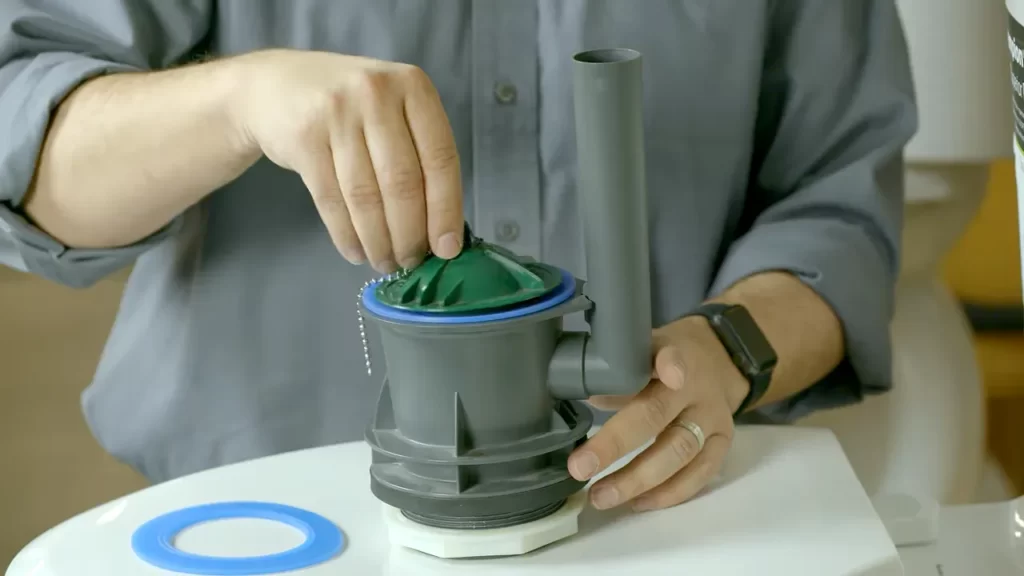
Step 5: Install the new flush valve seal
Take the new flush valve seal and position it onto the opening at the bottom of the tank. Make sure it sits snugly and forms a watertight seal.
Step 6: Reassemble and test
Reattach the nut to secure the new flush valve seal in place. Ensure it is tightened but not overly tightened to avoid any damage. Once secured, turn the water supply back on and let the tank fill with water. Finally, flush the toilet and observe if the new seal functions as intended, creating a proper seal and allowing water to flow smoothly into the bowl.
By following these simple steps, you can replace the flush valve seal in your toilet and restore its proper functioning. Remember to perform regular maintenance checks to ensure that the seal remains in good condition, avoiding any potential leaks and water wastage.

Signs Of A Damaged Flush Valve Seal
If you’ve been experiencing issues with your toilet, such as inconsistent flushing or a constantly running toilet, there’s a good chance that the flush valve seal could be the culprit. The flush valve seal is a small but important component of the toilet mechanism that helps to regulate the flow of water from the tank to the bowl during the flushing process. Over time, this seal can become worn or damaged, leading to several common problems.
Common problems caused by a damaged seal
A damaged flush valve seal can cause a range of frustrating issues in your toilet. Here are some of the most common problems that can occur when the seal is not functioning properly:
- Inconsistent flushing: One of the telltale signs of a damaged flush valve seal is a toilet that flushes inconsistently. You may notice that sometimes the toilet flushes with force, while other times it barely flushes at all. This can be a major inconvenience and can lead to clogs and other issues.
- Constant running: Another indication of a faulty seal is a toilet that constantly runs. If you hear the sound of running water even when the toilet hasn’t been flushed, it’s likely that the flush valve seal is allowing water to leak into the bowl from the tank. Not only does this waste water, but it can also cause your water bill to skyrocket.
- Water leakage: A damaged flush valve seal can also result in water leakage around the base of the toilet. You may notice small pools of water accumulating on the floor, indicating that the seal is not creating a tight enough seal between the tank and the bowl.
- Weak flush: If you find that your toilet has lost its flushing power and requires multiple flushes to clear the bowl, it could be due to a damaged flush valve seal. When the seal is compromised, water may not flow with enough force to effectively remove waste from the bowl.
- Noisy toilet: A damaged seal can also lead to a noisy toilet. You may hear gurgling or whistling sounds coming from the tank as water tries to pass through the faulty seal. This can be both annoying and a sign that there’s a problem that needs to be addressed.
By being able to recognize these signs of a damaged flush valve seal, you can take the necessary steps to rectify the issue and restore your toilet to its optimal functioning. In the next section, we will discuss how to identify when your flush valve seal is the culprit and what steps to take in order to replace it.
Preparation And Tools Needed
Before you start the process of replacing your flush valve seal, there are a few important steps you need to follow to ensure a smooth installation. Additionally, having the right tools on hand will help make the process easier and more efficient. In this section, we will discuss the necessary preparation and the tools you’ll need for this DIY project.
Gathering the necessary tools
Before you begin, it is essential to gather all the tools and materials required for the flush valve seal installation. By having everything ready and easily accessible, you can avoid any unnecessary delays or interruptions in the process.
Here is a list of the tools and materials you’ll need:
| Tools | Materials |
|---|---|
|
|
Safety precautions to consider before starting the replacement process
While installing a flush valve seal may seem like a relatively simple task, it is important to prioritize your safety. By taking a few precautionary measures, you can prevent any accidents or damage during the replacement process.
Here are some safety precautions to consider:
- Turn off the water supply to the toilet using the shut-off valve. This will prevent any unwanted leaks or water damage.
- Flush the toilet to drain the water from the tank and bowl.
- Place a bucket or container beneath the toilet tank to catch any excess water that may spill during the process.
- Wear protective gloves and goggles to shield your hands and eyes from any potential harm.
By following these safety precautions, you can ensure a safe and successful flush valve seal replacement process. Now that you have gathered the necessary tools and taken the necessary safety measures, you are ready to get started on installing your new flush valve seal.
Removing The Old Flush Valve Seal
Step-by-step guide to removing the seal
If you’re experiencing a leaky toilet or a weak flush, it might be time to replace the flush valve seal. The flush valve seal is a small but crucial component that helps to create a watertight seal between the toilet tank and the flush valve. Over time, the seal can become worn or damaged, leading to leaks and other issues. In this step-by-step guide, we’ll walk you through the process of removing the old flush valve seal so you can get your toilet back in working order.
- Start by shutting off the water supply to your toilet. You can usually find the shut-off valve located on the wall behind the toilet. Turn the handle clockwise to close the valve and stop the flow of water.
- Flush the toilet to drain as much water as possible from the tank. You can hold down the toilet handle until the tank is empty.
- Next, remove the flush valve assembly from the bottom of the tank. This is usually done by unscrewing the large nut on the bottom of the tank that holds the assembly in place. Use an adjustable wrench or pliers to loosen and remove the nut.
- Once the flush valve assembly is removed, you’ll be able to see the old flush valve seal. Carefully pry the old seal off the flush valve using a flathead screwdriver or a pair of needle-nose pliers. Be cautious not to scratch or damage the flush valve during this process.
- Inspect the area around the flush valve for any build-up or debris that may be preventing a proper seal. Use a cloth or sponge to clean the area and ensure it’s free from any obstructions.
Tips for dealing with stubborn or stuck seals
Removing an old flush valve seal can be a relatively straightforward process, but occasionally you may encounter a stubborn or stuck seal that requires some extra effort. Here are a few tips to help you deal with those tricky situations:
- If the seal is stuck firmly in place, try soaking it in warm water for a few minutes. This can help to soften the seal and make it easier to remove.
- Using a lubricant like WD-40 can also help to loosen a stuck seal. Spray a small amount onto the seal and allow it to penetrate for a few minutes before attempting to remove it.
- If you’re still having trouble removing the seal, consider using a seal removal tool. These tools are specifically designed to help take out stubborn seals without causing damage to the flush valve or other components.
- Remember to take your time and be patient. Rushing the process can lead to accidents or further damage. If you’re unsure about the steps involved, it’s always a good idea to consult a professional plumber.
By following these steps and tips, you should be able to successfully remove the old flush valve seal and prepare your toilet for a new one. Once the old seal is removed, you can move on to the next step of installing a new seal and restoring efficient flushing to your toilet.
Choosing The Right Replacement Seal
When it comes to replacing a flush valve seal, it’s important to choose the right one to ensure a leak-free and efficient toilet. The flush valve seal is a crucial component that helps control the flow of water during flushing, and over time, it can wear out or become damaged. In this section, we will discuss the different types of flush valve seals available and the factors to consider when selecting a replacement seal.
Different types of flush valve seals available
When looking for a replacement seal, you will come across various options. Here are some of the different types of flush valve seals available:
| Type | Description |
|---|---|
| Flapper Seal | This type of seal is the most common and is typically made of rubber or silicone. It is designed to create a tight seal between the flush valve and the toilet tank, preventing water from leaking. |
| Flush Valve Gasket | Designed to fit over the flush valve opening, this type of seal creates a watertight seal between the toilet tank and the bowl. It is often made of rubber or foam. |
| Dual Flush Seal | This type of seal is specifically designed for dual flush toilets, which have different flush options for liquid waste and solid waste. It ensures that the right amount of water is released depending on the type of flush. |
Factors to consider when selecting a replacement seal
Choosing the right replacement seal for your toilet requires considering certain factors. Here are some important factors to consider:
- Compatibility: Ensure that the replacement seal is compatible with your toilet make and model. Check the specifications provided by the manufacturer or consult a professional if needed.
- Material: Consider the material of the seal. Rubber and silicone seals are common options due to their durability and flexibility. They provide a tight seal and are resistant to water and chemicals.
- Size: Take note of the size of the seal, as it should fit snugly onto the flush valve opening. Measure the diameter of your existing seal or consult the toilet’s manual for the recommended size.
- Installation: Consider the ease of installation. Some seals may require specialized tools or professional assistance, while others can be easily installed by following simple instructions.
- Brand reputation: Research the reputation and reliability of the brand before purchasing a replacement seal. Look for customer reviews and feedback to ensure that you are buying a high-quality and long-lasting product.
By considering these factors, you can confidently choose the right replacement flush valve seal for your toilet, ensuring a smooth and leak-free flushing experience.
Installing The New Flush Valve Seal
Step-by-step instructions for installing the new seal
Installing a new flush valve seal is a simple process that can help improve the efficiency and effectiveness of your toilet’s flushing. Whether you’re experiencing leaks, dripping noises, or just want to ensure optimal performance, replacing the flush valve seal is a worthwhile maintenance task. Follow these step-by-step instructions to install the new seal:
- First, turn off the water supply to your toilet. Look for the shut-off valve, located near the base of the toilet on the wall or floor.
- Next, flush the toilet to drain as much water as possible from the tank. Use a sponge or towel to soak up any remaining water.
- Locate the flush valve assembly. This is usually at the center of the tank and is connected to the flushing handle by a chain or rod.
- Remove the old flush valve seal. Depending on the type of toilet you have, the seal may be held in place by a nut, clip, or simply friction. Carefully remove any fasteners and gently lift out the old seal.
- Inspect the flush valve for any damage or debris. Clean the area thoroughly to ensure a proper fit for the new seal.
- Take the new flush valve seal and align it with the flush valve opening. Ensure that it sits flat and secure without any gaps or misalignments.
- If necessary, adjust the position of the seal to ensure a perfect fit. It should be centered and level within the flush valve opening.
- Reassemble the components, securing the new flush valve seal in place. Make sure any fasteners are tightened appropriately without over-tightening.
- Turn the water supply back on and allow the tank to fill. Test the toilet by flushing and listen for any signs of leaks or unusual sounds.
- If everything appears to be functioning correctly, congratulations! You have successfully installed a new flush valve seal.
By following these simple steps, you can easily replace the flush valve seal and ensure optimal performance from your toilet. Remember to perform regular maintenance tasks like this to keep your bathroom fixtures in top shape.
Testing And Checking For Leaks
The testing and checking for leaks is a crucial step in the process of installing a flush valve seal. It ensures that the seal is properly installed and working effectively to prevent leaks, which can lead to water waste and potential damage to the toilet.
Importance of testing after installing the new seal
Testing the flush valve seal after installation is vital to ensure that it is working as intended. By performing this test, you can catch any issues or leaks early on and make necessary adjustments before they become bigger problems.
How to check for leaks and make necessary adjustments
Once you have installed the new flush valve seal, follow these steps to test for leaks and make any necessary adjustments:
- Close the water supply to the toilet by turning the shut-off valve clockwise.
-
Remove the toilet tank lid and place it in a safe location.
- Be careful not to drop the lid or place it on a hard surface, as it may crack or break.
- Flush the toilet to remove any remaining water from the tank.
-
Take a dry cloth or paper towel and wipe the inside of the tank, including the flush valve and seal.
- Make sure there is no debris or residue that could interfere with the seal’s proper functioning.
- Turn the water supply valve counterclockwise to allow water to refill the tank.
-
Observe the tank for any signs of leaking water.
- Pay close attention to the area around the flush valve seal.
- If you notice any leaks, it is important to pinpoint their source.
- If there are no leaks, flush the toilet a few times and repeat the observation process to ensure the seal remains intact.
-
If you discover any leaks, you may need to make some adjustments.
- Try loosening and re-tightening the flush valve seal or the bolts securing it to the tank.
- Make sure they are properly aligned and tightened.
-
If the leaks persist, you might need to replace the seal or seek professional assistance from a plumber.
- Continued leaks can lead to wasted water and potential damage to your toilet and surrounding area.
-
Once the testing and adjustments are complete, turn the water supply valve clockwise to shut off the water.
- Make sure the valve is tightly closed to prevent any water from flowing into the tank.
By thoroughly testing and checking for leaks after installing a flush valve seal, you can ensure that your toilet operates efficiently and remains leak-free. Regular maintenance and timely adjustments can help prevent costly repairs and promote water conservation.
Maintenance And Care Tips
Maintaining and caring for your flush valve seal is essential to ensure its longevity and prevent future issues. By following these simple tips, you can prolong the lifespan of your flush valve seal and avoid any inconvenient problems in the future.
Tips for prolonging the lifespan of the flush valve seal
1. Clean the seal regularly: Cleaning the flush valve seal is crucial to remove any buildup of dirt, grime, or mineral deposits that may affect its performance. Use a mild household cleaner and a soft cloth to wipe the seal gently. Avoid using abrasive cleaners or scrub brushes as they may damage the seal.
2. Check for leaks: Periodically inspect the flush valve seal for any signs of leakage. A leaky seal can waste water and increase your utility bills. If you notice any leaks, it is important to address them promptly. Replace the seal if necessary or consult a professional plumber for assistance.
3. Prevent excessive force: Avoid applying excessive force when flushing the toilet. Pushing the handle or button too hard can strain the flush valve seal and lead to premature wear and tear. A gentle and controlled flush is sufficient to effectively clear waste.
4. Keep the toilet tank clean: Maintaining a clean toilet tank is crucial for the proper functioning of the flush valve seal. Regularly remove any debris, sediment, or mineral deposits that may accumulate in the tank. This will prevent clogging and ensure the seal maintains a tight seal.
Regular maintenance routines to prevent future issues
In addition to the above tips, establishing a regular maintenance routine can help prevent future issues with your flush valve seal. Consider incorporating the following practices into your maintenance routine:
- Inspect and replace faulty parts: Regularly inspect the flush valve, flush handle, flapper, and other toilet components. Replace any worn or faulty parts to ensure optimal performance.
- Adjust water levels: Check the water levels in the toilet tank to ensure they are appropriately adjusted. Improper water levels can put unnecessary strain on the flush valve seal.
- Test for proper flushing: Regularly test the flushing mechanism to ensure it is working efficiently. If you notice any weak flushes or incomplete bowl evacuation, it may be a sign of a problem with the flush valve seal.
By incorporating these maintenance routines into your regular household tasks, you can prevent future issues with your flush valve seal and enjoy a properly functioning toilet for years to come.
Troubleshooting Common Problems
Troubleshooting Tips for Common Seal Replacement Issues
If you’ve recently installed a flush valve seal and are experiencing leaks or malfunctions, don’t fret! These issues are not uncommon and can easily be addressed with some troubleshooting. In this section, we will provide you with some handy tips to help you troubleshoot and resolve common problems that may arise after the installation of a flush valve seal.
1. Leaks from the Base of the Toilet
One of the most common problems that people encounter after replacing a flush valve seal is leaks from the base of the toilet. This can be frustrating, but fear not! Here are some troubleshooting tips to help you tackle this issue:
– Inspect the seal: Check if the seal is properly seated and ensure that there are no damages or cracks. If you notice any issues with the seal, it may need to be replaced.
– Tighten the bolts: Ensure that the bolts securing the toilet to the floor are tightened properly. Sometimes, loose bolts can cause water to leak from the base of the toilet.
– Apply silicone caulk: If the seal and bolts are in good condition but the leak persists, applying a thin bead of silicone caulk around the base of the toilet can help create a watertight seal.
2. Weak or Incomplete Flushing
If you find that your toilet is not flushing with full force or the flush seems incomplete, there may be an issue with the flush valve seal. Here’s what you can do to troubleshoot this problem:
– Check the chain: Ensure that the chain connected to the flush valve seal is not too loose or tangled. Adjust it so that it has the right amount of slack.
– Inspect the flapper: Check if the flapper is functioning properly and is not obstructed in any way. Clean or replace the flapper if necessary.
– Adjust the water level: Sometimes, the water level in the tank may be too low, causing a weak flush. Adjust the water level to the manufacturer’s recommended setting to ensure adequate flushing power.
3. Continuous Water Running
If you hear the sound of water running continuously even after flushing, it’s likely that there is a problem with the flush valve seal. Try the following troubleshooting steps to fix this issue:
– Inspect the seal: Ensure that the flush valve seal is properly positioned and sealed. If it is damaged or worn out, you may need to replace it.
– Check the fill valve: Verify if the fill valve is functioning properly and is not causing water to continuously flow into the tank. Adjust or replace the fill valve if needed.
– Check for leaks: Examine the various components of the toilet tank for any signs of leaks. Tighten or replace any faulty connections to eliminate the continuous water running.
By following these troubleshooting steps, you can easily resolve common problems that may arise after installing a flush valve seal. Remember to thoroughly inspect the seal, tighten bolts, adjust chains, check flappers, and properly position everything to ensure a watertight seal and optimal flushing performance. Replace any damaged or worn-out parts as necessary. With a little troubleshooting, your toilet will be back to functioning flawlessly in no time!
Benefits Of Proper Flush Valve Seal Installation
Energy-saving benefits of a properly functioning seal
Proper installation of a flush valve seal offers a multitude of benefits, one of which is its energy-saving capabilities. When the flush valve seal is in good condition and installed correctly, it ensures that the water in the toilet tank does not leak or continuously run, thereby reducing unnecessary water consumption. This not only conserves water, but also helps to lower your energy bills.
A properly functioning flush valve seal prevents water wastage by maintaining a tight seal between the toilet tank and the bowl. When the toilet is flushed, the water is released from the tank and into the bowl, efficiently rinsing away waste. However, when the seal is damaged or improperly installed, water can leak out of the tank and into the bowl continuously, leading to water wastage and a higher water bill.
By addressing any issues with the flush valve seal and ensuring its proper installation, you can significantly reduce the amount of water wasted each time you flush. This simple act not only contributes to global water conservation efforts, but also helps you save on your monthly utility bills.
Cost-saving advantages in reducing water waste
In addition to the energy-saving benefits, proper flush valve seal installation can lead to significant cost savings by reducing water waste. The continuous flow of water caused by a faulty seal can result in hundreds of gallons of water wasted each day.
Wasted water equals wasted money. By successfully installing a flush valve seal, you can prevent the unnecessary loss of water and reduce your monthly water bill expenses. With the rising costs of water and increasing environmental concerns, taking steps to minimize water waste is not only financially prudent but also environmentally responsible.
Investing a little time and effort into installing a flush valve seal properly can yield substantial returns in the long run. Not only will it help you save money, but it will also contribute to the overall sustainability and conservation of our precious water resources.
Frequently Asked Questions
How Do You Install A Flush Seal?
To install a flush seal, follow these steps: 1. Start by removing the old seal and cleaning the area thoroughly. 2. Apply adhesive to the back of the new seal. 3. Press the seal firmly into place, making sure it is aligned properly.
4. Allow the adhesive to dry completely before using the seal. 5. Regularly check and replace the seal as needed to maintain proper functionality.
Where Does The Flush Valve Seal Go?
The flush valve seal goes between the flush valve and the toilet tank.
How Do You Fix A Leaking Flush Valve?
To fix a leaking flush valve, first, turn off the water supply to the toilet. Next, remove the tank lid and flush the toilet to drain the water. Then, unscrew the flush valve from the tank and replace it with a new one.
Finally, reassemble the tank and turn on the water supply.
Why Is My Toilet Flush Valve Not Sealing?
The toilet flush valve may not be sealing due to wear and tear or a faulty seal. To fix it, check for any damage or debris on the valve and replace it if necessary. Ensure tight connections and proper alignment for a secure seal.
Conclusion
To sum up, replacing the flush valve seal is a simple and important maintenance task that can prevent leaks and ensure the proper functioning of your toilet. By following the step-by-step guide provided in this blog post, you can easily install a new flush valve seal and avoid any potential issues in the future.
Remember to inspect your toilet regularly and address any necessary repairs promptly. With a little effort and proper maintenance, you can keep your toilet working efficiently for years to come.