To install floating shelves without drilling, use adhesive mounting strips instead. Here are some easy steps to follow.
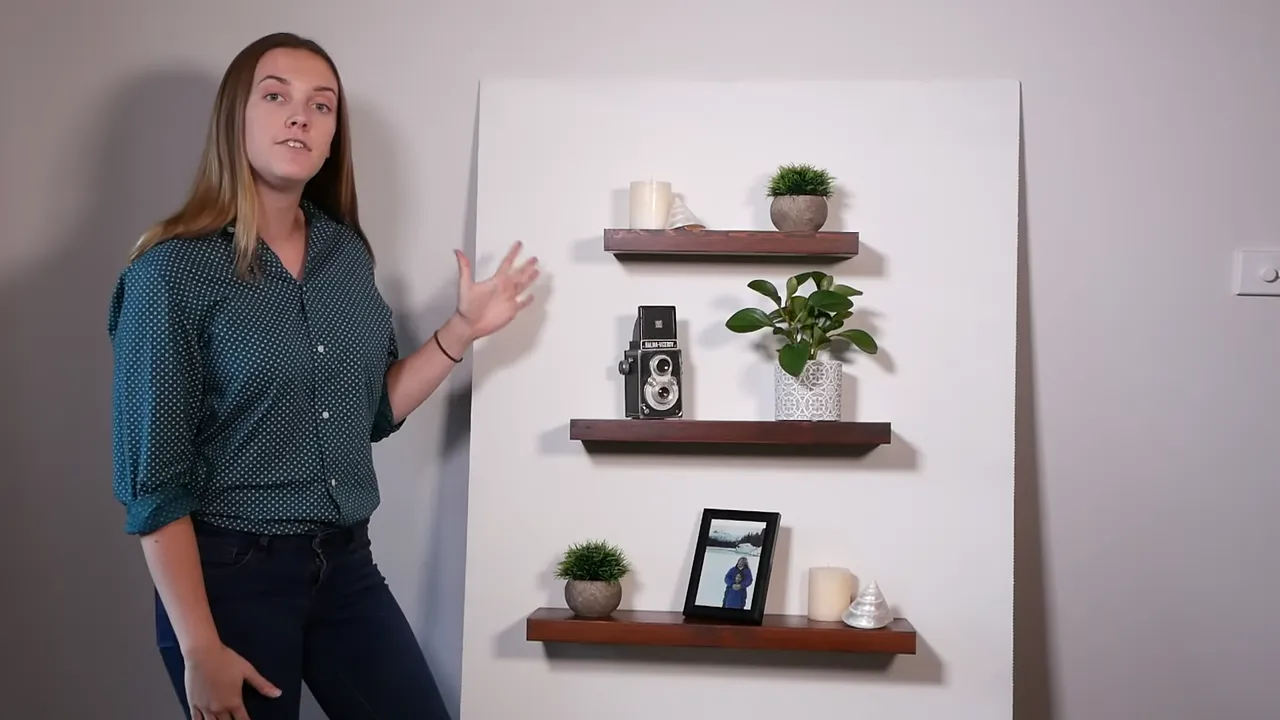
Floating shelves are a popular choice for adding storage and display space to any room. They give a clean, modern look and can be easily installed without the need for drilling or damaging the walls. If you’re wondering how to install floating shelves without drilling, you’re in luck.
We will guide you through the process of using adhesive mounting strips to securely attach floating shelves to your walls. Whether you’re a renter or simply prefer a non-permanent installation method, this is a great alternative that will provide you with sturdy and stylish shelves. So, let’s get started!
The Benefits Of Floating Shelves
Floating shelves offer several advantages that make them a popular choice for homeowners and interior designers. Whether you’re looking to save space, add style to your décor, or avoid damage from drilling, floating shelves provide a versatile and convenient storage solution for any room in your home.
Space-saving storage solution
One of the primary reasons why floating shelves are so popular is their ability to save space. Unlike traditional shelving units that take up valuable floor space, floating shelves attach directly to the wall, creating a sleek and streamlined look. By installing floating shelves, you can effectively utilize vertical space and transform your walls into functional storage areas. This is especially beneficial for smaller rooms or apartments where maximizing space is crucial.
Versatile and customizable to fit any decor style
Another major advantage of floating shelves is their versatility and ability to complement any decor style. Whether you have a modern, minimalist design or a cozy, rustic aesthetic, there are floating shelves available to suit your needs. These shelves come in various materials such as wood, metal, or glass, allowing you to choose an option that seamlessly integrates with your existing furniture and color scheme. Additionally, the open design of floating shelves makes it easy to display items such as books, decorative objects, or personal collections, adding a personalized touch to your space.
No damage or holes left behind
One of the significant concerns when installing traditional shelves is the damage caused by drilling holes in the walls. Floating shelves offer a solution to this problem by eliminating the need for drilling altogether. These shelves are typically mounted using a bracket or a cleat system, which allows them to be securely attached to the wall without causing any damage. This means that you can enjoy the benefits of additional storage without worrying about unsightly holes or the hassle of repairing walls when it’s time to remove the shelves.
Choosing The Right Floating Shelves
When it comes to installing floating shelves without drilling, choosing the right shelves is key. Not only do you want shelves that are sturdy and can hold your items securely, but you also want ones that complement your desired style. In this section, we will discuss three important factors to consider when selecting floating shelves: weight capacity, adhesive mounting options, and style compatibility.
Consider the Weight Capacity of the Shelves
The weight capacity of the shelves is crucial to ensure that they can support the items you plan to display. Before purchasing any floating shelves, take the time to assess the weight of the items and their distribution to avoid any mishaps or accidents later on. Keep in mind that heavier items such as books or kitchen appliances will require shelves with a higher weight capacity, while lightweight decorative items may only need shelves with a lower weight limit.
Look for Shelves with Adhesive Mounting Options
Adhesive mounting options provide a hassle-free and drill-free installation method, making them an excellent choice for those who want to avoid damaging their walls. Look for floating shelves that come with strong adhesive strips or glue for easy installation. Before applying the adhesive, make sure to clean the wall surface thoroughly to ensure proper adhesion. It’s also a good idea to follow the manufacturer’s instructions for applying and curing the adhesive to achieve optimal results.
Select Shelves That Match Your Desired Style
While functionality is essential, it’s equally important to choose floating shelves that match your desired style and complement your room’s aesthetics. Whether you prefer a modern, minimalist look or a rustic, farmhouse vibe, there are floating shelves available in various materials, finishes, and designs to suit every taste. Take the time to browse through different options and find the ones that resonate with your personal style and existing decor.
In conclusion, when choosing the right floating shelves for a drill-free installation, it’s crucial to consider weight capacity, adhesive mounting options, and style compatibility. By considering these factors, you can ensure that your floating shelves not only provide the functionality you need but also enhance the overall look and feel of your space.
Preparing Your Walls For Installation
In order to successfully install floating shelves without drilling, it is important to properly prepare your walls for the task. By following these steps, you can ensure a secure and stable installation that will enhance the beauty and functionality of your space.
Determine the ideal location for your shelves
Before you begin installing your floating shelves, take some time to assess the ideal location for them. Consider the layout of the room, the purpose of the shelves, and any existing fixtures or furniture that may affect their placement. Once you have determined where you want the shelves to be, mark the spots on the wall using a level and measuring tape.
Clean the wall surface thoroughly
Once you have marked the desired locations for your shelves, it is crucial to clean the wall surface thoroughly. Remove any dust, dirt, or debris using a damp cloth or sponge. This will ensure that the adhesive used to mount the shelves adheres properly and creates a strong bond with the wall.
Additionally, if there are any existing nails or screws that need to be removed, take the time to do so. Smooth out any uneven surfaces or rough patches on the wall, as these can impact the installation process.
Use a level and measuring tape to mark the shelf placement
Using a level and measuring tape, mark the precise placement of each shelf on the wall. This will ensure that the shelves are installed in a straight and aligned manner, creating a visually appealing display. Take your time with this step to avoid any mistakes.
Measure the distance between each mark and make any necessary adjustments to ensure equal spacing between the shelves. This will help create a balanced and harmonious look.
Conclusion
By following these steps to prepare your walls for the installation of floating shelves without drilling, you can ensure a successful and secure project. Take the time to determine the ideal location for your shelves, clean the wall surface thoroughly, and use a level and measuring tape to mark the shelf placement. This will result in a beautiful and functional addition to your space.
Installing Floating Shelves With Adhesive Strips
When it comes to installing floating shelves without the need for drilling, one of the easiest and most convenient methods is using adhesive strips. These strips provide a strong and reliable bond, allowing you to securely mount your shelves to the wall. In this guide, we’ll walk you through the simple steps to install floating shelves with adhesive strips.
Apply adhesive strips to the back of the shelves:
The first step is to apply adhesive strips to the back of the shelves. These strips should be specifically designed for mounting purposes and provide a strong adhesive hold. Before applying the strips, make sure the surface of the shelves is clean and free from any dust or debris. Cut the adhesive strips to the required length and attach them to the back of the shelves, following the manufacturer’s instructions. Ensure that you apply enough strips to distribute the weight of the shelves evenly.
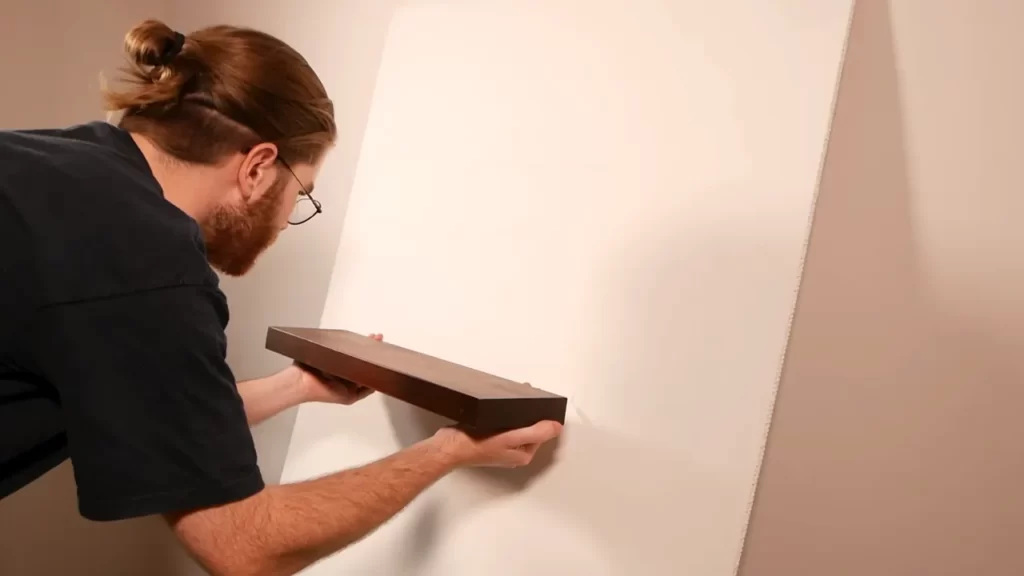
Press the shelves firmly against the wall:
Once the adhesive strips are in place, carefully position the shelves against the wall where you want them to be installed. It’s important to align the shelves correctly and level them before pressing them firmly against the wall. Apply even pressure to ensure that the adhesive strips make full contact with the wall surface. Use a spirit level to ensure the shelves are straight and level before moving on to the next step.
Allow the adhesive to cure according to manufacturer’s instructions:
After pressing the shelves against the wall, it’s crucial to allow the adhesive to cure before placing any items on the shelves. Each manufacturer has specific instructions regarding the curing time, which usually ranges from 24 to 48 hours. It’s essential to follow these instructions to ensure that the adhesive fully bonds and provides a strong hold. Avoid putting any weight on the shelves until the recommended curing time has elapsed to prevent them from coming loose.
In conclusion, installing floating shelves with adhesive strips offers a practical and drill-free solution. By following these simple steps, you can securely mount your shelves to the wall and create an attractive display or storage space. Remember to carefully read and follow the manufacturer’s instructions for the best results. Enjoy the benefits of floating shelves without the hassle of drilling!
Installing Floating Shelves With Adhesive Hooks
When it comes to adding extra storage space to your home, floating shelves can be a great solution. Not only do they provide a modern and elegant look, but they are also easy to install. If you’re looking for a drilling-free option, installing floating shelves with adhesive hooks is the way to go. This method requires no drilling into the wall, making it a perfect choice for renters or anyone who doesn’t want to deal with wall damages.
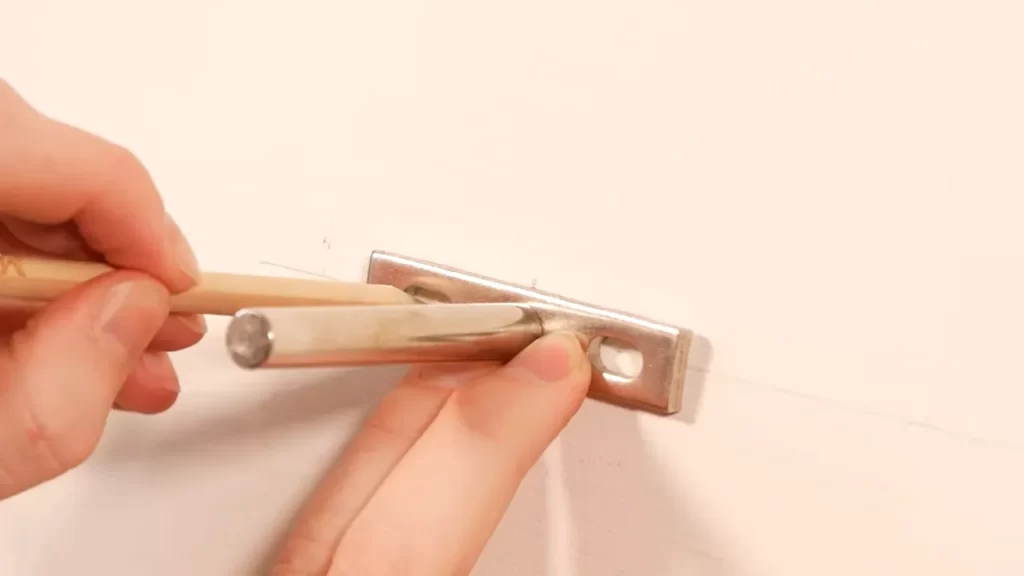
Attach adhesive hooks to the wall
The first step in installing floating shelves with adhesive hooks is to attach the hooks to the wall. Adhesive hooks are specifically designed to hold a certain weight, so be sure to choose hooks that can support the weight of your shelves securely. Follow these steps to attach adhesive hooks:
- Clean the wall surface where you plan to attach the hooks. Make sure it’s free from dust and dirt to ensure proper adhesion.
- Peel off the backing of the adhesive hook, revealing the sticky side.
- Press the adhesive side firmly against the wall, applying enough pressure to ensure it sticks well.
- Repeat this process for each hook, spacing them evenly according to the dimensions of your shelves.
Hang the shelves securely on the hooks
Once the adhesive hooks are securely attached to the wall, it’s time to hang the floating shelves. Follow these steps to ensure a secure hanging:
- Slide the shelf brackets onto the hooks, making sure they are firmly seated.
- Press down on the shelf, applying even pressure to engage the brackets with the hooks.
- Make any necessary adjustments to ensure the shelf is level and centered.
- Continue to press down on the shelf until it feels securely in place.
Ensure the shelves are level and stable
After hanging the shelves on the adhesive hooks, it’s important to ensure they are level and stable. This will prevent any items placed on the shelves from sliding off and maintains the aesthetic appeal of your floating shelves. Follow these steps to ensure the shelves are level and stable:
- Use a level tool to check if the shelves are perfectly horizontal. Make adjustments if necessary.
- Make sure the adhesive hooks and brackets are securely attached to the wall. If any hook or bracket feels loose, consider using additional adhesive or replacing the hook.
- Test the stability of the shelves by gently applying pressure to different areas. If you notice any wobbling or instability, double-check the attachment of the hooks and brackets.
By following these simple steps, you can easily install floating shelves without the need for drilling. Enjoy the convenience of extra storage space in your home without the hassle of wall damages. Remember to choose high-quality adhesive hooks and regularly check the stability of your shelves to ensure they remain secure over time.
Alternative Methods For Installing Floating Shelves Without Drilling
When it comes to installing floating shelves without drilling, there are several alternative methods that you can consider. These methods provide a convenient and hassle-free solution for those who are unable or unwilling to drill into their walls. In this article, we will explore three such methods: utilizing heavy-duty adhesive tape, using brackets or brackets with adhesive strips, and exploring magnetic options for metal surfaces.
Utilizing heavy-duty adhesive tape
One of the simplest methods for installing floating shelves without drilling is by utilizing heavy-duty adhesive tape. This type of tape is designed to hold a significant amount of weight and is often used in the construction industry. To install your floating shelves using adhesive tape, follow these steps:
- Clean the surface where you plan to install the shelves. Make sure it is free from dust, dirt, and any other debris that may interfere with the adhesion of the tape.
- Measure and mark the desired location for your shelves.
- Cut strips of heavy-duty adhesive tape to the length of your shelf brackets.
- Peel off the backing of the tape and apply it to the back of your shelf brackets.
- Press the brackets firmly against the cleaned surface and hold them in place for a few seconds to ensure a strong bond.
- Repeat the process for each bracket, allowing the adhesive tape to cure according to the manufacturer’s instructions before placing any weight on the shelves.
Using brackets or brackets with adhesive strips
If you prefer a more traditional look or have concerns about relying solely on adhesive tape, you can use brackets or brackets with adhesive strips to install your floating shelves without drilling. This method provides additional support and stability. Here’s how you can do it:
- Clean the surface and mark the desired location for your shelves.
- Choose brackets or brackets with adhesive strips that are designed to support the weight of your shelves.
- Attach the brackets to the wall using the adhesive strips or screws, following the manufacturer’s instructions.
- Slide your floating shelves onto the brackets and make sure they are level.
- Secure the shelves to the brackets according to the instructions provided.
Exploring magnetic options for metal surfaces
If you have metal surfaces in your home, you can explore magnetic options for installing floating shelves without drilling. Magnetic mounting systems offer a convenient and versatile solution. Here’s how you can use them:
- Clean the metal surface where you want to install the shelves.
- Choose magnetic mounting systems that are suitable for the weight and size of your shelves.
- Attach the magnetic mounts to the metal surface following the manufacturer’s instructions.
- Place your floating shelves onto the magnetic mounts and adjust them as needed.
- Ensure that the shelves are securely held by the magnetic mounts before placing any items on them.
By utilizing these alternative methods for installing floating shelves without drilling, you can enjoy the aesthetic appeal and functionality of floating shelves without the need for permanent wall alterations. Whether you choose heavy-duty adhesive tape, brackets with adhesive strips, or magnetic options for metal surfaces, these methods provide convenient solutions that can be easily reversed if needed.
Tips For Maintaining And Removing Floating Shelves
Once you have successfully installed your floating shelves without drilling, it is important to properly maintain and care for them to ensure their longevity. Additionally, if you ever decide to remove the shelves, it is crucial to follow the manufacturer’s instructions to avoid damaging the walls. Here are some essential tips for maintaining and removing floating shelves:
Regularly Clean and Dust the Shelves
To keep your floating shelves looking their best, it is essential to regularly clean and dust them. Dust and dirt can accumulate on the surface, making the shelves appear dull and unattractive. To clean your shelves, simply wipe them down with a soft, damp cloth or use a gentle cleaner suitable for the type of material your shelves are made of. Avoid using harsh chemicals or abrasive materials that could damage the finish. By regularly cleaning and dusting your floating shelves, you can maintain their aesthetic appeal and keep them looking brand new.
Avoid Placing Excessively Heavy Items on the Shelves
While floating shelves are designed to be sturdy, it is important to avoid placing excessively heavy items on them. The weight capacity of your shelves will depend on the specific design and materials used. Overloading the shelves with heavy objects not only puts strain on the shelf brackets but also increases the risk of the shelves detaching from the wall. Remember to consult the manufacturer’s guidelines for weight limits and distribute the weight evenly across the shelves. By being mindful of the weight placed on your floating shelves, you can prevent unnecessary damage to the shelves and ensure their stability.
Follow Manufacturer’s Instructions for Proper Removal without Damaging the Walls
If you ever need to remove your floating shelves, it is crucial to follow the manufacturer’s instructions to avoid damaging the walls. Each shelf may have its own specific removal process, so refer to the accompanying documentation or contact the manufacturer for guidance. Some shelves may require the use of special tools or techniques, such as sliding a flat tool between the shelf and the wall to release it. When removing the shelves, take your time and proceed carefully to avoid causing any accidental damage. By adhering to the manufacturer’s instructions, you can safely remove the floating shelves without leaving unsightly marks or holes on your walls.
Frequently Asked Questions
Can You Hang Floating Shelves Without Drilling?
Yes, you can hang floating shelves without drilling by using adhesive hooks or brackets specifically designed for this purpose. These alternatives provide a strong hold and are easy to install, making them a convenient option for those who want to avoid drilling into the walls.
How Do You Hang Floating Shelves Without Holes?
To hang floating shelves without holes, use adhesive strips or brackets that can be attached to the wall without drilling. These alternatives provide a secure hold without causing any damage to your walls. Follow the instructions carefully for proper installation.
Can You Use Command Strips To Hang Floating Shelves?
Yes, you can use command strips to hang floating shelves. They provide a secure hold without damaging the walls. Make sure to follow the weight and size limits specified by the command strips manufacturer for best results.
How Do You Anchor A Shelf Without Drilling?
To anchor a shelf without drilling, use adhesive hooks or wall anchors. Adhesive hooks stick to the wall and provide support for lightweight shelves. Wall anchors are inserted into the wall and provide stability for heavier shelves. Both options are easy to install and don’t require drilling.
Conclusion
Installing floating shelves without drilling is a versatile solution for adding extra storage or decorative displays in any living space. With the simple steps outlined in this blog post, you can achieve a clean and seamless look without the need for complex tools or damaging your walls.
Whether you live in a rental property or prefer a temporary solution, this method offers convenience and flexibility. So go ahead, transform your space with style and functionality, and enjoy the benefits of floating shelves without drilling.