To install floating shelves without brackets, use adhesive strips designed for heavy-duty hanging. First, clean the wall surface where you want to install the shelves.
Apply the adhesive strips to the back of the shelf, ensuring they are evenly spaced. Press the shelf firmly against the wall, holding it in place for a few seconds. Repeat the process for each shelf, making sure to follow the manufacturer’s instructions for weight limits and drying time.
Materials Needed
Before you can begin installing floating shelves without brackets, it’s essential to gather the necessary materials. Having these items on hand will ensure a smooth and successful installation process. Here are the materials you’ll need:
Wall anchors
Wall anchors are crucial for providing extra support and stability to your floating shelves. These anchors secure the shelves to the wall, preventing them from sagging or falling. Make sure to choose wall anchors that are suitable for the weight and size of your shelves.
Level
A level is a vital tool that helps you ensure your floating shelves are installed perfectly straight. It ensures that the shelves are accurately positioned, giving your space a polished and professional look. With a level handy, you’ll be able to enjoy aesthetically pleasing and functional floating shelves.
Drill
A power drill is an invaluable tool for installing floating shelves without brackets. It allows you to quickly and effortlessly create holes in the wall for the wall anchors. Make sure to use a drill bit that matches the size of your wall anchors to ensure a secure installation.
Screws
Screws are essential for attaching the wall anchors to the wall and securing the floating shelves. Be sure to use the appropriate screws for your wall type to ensure a strong and reliable mounting. Using the wrong type of screws can lead to problems such as shelves that are not securely attached or damage to your walls.
Floating shelves
Of course, you’ll need the floating shelves themselves. These shelves provide a sleek and modern appearance, as they appear to “float” on the wall without any visible brackets. When choosing floating shelves, consider the dimensions, material, and weight capacity to ensure they are suitable for displaying your desired items.
Choosing The Right Wall Anchors
When it comes to installing floating shelves without brackets, one of the key steps is choosing the right wall anchors. Wall anchors are crucial for providing the necessary stability and support for your shelves, ensuring they stay securely attached to the wall.
Importance of Wall Anchors
The importance of wall anchors cannot be overstated when it comes to installing floating shelves without brackets. These anchors are designed to distribute the weight of the shelves evenly and prevent them from sagging or falling. Without proper anchors, your shelves may not be able to withstand the weight of your belongings and could potentially cause damage to your walls or even injure someone.
Types of Wall Anchors
There are several types of wall anchors available in the market, each with its own set of unique characteristics and uses. Here are some commonly used wall anchors:
- Plastic Sleeve Anchors: These anchors are suitable for lightweight shelves and are easy to install. They expand as the screw is tightened, creating a tight grip within the wall.
- Metal Anchors: Metal anchors, such as toggle bolts or molly bolts, provide a strong hold and are ideal for heavier shelves. They consist of a metal sleeve that expands behind the wall, providing added stability.
- Expansion Anchors: These anchors are versatile and work well with a variety of wall materials. They come with an expandable sleeve that grips the wall securely when the screw is tightened.
- Winged Plastic Anchors: Winged anchors are suitable for light to medium-weight shelves and are easy to install. The wings on these anchors prevent them from rotating inside the wall and offer good stability.
Considerations for Choosing Wall Anchors
When selecting wall anchors for your floating shelves, there are a few considerations to keep in mind. These factors will help ensure that you choose the right anchors for your specific needs:
- Weight Capacity: Determine the weight capacity required for your shelves and select anchors that can support that weight. It’s always a good idea to choose anchors with a higher weight capacity to provide an extra layer of security.
- Wall Material: Consider the type of wall you will be installing the shelves on. Different types of wall materials may require specific types of anchors to ensure a secure hold.
- Installation Ease: Some anchors are easier to install than others. Consider your level of expertise and the tools available to you before making a decision.
- Price and Availability: Take into account the cost and availability of the wall anchors. While it’s important to select high-quality anchors, it’s also essential to find options that fit within your budget.
By carefully considering these factors and choosing the right wall anchors for your floating shelves, you can ensure a secure and successful installation. Remember, the stability and durability of your shelves depend on the quality of the anchors you choose, so don’t skimp on this important step.
Preparing The Wall Surface
Before installing floating shelves without brackets, it’s essential to prepare the wall surface properly. This will ensure a sturdy and secure installation that will last for years to come. The preparation process consists of three main steps: locating the studs, marking the drill points, and using a level to ensure accuracy. Let’s dive in and learn more about each step.
Locating the studs
The first step in preparing the wall surface is to locate the studs. Studs are the vertical wooden or metal beams behind the drywall that provide structural support to the wall. Finding the studs is crucial because they will provide the necessary support for your floating shelves. Here’s how you can do it:
- Start by using a stud finder tool, which is easily available at any hardware store. Run it along the wall, following the instructions provided with the tool. The stud finder will notify you when it detects a stud.
- Alternatively, if you don’t have a stud finder, you can use other methods to locate the studs. One popular technique is tapping the wall lightly with your knuckles. A hollow sound indicates the absence of a stud, while a solid and dull sound indicates the presence of a stud.
Pro tip: Remember that studs are typically spaced 16 or 24 inches apart, so once you locate one stud, you can measure the distance to find the adjacent ones.
Marking the drill points
After locating the studs, the next step is to mark the drill points for your floating shelves. This will ensure accurate and secure installation. Here’s how you can do it:
- Use a pencil to mark the exact spot where you want to install the shelves. Make sure to keep the measurements consistent and level.
- Now, measure the distance from the nearest stud to the marked drill points. This will help you determine the length of the screws or anchors required for installation.
Pro tip: Double-check your measurements and marks before drilling to avoid any mistakes or uneven shelves.
Using a level to ensure accuracy
Lastly, using a level is crucial to ensure the accuracy of your installation. A level will help you confirm that your shelves are perfectly horizontal and aligned. Here’s how you can do it:
- Place a level on top of the marked drill points and adjust accordingly until the bubble is perfectly centered within the level.
- Ensure that the level is leveled both horizontally and vertically to guarantee the shelves are straight.
Pro tip: Consider using a laser level for even more precise and professional results.
By following these steps and properly preparing the wall surface, you are now ready to move on to the next step of installing your floating shelves without brackets. Stay tuned for our upcoming blog post which will guide you through the installation process.
Drilling And Installing Wall Anchors
Selecting the drill bit
When it comes to installing floating shelves without brackets, drilling and installing wall anchors is a critical step in ensuring sturdy and secure shelves. The first step in this process is selecting the right drill bit. You’ll want to choose a bit that matches the size of the wall anchor you’ll be using. Common wall anchors are typically 3/16 inch or 1/4 inch in diameter, so make sure to select a drill bit that corresponds with this size.
Drilling into the wall
Once you have the appropriate drill bit, it’s time to start drilling into the wall. But before you begin, it’s essential to locate the position where you want to install your floating shelves. Use a stud finder or knock on the wall to identify any studs. If you do find a stud, it’s preferable to mount your shelves directly onto it for added stability. However, if there are no studs available or they aren’t in the desired position, drilling into the drywall is perfectly fine.
When drilling, make sure to wear safety goggles to protect your eyes from any flying debris. Start by marking the spot where you’ll be drilling with a pencil or tape. Then, hold the drill perpendicular to the wall and start drilling slowly. Apply gentle pressure and let the drill bit do the work. The depth of the hole will depend on the length of the wall anchor you’re using, so make sure to drill deep enough for the anchor to fit snugly.
Inserting the wall anchors
Once you’ve completed drilling the holes, it’s time to insert the wall anchors. Wall anchors are essential because they provide support and prevent the shelves from sagging or falling down. These anchors expand when screws are inserted, creating a secure hold within the wall.
To insert the wall anchor, align it with the hole you drilled and gently tap it into place using a hammer. Ensure it sits flush with the wall surface. If you’re using a screw-in anchor, simply screw it into the hole until it is tight. Wall anchors come in various types, including plastic, metal, and toggle anchors, so choose the one that suits your shelving needs.
Attaching the brackets to the wall
With the wall anchors in place, it’s time to attach the brackets to the wall. Line up the bracket holes with the corresponding wall anchor holes. Insert the screws provided with the brackets into the wall anchors and tighten them until the brackets are securely fastened to the wall.
Make sure to check for any wobbling or unevenness in the brackets. If needed, adjust the screws or anchors to ensure a firm and level mounting. Double-check that the brackets are firmly attached before proceeding to install the shelves.
By following these steps for drilling and installing wall anchors, you’ll be well on your way to securely mounting your floating shelves without the need for visible brackets. Enjoy the freedom of stylish and functional shelves that appear to float effortlessly on your walls!

Mounting The Floating Shelves
Measuring and marking the shelf position
Before mounting the floating shelves, it is essential to ensure that you measure and mark the shelf position accurately. By doing this, you can guarantee a level and aligned installation. Here’s a step-by-step guide to help you with this process:
- Begin by determining the desired height of your floating shelves. Take into consideration any surrounding furniture or fixtures that could affect the positioning.
- Use a measuring tape to measure and mark the height of where you want to mount the first shelf. Repeat this process for each subsequent shelf.
- For precision, use a level to ensure that the marked points are perfectly aligned. This step is crucial to prevent any crooked or uneven shelves.
- Once you’ve confirmed the alignment, mark the position where the brackets will be attached to the wall. These marks will serve as your installation reference points.
Attaching the shelves to the brackets
Now that you have the measurements and bracket positions marked, it’s time to attach the shelves to the brackets. Follow these steps to complete this stage:
- Place the first bracket against the wall, lining it up with the marked position.
- Secure the bracket to the wall using the appropriate screws or mounting hardware. Make sure to use a level to ensure the bracket is straight and level before fully tightening the screws.
- Repeat this process for each bracket, making sure they are all securely attached to maintain proper stability.
- Carefully place the shelf onto the brackets, making sure they align with the brackets’ support arms.
- Gently press down on the shelf to ensure a snug fit.
Using a level to ensure alignment
To achieve a polished and professional installation, it is essential to use a level to double-check the alignment of your floating shelves. Follow these steps to ensure optimum alignment:
- Place the level on top of the first installed shelf, checking for any signs of tilting or unevenness.
- If the shelf is not level, carefully adjust it by slightly loosening the screws and repositioning it.
- Continue to use the level to check the alignment of each successive shelf, making any necessary adjustments.
- Once all the shelves are level and aligned, tighten the screws securely to finalize the installation.
By incorporating these steps into your installation process, you can mount floating shelves without brackets flawlessly. Ensure precise measuring and leveling techniques to achieve a stylish and functional addition to your space.
Finalizing The Installation
After successfully installing floating shelves without brackets and ensuring that they are securely attached to the wall, there are a few essential steps to take to complete the installation. These final touches will not only enhance the stability of the shelves but also conceal any visible screws and provide a clean and organized look to your space.
Checking the Stability of the Shelves
Before proceeding, it is important to check the stability of the shelves to ensure they can hold the weight of the items you plan to place on them. To do this, gently apply pressure to the front edge and corners of each shelf to see if there is any wobbling or movement. If you notice any instability, you may need to reinforce the shelves by adding more screws or adjusting their position on the wall.
Concealing the Screws
To achieve a seamless and professional appearance, concealing the screws is crucial. There are several methods you can use to hide the screws:
- Wood filler or putty: If your shelves are made of wood, you can fill the screw holes with wood filler or putty that matches the color of the shelves. Apply the filler using a putty knife, smooth it out, and let it dry. Once it’s dry, sand the area until it’s smooth and then paint or stain the shelves to blend in with the rest of the wall.
- Wall anchors and touch-up paint: For shelves made of materials other than wood, you can use wall anchors to secure them to the wall. After installing the anchors and attaching the shelves, touch-up paint matching the color of the wall can be used to paint over the screw heads, making them virtually invisible.
- Decorative caps or covers: Another option to consider is using decorative caps or covers designed specifically for concealing screws. These caps come in various styles and finishes and can add a decorative element to your shelves while hiding the screws at the same time.
Cleaning and Organizing the Shelves
Once the shelves are stable and the screws are concealed, it’s time to clean and organize them. Remove any dust or debris that may have accumulated during the installation process, and wipe down the shelves with a damp cloth or appropriate cleaning solution. Then, arrange your items on the shelves, keeping in mind both functionality and aesthetics. Consider using containers, baskets, or dividers to keep smaller items organized and visually appealing.
By following these final steps and ensuring the stability, concealment of screws, and cleanliness of your floating shelves, you can create a polished and stylish look while maximising the storage and display space in your home.
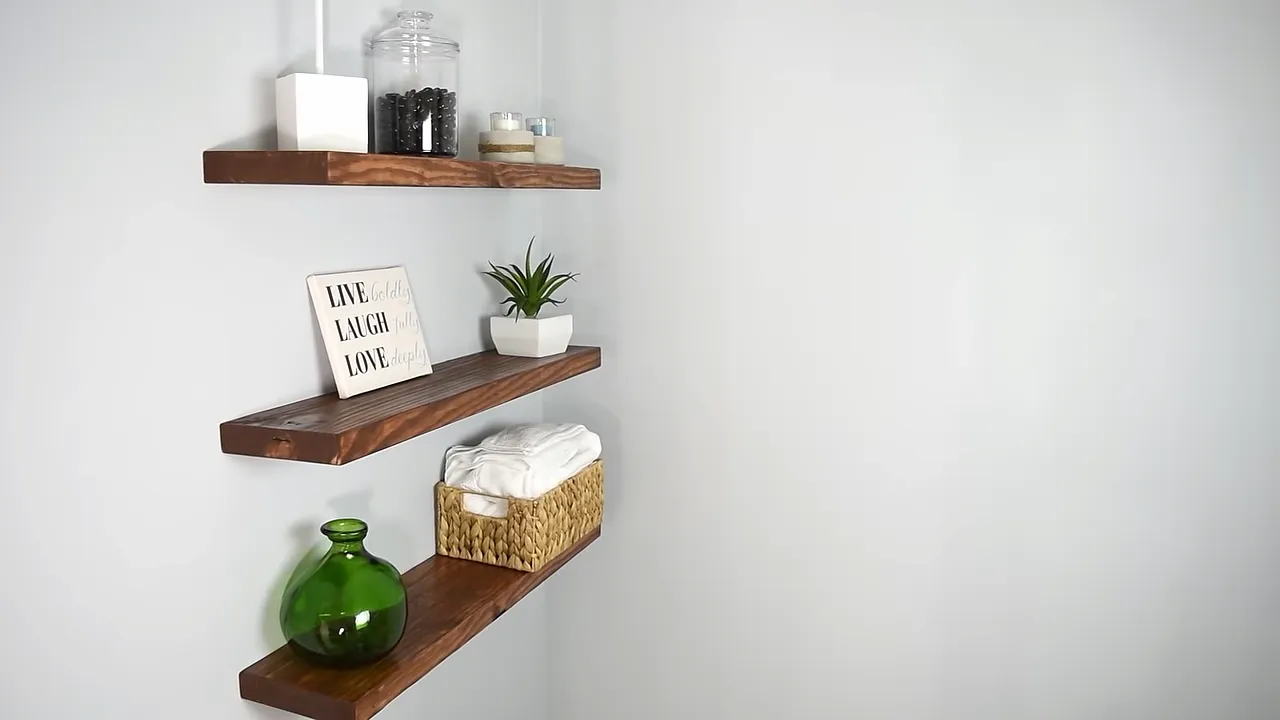
Decorating And Styling The Floating Shelves
Once you have successfully installed your floating shelves without brackets, it’s time to transform them into a stylish and eye-catching display. Decorating and styling your shelves can truly bring a room to life, showcasing your personal style and adding a touch of sophistication. In this section, we will explore essential tips and ideas for choosing the right decor items, arranging objects on the shelves, and creating an aesthetically pleasing display.
Choosing the right decor items
When selecting decor items for your floating shelves, it’s essential to consider both form and function. The items you choose should not only enhance the overall aesthetic of the room but also serve a practical purpose. Here are some ideas to help you make the right choices:
- Consider the overall theme or style of the room and choose decor items that complement it. Whether your decor style is modern, eclectic, or traditional, make sure the items you choose tie in with the overall design.
- Vary the heights of the objects on the shelves to create visual interest. Mix tall vases or sculptures with smaller decorative pieces to add dimension.
- Don’t be afraid to incorporate natural elements such as plants or flowers. They not only bring life to the shelves but also add a refreshing touch to the room.
- If you have a collection of items, display them together to create a focal point. Group similar pieces, such as vintage books or collectibles, to create a cohesive look.
- Consider the color palette of the room and choose decor items that complement or contrast with it. This will help create a harmonious and balanced display.
Arranging objects on the shelves
Now that you have chosen your decor items, it’s time to arrange them on the floating shelves. The arrangement should be visually appealing and balanced. Here are some tips to help you create an inviting display:
- Start by placing the largest or tallest items on the shelves as anchor pieces. These items will serve as a foundation for the rest of the arrangement.
- Create a balanced look by spreading objects of varying heights and sizes throughout the shelves. This will help distribute visual weight evenly and make the display more visually appealing.
- Mix textures and materials to add visual interest. Combine items made of glass, wood, metal, or ceramics to create a dynamic and layered display.
- Consider using books as risers or stands for smaller decorative objects. This adds height and dimension to the arrangement.
- Step back and assess the overall display from different angles. Make adjustments as needed to ensure a visually pleasing composition.
Tips for creating an aesthetically pleasing display
To achieve an aesthetically pleasing display on your floating shelves, incorporating a few additional tips can make a significant difference. Follow these suggestions to elevate your decor:
- Avoid overcrowding the shelves. Leave some negative space to create a balanced and visually appealing display.
- Create a sense of cohesion by repeating colors, textures, or shapes throughout the arrangement. This will tie the display together and make it more visually pleasing.
- Consider incorporating art or framed photographs into the arrangement. This can add a personal touch and create a focal point.
- Regularly rotate the items on your shelves to keep the display fresh and prevent it from becoming stagnant. This allows you to showcase different pieces and experiment with new arrangements.
- Don’t be afraid to think outside the box and get creative with your decor choices. Unique and unexpected items can add a touch of personality and make your display truly standout.
By following these tips and ideas, you can transform your floating shelves into a stunning and stylish focal point in any room. Take the time to curate a display that reflects your personal style and allows your decor items to shine.
Frequently Asked Questions
How Do You Install A Floating Shelf Without Brackets?
To install a floating shelf without brackets, follow these steps: 1. Locate and mark the desired position on the wall. 2. Drill holes into the wall for wall anchors. 3. Insert wall anchors into the holes. 4. Attach a mounting board to the wall anchors.
5. Slide the floating shelf onto the mounting board.
Can You Hang Floating Shelves Without Anchors?
Yes, you can hang floating shelves without anchors. However, it is recommended to use anchors for better stability and support. Without anchors, the shelves may not be as secure and could potentially fall. Using anchors ensures a reliable and sturdy installation.
Do Floating Shelves Need Brackets?
Yes, floating shelves generally require brackets for support. Brackets help to keep them stable and secure on the wall. Without brackets, the shelves may not be able to hold the weight of items placed on them.
How Do You Hang A Floating Shelf Without A Stud?
To hang a floating shelf without a stud, use wall anchors or toggle bolts. These provide stability and support. Remember to choose the right size and weight capacity for your shelf. Make sure to follow the manufacturer’s instructions for installation.
Conclusion
To sum it up, installing floating shelves without brackets may seem like a daunting task, but with the right tools and technique, it can be achieved easily. By following the step-by-step instructions outlined in this post, you can create a stylish and functional storage solution for your space.
So say goodbye to bulky brackets and hello to sleek floating shelves that bring a modern touch to any room. Don’t wait any longer, give it a try and transform your space today!