To install floating shelves on drywall, you will need to first locate the studs using a stud finder, then mark the desired location for the shelves. (17 words) Installing floating shelves on drywall requires finding studs and marking the shelf’s position.
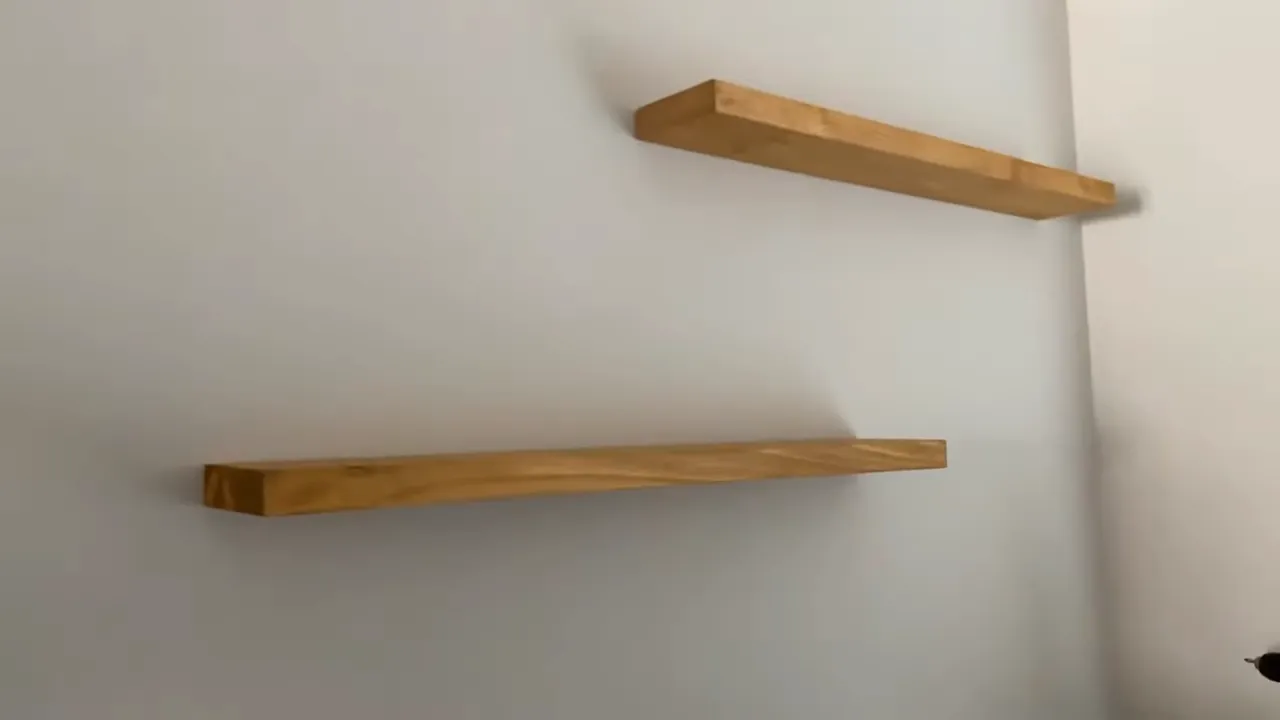
(11 words) Floating shelves are a popular choice for adding functional and decorative storage to any room. They not only provide a sleek and modern look but also maximize space by appearing as if they are “floating” on the wall. This type of shelving is particularly suitable for small spaces or areas where conventional shelving methods may not be feasible.
However, installing floating shelves on drywall can be a little tricky if not done correctly. The weight of the items placed on the shelves, as well as the potential for accidental mishandling, can put stress on the drywall. Therefore, it’s important to install the shelves securely to avoid any damage or accidents. In this guide, we will walk you through the step-by-step process of how to install floating shelves on drywall, ensuring a secure and stylish addition to your space.
Preparing Your Workspace
Before you start the installation process of floating shelves on drywall, it’s important to prepare your workspace properly. This will ensure that the project goes smoothly and that your shelves are secure and stable once installed. Preparing your workspace involves gathering the necessary tools and materials, measuring and marking the wall for shelf placement, and locating studs for secure installation. Let’s dive into each step in detail.
Gathering the Necessary Tools and Materials
In order to successfully install floating shelves on drywall, you will need to have the right tools and materials at hand. Here’s a list of what you’ll need:
- Power drill
- Tape measure
- Pencil or marker
- Spirit level
- Stud finder
- Screws or wall anchors (depending on the weight of your shelves)
- Floating shelf brackets
- Screwdriver or drill bit suitable for your screws
Make sure you have all these tools and materials in place before you begin the installation process.
Measuring and Marking the Wall for Shelf Placement
Before you can install the floating shelves, you need to determine where they will be placed on the wall. To do this, start by measuring the desired height and width of the shelves. Use a tape measure to accurately measure the dimensions and mark them on the wall with a pencil or marker.
Once you have marked the dimensions, use a spirit level to ensure the lines are perfectly straight. This will help guarantee that your shelves will be level once installed.
Locating Studs for Secure Installation
It is crucial to locate the studs behind the drywall before installing the floating shelves. Studs provide the necessary support and stability to hold the weight of the shelves and any items you plan to place on them. To find the studs, use a stud finder. Run it along the wall, following the manufacturer’s instructions, until you hear a beep or see a light indicating the presence of a stud.
Once you have located the studs, mark their positions on the wall. This will be the exact spots where you will attach the floating shelf brackets for a secure installation.
By following these steps to prepare your workspace, you are setting yourself up for a successful floating shelf installation on drywall. Gathering the necessary tools and materials, measuring and marking the wall for shelf placement, and locating studs are essential aspects that contribute to the overall strength and stability of your shelves.
Mounting The Shelf Brackets
Once you have determined the position for your floating shelves and marked the spots on the wall, it’s time to mount the shelf brackets. This step is crucial as it ensures the stability and support of your shelves. Follow these simple steps to securely attach the brackets to the wall:
Determining the optimal bracket placement
The first step in mounting the shelf brackets is to determine the optimal placement for them. This will depend on the size and weight of your shelves, as well as the aesthetic you’re aiming to achieve. As a general rule, sturdy brackets should be placed at least 16 inches apart to provide sufficient support.
If you’re installing longer shelves or planning to display heavier items, it’s a good idea to use additional brackets for added stability. Consider evenly distributing the weight across multiple brackets to maintain balance.
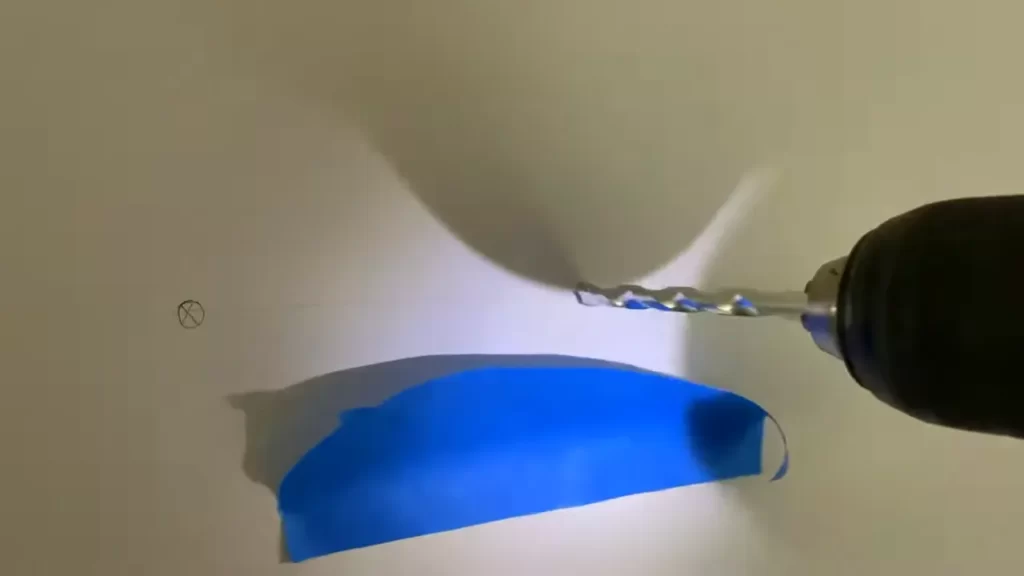
Marking and drilling holes for bracket installation
Once you have determined the optimal placement for your brackets, it’s time to mark the spots for drilling. Use a level to ensure your markings are straight and even. This will ensure that your shelves will be level and visually pleasing once installed.
With your markings in place, use a drill and an appropriate-sized drill bit to create holes for the bracket screws. It’s important to choose a drill bit that matches the size of the screws provided with your shelf brackets. This will ensure a secure and tight fit.
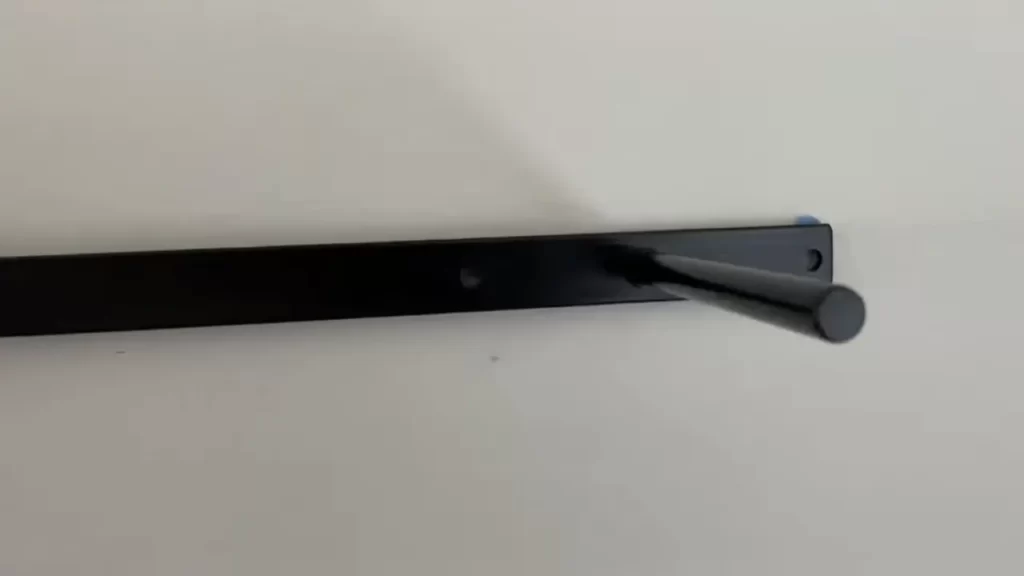
Attaching the brackets securely to the wall
Now that the holes are drilled, it’s time to attach the brackets securely to the wall. Place the brackets against the wall, aligning the pre-drilled holes with the drilled holes on the wall.
Insert the screws into the holes and use a screwdriver or drill to tighten them. Make sure the brackets are firmly attached to the wall and do not wiggle or move. A securely mounted bracket will provide the necessary support for your shelves.
Repeat this process for all the brackets until they are all securely installed. Remember to double-check the alignment and stability of each bracket as you go along.
Once all the brackets are properly mounted, you are ready to move on to the next step of installing your floating shelves: attaching the shelf board to the brackets.
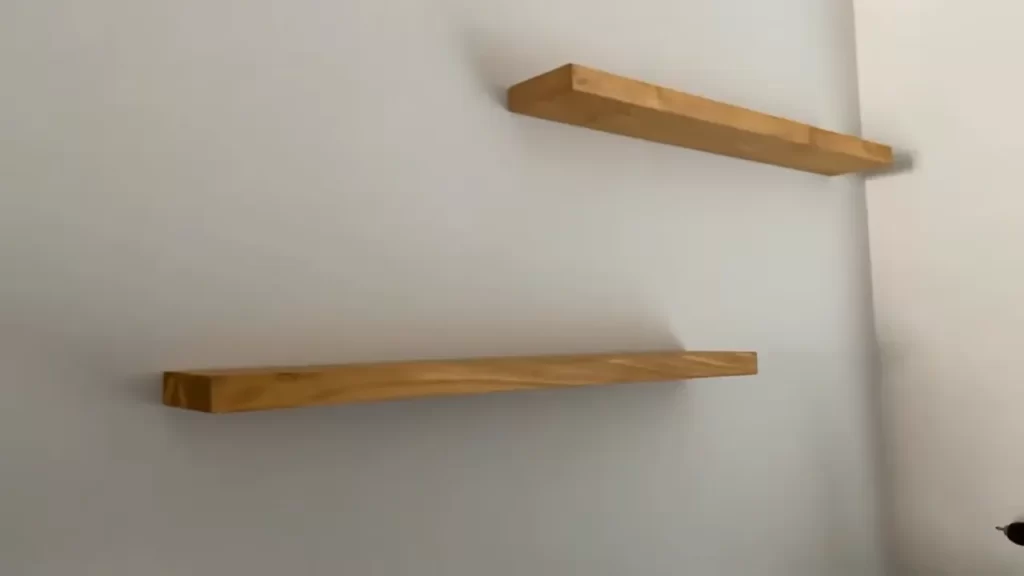
Installing The Floating Shelves
Installing floating shelves on drywall can be a great way to add storage and display space to your home. Not only are they functional, but they also have a sleek and modern look that can enhance the overall aesthetic of any room. In this guide, we will walk you through the step-by-step process of installing floating shelves on drywall, from measuring and cutting the shelf boards to ensuring stability and leveling the shelves.
Measuring and Cutting the Shelf Boards to Size
The first step in installing floating shelves is to measure and cut the shelf boards to the desired size. Start by determining the length of the shelves and mark the measurements on the boards. Use a tape measure and a pencil to ensure accuracy.
Once you have marked the measurements, it’s time to cut the shelf boards. You can use a circular saw or a table saw for this task. Make sure to wear appropriate safety gear and follow the manufacturer’s instructions for operating the saw.
If you don’t have access to power tools, you can also have the boards cut to size at your local home improvement store. Just provide them with the measurements, and they will be able to cut the boards to your specifications.
Attaching the Shelf Boards to the Brackets
After the shelf boards have been cut to size, it’s time to attach them to the brackets. Start by positioning the brackets on the wall where you want the shelves to be installed. Use a level to ensure that the brackets are straight and mark the locations of the screw holes on the wall.
Next, pre-drill the screw holes using a drill bit that is slightly smaller than the diameter of the screws you will be using. This will help prevent the drywall from cracking when you attach the brackets.
Now, it’s time to attach the brackets to the wall. Place the bracket over the pre-drilled holes and insert the screws through the bracket and into the wall. Use a screwdriver or a power drill to secure the brackets in place. Make sure the brackets are tightly fastened to provide proper support for the shelves.
Ensuring Stability and Leveling the Shelves
Once the brackets are securely attached to the wall, it’s time to ensure the stability of the shelves. Place the shelf boards onto the brackets and check if they are level. If the shelves are not level, adjust them by loosening or tightening the screws on the brackets until they are perfectly horizontal.
It’s also important to ensure that the shelves are stable. Give them a gentle push to check if they wobble or feel loose. If the shelves are not stable, you may need to add additional screws or brackets for support.
Finally, step back and admire your newly installed floating shelves. They are now ready to be decorated and used to showcase your favorite items, whether it’s books, picture frames, or decorative accents.
Installing floating shelves on drywall can be a rewarding DIY project that adds both functionality and style to your home. With the proper measurements, tools, and some patience, you can enjoy the benefits of these sleek and modern shelves in no time.
Tips For A Professional Finish
When it comes to installing floating shelves on drywall, attention to detail is key in achieving a professional finish. From filling and sanding any visible holes or gaps to painting or staining the shelves to match your decor, every step contributes to the overall look and functionality of your shelves. Additionally, adding decorative touches and styling them ensures that your shelves not only serve a practical purpose but also enhance the aesthetic appeal of your space. To help you achieve a flawless result, we have curated a list of tips to guide you through each stage of the process.
Filling and sanding any visible holes or gaps
Before proceeding with installing your floating shelves, it’s essential to ensure that the drywall surface is smooth and free from any imperfections. This can be achieved by filling any visible holes or gaps with a high-quality spackling compound. Here’s how:
- Start by cleaning the surface of the drywall to remove any dust or debris.
- Apply the spackling compound to the holes or gaps using a putty knife, making sure to fill them completely.
- Smooth out the excess compound using the putty knife, ensuring a level and flush finish with the surrounding wall.
- Allow the compound to dry according to the manufacturer’s instructions.
- Once dry, sand the filled areas using fine-grit sandpaper to create a seamless surface.
By following these steps, you can achieve a smooth and even base for your floating shelves.
Painting or staining the shelves to match your decor
Whether you prefer a painted or stained finish, matching your floating shelves to the existing decor of your space is crucial for a cohesive and polished look. Here’s how you can achieve a professional finish through painting or staining:
- Start by sanding the shelves to remove any rough edges or imperfections.
- If you choose to paint, apply a coat of primer to ensure better adhesion and an even finish. For staining, skip this step.
- Once the primer is dry, apply a thin and even coat of paint or stain, following the grain of the wood for stained shelves.
- Allow the first coat to dry completely before applying additional coats if needed. Sand lightly between coats for a smoother finish.
- Finish off your shelves with a clear topcoat to protect the surface and enhance durability.
By carefully selecting the appropriate paint or stain and following these steps, you can achieve beautifully finished floating shelves that seamlessly blend with your overall decor.
Adding decorative touches and styling the shelves
Once your floating shelves are securely installed and finished, it’s time to add those personal touches and style them to suit your taste and space. The decorative elements you choose can elevate the visual appeal of your shelves and transform them into functional focal points. Here are a few ideas:
| Decorative Touches | Styling Tips |
| Greenery and plants | Add small potted plants or succulents for a touch of nature. |
| Artwork and framed photos | Display your favorite pieces of art or personal photographs in attractive frames. |
| Books and magazines | Stack books and magazines horizontally or vertically for an organized and stylish look. |
| Candles and candle holders | Place scented candles or decorative candle holders for a cozy ambiance. |
| Decorative baskets or storage boxes | Use baskets or boxes to store and display small items while adding texture. |
Remember, the key to successful styling is achieving a balance between functionality and aesthetics. Experiment with different arrangements and arrangements until you find what works best for your space.
In conclusion, following these tips for a professional finish will ensure that your floating shelves not only provide storage space but also enhance the overall look and feel of your room. From filling and sanding any visible holes or gaps to painting or staining the shelves and adding decorative touches, every step plays a vital role in creating a visually appealing and functional shelving installation.
Ensuring Safety And Weight Capacity
Understanding weight limitations and load-bearing capacity
Floating shelves can be a great addition to any room, providing both functionality and style. However, it is important to ensure that these shelves are installed safely and can support the weight of the items you plan to display on them. Understanding the weight limitations and load-bearing capacity of your floating shelves is crucial to avoid any accidents or damage to your walls.
When it comes to weight limitations, every type of floating shelf has its own specific range. It is important to check the manufacturer’s guidelines or specifications to determine the maximum weight capacity of the shelves you have chosen. Exceeding this weight limit can put unnecessary stress on your drywall and increase the risk of the shelves detaching from the wall.
To accurately assess the load-bearing capacity of your drywall, it is essential to locate the wall studs. These sturdy wooden frames offer the best support for floating shelves. You can use a stud finder or follow certain clues such as nail patterns or electrical outlets to locate the studs. Once you have identified the studs, make sure to align the brackets or mounting hardware of your shelves with them to ensure maximum stability and weight-bearing capacity.
Using appropriate anchors or toggles for heavier shelves
If you plan to install heavier floating shelves or if you cannot locate a stud for mounting, it is essential to use appropriate anchors or toggles to secure the shelves. These anchors are designed to distribute the weight evenly across the drywall, minimizing the risk of damage or accidents.
There are several types of anchors available, including plastic anchors, winged anchors, and toggle anchors. Plastic anchors are suitable for lighter shelves, while winged anchors and toggle anchors provide more stability for heavier items. Make sure to choose the right anchor based on the weight and dimensions of your shelves.
To install the anchors or toggles, you will need to drill a hole in the drywall and insert the anchor. Follow the manufacturer’s instructions for the specific type of anchor you are using. Once the anchor is in place, you can attach the brackets or mounting hardware of your floating shelves securely, ensuring proper weight distribution.
Regular maintenance and inspection for shelf stability
Once your floating shelves are installed, it is crucial to perform regular maintenance and inspection to ensure their stability and safety.
Inspect your shelves periodically for any signs of damage, such as cracks, warping, or loose screws. Additionally, check the weight distribution of your items on the shelves to ensure they are within the weight limitations. Overloading the shelves can compromise their stability and increase the risk of detachment.
Regularly dust and clean your shelves to prevent the accumulation of dirt or debris that can weaken the brackets or mounting hardware. It is also important to avoid placing any items on the edges of the shelves, as this can unbalance the weight distribution and affect the stability of the shelves.
Troubleshooting And Common Challenges
Installing floating shelves on drywall can be a fantastic way to add both style and functionality to your space. However, like any DIY project, it’s not without its challenges. In this section, we’ll discuss some common troubleshooting techniques and solutions for the most frequently encountered issues during installation.
Fixing shelves that are not level or sagging
If you find that your floating shelves are not level or start sagging over time, there are a few steps you can take to rectify the situation. Here’s what you need to do:
- Before making any adjustments, ensure that the mounting brackets are securely attached to the wall.
- Use a level and mark a straight line on the wall where you want the shelf to be level.
- If the shelf is sagging in the middle, it might be due to insufficient support. To fix this, remove the shelf and add additional support brackets in the center.
- Ensure that all screws or brackets are tightened properly.
- Recheck the level and adjust accordingly until the shelf is level.
Repairing damaged drywall during installation
During the installation process, you may encounter situations where the drywall gets damaged. Don’t worry! Here’s what you can do to repair it:
- If there are small holes or cracks in the drywall, you can use spackling compound to fill them. Apply the compound using a putty knife, ensuring it is smooth and level with the existing wall surface.
- For larger holes, you may need to use a drywall patch. Place the patch over the damaged area and secure it with joint compound. Smooth out the compound, feathering it over the edges of the patch.
- Allow the patch or spackling compound to dry completely, following the manufacturer’s instructions.
- Once it’s dry, sand the repaired area to create a smooth surface. Wipe away any dust with a clean cloth or sponge.
- You can then paint over the repaired area to match the rest of the wall.
Dealing with issues such as stud spacing or obstructions
When installing floating shelves, you may come across stud spacing issues or obstructions that prevent direct attachment to the wall. Here are some steps to help you overcome these challenges:
- Use a stud finder to locate the studs in the wall. If the stud spacing doesn’t align with your desired shelf placement, you can use alternative mounting options, such as heavy-duty drywall anchors.
- If there are obstructions preventing direct attachment to the wall, consider using a ledger board. A ledger board is a piece of wood or metal that is attached to the wall and provides additional support for the shelves.
- Ensure that the ledger board is securely fastened to the studs, and then attach the floating shelves to the ledger board.
- Be sure to follow the manufacturer’s instructions for installing the ledger board and choose appropriate hardware that can support the weight of the shelves.
By following these troubleshooting techniques and solutions, you can overcome common challenges and successfully install floating shelves on drywall. Now, you can enjoy the beauty and functionality they add to your space!
Frequently Asked Questions
Can You Mount Floating Shelves Into Drywall?
Yes, you can mount floating shelves into drywall. Just make sure to use appropriate anchors and screws, considering the weight and depth of the shelves. It’s important to follow the manufacturer’s instructions and use a stud finder if possible for added stability.
Can You Put Floating Shelves On Drywall Without Studs?
Yes, you can mount floating shelves on drywall without studs. However, it is important to use appropriate wall anchors to support the weight of the shelves and ensure they are securely attached to the drywall. Make sure to choose anchors that are suitable for the weight capacity of the shelves.
How Do You Install A Floating Shelf Without Studs?
To install a floating shelf without studs, use wall anchors or toggle bolts to secure it. First, mark the desired location for the shelf. Next, drill holes into the wall and insert the anchors or toggle bolts. Finally, attach the shelf to the anchors or toggle bolts for a secure installation.
How Do You Hang Shelves On Drywall Without Studs?
To hang shelves on drywall without studs, use wall anchors or toggle bolts for added support. First, mark the desired location for the shelf. Then, drill holes and insert the anchors or toggle bolts. Finally, secure the shelf brackets to the wall using screws.
Conclusion
Installing floating shelves on drywall can be a simple and rewarding DIY project. By carefully following the steps outlined in this guide, you can ensure a secure and stylish addition to your home decor. Remember to measure accurately, use proper tools, and locate studs for maximum stability.
With a little patience and attention to detail, you’ll have beautiful floating shelves that enhance the functionality and aesthetics of your space. Happy installing!