To install a flapper in a toilet, remove the old flapper using pliers and a screwdriver, then attach the new flapper to the flush valve chain and secure it in place with the mounting brackets. Intro: Proper installation of a flapper in your toilet is vital for correct flushing and preventing leaks.
Over time, the flapper in your toilet may become worn out or damaged, requiring replacement. By following a few simple steps, you can easily install a new flapper and restore proper functionality to your toilet. In this guide, we will provide a step-by-step explanation of how to install a flapper in your toilet, ensuring a reliable and efficient flushing system.
Understanding The Function And Importance Of A Flapper
A flapper is an essential component of a toilet that plays a crucial role in its proper functioning. Understanding its function and importance is vital for maintaining the efficiency and effectiveness of your toilet’s flushing mechanism. In this section, we will delve into what exactly a flapper is and why it is so important.
What is a flapper and why is it important for the toilet?
A flapper, also known as a flush valve seal, is a rubber or silicone device that acts as a barrier between the toilet tank and the bowl. It is located at the bottom of the tank and is attached to a chain or rod, which is connected to the toilet handle. When the handle is pressed, it lifts the flapper, allowing water to flow from the tank into the bowl.
The importance of a flapper lies in its ability to create a tight seal between the tank and the bowl. This seal prevents water from continuously flowing into the bowl and ensures that the tank holds an adequate amount of water for each flush. Without a properly functioning flapper, the toilet may either continuously run, wasting water and increasing your utility bills, or it may struggle to flush efficiently, leading to clogs and incomplete flushes.
The role of the flapper in the flushing process
When the toilet’s handle is pressed, it pulls up the flapper, releasing the water stored in the tank. This water rushes into the bowl through the flush valve, generating the necessary force to remove waste and thoroughly clean the bowl.
Once the flushing process is complete, the flapper drops back down, creating a seal that prevents any further water from flowing into the bowl. This seal is crucial because it allows the tank to refill with water, preparing it for the next flush.
Additionally, the flapper’s design allows for precise control over the amount of water released during each flush. This is especially important for water conservation efforts, as it helps regulate the water usage and prevents unnecessary wastage.
In conclusion, a properly functioning flapper is essential for an efficient and effective flushing mechanism in your toilet. By understanding the function and importance of the flapper, you can ensure that your toilet works optimally, saving water and preventing any potential issues.

Assessing Flapper Problems And Indications For Replacement
Is your toilet experiencing repetitive flushing issues? If so, the culprit might be a faulty flapper. The flapper is a crucial component of your toilet’s flushing mechanism, responsible for allowing water to flow from the tank into the bowl during each flush. Over time, flappers can wear out or become damaged, leading to leaks, continuous running water, and ineffective flushing. In this section, we will discuss common signs of a faulty flapper and how to determine if your flapper needs to be replaced.
Common signs of a faulty flapper
Identifying a faulty flapper can be quite straightforward if you know what to look for. Here are some common signs that indicate your flapper might be causing issues:
- Continuous running water: If you hear water running in your toilet tank long after flushing, it could be a sign that the flapper is not sealing properly. This constant water flow wastes both water and money.
- Weak or incomplete flushes: If your toilet bowl is not fully emptying or you notice a weak flushing action, a worn-out flapper may be to blame. Insufficient water release from the tank can result in ineffective flushing.
- Visible damage: Examine the flapper for any signs of wear, cracks, or deterioration. A damaged flapper will not be able to provide a secure seal between the tank and bowl, causing water leaks.
- Water leaks into the bowl: If you notice water leaking into the bowl even when the toilet is not being used, it could indicate a faulty flapper. Leaks can commonly occur when the flapper is not seating correctly.
How to determine if your flapper needs to be replaced
Now that you are aware of the signs that may indicate a faulty flapper, you can assess whether it needs to be replaced. Follow these steps:
- Perform a dye test: Add a few drops of food coloring into the toilet tank. Wait for about 15 minutes without flushing. If you notice the food coloring seeping into the bowl, it signifies a flapper leak that requires replacement.
- Inspect the flapper: Lift the lid off the tank and visually examine the flapper. Look for any visible signs of damage such as cracks, tears, or excessive wear. If the flapper appears worn out or damaged, it is a good indication that it needs replacement.
- Check for proper seal: Flush the toilet and observe the flapper’s seal. It should close tightly against the flush valve opening and form a complete seal. If you notice any gaps or the flapper does not close properly, replacement is necessary.
- Listen for running water: After flushing, listen for any water running inside the tank. If you hear water trickling or continuous running, it suggests a faulty flapper that needs to be replaced.
By assessing the common signs of a faulty flapper and performing simple tests, you can quickly determine if replacing the flapper is necessary. Resolving flapper issues timely will not only improve your toilet’s performance but also save water and prevent costly water bills.
Gathering The Necessary Tools And Materials
Before you embark on the task of installing a flapper in your toilet, it is important to gather all the necessary tools and materials. Having everything you need at your fingertips will make the process smoother and more efficient. In this section, we will outline the essential tools needed for flapper installation and recommend the materials for optimal performance. Let’s get started!
Essential Tools Needed for Flapper Installation
Installing a flapper requires a few basic tools that you may already have in your toolbox. If not, they are readily available at most home improvement stores. Here are the essential tools you will need:
| Tool | Description |
|---|---|
| Adjustable Wrench | An adjustable wrench will be handy for loosening and tightening nuts and bolts. |
| Screwdriver | A screwdriver is necessary for removing screws that hold the tank lid in place. |
| Plunger | A plunger may be needed to clear any clogs before installing the new flapper. |
| Bucket or Towel | A bucket or towel is useful for catching any water that may spill during the installation process. |
Recommended Materials for Optimal Performance
Using high-quality materials is essential for ensuring the optimal performance of your flapper. While there are various options available, it is recommended to choose the following materials:
- Flapper: Select a flapper that is compatible with your toilet model and made of durable rubber or silicone for long-lasting performance.
- Chain and Hook: Ensure the chain that connects the flapper to the flush handle is sturdy and properly adjusted to allow for smooth flushing.
- Flapper Seal: Invest in a good flapper seal to prevent leaks and maintain a watertight seal between the flapper and the flush valve.
By using these recommended materials, you can be confident that your flapper will function effectively and efficiently, reducing the risk of water wastage and potential toilet problems down the line.
Now that you have gathered the necessary tools and materials, you are ready to move on to the next step of installing the flapper in your toilet. Stay tuned for our upcoming blog post where we will guide you through the installation process step by step!
Step 1: Shutting Off The Water Supply
Before starting the process of installing a flapper in your toilet, it’s essential to shut off the water supply to avoid any potential water damage. This step is crucial to ensure a smooth and hassle-free installation. Follow the simple steps below to locate the water supply valve and turn off the water to the toilet:
Locating the Water Supply Valve
The water supply valve is typically located near the base of the toilet, where the water hose connects to the wall. To locate it, follow these steps:
- Look behind the toilet bowl where the water hose connects to the wall.
- Scan along the wall, near the floor level, for a valve or lever.
- If necessary, move any surrounding objects or covers to get a clear view of the valve.
Turning Off the Water to the Toilet
Once you have located the water supply valve, you can proceed to turn off the water to the toilet. Here’s how to do it:
- Gently turn the valve clockwise until it is fully closed. This will shut off the water supply to the toilet.
- Double-check to ensure that the valve is completely closed by attempting to flush the toilet. If there is no water flowing into the tank, you have successfully shut off the water.
- If the valve is stubborn or difficult to turn, you may need to use pliers or an adjustable wrench for extra leverage. Be careful not to apply excessive force as it may damage the valve.
By shutting off the water supply to the toilet, you have taken the necessary precautions to prevent any accidental water flow during the flapper installation process. This ensures that the installation will be smooth and free from any potential water damage. With the water supply turned off, you can now confidently proceed to the next step of installing the flapper in your toilet.
Step 2: Emptying The Tank
Before installing a new flapper in your toilet, it’s crucial to empty the tank completely. This step ensures that you can work on the flapper without any water getting in the way. Follow the simple instructions below to empty the tank effectively.
Flushing the Toilet to Remove Water
The first thing you need to do is flush the toilet to remove as much water as possible from the tank. Locate the toilet’s flush handle and press it down firmly. This action activates the flushing mechanism, causing the water to be drained from the tank and into the bowl. By flushing, you minimize the amount of water you will have to manually remove.
Ensuring the Tank is Fully Drained
After flushing, you’ll notice that some water might still remain in the tank. It’s essential to ensure that the tank is fully drained before proceeding with the installation of the new flapper. To accomplish this, grab a small container or a large sponge to soak up the remaining water. Carefully and patiently, sponge out the water until the tank is empty.
Remember, it’s essential to empty the tank thoroughly to avoid any accidents or damage during the installation process.
Step 3: Removing The Old Flapper
After you have successfully identified the type of flapper in your toilet, it’s time to move on to the next step – removing the old flapper. This is an important step in the installation process as it ensures a proper fit and functionality of the new flapper. Follow the steps below to easily detach the old flapper from the flush valve assembly.
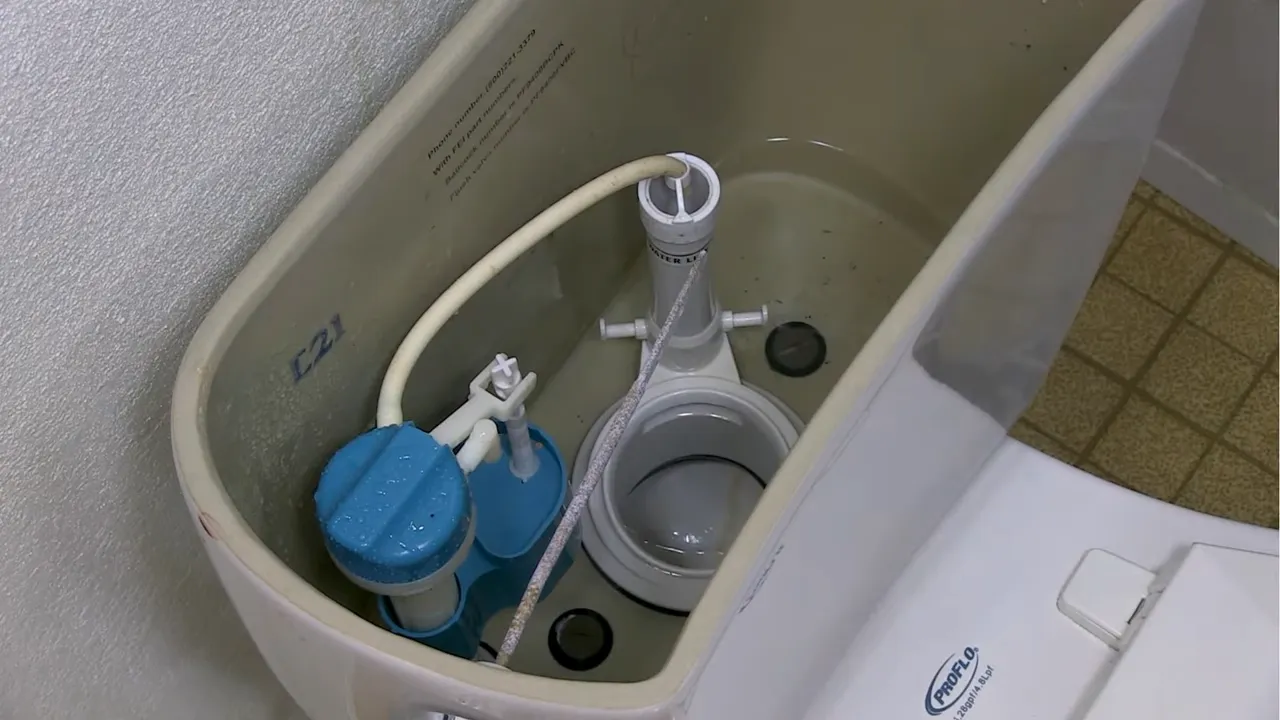
Identifying the type of flapper in your toilet
The first thing you need to do is determine the type of flapper that is currently installed in your toilet. This will help you understand the specific method to detach it. There are three common types of flappers:
- Rubber flapper: These are the most common type and are typically black or red in color. They attach to the flush valve assembly with a ring or chain.
- Float cup flapper: This type has a round float attached to it and is often found in newer toilets. The float cup flapper is usually connected to the flush valve assembly with a rod.
- Tower flapper: This type of flapper has a tall tower-like structure and is secured to the flush valve assembly with a chain.
To identify the type of flapper in your toilet, simply lift the lid of the toilet tank and visually inspect the flapper. Take note of its shape, color, and any attachments that may be present.
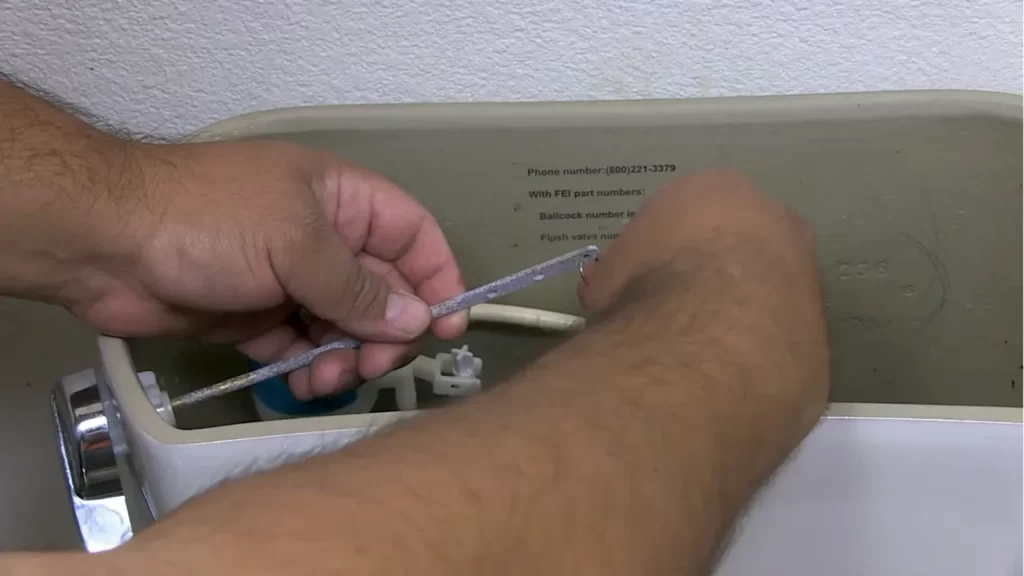
Detaching the old flapper from the flush valve assembly
Now that you know the type of flapper, let’s proceed with the removal process. Follow these steps:
- Turn off the water supply to the toilet by locating the shut-off valve, typically located on the wall behind the toilet. Rotate the valve clockwise until it is fully closed.
- Flush the toilet to drain the water from the tank.
- Inspect the flapper to locate the attachment mechanism. It could be a ring, chain, or rod depending on the type of flapper.
- Disconnect the flapper from the attachment mechanism. This may involve unscrewing a ring, unclipping a chain, or removing a rod.
- Once disconnected, carefully lift the old flapper out of the flush valve assembly. Take note of the position and orientation of the flapper for future reference.
Congratulations! You have successfully removed the old flapper from your toilet. This paves the way for the next step, which involves installing the new flapper. Stay tuned for the next part of our guide where we will cover the installation process.
Step 4: Choosing The Right Replacement Flapper
Different types of flappers available in the market
If you are in the market for a replacement flapper for your toilet, it is important to know that not all flappers are created equal. There are different types of flappers available, each designed to fit specific toilet models and meet different needs. By understanding the different options available, you can select the appropriate flapper that will work best for your toilet.
Here are a few common types of flappers that you may come across:
| Flapper Type | Description |
| Rubber flapper | A rubber flapper is the most common type of flapper and is suitable for most toilet models. It provides a reliable seal and is known for its durability. |
| Adjustable flapper | An adjustable flapper allows you to control the amount of water that flows into the toilet bowl. This can help you save water and reduce your water bill. |
| Universal flapper | A universal flapper is designed to fit most toilet models and can be a convenient option if you are unsure about the specific flapper required for your toilet. |
| Specialty flapper | Specialty flappers are designed for specific toilet models or brands. If you have a unique or older toilet, you may need a specialty flapper to ensure compatibility. |
Selecting the appropriate flapper for your toilet model
Now that you are familiar with the different types of flappers available, it’s time to select the right replacement flapper for your toilet model. Here are some steps to help you make the right choice:
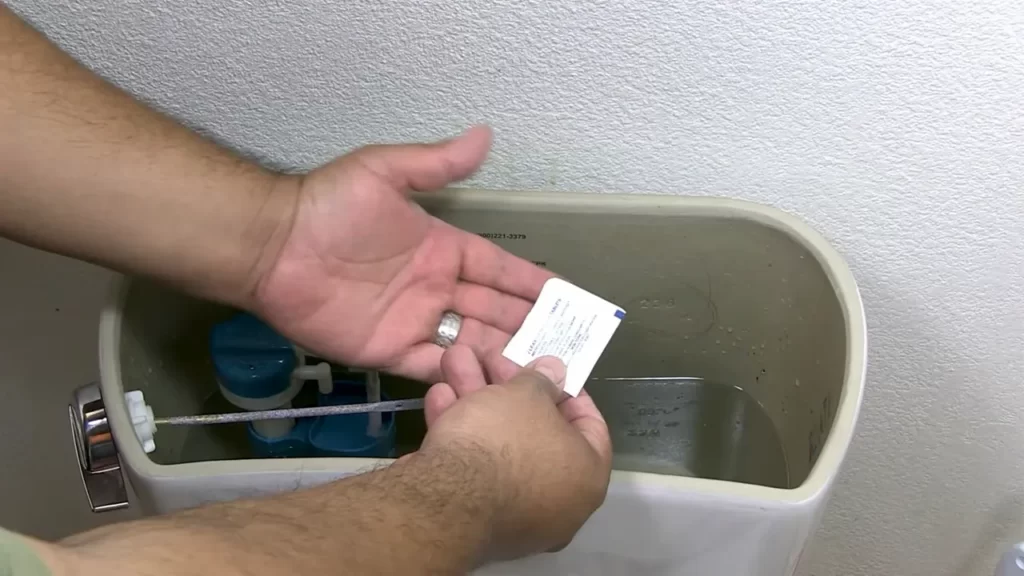
- Check your toilet model: First, you need to identify the make and model of your toilet. This information can usually be found on the inside of the toilet tank lid or on the back of the toilet bowl.
- Refer to the manufacturer’s guidelines: Look for the manufacturer’s recommendations regarding the compatible flapper for your specific toilet model. This information can be found in the toilet’s user manual or on the manufacturer’s website.
- Measure the flapper size: Take measurements of the existing flapper to ensure the replacement flapper is the right size. Measure the diameter and thickness of the flapper, as well as the length and width of the chain attachment.
- Compare features: Consider the features you need in a flapper, such as water-saving capabilities or durable construction. Compare the features of different flappers to find one that meets your requirements.
- Purchase the replacement flapper: Once you have gathered all the necessary information, it’s time to purchase the replacement flapper. You can find flappers at hardware stores, plumbing supply stores, or online retailers.
By following these steps, you can ensure that you select the appropriate replacement flapper for your toilet model. Remember to carefully read the installation instructions provided with the new flapper to ensure proper installation.
Step 5: Installing The New Flapper
Now that you have removed the old flapper from your toilet’s flush valve, it’s time to install the new one. Follow these simple steps to ensure a proper installation:
Positioning the new flapper over the flush valve
Step 1: Take out the new flapper from its packaging and inspect it for any damages or defects.
Step 2: Carefully position the flapper over the flush valve, ensuring that the seal lines up with the valve opening.
Properly attaching the flapper to the chain and overflow tube
Step 3: Check the length of the chain attached to the flapper. It should have a slight amount of slack, allowing the flapper to close completely without being too tight.
Step 4: Attach one end of the chain to the small hole located on the flapper arm. Make sure it is secure and will not come loose during flushing.
Step 5: Attach the other end of the chain to the overflow tube. The chain should have enough slack to allow the flapper to close fully but not so much slack that it gets tangled or obstructs the flapper’s movement.
Step 6: Test the flapper by flushing the toilet. Ensure that it opens fully when the handle is pressed and closes properly after the flush is complete.
With these simple steps, you can easily install a new flapper in your toilet. Remember, a properly functioning flapper is crucial for efficient flushing and water conservation. Taking the time to replace an old or faulty flapper can save you money on water bills and prevent any unnecessary leaks. So go ahead and give your toilet a new lease of life by installing a new flapper!
Step 6: Adjusting Flapper Chain Length
Determining the ideal chain length for optimal performance
Once you have successfully installed the flapper in your toilet, it is crucial to adjust the chain length to ensure proper functioning. The chain connects the flapper to the toilet handle, allowing it to open and close smoothly when you flush. Determining the correct chain length is essential to avoid any issues such as the flapper not sealing properly or the chain getting tangled.
Making necessary adjustments to ensure proper function
Adjusting the flapper chain length is a simple process that can significantly improve the performance of your toilet. To ensure proper function, follow these steps:
- Start by examining the chain length. Ideally, it should have some slack so that the flapper can close completely after flushing. However, having too much slack can cause the chain to get caught or tangled, leading to problems with flushing.
- If the chain is too long, you will need to shorten it. Begin by locating the chain hook or adjustment clip near the toilet handle. This clip is typically found on the chain itself.
- Using a pair of pliers, disconnect the chain from the hook or clip. Be gentle to avoid damaging the chain or clip.
- Next, determine how much you need to shorten the chain. One way to do this is by testing the flapper’s closing mechanism. Flush the toilet and observe the chain’s movement. If the flapper closes smoothly without getting caught or stuck, the chain length is suitable. However, if you notice any issues, such as the flapper not sealing properly, the chain is likely too long.
- To shorten the chain, use the pliers to remove excess links. Take care to remove an equal number of links from both sides of the chain to maintain balance.
- Once you have removed the desired number of links, reattach the chain to the hook or clip.
After making the necessary adjustments, flush the toilet a few times to check if the flapper opens and closes smoothly without any issues. Test for proper sealing as well, ensuring that water doesn’t continue to flow into the bowl once the flush is complete. If everything is working correctly, you have successfully adjusted the flapper chain length for optimal performance.
Step 7: Restoring Water Supply And Testing
Step 7: Restoring Water Supply and Testing
After successfully installing the flapper in your toilet, it’s time to restore the water supply and conduct a thorough test to check for leaks and functionality. This step is crucial as it ensures that your toilet is operating smoothly and efficiently.
Turning on the water supply to the toilet
To begin, locate the shut-off valve near the base of your toilet. This valve controls the water flow to the toilet, allowing you to turn it on and off as needed. Turn the valve clockwise to shut off the water supply.
Once the water supply is off, locate the shut-off valve in the main water line of your home. This valve is typically found near the water meter. Turn this valve clockwise to shut off the water supply to your entire home. Turning off the main water supply ensures that you won’t have any unexpected water flow while working on your toilet.
Now, it’s time to turn on the water supply to your toilet. Begin by turning the shut-off valve near the base of the toilet counterclockwise to open it. This will allow water to flow into the toilet tank.
Conducting a thorough test to check for leaks and functionality
Once the water supply is restored, it’s important to conduct a thorough test to ensure that everything is working as it should. This will help you identify any potential leaks or issues before they become major problems.
Start by carefully observing the toilet tank and the surrounding area for any signs of water leakage. Look for drips, puddles, or wet spots that may indicate a faulty installation or a worn-out flapper.
Next, flush the toilet several times to check the functionality of the flapper. Observe how the flapper opens and closes during the flushing process. It should open fully when the toilet is flushed and close tightly afterward to prevent water from continuously flowing into the bowl.
Listen for any unusual sounds or hissing noises that may indicate a problem with the flapper or the water flow. If you notice any issues during the test, it may be necessary to recheck the installation or consider replacing the flapper altogether.
In conclusion, restoring the water supply and conducting a thorough test is a critical step after installing a flapper in your toilet. By following these steps and being meticulous in your observations, you can ensure that your toilet is functioning properly and efficiently, without any leaks or malfunctioning parts.
Troubleshooting Common Issues And Maintenance Tips
After installing a flapper in your toilet, there are a few potential problems that may arise. By understanding these issues, you can quickly troubleshoot and resolve any problems that come your way. Additionally, following some maintenance tips will help prolong the lifespan of the flapper, ensuring it continues to function optimally. Let’s dive into the common issues and maintenance tips:
Potential problems that may arise after installation
Even after a proper installation, you may encounter a few common issues with your toilet flapper. Being aware of these problems will help you identify and rectify any concerns:
1. Leakage
One possible issue is leakage, where water continues to flow into the toilet bowl even when the flapper is supposed to be sealed. This can be caused by a worn-out or misaligned flapper. To troubleshoot this, you can:
- Inspect the flapper for any signs of wear and tear.
- Ensure the flapper is correctly aligned with the flush valve seat.
- If necessary, replace the flapper with a new one.
2. Incomplete Flushing
Another common issue is incomplete flushing, where the flapper closes too quickly, preventing a full flush. This can often be due to the chain length being too short. To resolve this, follow these steps:
- Check the length of the chain connecting the flapper to the flush lever.
- If the chain is too short, adjust it to allow for a longer flush.
- Test the flush to ensure it completes properly.
3. Slow Refilling
A slow refilling toilet tank can be frustrating. If you notice that the tank takes an unusually long time to refill after flushing, it may be due to a flapper issue. Here’s what you can do to troubleshoot:
- Inspect the flapper for any debris or mineral buildup.
- Clean the flapper or replace it entirely if necessary.
- Ensure the water supply valve is fully open.
Maintenance tips to prolong the lifespan of the flapper
To keep your flapper functioning optimally and extend its lifespan, follow these maintenance tips:
1. Regular Cleaning
Periodically clean the flapper to prevent debris and mineral buildup, which can affect its performance. Use a soft cloth or sponge to wipe the flapper and ensure there is no blockage.
2. Check the Chain
Regularly inspect the chain connecting the flapper to the flush lever. Make sure the chain is properly adjusted and doesn’t have any knots or twists. An improperly functioning chain can lead to issues with the flapper’s operation.
3. Be Mindful of the Water Quality
In areas with hard water, mineral deposits can accumulate more quickly, affecting flapper performance. Consider using water softeners or regular cleaning to prevent mineral buildup.
By troubleshooting common issues and maintaining your toilet flapper, you can ensure its longevity and enjoy a properly functioning toilet for years to come!
Frequently Asked Questions
Are Toilet Flappers Easy To Replace?
Toilet flappers are easy to replace. You can do it yourself by following simple steps. Just turn off the water supply, remove the old flapper, and replace it with a new one. Then, turn the water supply back on. No need to call a professional!
How Do You Install A Float Flapper?
To install a float flapper, follow these steps: 1. Shut off the water supply. 2. Empty the tank by flushing the toilet. 3. Remove the old flapper. 4. Attach the new flapper to the chain and clip it onto the overflow tube.
5. Turn on the water supply and test for leaks.
How Long Does It Take To Install A Toilet Flapper?
Installing a toilet flapper usually takes around 10-15 minutes. Just follow these steps: 1. Turn off the water supply. 2. Drain the tank. 3. Remove the old flapper. 4. Install the new flapper. 5. Turn the water supply back on, and you’re good to go!
Can You Change Toilet Flapper Without Turning Off Water?
Yes, you can change a toilet flapper without turning off the water. Simply lift the lid, remove the old flapper, and replace it with a new one. However, it is recommended to shut off the water supply to avoid any potential leakage or accidents.
Conclusion
Installing a flapper in your toilet is a simple and cost-effective solution to fix common toilet problems. By following these easy steps, you can ensure a smooth and efficient flushing system. Regular maintenance and timely replacement of the flapper can prevent water wastage and keep your toilet in good working condition.
So, don’t hesitate, get started and enjoy a hassle-free toilet experience.