To install a faucet in a bathroom sink, follow these steps: shut off the water supply, remove the old faucet, clean the sink surface, apply plumber’s putty to the base, insert the faucet through the mounting holes, secure it with nuts and washers, connect the water supply lines, and finally, turn on the water supply and test for any leaks. Installing a faucet in a bathroom sink is a simple process that can greatly improve the functionality and appearance of your bathroom.
Whether you are upgrading your current faucet or replacing a faulty one, this guide will help you complete the installation with ease. Just follow these steps and enjoy a new, properly functioning faucet in your bathroom sink.
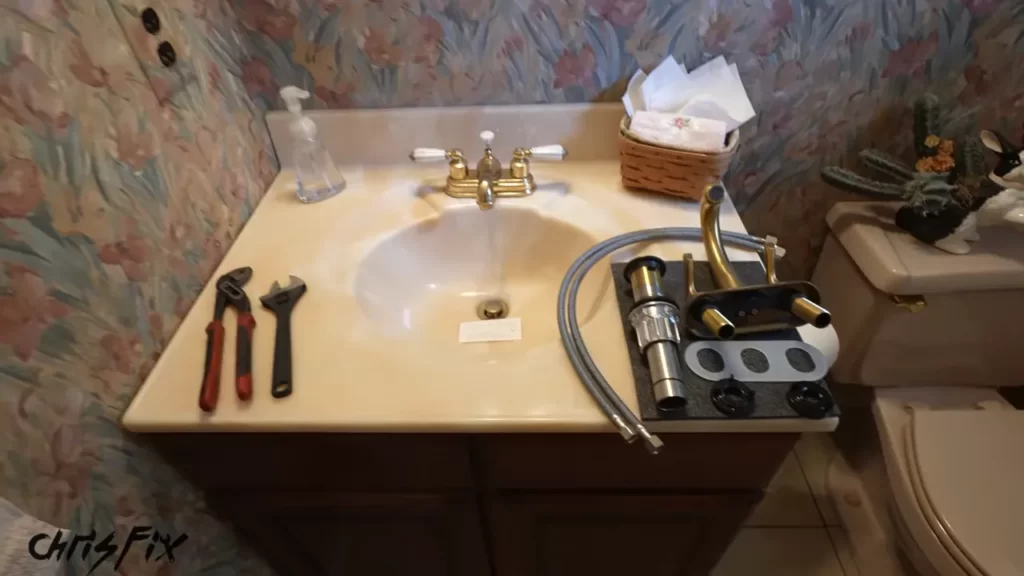
Gathering The Necessary Tools And Materials
Installing a faucet in your bathroom sink can be a relatively simple and rewarding DIY project. Before you get started, however, it’s important to gather all the necessary tools and materials to ensure a smooth and successful installation. In this section, we will guide you through knowing the required tools, getting the right faucet and parts, and checking the compatibility with the sink.
Knowing the required tools
To begin the installation process, it’s essential to have the right tools on hand. Here is a list of the tools you will need:
| Tools | Description |
|---|---|
| Adjustable wrench | An adjustable wrench will allow you to tighten and loosen nuts and bolts of different sizes. |
| Basin wrench | This specialized wrench is designed to reach and tighten nuts in hard-to-reach spaces, such as under the sink. |
| Screwdriver (flathead and Phillips) | A set of screwdrivers will come in handy for removing and installing screws of different types. |
| Plumber’s tape | Plumber’s tape, also known as Teflon tape, is used to create a watertight seal on threaded connections. |
| Tubing cutter | If your new faucet requires plumbing modifications, a tubing cutter will help you cut pipes to the desired length. |
Getting the right faucet and parts
Before purchasing a new faucet, it’s crucial to consider the style and design that will complement your bathroom. Measure the sink and countertop holes to ensure you choose a faucet with the correct spread. Additionally, verify if your sink requires a single-handle or double-handle faucet.
When purchasing the faucet, make sure to check that it includes all the necessary parts, such as supply lines, mounting hardware, and a drain assembly. If any components are missing, you may need to purchase them separately.
Checking compatibility with the sink
Once you have selected a faucet, it’s important to check its compatibility with your sink. Consider the following:
- Number of holes on your sink: Determine if your sink has one, two, or three holes, as this will determine the type of faucet you can install.
- Center-set or widespread faucet: Measure the distance between the outer holes to determine if your sink can accommodate a center-set or widespread faucet.
- Sink material: Different types of sinks require different installation methods. A porcelain sink, for example, may require extra care to avoid chipping or cracking.
By gathering the necessary tools and materials, and ensuring compatibility with your sink, you are well on your way to successfully installing a faucet in your bathroom sink. In the next section, we will guide you through the process of removing the old faucet.

Preparing The Sink For Installation
Before you can install a new faucet in your bathroom sink, it is important to properly prepare the sink. This involves clearing the workspace and ensuring safety, turning off the water supply, and removing the old faucet while thoroughly cleaning the sink.
Clearing the workspace and ensuring safety
To ensure a smooth and safe installation process, it is crucial to clear the workspace of any unnecessary items or clutter that may hinder your movement or cause accidents. Remove any items from the sink area, such as toiletries, soap dispensers, and toothbrush holders. This will provide you with ample space to work and prevent any potential damages to these items.
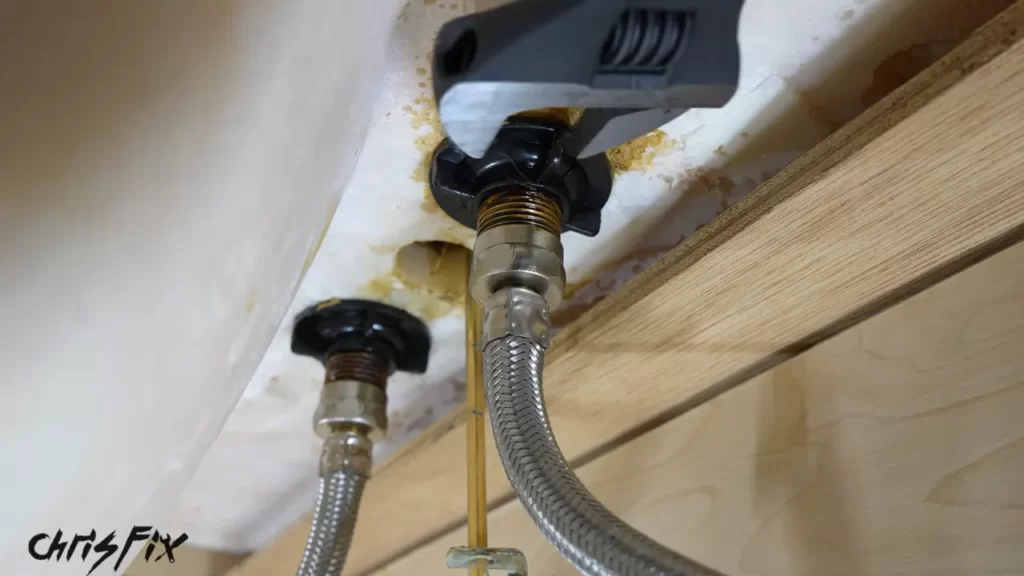
Turning off the water supply
Before starting the faucet installation, you need to turn off the water supply to the sink. Locate the shut-off valves located under the sink or near the main water supply. Turn the valve to the right (clockwise) until it stops to shut off the water completely. This will prevent water from spilling out and potentially causing a mess during the installation process.
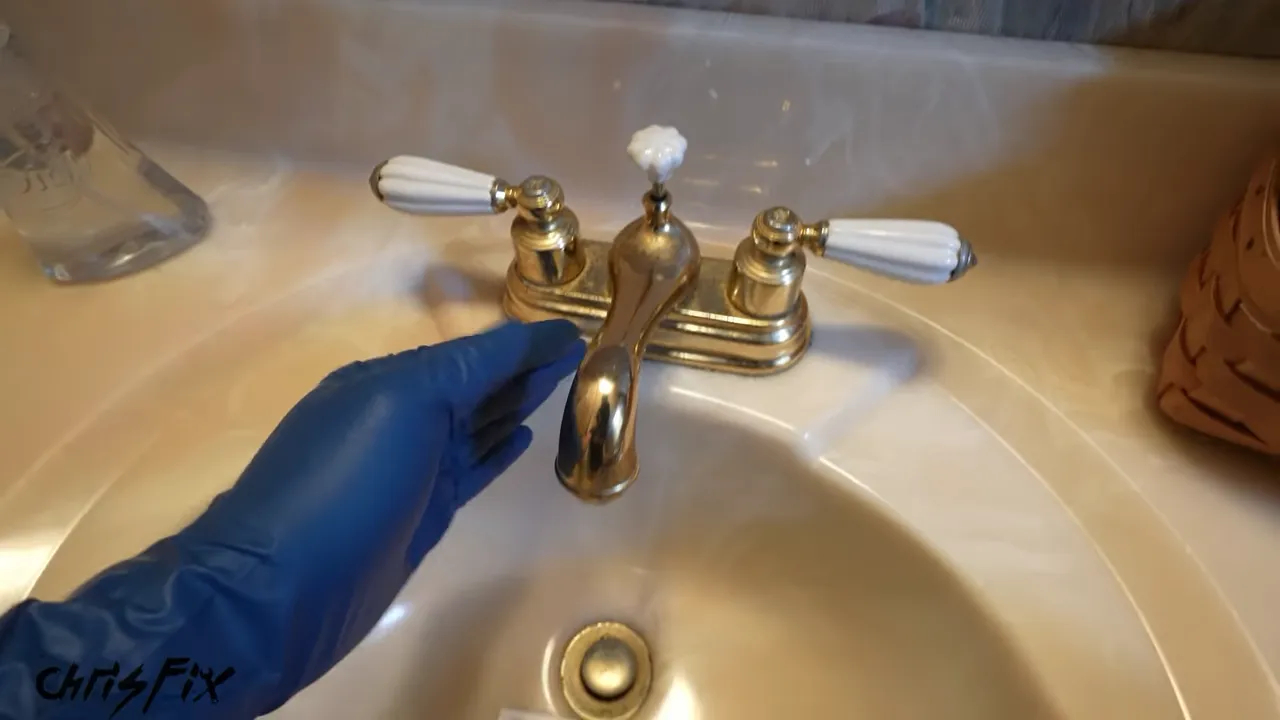
Removing the old faucet and cleaning the sink
With the water supply turned off, it’s time to remove the old faucet. Start by disconnecting the water supply lines using an adjustable wrench, and make sure to place a bucket or some towels underneath to catch any residual water. Once the water supply lines are disconnected, use a basin wrench or a pair of pliers to loosen and remove the faucet nuts securing the old faucet to the sink.
Once the old faucet is removed, take this opportunity to thoroughly clean the sink. Remove any excess caulk or adhesive left behind by the old faucet, and scrub the sink surface using a mild cleanser or vinegar solution. This will ensure a clean and smooth surface for the new faucet installation.
Installing The New Faucet
Installing the new faucet is an essential step in enhancing the functionality and aesthetics of your bathroom sink. Proper installation ensures a smooth flow of water and prevents leaks that can lead to expensive repairs in the future. In this guide, we will walk you through the process of installing a faucet in your bathroom sink, from assembling the faucet components to connecting the supply lines and checking for leaks.
Assembling the faucet components
Before you begin, gather all the necessary components of your new faucet. These may include the spout, handles, aerator, and other parts specific to your faucet model. Lay them out on a clean surface, ensuring that you have all the required parts and tools handy.
Once you have all the components, follow these steps to assemble your faucet:
- Place the rubber or plastic gasket on the bottom of the faucet.
- Insert the faucet spout into the appropriate hole on the sink.
- If your faucet has separate handles, attach them to the base of the faucet.
- Secure the handles by tightening the screws or nuts provided.
- If necessary, attach the aerator to the end of the faucet spout.
Attaching the faucet to the sink
With the faucet components assembled, it’s time to firmly attach the faucet to the sink. Follow these steps:
- Position the assembled faucet on the sink, ensuring that the spout aligns with the sink’s drain.
- Locate the mounting nuts or washers provided with your faucet.
- Slide the mounting nuts or washers onto the faucet tails and tighten them securely using a wrench or pliers.
- Ensure the faucet is level and properly aligned with the sink.
- If required, use a sealant or plumber’s putty between the sink and the faucet base to create a watertight seal.
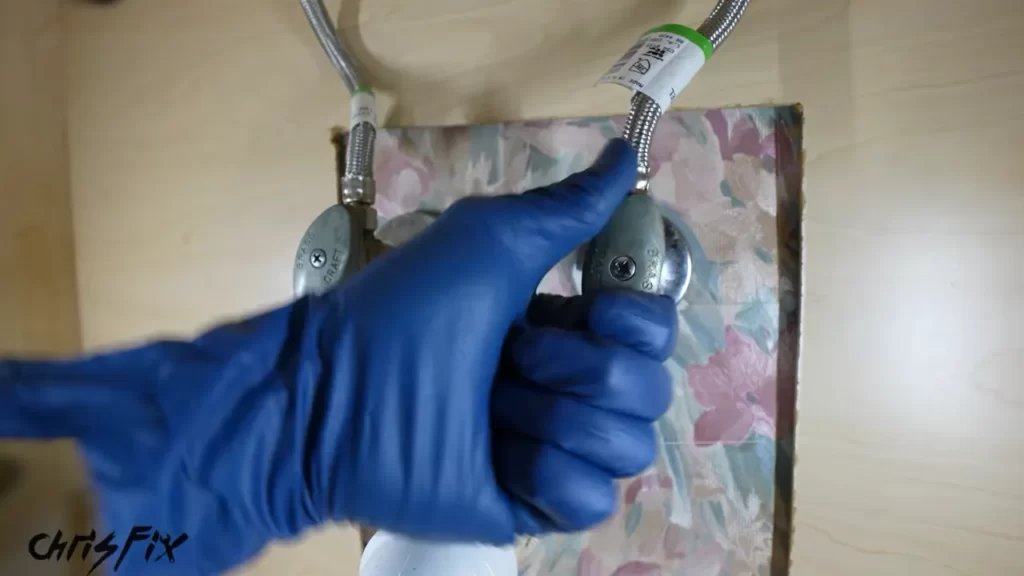
Connecting the supply lines
Once the faucet is securely attached to the sink, you need to connect the supply lines to ensure a steady flow of water. Follow these steps:
- Locate the hot and cold water supply valves beneath the sink.
- Connect the flexible supply lines to the corresponding hot and cold water supply valves.
- Hand-tighten the connections, ensuring they are snug and leak-free.
- Use a wrench or pliers to give the connections a final tighten, being careful not to overtighten and damage the fittings.
Checking for leaks and making adjustments
With the faucet and supply lines connected, it’s crucial to check for any leaks and make necessary adjustments. Follow these steps:
- Turn on the hot and cold water supply valves slowly.
- Observe the faucet and the connections for any signs of leakage.
- If you notice any leaks, tighten the connections gently until the leaks stop.
- Check that the handles operate smoothly and without any resistance.
- Test the hot and cold water by adjusting the handles and ensuring that the water flows consistently and at the desired temperature.
By following these steps and ensuring a proper installation, you can enjoy a fully functional faucet in your bathroom sink. Regularly check your faucet for any signs of wear or leaks to prevent any potential issues in the long run.
Testing And Finalizing The Installation
Once you have successfully installed your faucet in the bathroom sink, it is crucial to test and finalize the installation to ensure everything is in working order. This step is essential in order to identify any potential issues and make any necessary adjustments before completing the installation process.
Turning on the Water Supply
To begin, turn on the water supply valves under the sink. These valves control the flow of water to the faucet. Slowly open both valves and listen for any signs of leakage or unusual noises. If you notice any leaks, immediately tighten the connections to ensure a secure fit.
Checking for Smooth Water Flow
Once the water supply is turned on, it is important to check the flow of water from the faucet. Turn on both the hot and cold water handles and observe the water flow. Pay close attention to any fluctuations in water pressure or irregularities in the stream. If you notice any issues, it may be necessary to clean the aerator to remove any debris that could be causing a disruption in the smooth flow of water.
Making any Necessary Adjustments
If you encounter any issues with the water flow or notice any leaks during the testing process, it is crucial to make the necessary adjustments. Start by tightening any loose connections and ensuring all fittings are secure. If the water flow is not satisfactory, consider adjusting the water pressure or cleaning the aerator.
Cleaning up the Workspace
Once you have tested the faucet and made any necessary adjustments, it is time to clean up your workspace. Remove any tools or materials that were used during the installation process. Wipe down the sink and surrounding area to remove any dust or debris. Taking the time to clean up will not only provide a polished finish to your installation but also ensure a safe and clutter-free bathroom environment.
Tips And Troubleshooting
Common installation mistakes to avoid
Installing a faucet may seem like a straightforward task, but it’s important to avoid some common mistakes that can lead to future issues. Here are some key mistakes to steer clear of:
- Not properly aligning the faucet: It’s crucial to ensure that the faucet is aligned correctly with the sink and the countertop. A misaligned faucet can cause leaks and hinder the smooth flow of water.
- Skipping the use of plumber’s tape: Plumber’s tape, also known as Teflon tape, helps create a watertight seal between the faucet components. Failing to use plumber’s tape can result in leaks.
- Overtightening the connections: While it’s important to tighten the connections, overdoing it can damage the fittings or cause leakages. Use a wrench or pliers to secure the connections firmly but avoid excessive force.
- Not checking for leaks immediately: Once the installation is complete, don’t forget to check for any leaks or drips. This will allow you to address any issues promptly before they worsen.
Dealing with leakages and drips
Leakages and drips can be frustrating, but with some troubleshooting, you can resolve these issues effectively. Here’s what you can do:
- Tighten loose connections: Check all the connections, including the supply lines and the spout base. Use a wrench or pliers to tighten any loose fittings.
- Replace damaged parts: If you notice any damaged or worn-out components, such as O-rings or washers, replace them to eliminate leaks. You can easily find replacement parts at your local hardware store.
- Ensure proper installation: Double-check that the faucet is installed correctly with the recommended plumber’s tape and appropriate tightening. A faulty installation can lead to leakages, so it’s important to address any installation errors.
Troubleshooting low water pressure
If you’re experiencing low water pressure from your faucet, here are a few troubleshooting tips:
- Clean or replace aerator: Over time, mineral deposits can clog the aerator, causing reduced water flow. Remove the aerator, clean it with vinegar or replace it if necessary.
- Check water supply valves: Make sure the water supply valves under the sink are fully open. Partially closed valves can restrict water flow.
- Inspect the supply lines: Examine the supply lines for kinks or blockages. Straighten any kinks and clear any blockages to restore proper water pressure.
- Contact a professional plumber: If all else fails, it’s best to seek the assistance of a professional plumber who can diagnose and resolve any underlying issues causing low water pressure.
Maintaining and cleaning the faucet for longevity
Proper maintenance and regular cleaning can extend the lifespan of your bathroom faucet. Follow these simple steps:
- Wipe the faucet regularly: Use a soft cloth or sponge with mild soap and water to clean the surface of the faucet. Avoid abrasive cleaners that can scratch the finish.
- Remove mineral deposits: If you notice mineral deposits on the faucet, soak a cloth in vinegar and wrap it around the affected areas. Leave it for a few hours, then scrub gently to remove the deposits.
- Lubricate moving parts: Apply a small amount of silicone-based lubricant to the moving parts of the faucet, such as the handle and spout, to keep them functioning smoothly.
- Inspect for leaks and drips: Regularly check for any signs of leaks or drips and address them promptly. Ignoring these issues can lead to more significant problems down the line.
By following these tips and troubleshooting suggestions, you can install your bathroom sink faucet properly, resolve common problems, and ensure the longevity of your faucet.
Frequently Asked Questions
Can I Install Bathroom Faucet Myself?
Yes, you can install a bathroom faucet yourself. It is a simple process that can be done with basic tools. Just follow the instructions provided with the faucet and ensure that you have the necessary skills and knowledge. If in doubt, consult a professional plumber.
Can I Install A Sink Faucet Myself?
Yes, you can install a sink faucet yourself. It’s a straightforward process that requires basic tools and some plumbing knowledge. Follow the instructions provided with the faucet, turn off the water supply, remove the old faucet, connect the new one, and turn the water back on.
How Do You Replace A Bathroom Sink Faucet?
To replace a bathroom sink faucet, start by turning off the water supply valves. Next, remove the old faucet by loosening the nuts and disconnecting the supply lines. Clean the area and install the new faucet by connecting the supply lines and tightening the nuts.
Finally, turn on the water supply valves to test the new faucet.
How Do You Install A Standard Bathroom Faucet?
To install a standard bathroom faucet, follow these steps: 1. Shut off the water supply. 2. Remove the old faucet. 3. Clean the sink’s surface and apply plumber’s putty or a silicone sealant. 4. Place the faucet on the sink and tighten the mounting nuts.
5. Connect the water supply lines and turn on the water.
Conclusion
Installing a faucet in your bathroom sink is not as daunting as it may seem. By following the step-by-step guide provided in this blog post, you can successfully complete the installation process without any hassle. Remember to gather all the necessary tools and materials beforehand, and take your time to ensure proper alignment and tight connections.
With these simple tips, you’ll have a functional and stylish faucet in no time, enhancing the overall appeal of your bathroom.