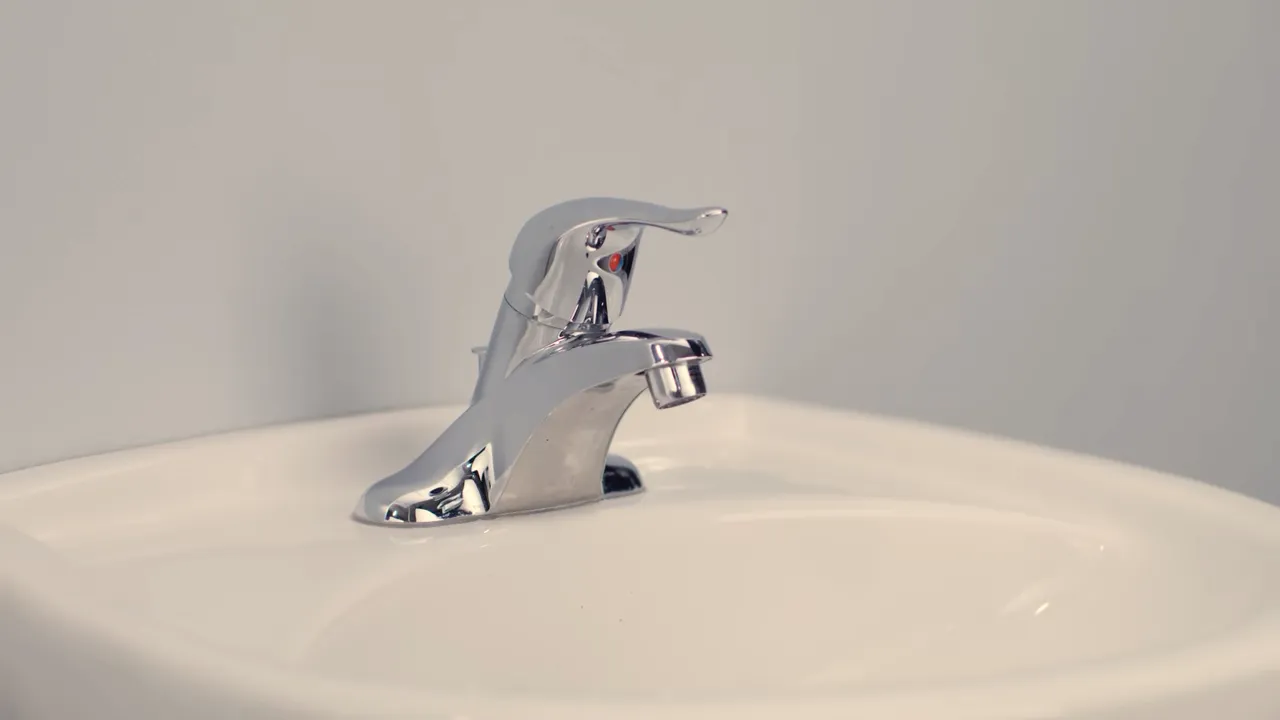
To install a faucet in the bathroom, turn off the water supply and assemble the necessary tools and materials. Remove the old faucet and clean the area before attaching the new faucet.
Factors To Consider When Selecting A Faucet
When it comes to renovating your bathroom or simply replacing an old faucet, selecting the right one can make a significant difference in both functionality and style. With various options available in the market, it’s essential to consider a few factors that can help you make an informed decision. Let’s dive into the key factors you should keep in mind when selecting a faucet for your bathroom.
Budget and Price Range
The first factor to consider is your budget and price range. It’s important to determine how much you are willing to spend on a new faucet. Keep in mind that higher price doesn’t always mean better quality. Consider your needs and find a faucet that offers both durability and affordability. Set a realistic budget and look for options that fit within your price range.
Style and Design
The style and design of the faucet play a crucial role in enhancing the overall aesthetic of your bathroom. Consider the existing decor and choose a faucet that complements the style and theme. There are various styles available, such as traditional, modern, vintage, and contemporary. Pay attention to the finishes as well, like chrome, brushed nickel, bronze, or brass. Select a style and finish that adds a touch of elegance to your bathroom.
Size and Configuration
Size and configuration are important factors to consider when selecting a faucet. Measure the space available on your bathroom countertop or sink to ensure the faucet fits perfectly. Additionally, consider the configuration of the faucet, whether you prefer a single-handle or double-handle faucet. The configuration determines how the water flows and the overall functionality. Choose a size and configuration that suits your needs and preferences.
In conclusion, selecting the right faucet for your bathroom involves considering factors like budget and price range, style and design, as well as size and configuration. By keeping these factors in mind, you can choose a faucet that not only meets your practical needs but also enhances the aesthetic appeal of your bathroom.
Steps To Measure Your Existing Faucet
Before installing a new faucet in your bathroom, it’s important to accurately measure your existing faucet to ensure a proper fit. Taking precise measurements will help you find a replacement that matches your current setup, saving you time and frustration. In this section, we will guide you through the steps to measure your existing faucet so you can confidently select a new one that fits perfectly.
Removing the Old Faucet
The first step in measuring your existing faucet is to remove the old one. Follow these steps to safely remove your old faucet:
- Turn off the water supply: Locate the shut-off valves under the sink and turn them clockwise to cut off the water supply to the faucet. This will prevent any water leakage during the removal process.
- Disconnect the supply lines: Use an adjustable wrench to loosen and disconnect the supply lines connected to the faucet. Ensure you have a container or towel ready to catch any residual water.
- Remove the mounting nuts: Locate the mounting nuts securing the faucet to the sink or countertop and remove them using a basin wrench. Carefully lift the old faucet out of the mounting holes.
By following these steps, you will have successfully removed the old faucet and can now proceed with measuring the required dimensions for your new one.
Measuring the Hole Spacing
The next step is to measure the hole spacing in your sink or countertop. This measurement is crucial as it determines the compatibility of your new faucet. Follow these steps:
- Measure the distance between the center of the left hole and the center of the right hole. Use a tape measure and record the measurement in inches.
- Ensure accuracy: To ensure accuracy, measure from the center of the holes rather than the edges.
Once you have obtained the hole spacing measurement, you can proceed with determining the height of your new faucet.
Determining the Faucet Height
The final step in measuring your existing faucet is determining the height of the new replacement. This measurement ensures that your new faucet will fit comfortably and provide optimal functionality. Follow these steps to determine the appropriate faucet height:
- Measure from the base of the faucet to the top of the spout.
- Consider your sink or countertop height: Take into account the height of your sink or countertop when selecting a faucet. A taller faucet may be more suitable for a deeper sink or a higher countertop.
By accurately measuring the hole spacing and determining the faucet height, you will be equipped with the information needed to select the perfect replacement faucet for your bathroom.
Essential Tools For Faucet Installation
When it comes to installing a faucet in your bathroom, having the right tools is essential. These tools not only make the installation process easier but also ensure that the job is done correctly. In this section, we will discuss the essential tools you need to have on hand for a successful faucet installation.
Adjustable Wrench
An adjustable wrench is a must-have tool for faucet installation. This versatile tool allows you to tighten or loosen nuts and bolts of various sizes. When installing a bathroom faucet, you will often encounter different sizes of nuts and bolts, and an adjustable wrench will help you get a precise and secure fit. Make sure to choose a wrench with a comfortable grip and a wide opening range to accommodate different sizes of fasteners.
Screwdrivers
Screwdrivers are another essential tool for faucet installation. You will need both a Phillips and a flat-head screwdriver to remove and tighten screws during the installation process. A Phillips screwdriver is typically used for cross-head screws, while a flat-head screwdriver is ideal for slotted screws. Having both types of screwdrivers in your toolbox ensures that you can handle any type of screw you may encounter.
Plumber’s Tape
Plumber’s tape, also known as thread seal tape, is a thin white tape that is used to create a watertight seal between threaded connections. It is commonly used when connecting pipes and fittings to prevent leaks. Before attaching your new faucet, it is crucial to apply plumber’s tape to the threaded connections to ensure a tight seal and avoid any future problems with water leakage.
Pipe Cutter
A pipe cutter is a tool that is used to cut through pipes with precision. When installing a new faucet, you may need to cut through existing pipes to remove the old faucet or make adjustments to the plumbing system. A pipe cutter allows you to make clean, straight cuts without damaging the surrounding pipes. It is essential to choose a pipe cutter that is appropriate for the size of your pipes to ensure accurate cuts.
Required Supplies For Faucet Installation
New Faucet
Installing a new faucet can add a touch of style and functionality to your bathroom. Whether you’re upgrading to a more modern design or simply replacing an old, worn-out faucet, having the right supplies is essential. One of the first supplies you’ll need is a new faucet itself. When choosing a new faucet, consider the style and finish that will complement your bathroom decor, as well as the features and functionality that best suit your needs.
Flexible Water Supply Lines
Once you have your new faucet, you’ll need to connect it to your water supply. For this, you’ll need flexible water supply lines. These lines are made of durable materials and can be easily bent and adjusted to fit the space under your sink. They come in various lengths and with different types of connectors, so be sure to choose the ones that are compatible with your faucet and water supply connections. Flexible water supply lines are essential for a secure and leak-free installation.
Plumbers Putty
To ensure a watertight seal around your faucet and prevent any leaks, you’ll need plumbers putty. This moldable substance is typically used to seal gaps between the faucet and the sink surface. Applying plumbers putty creates a barrier that prevents water from seeping into the cabinet below. It’s important to use a high-quality plumbers putty to ensure a long-lasting seal.
Mounting Hardware
Lastly, you’ll need the necessary mounting hardware to secure your faucet in place. This includes screws, washers, and nuts that are specifically designed for faucet installation. The mounting hardware ensures that the faucet is securely attached to the sink or countertop, preventing any wobbling or movement during use. It’s important to follow the manufacturer’s instructions and use the correct size and type of mounting hardware for your specific faucet model.
In conclusion, having the required supplies for faucet installation is crucial for a successful and hassle-free process. This includes a new faucet, flexible water supply lines, plumbers putty, and mounting hardware. By ensuring you have these supplies on hand, you can confidently install your new faucet and enjoy the enhanced functionality and style it brings to your bathroom.
Step 1: Shutting Off The Water Supply
Before you can begin installing your new bathroom faucet, it’s important to shut off the water supply. This will ensure that you don’t have any water flowing while making the necessary connections. In this step, we will guide you through the process of locating the shut-off valves and turning off the water.
Locating the Shut-Off Valves
First, you will need to locate the shut-off valves for your bathroom. These valves are typically located beneath the sink or behind the toilet. In some cases, they may be located in a utility room or basement. If you’re not sure where to find them, refer to your home’s plumbing diagram or consult a professional plumber if needed.
Turning Off the Water
Once you have located the shut-off valves, it’s time to turn off the water. To do this, simply locate the valve handles and turn them clockwise until they are tightly closed. This will stop the flow of water to your bathroom fixtures. It’s always a good idea to test the water flow by turning on a faucet in your bathroom to make sure the water has been completely shut off.
By shutting off the water supply, you can proceed with confidence knowing that you won’t have any unexpected water leaks or messes while installing your new bathroom faucet. Now that you have completed the first step, you can move on to the next step of the installation process.
Step 2: Removing The Old Faucet
Removing the old faucet is an essential step in installing a new one. This process involves disconnecting the supply lines and removing the mounting nuts. Following these steps correctly will ensure a smooth and successful removal, allowing you to proceed with the installation process. Let’s dive into the details of each step.
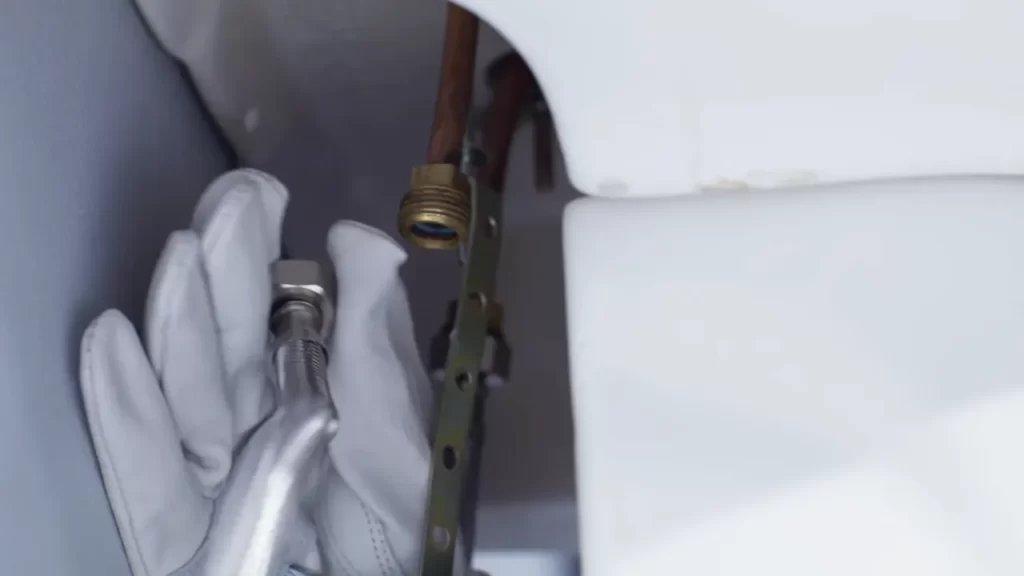
Disconnecting the Supply Lines
To start removing the old faucet, you need to disconnect the supply lines. These are the water lines that connect your faucet to the water supply. Here’s how you can do it:
- Turn off the water supply: Locate the shut-off valves under the sink and rotate them clockwise to turn off the water supply. This step prevents any water from flowing when you disconnect the supply lines.
- Remove the water supply lines: Use an adjustable wrench to loosen the nut that connects each supply line to the faucet. Turn the nut counterclockwise until it’s loose enough to remove the supply line from the faucet connection.
- Drain any remaining water: Once the supply lines are disconnected, you may encounter some residual water. Place a bucket or a towel under the connections to catch any drips.
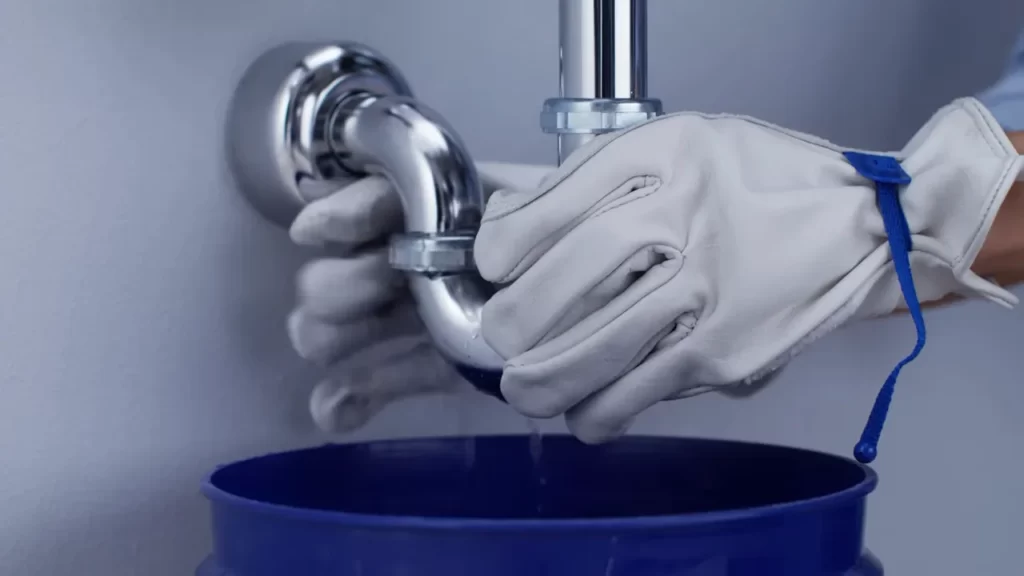
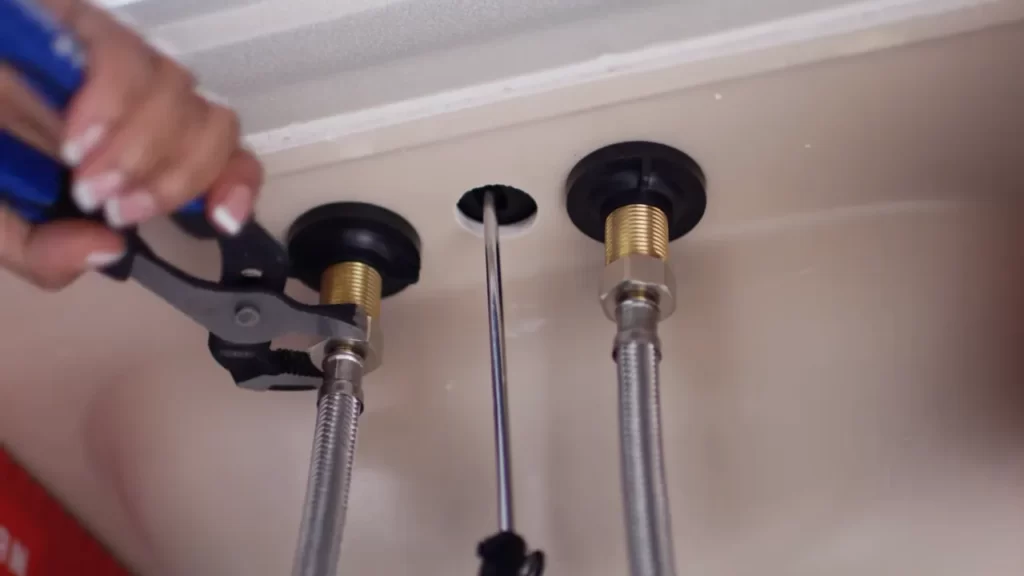
Removing the Mounting Nuts
Once the supply lines are disconnected, the next step is to remove the mounting nuts. These nuts secure the faucet to the sink or countertop. Here’s what you need to do:
- Locate the mounting nuts: Look underneath the sink or countertop to find the mounting nuts securing the faucet. Depending on the type of faucet, you may find two or more mounting nuts.
- Use a basin wrench or adjustable pliers: Use the appropriate tool, such as a basin wrench or adjustable pliers, to grip the mounting nuts. Turn the nuts counterclockwise to loosen and remove them.
- Remove the old faucet: Once all the mounting nuts are removed, carefully lift the old faucet out of the sink or countertop. Make sure to support the faucet to prevent any damages or accidents.
Removing the old faucet might require some effort, but it’s an essential step to ensure a clean and proper installation of the new faucet. Taking the time to disconnect the supply lines and remove the mounting nuts correctly will make the installation process much smoother. With the old faucet now removed, you’re ready to move on to the next step of installing your new bathroom faucet.
Step 3: Preparing The Sink And New Faucet
Now that you have gathered all the necessary tools and materials, it’s time to move on to Step 3: Preparing the Sink and New Faucet. This step is crucial to ensure a proper installation and long-lasting performance of your bathroom faucet. In this step, you will clean the sink surface and apply plumber’s putty to create a watertight seal between the sink and the faucet.
Cleaning the Sink Surface
Before installing the new faucet, it’s important to clean the sink surface thoroughly. This will remove any dirt, debris, or old caulk that might affect the adhesion of the plumber’s putty. To clean the sink, follow these simple steps:
- Start by removing any soap scum or grime using a mild detergent and a sponge or cloth.
- Rinse the sink with clean water to remove any remaining residue.
- Dry the sink surface completely using a clean cloth or towel.
Applying Plumbers Putty
Plumber’s putty is a flexible material that creates a waterproof seal between the sink and the faucet. Applying plumber’s putty correctly will prevent any leaks from occurring. Here’s how you can apply plumber’s putty:
- Take a small amount of plumber’s putty and roll it between your hands to create a long, thin rope.
- Place the putty rope around the base of the faucet, ensuring it covers the entire area where the faucet will come in contact with the sink.
- Press the faucet firmly onto the sink surface, making sure it is centered and level.
- Wipe away any excess putty using a clean cloth or towel.
It’s important to note that plumber’s putty is not suitable for use with certain materials such as granite or marble sinks. In such cases, you should consult the manufacturer’s instructions or consider using a silicone-based caulk instead.
By following these steps and properly preparing the sink and new faucet, you are one step closer to completing the installation process. In the next step, we will cover the actual installation of the faucet, so stay tuned!
Step 4: Installing The New Faucet
Now that you have successfully removed the old faucet and prepared the sink, it’s time to move on to the exciting part – installing your brand new faucet! In this step, we will guide you through the process of positioning and aligning the faucet, as well as attaching the mounting hardware.
<h3>Positioning and Aligning the Faucet
The first step in installing your new faucet is to ensure proper positioning and alignment. This will not only enhance the overall look of your bathroom but also make it more functional. To get started, follow these simple steps:
- Place the faucet on the sink countertop where you want it to be installed. Make sure that it is centered and aligned with the sink’s drain.
- Check the clearance between the back of the faucet and the backsplash. It should allow for easy operation of the handle without any obstruction.
- Adjust the faucet’s position if needed, ensuring that it is straight and in the desired location. You can use a level to ensure that it is perfectly aligned.
<h3>Attaching the Mounting Hardware
Once you have positioned and aligned the faucet, it’s time to secure it in place by attaching the mounting hardware. Here’s a step-by-step guide:
- Locate the faucet’s mounting holes on the sink countertop. These are typically pre-drilled.
- Take the mounting hardware provided with your faucet and insert it into the corresponding holes. This usually includes a long screw or bolt that goes through the bottom of the sink.
- Tighten the mounting hardware using a wrench or pliers, ensuring that the faucet is secure and doesn’t wobble.
- If your faucet requires additional securing, refer to the manufacturer’s instructions for any extra steps.
By following these simple steps, you have successfully positioned, aligned, and securely attached your new faucet. Your bathroom is one step closer to looking and functioning beautifully!
Step 5: Connecting The Supply Lines
Now that you have successfully installed the faucet body and placed the drain assembly, the next step is to connect the supply lines. The supply lines are responsible for delivering hot and cold water to the faucet, enabling you to use it efficiently. In this step, we will guide you through the process of attaching the flexible water supply lines and tightening the connections.
Attaching Flexible Water Supply Lines
Before you start: Ensure that the water supply valves are turned off to avoid any leaks or accidents during the installation process. It is also a good idea to have a bucket handy to catch any residual water that may be present in the supply lines.
To attach the flexible water supply lines, follow these steps:
- Locate the faucet connectors at the bottom of the faucet body. These connectors are typically marked as “hot” and “cold” to indicate the respective water supply line.
- Take one end of the flexible water supply line and attach it to the corresponding connector. Ensure that the line is securely fastened by hand tightening it initially.
- Repeat the same process for the other end of the supply line, connecting it to the corresponding water supply valve.
- Once both supply lines are attached, use an adjustable wrench to further tighten the connections. Be careful not to overtighten, as it may cause damage to the fittings.
Tip: To prevent leaks, you can use a small amount of plumber’s tape on the threaded sections of the connectors before attaching the supply lines.
Tightening the Connections
After attaching the supply lines, it is crucial to tighten the connections properly to ensure a leak-free installation. Follow these steps:
- Using an adjustable wrench, gently tighten the connections on both ends of each supply line. Remember to use just enough force to secure the fittings without causing any damage.
- Check for any leaks by turning on the water supply valves gradually. Inspect the connections for any signs of water leakage.
- If you notice any leaks, use the adjustable wrench to give the connections an extra quarter turn to further tighten them.
- Continue monitoring the connections for several minutes to ensure that there are no leaks. If any leaks persist, consider replacing the supply lines or seeking professional assistance.
Congratulations! You have successfully connected the supply lines of your bathroom faucet. Proceed to the next step to complete the installation process.
Step 6: Testing The New Faucet
Once you have successfully installed your new bathroom faucet, it’s essential to test it before considering the job complete. Testing the new faucet ensures that everything is functioning correctly and that there are no leaks. Follow the steps below to properly test your new faucet.
Turning On the Water Supply
Before you test the faucet, make sure to turn on the water supply. Locate the shut-off valves under the sink and turn them counterclockwise to open the water flow. Slowly open the valves to allow water to flow through the pipes and into the faucet.
Checking for Leaks
With the water supply turned on, check for any leaks in and around the faucet. Here’s how:
- Inspect the Connections: Look closely at the connections between the faucet and the supply lines. Make sure the connections are tight, and there are no visible signs of water dripping or leaking.
- Run Water: Turn on both the hot and cold water handles. Allow the water to run for a few minutes while keeping an eye out for any leaks.
- Check Under the Sink: Carefully examine the underside of the sink for any signs of leakage. Look for damp spots, water droplets, or puddles.
If you notice any leaks during the testing process, it’s crucial to address them immediately. Tighten the connections if needed and ensure all parts are properly installed. Leaks can lead to water damage over time, so it’s essential to fix them promptly.
Once you have thoroughly tested the new faucet and confirmed that there are no leaks, congratulations! You have successfully installed your bathroom faucet. Enjoy the convenience and functionality of your new addition to the bathroom.
Step 1: Securing The Faucet Base
Installing a new faucet in your bathroom can give it a fresh and updated look. However, before you can enjoy the benefits of a new faucet, you need to secure the faucet base properly. In this step-by-step guide, we’ll walk you through the process of tightening the mounting hardware and removing any excess plumber’s putty to ensure a secure and leak-free installation.
Tightening the Mounting Hardware
To secure the faucet base, you’ll need to tighten the mounting hardware. This hardware typically consists of nuts and bolts that hold the faucet firmly in place. Here are the steps to follow:
- First, locate the mounting holes on the sink or countertop where you’ll be installing the faucet. These holes are usually pre-drilled and can be found near the center of the sink.
- Insert the faucet base into the mounting holes, making sure it sits level and centered.
- Once the faucet base is in position, reach under the sink and locate the mounting nuts. These nuts are usually threaded onto the faucet’s tailpiece.
- Tighten the mounting nuts by turning them clockwise using a basin wrench or adjustable pliers. Be careful not to overtighten, as this can damage the faucet or the sink.
By securely tightening the mounting hardware, you’ll ensure that the faucet base remains stable and doesn’t wobble during use. This will help prevent leaks and maintain a proper seal.
Removing Excess Plumbers Putty
After securing the faucet base, you may notice some excess plumber’s putty around the edges. Plumbers putty is a waterproof sealing compound used to create a watertight seal between the faucet and the sink or countertop. While it’s important for a proper installation, excess putty can be unsightly and difficult to clean. To remove it:
- Gently scrape off the excess putty using a plastic putty knife or your fingers. Avoid using metal tools, as they can scratch the surface of the sink or countertop.
- Wipe away any remaining residue with a damp cloth or sponge.
- For stubborn putty stains, you can use a small amount of mild detergent or a specialized cleaner recommended for your sink or countertop material.
Removing excess plumber’s putty will leave your faucet installation looking clean and professional. It’s a simple step that can enhance the overall appearance of your bathroom.
Now that you’ve successfully secured the faucet base and removed any excess plumber’s putty, you’re ready to move on to the next step in installing your bathroom faucet. Stay tuned for our next guide, where we’ll cover connecting the water supply lines and testing for leaks.
Step 2: Reconnecting The Drain Assembly
Once you have successfully installed the faucet in your bathroom, the next step is reconnecting the drain assembly. This crucial step ensures that the water flows smoothly and prevents any leaks or clogs in the future. Follow the below steps to complete this process:
Installing and Tightening the Drain
1. Begin by placing a thin bead of plumber’s putty around the underside of the drain flange. This helps create a watertight seal between the sink and the drain.
2. Insert the drain flange into the drain hole in the sink, making sure it fits snugly.
3. From underneath the sink, slip the rubber gasket and the paper or cardboard gasket onto the drain flange.
4. Screw the drain nut onto the flange from underneath the sink and hand tighten it.
5. Use a pair of pliers or a basin wrench to further tighten the drain nut. Be careful not to overtighten, as it may cause damage to the gasket or the drain.
6. Finally, wipe off any excess plumber’s putty that may have squeezed out during the tightening process.
Testing the Drain for Proper Operation
Once you have installed and tightened the drain assembly, it’s essential to test it to ensure proper operation. Follow the steps below:
- Close the sink’s pop-up or stopper mechanism.
- Fill the sink with water, ensuring it covers the drain opening.
- Now, open the stopper or release the pop-up mechanism to let the water drain out.
- Observe the drain carefully for any leaks or slow drainage. Pay attention to the connection points as well as the actual drain opening.
- If any leaks or issues are detected, try tightening the drain nut further or adjusting the rubber gasket. If the problem persists, consulting a professional plumber may be necessary.
By properly installing and testing the drain assembly, you can ensure that your new bathroom faucet functions flawlessly. Now that you have completed this step, you’re one step closer to enjoying your upgraded bathroom space!
Step 3: Cleaning Up
When installing a new faucet in your bathroom, it’s important to follow all the necessary steps to ensure a successful installation. Once the new faucet is securely in place, it’s time to move on to Step 3: Cleaning Up. This step involves removing any debris or residue left from the installation process and giving the new faucet a polish and shine. By taking the time to clean up properly, you can ensure that your new faucet looks its best and functions at its full potential.
Removing Any Debris or Residue
The first task in the cleaning up process is to remove any debris or residue that may have been left behind during the installation. This can include things like bits of caulk, excess plumber’s putty, or any other leftover materials.
Here are the steps to remove debris or residue:
- Start by using a plastic putty knife or a scraper to gently scrape away any visible debris. Be careful not to scratch the surface of the faucet.
- Next, use a damp cloth or sponge to wipe away any remaining residue. You can use a mild soap or a non-abrasive cleaner if needed.
- Once all the debris and residue have been removed, thoroughly dry the area with a clean, dry cloth to prevent water spots or streaks.
Polish and Shine the New Faucet
Now that the debris and residue have been cleared away, it’s time to give your new faucet a beautiful polish and shine. This step will not only enhance its appearance but also help protect it from stains and water spots.
Follow these steps to polish and shine your new faucet:
- Start by applying a small amount of a gentle, non-abrasive metal cleaner or polish to a clean, soft cloth.
- Gently rub the cloth over the entire surface of the faucet, paying special attention to any areas that may have fingerprints or smudges.
- Once you have finished polishing, use a separate clean cloth to buff the faucet and remove any excess polish. This will give it a brilliant shine.
- If your faucet has any plastic or chrome parts, make sure to use a cleaner specifically formulated for those materials to avoid damage.
By following these steps and taking the time to properly clean up after installing your new bathroom faucet, you can ensure that it not only looks great but also functions at its best. Remember to choose the right cleaning products for your specific faucet and always read and follow the manufacturer’s instructions for cleaning and maintenance.
Additional Tips For Success
Taking Pictures Before Disassembly
Taking pictures before disassembly is a smart move that can save you a lot of headache during the installation process. By documenting the steps with photographs, you’ll have a visual reference to guide you when it’s time to reassemble the faucet later.
Before you start taking pictures, make sure to turn off the water supply to the bathroom faucet. This will prevent any unexpected leaks or water damage. Once the water is off, grab your smartphone or camera and start snapping pictures.
Focus on capturing detailed shots of the faucet’s components, such as the handles, spout, and any associated valves. Make sure to get close-up shots of any screws or fasteners, as these can be easy to forget during reassembly. And don’t forget to document the order in which the parts are removed.
Using Plumber’s Tape for Leak Prevention
One of the most common issues when installing a bathroom faucet is dealing with leaks. To prevent leaks from occurring, it’s essential to use plumber’s tape or Teflon tape during the installation. This tape creates a watertight seal between threaded connections, reducing the risk of water leakage.
Before applying the tape, make sure to clean the threads of the faucet connections to remove any debris or residue. Then, begin wrapping the tape around the threaded part in a clockwise direction. Be careful not to overlap the tape too much, as this can prevent a proper seal.
Once you’ve wrapped the tape a few times, tear it off and press it firmly against the thread to ensure it adheres well. After that, you can proceed with attaching the faucet components as instructed by the manufacturer.
Seeking Professional Help When Needed
While installing a bathroom faucet can be a fairly straightforward task, there may be situations where seeking professional help is the best option. If you encounter any challenges or are unsure about any part of the installation process, it’s advisable to consult with a plumbing professional.
A professional plumber can provide expert guidance, ensure that the installation is done correctly, and address any potential issues that may arise. They have the experience and specialized tools to handle the job efficiently and effectively. Don’t hesitate to reach out for help if you’re unsure or overwhelmed.
Remember, taking pictures before disassembly, using plumber’s tape for leak prevention, and seeking professional help when needed are all valuable tips for a successful bathroom faucet installation. Employ these tips to ensure a smooth and hassle-free experience.
Frequently Asked Questions
Can I Install Bathroom Faucet Myself?
Yes, you can install a bathroom faucet yourself. Ensure you have the necessary tools and follow the manufacturer’s instructions. Turn off the water supply and disconnect the old faucet. Install the new faucet by connecting the supply lines, tightening them securely.
Test for leaks and enjoy your new fixture.
How Do I Install A New Bathroom Faucet?
To install a new bathroom faucet, follow these steps: 1. Turn off the water supply. 2. Disconnect the old faucet. 3. Position the new faucet in place. 4. Connect the water lines. 5. Tighten the nuts and test for leaks.
Do You Need Plumbers Putty To Install Bathroom Faucet?
Yes, plumbers putty is needed to install a bathroom faucet. It helps create a watertight seal and prevents leaks. Regular maintenance is essential to ensuring the longevity and efficiency of your faucet.
How Long Does It Take A Plumber To Install A Bathroom Faucet?
A plumber can typically install a bathroom faucet in about one to two hours.
Conclusion
Installing a bathroom faucet may seem intimidating at first, but with the right tools and step-by-step guidance, it can be a straightforward process. From turning off the water supply to connecting the new faucet, this blog post has provided you with the essential tips and instructions to successfully install a faucet in your bathroom.
Now, you can confidently save money and add a personal touch to your bathroom décor by completing this DIY project on your own. Enjoy your newly installed faucet and the satisfaction of a job well done!