
To install a drop-in sink on a granite countertop, follow these steps: first, measure and mark the desired location for the sink on the countertop. Then, use a drill to create pilot holes for the sink’s clips.
Once the pilot holes are ready, apply a bead of silicone adhesive around the rim of the sink opening. Finally, carefully place the sink into the opening and secure it in place with the clips.
Factors To Consider When Selecting A Drop-In Sink
Choosing the right drop-in sink for your granite countertop can greatly enhance the overall functionality and aesthetic appeal of your kitchen. A drop-in sink, also known as a top-mount sink, is a popular choice among homeowners due to its easy installation and versatility. However, there are several factors that you should consider before making a purchase. In this section, we will explore the key factors to keep in mind when selecting a drop-in sink for your granite countertop.
Size and Shape
The size and shape of the drop-in sink are important considerations as they affect the overall look and functionality of your kitchen. When determining the size, you need to consider the dimensions of your countertop and the available space in your kitchen. Measure the length, width, and depth of your existing countertop cutout to ensure that the sink will fit properly.
Additionally, think about the shape that would best complement your kitchen design. Drop-in sinks come in various shapes, including square, rectangular, circular, and oval. The choice of shape depends on your personal preference and the overall style of your kitchen. Consider the available space and the layout of your countertop to choose a sink shape that fits seamlessly and enhances the aesthetic appeal of your kitchen.
Material and Finish
The material and finish of the drop-in sink play a crucial role in its durability and overall appearance. Granite countertops are known for their natural beauty, so it is important to select a sink that complements the elegance of the granite. Stainless steel drop-in sinks are a popular choice as they offer durability and a sleek, modern look that complements the natural beauty of the granite.
Other materials such as porcelain, cast iron, and composite granite are also available but may have different maintenance requirements and aesthetic effects. Consider the overall design and color scheme of your kitchen, and choose a material and finish that not only matches your granite countertop but also enhances the visual appeal of your kitchen space.
Style and Design
When selecting a drop-in sink, it is important to consider the style and design that best fits your kitchen aesthetic. Whether you prefer a contemporary, traditional, or farmhouse look, there are drop-in sinks available in a wide range of styles and designs to suit your taste.
Consider the faucet placement and the number of faucet holes required for your sink. Some drop-in sinks have pre-drilled holes for faucets and accessories, while others offer customization options. Also, think about additional features such as built-in cutting boards, soap dispensers, or extra-deep bowls that can enhance the functionality of your sink.
By carefully considering the size and shape, material and finish, as well as the style and design of the drop-in sink, you can select a sink that not only fits seamlessly into your granite countertop but also enhances the overall functionality and aesthetic appeal of your kitchen.

Essential Tools For The Installation Process
When it comes to installing a drop-in sink on a granite countertop, having the right tools is crucial to ensure a seamless and secure installation. In this section, we will discuss the essential tools you will need to successfully complete the installation process.
Adjustable Wrench
An adjustable wrench is a versatile tool that allows you to tighten or loosen nuts and bolts of various sizes. When installing a drop-in sink, you will need an adjustable wrench to secure the mounting clips or brackets that hold the sink in place. This tool is especially important for achieving a snug fit and preventing any movement or wobbling of the sink.
Screwdriver
A screwdriver is an indispensable tool in any DIY project, including installing a drop-in sink on a granite countertop. You will need a screwdriver to remove any existing screws or hardware that may be holding the old sink in place. Additionally, a screwdriver will come in handy when attaching the mounting clips or brackets to secure the new sink firmly.
Silicone Caulk
To create a watertight seal between the sink and the countertop, silicone caulk is a must-have tool for the installation process. Silicone caulk is a flexible and durable material that prevents water from seeping through any gaps or spaces between the sink and the countertop. It is important to choose a high-quality silicone caulk that is specifically designed for use in kitchens and bathrooms.
Plumber’s Putty
Another essential tool for installing a drop-in sink is plumber’s putty. Plumber’s putty is a moldable sealant that helps to create a watertight seal around the drain. By applying plumber’s putty to the underside of the drain, you can prevent leaks and ensure that water drains properly into the pipes. This tool is particularly useful when connecting the drain assembly to the sink.
Tape Measure
Accurate measurements are key to a successful sink installation. A tape measure will enable you to measure the dimensions of your countertop accurately. This will help you determine the size of the sink that will fit perfectly into the cutout. With precise measurements, you can ensure that the sink is centered and aligned correctly, creating a polished and professional look.
In conclusion, the essential tools mentioned above are vital for a smooth and successful installation of a drop-in sink on a granite countertop. Having these tools on hand will not only make the installation process easier but also ensure a secure and long-lasting sink that fits seamlessly into your countertop.
Step 1: Preparation And Safety Measures
Before you start installing a drop-in sink on a granite countertop, it is essential to take the necessary steps for preparation and safety. By following this step-by-step guide, you can ensure a smooth and successful installation process.
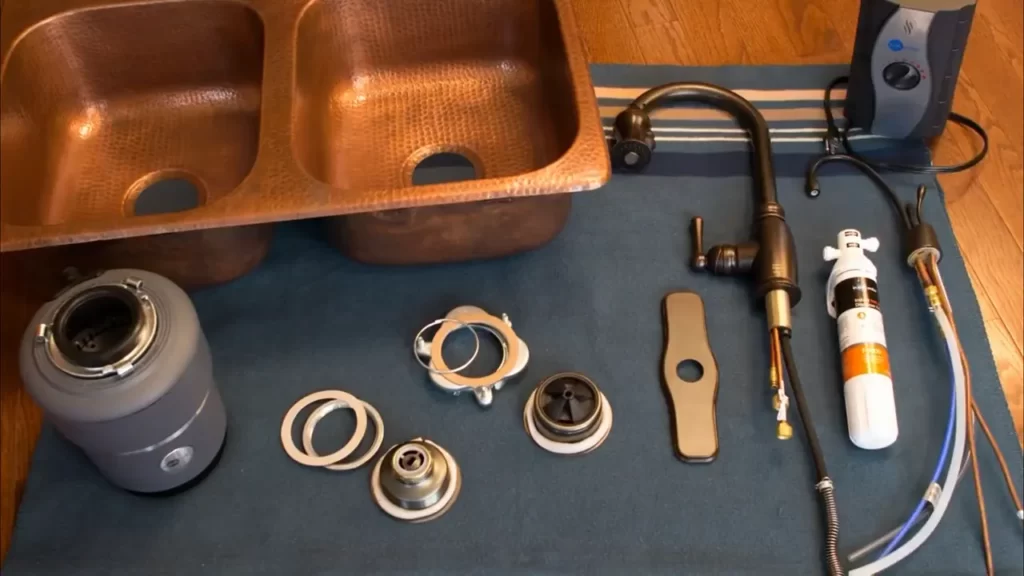
Gather all the necessary tools and materials
First and foremost, make sure you have all the tools and materials required for the installation. This will save you time and effort during the process. Here is a list of things you will need:
- Drop-in sink
- Granite countertop
- Masking tape
- Drill machine
- Masonry drill bit
- Silicone adhesive
- Plumber’s putty
- Screwdriver
- Wrench
- Clean cloth
Having all these tools and materials at hand will ensure a hassle-free installation experience.
Turn off the water supply
Before you begin the installation process, it is crucial to turn off the water supply. This will prevent any water leakage or mess during the installation. To turn off the water supply, locate the shut-off valves underneath the sink and turn them clockwise until they are fully closed. It is advisable to test the water supply by turning on the faucet to make sure it is shut off completely.
Ensure the work area is clean and free from any debris
Cleanliness is vital when installing a drop-in sink on a granite countertop. Make sure the work area is clean and free from any debris that could interfere with the installation process. Use a clean cloth to wipe down the countertop and remove any dust or dirt. This will provide a smooth and secure surface for the sink to be installed.
By taking these necessary preparation and safety measures, you are ensuring a successful and hassle-free installation of your drop-in sink on a granite countertop. Now, you are ready to move on to the next step of the installation process.
Step 2: Removing The Old Sink (If Applicable)
Before you can install a drop-in sink on your granite countertop, you’ll need to remove the old sink (if there is one). This step-by-step guide will walk you through the process of disconnecting the plumbing connections, loosening and removing the mounting clips or brackets, and carefully lifting and removing the old sink.
Disconnecting the plumbing connections
The first step in removing the old sink is to disconnect the plumbing connections. This includes turning off the water supply, either at the shut-off valves under the sink or at the main water supply. Additionally, you’ll need to disconnect the drain pipes and any other plumbing connections attached to the sink.
To disconnect the plumbing connections:
- Place a bucket or basin underneath the sink to catch any remaining water.
- Use an adjustable wrench to loosen the nuts connecting the water supply lines to the faucet.
- Once the nuts are loose, use your hands to carefully unscrew them completely.
- Next, use a pipe wrench or pliers to loosen the nuts connecting the drain pipes to the sink.
- Once the nuts are loose, carefully disconnect the drain pipes from the sink.
Loosening and removing the mounting clips or brackets
Once the plumbing connections are disconnected, it’s time to loosen and remove the mounting clips or brackets that hold the sink in place. These clips or brackets may be located underneath the sink, attached to the countertop, or a combination of both.
To loosen and remove the mounting clips or brackets:
- Inspect the underside of the sink to identify the clips or brackets holding it in place.
- Using a screwdriver or a drill with the appropriate bit, carefully remove the screws or fasteners securing the mounting clips or brackets.
- Take note of the location of each clip or bracket as you remove them to ensure proper reinstallation of the new sink.
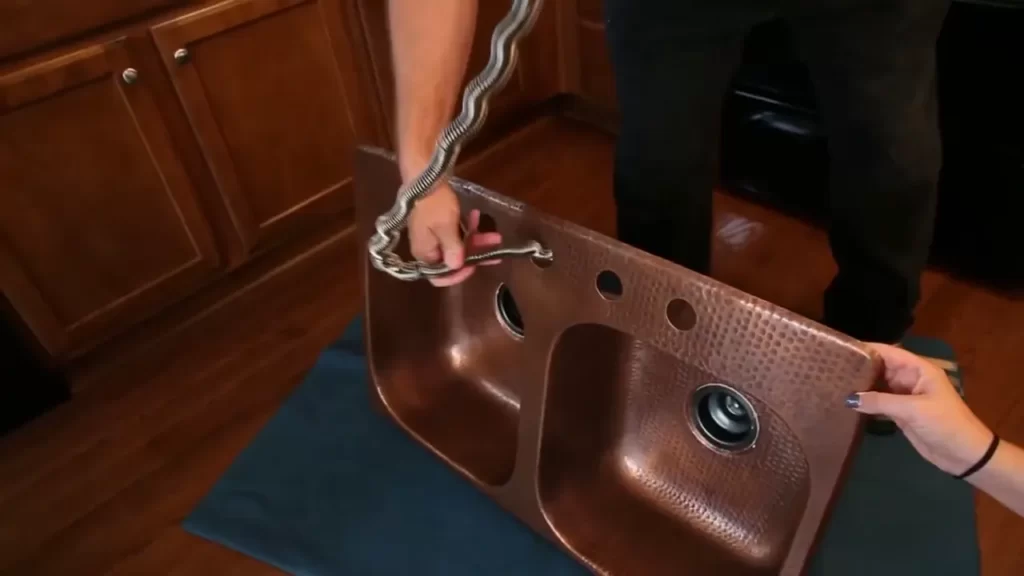
Carefully lifting and removing the old sink
With the plumbing connections and mounting clips or brackets removed, it’s time to lift and remove the old sink from the granite countertop. This step requires caution to prevent any damage to the countertop or surrounding areas.
To carefully lift and remove the old sink:
- Enlist the help of a friend or family member to assist in lifting and carrying the sink.
- Place your hands at either side of the sink and lift it straight up, using your legs for support.
- Slowly and carefully remove the sink from the countertop, ensuring not to scrape, scratch, or damage the granite surface.
- Set the old sink aside in a safe area or dispose of it properly.
With the old sink successfully removed, you’re now ready to move on to the next step of installing the drop-in sink on your granite countertop. Stay tuned for Step 3: Preparing the Countertop and Sink for Installation.

Step 3: Measuring And Marking The Cutout
Now that you have placed the sink on the countertop and traced the outline, it’s time to move on to the next step – measuring and marking the position of the faucet holes. This crucial step ensures that your sink and faucet are perfectly aligned, allowing for a seamless installation. Follow these instructions to complete this step successfully.
Placing the sink on the countertop
Before you can measure and mark the cutout, you need to place the drop-in sink on the granite countertop. Ensure that the sink is centered and aligned properly with the edge of the countertop. This will give you an accurate measurement and ensure a professional-looking installation.
Tracing the outline of the sink
Once you have properly positioned the sink, take a pencil or marker and carefully trace the outline of the sink onto the granite countertop. This will serve as a guide when cutting the hole for the sink. Make sure to trace exactly along the edge of the sink, so that the cutout will fit the sink perfectly.
Measuring and marking the position of the faucet holes
Now that the sink outline is traced onto the countertop, it’s time to measure and mark the position of the faucet holes. To do this, you will need to refer to the instructions provided by the sink manufacturer, as the positioning may vary depending on the model.
Using a measuring tape or ruler, measure the distance from the edge of the sink to the center of each faucet hole. Refer to the sink’s template or instruction manual to determine the recommended measurement. Once you have the measurements, mark the position of each faucet hole on the countertop using a pencil or marker. Double-check your measurements to ensure accuracy before proceeding.
By accurately measuring and marking the cutout, as well as the position of the faucet holes, you are now ready to move on to the next step – cutting the hole for the drop-in sink and drilling the faucet holes. With precision and attention to detail, your granite countertop installation will be a success.
Step 4: Cutting The Granite Countertop
Once you have marked the outline of the drop-in sink on your granite countertop, it’s time to make precise cuts to accommodate the sink. This step requires careful handling and the use of the right tools to ensure a clean and accurate cut.
Using a diamond blade on a wet saw
One of the most effective tools for cutting granite is a wet saw with a diamond blade. This combination allows for smooth and precise cuts without causing damage to the stone. The water from the wet saw helps to cool down the blade, preventing any heat-related issues.
Here’s how to use a diamond blade on a wet saw:
- Make sure you have set up your wet saw in a well-ventilated area and have taken all necessary safety precautions, such as wearing safety goggles and gloves.
- Place the granite countertop on the cutting surface of the wet saw, ensuring that it is securely held in place.
- Turn on the wet saw and lower the diamond blade onto the marked lines. Start cutting slowly and steadily, allowing the blade to do the work.
- Continue cutting along the marked lines, applying light pressure and maintaining a steady pace. Avoid rushing or forcing the blade through the granite.
- Once you have completed the cut, turn off the wet saw and carefully remove the granite countertop from the cutting surface.
Making precise cuts along the marked lines
When cutting the granite countertop, it is essential to make precise cuts along the marked lines. This will ensure a perfect fit for the drop-in sink and prevent any gaps or unevenness. To achieve accurate cuts, follow these steps:
- Take your time to double-check the markings on the granite countertop, ensuring they align with the intended location of the drop-in sink.
- Hold the wet saw firmly and guide it along the marked lines, maintaining a steady motion to achieve consistent and straight cuts.
- Pay close attention to the depth of the cut, ensuring it matches the thickness of the drop-in sink to create a seamless installation.
Taking precautions to prevent chipping or cracking
Granite is a durable stone, but it can still chip or crack if not handled appropriately during the cutting process. To prevent any damage to the granite countertop, follow these precautions:
- Use a diamond blade specifically designed for cutting granite, as it will minimize the risk of chipping or cracking.
- Apply light pressure while cutting and let the blade do the work. Pushing too hard can lead to unwanted damage.
- Ensure that the wet saw is properly set up, with the blade positioned at the correct angle to avoid unnecessary friction or stress on the granite.
By taking these precautions and making precise cuts along the marked lines using a diamond blade on a wet saw, you can successfully cut your granite countertop to accommodate a drop-in sink. This step is crucial for achieving a professional and seamless installation, ensuring your sink fits securely and enhances the overall look of your kitchen.
Step 5: Installing The Sink
Applying a bead of silicone caulk around the perimeter of the cutout
Before installing the drop-in sink on your granite countertop, it is essential to apply a bead of silicone caulk around the perimeter of the cutout. This will create a watertight seal and prevent any leakage. Make sure to use a high-quality silicone caulk specifically designed for bathroom or kitchen fixtures.
Carefully lowering the sink into the cutout
Once you have applied the silicone caulk, carefully lower the drop-in sink into the cutout on the granite countertop. It is crucial to handle the sink with care to avoid any damage to the countertop or sink itself. If the sink is heavy, consider asking for assistance to ensure a smooth installation process.
Adjusting the position and ensuring it is level
After placing the sink into the cutout, it is important to adjust its position and ensure that it is level. An uneven sink can lead to water pooling and improper drainage. Use a level tool to check if the sink is perfectly horizontal in all directions. If needed, make adjustments by gently lifting and repositioning the sink until it is level.
Securing the sink with clamps or brackets
Once the sink is in the desired position and level, it’s time to secure it to the granite countertop. Depending on the sink model, you may need to use clamps or brackets to hold it in place. Follow the manufacturer’s instructions for proper installation. Ensure that the clamps or brackets are tight enough to keep the sink secure but not too tight to cause any damage to the sink or the countertop.
Wiping away any excess caulk and allowing it to cure
Finally, wipe away any excess caulk around the perimeter of the sink using a damp cloth or sponge. This will give the installation a neat and finished appearance. Allow the caulk to cure according to the manufacturer’s instructions before using the sink. This curing period is essential to ensure the caulk forms a strong and durable seal.
By following these steps for installing a drop-in sink on a granite countertop, you can achieve a professional and secure installation. Remember, if you’re unsure about any step, it’s always better to seek professional help to ensure the longevity and functionality of your sink.
Step 6: Securing The Sink
When it comes to installing a drop in sink on a granite countertop, securing the sink properly is crucial to ensure its stability and longevity. In this step, we’ll guide you through the process of attaching the mounting clips or brackets, tightening them to secure the sink in place, and checking for any gaps or unevenness.
Attaching the mounting clips or brackets
To begin, you’ll need to attach the mounting clips or brackets to the underside of the granite countertop. These clips or brackets act as supports for the sink, helping to hold it firmly in place.
First, determine the number of mounting clips required for your sink. This can vary depending on the size and weight of the sink. Typically, you will need at least four clips, with one positioned near each corner of the sink.
Once you have determined the appropriate number of clips, place them evenly along the edge of the sink, making sure they are equidistant from each other. Use a screwdriver or a drill to secure the clips to the underside of the countertop.
Tightening the clips to secure the sink in place
Once the mounting clips or brackets are in position, it’s time to tighten them to secure the sink in place. Start by locating the screw holes on the clips.
Using a screwdriver or a drill, carefully tighten the screws on each clip, gradually applying equal pressure to ensure the sink is securely fastened. It’s important to avoid over-tightening the screws, as this can potentially damage the sink or the countertop.
Make sure to check if the sink is level and properly aligned with the countertop while tightening the clips. This will help prevent any future issues with water drainage or potential leaks.
Checking for any gaps or unevenness
Finally, after securing the sink with the clips, it’s essential to check for any gaps or unevenness between the sink and the countertop. This step ensures that the installation is seamless and provides an aesthetically pleasing result.
Run your fingers along the edges of the sink, feeling for any gaps or uneven spots. If you notice any inconsistencies, gently adjust the sink by loosening the clips and repositioning it until it sits flush with the countertop.
Additionally, inspect the sink from different angles to ensure there are no visible gaps or misalignments. This step will give you confidence that your drop-in sink is securely installed and will provide worry-free functionality for years to come.
Following these steps to secure the sink will not only enhance the appearance of your granite countertop, but it will also ensure the sink remains stable and functional, allowing you to enjoy your kitchen or bathroom with peace of mind.
Step 7: Connecting The Plumbing
After successfully installing the drop-in sink on your granite countertop, the next crucial step is connecting the plumbing. This involves reattaching the water supply lines and sealing the drain assembly to ensure a leak-free installation. In this step-by-step guide, we will walk you through the process of reconnecting the water supply lines and applying plumber’s putty to seal the drain.
Reconnecting the Water Supply Lines
Connecting the water supply lines is an essential part of the plumbing installation process. This step ensures that the sink will have access to water for everyday use. Here’s how you can easily reconnect the water supply lines:
- Begin by turning off the main water supply valve to prevent any potential leaks.
- Locate the shut-off valves beneath the sink and turn them counterclockwise to close them.
- Inspect the water supply lines for any damage or wear. If necessary, replace them with new flexible hoses.
- Connect the hot and cold water supply lines to their respective shut-off valves. Ensure they are securely tightened using an adjustable wrench.
- Once the connections are secure, turn on the main water supply valve and check for any leaks.
Applying Plumber’s Putty to Seal the Drain
The drain assembly is a crucial component of your sink’s plumbing system. To ensure a watertight seal, it’s important to apply plumber’s putty. Follow these steps to properly apply plumber’s putty and seal the drain:
- Remove the drain cover and thoroughly clean the area around the drain hole.
- Take a small amount of plumber’s putty and roll it into a thin rope-like shape.
- Place the putty along the underside of the drain flange, ensuring it covers the entire circumference of the hole.
- Insert the drain into the sink’s drain hole and press it firmly down to create a tight seal.
- Wipe away any excess putty that may have squeezed out.
- Attach the drain flange to the drain assembly, tightening it securely with a wrench.
By following these steps, you will successfully connect the plumbing for your drop-in sink on a granite countertop. Remember to check for any leaks or drips after completing the installation process to ensure a properly functioning sink. With the plumbing connected, you are one step closer to enjoying your beautiful and functional sink!
Step 8: Testing The Installation
Once you have successfully installed the drop-in sink on your granite countertop, it’s time to test the installation to ensure everything is in working order. This final step will ensure that you have a functional and leak-free sink that is ready for use. Follow the instructions below to test and evaluate the installation.
Restoring the Water Supply
The first step in testing the installation is to restore the water supply. Turn on the shut-off valves under the sink to allow water to flow to the faucet. Take a moment to inspect the supply lines for any signs of leaks or drips. If everything looks good, proceed to the next step. If you notice any leaks, tighten the connections or replace the faulty parts before continuing.
Checking for any Leaks
Next, check for any leaks around the sink. Start by running water into the sink and carefully observe the area where the sink and countertop meet. Look for any signs of water dripping or puddling around the edges. Additionally, check underneath the sink for any signs of water leaks or moisture. If you discover any leaks, make sure to address them promptly to prevent any further damage to your countertop or cabinets.
Evaluating the Functionality of the Sink
Finally, evaluate the functionality of the sink to ensure it is working as expected. Test each feature, including the faucets, sprayer, and garbage disposal (if applicable). Turn the faucets on and off to check if the water is running smoothly and the handles are functioning properly. Activate the sprayer to make sure it is providing adequate water pressure. If you have a garbage disposal, turn it on to ensure it is grinding the food waste effectively.
In conclusion, testing the installation of your drop-in sink is a crucial step before considering the project complete. By restoring the water supply, checking for any leaks, and evaluating the functionality of the sink, you can ensure a successful installation that will serve you well for years to come.
Regular Cleaning And Maintenance Tips
Regular cleaning and maintenance are crucial for keeping your drop-in sink in top condition and ensuring its longevity. By following these simple tips, you can keep your granite countertop and sink looking clean and beautiful.
Using non-abrasive cleaners
When it comes to cleaning your drop-in sink on a granite countertop, it’s important to use non-abrasive cleaners. Abrasive cleaners can scratch and damage the surface of both the sink and the countertop. Instead, opt for gentle cleansers that are specifically designed for granite surfaces.
Avoiding harsh chemicals
Harsh chemicals, such as bleach and ammonia-based cleaners, can cause discoloration and damage to your granite countertop and sink. It’s best to avoid using these chemicals altogether. Instead, opt for mild, pH-neutral cleaners that are safe for granite surfaces. Diluted dish soap or a mixture of water and vinegar can be effective for cutting through grease and grime without causing any harm.
Preventing stains and scratches
Preventing stains and scratches is important for maintaining the beauty of your drop-in sink and granite countertop. Here are some tips to keep in mind:
- Avoid leaving standing water in your sink for extended periods, as it can lead to water spots and mineral deposits. Wipe the sink dry after each use.
- Use cutting boards and trivets to protect your countertop from scratches caused by sharp utensils or hot pans.
- Be cautious when using heavy pots and pans. Avoid dropping them directly onto the sink or countertop, as it can cause chipping or cracking.
- Regularly clean and dry the area around the sink to prevent the buildup of dirt and grime.
By following these regular cleaning and maintenance tips, you can keep your drop-in sink looking great and ensure its durability for years to come. Remember to always use non-abrasive cleaners, avoid harsh chemicals, and take preventative measures to prevent stains and scratches on your beautiful granite countertop.
Troubleshooting Common Issues
Installing a drop-in sink on a granite countertop can be a straightforward process, but sometimes issues may arise. In this section, we will delve into some common problems you might encounter and provide solutions to help you troubleshoot and resolve them.
Dealing with leaks or drips
One of the most common problems you may face when installing a drop-in sink on a granite countertop is dealing with leaks or drips. Leaks can occur due to improper sealing or a faulty installation. To address these issues, follow these steps:
- First, inspect the area around the sink for any visible leaks or drips.
- If you notice any water seeping through, it is likely that the sink is not properly sealed. To fix this, carefully remove the sink from the countertop.
- Check the sealing material and make sure it is not cracked or worn out. If it is damaged, replace it with a new sealant.
- Ensure that the sink is properly aligned with the drain opening on the countertop.
- Reinstall the sink and apply a generous amount of sealant around the edges to create a watertight seal.
- Check for leaks again after reinstallation. If the problem persists, consider seeking professional help to ensure a proper seal.
Fixing clogs or drainage problems
Clogs and drainage problems can occur in any sink, including drop-in sinks on granite countertops. To fix these issues, follow these steps:
- If you notice water draining slowly or backing up in the sink, there may be a clog in the drainpipe.
- Start by using a plunger to try and dislodge the clog. Place the plunger firmly over the drain opening and push down forcefully a few times, then quickly pull up to create suction.
- If plunging does not work, try using a plumbing snake or auger. Insert the snake into the drain until you feel resistance, then rotate the snake to break up the clog.
- For stubborn clogs, you may need to use a chemical drain cleaner. Be cautious and follow the manufacturer’s instructions carefully to avoid damaging your sink or countertop.
- Once the clog is cleared, test the drainage by running water and ensure it flows freely. If the problem persists, it is advisable to consult a professional plumber for further assistance.
Repairing or replacing damaged parts
In some cases, you may encounter damaged parts during or after the installation of a drop-in sink on a granite countertop. If you notice any broken or malfunctioning components, here’s what you can do:
- Identify the specific part that needs repair or replacement.
- If it is a simple issue like a loose faucet handle or a worn-out gasket, you can easily fix it by tightening the screws or replacing the gasket, respectively.
- If the damage is more severe, such as a cracked sink bowl or a malfunctioning garbage disposal, you may need to replace the entire unit. Consult the manufacturer’s instructions or seek professional help for guidance on the replacement process.
- Make sure to turn off the water supply and disconnect any electrical connections before attempting any repairs or replacements.
- Once the damaged part is repaired or replaced, test the sink functionality to ensure everything is working properly.
By addressing these common issues in the installation of drop-in sinks on granite countertops, you can maintain a functional and aesthetically pleasing sink in your kitchen or bathroom. Remember, if you encounter any challenges beyond your expertise, it is always advisable to seek professional assistance to ensure a satisfactory resolution. Happy troubleshooting!
Frequently Asked Questions
Can You Put A Drop In Sink On Granite?
Yes, you can put a drop-in sink on granite. It is a popular choice as the sink is mounted on top of the countertop, making it easier to install and remove. Just ensure that the sink is properly sealed to prevent water leakage and damage to the granite.
How Do You Attach A Sink To A Granite Countertop?
To attach a sink to a granite countertop, follow these steps: 1. Apply a thin layer of silicone adhesive around the sink’s edge. 2. Gently lower the sink into the designated opening on the countertop. 3. Adjust the sink to ensure it is properly aligned.
4. Use clamps or support brackets to hold the sink securely in place. 5. Allow the adhesive to dry completely before using the sink.
What Glue To Use To Attach A Sink To Granite Countertop?
Use a high-quality epoxy or adhesive specifically made for bonding sinks to granite countertops. These adhesives provide a strong, durable bond and ensure the sink stays securely attached to the countertop. Apply the glue according to the manufacturer’s instructions for best results.
Can You Install A New Sink In Existing Granite Countertop?
Yes, it is possible to install a new sink in an existing granite countertop.
Conclusion
Installing a drop-in sink on a granite countertop requires careful steps to ensure a secure and long-lasting fit. By following the proper instructions and using the right tools, you can successfully complete this task without any difficulty. Remember to measure accurately, create a template, and seal the sink properly to prevent any leaks and damage.
With these tips in mind, you can confidently enhance the functionality and beauty of your kitchen with a drop-in sink on your granite countertop.