To install a driveway drainage channel, you need to follow these steps. First, identify the desired location and mark it accordingly.
Then, dig a trench that matches the dimensions of the channel. Ensure the trench is level and sloped for proper water flow. Finally, place the channel in the trench and secure it with concrete or compacted gravel for stability. Driveway drainage is crucial to prevent water buildup and potential damage.
Installing a drainage channel is an effective solution to manage excess water runoff, ensuring the durability and safety of your driveway. This guide will provide you with a concise, step-by-step process to install a driveway drainage channel efficiently and effectively. By following these instructions, you can successfully redirect water away from your driveway, protecting it from erosion, cracks, or flooding. Let’s delve into the details of this straightforward installation procedure and get your driveway adequately equipped to handle any rainfall or runoff.
Choosing The Right Drainage Channel For Your Driveway
Installing a drainage channel for your driveway is an important part of preventing water buildup and ensuring the longevity of your driveway. By choosing the right drainage channel, you can effectively manage the surface water runoff and protect your driveway from potential damage caused by heavy rain and flooding. In this article, we will discuss the different factors to consider when selecting a drainage channel and explore the various types available in the market.
Factors to consider when selecting a drainage channel
When it comes to choosing a drainage channel for your driveway, there are several key factors that you should take into account. Each of these factors will contribute to the overall effectiveness and efficiency of the drainage system:
- Drainage capacity: It is crucial to consider the amount of water that needs to be drained away from your driveway. The drainage capacity of a channel depends on its width, depth, and flow rate. Assessing the average rainfall in your area will help in determining the appropriate drainage capacity required.
- Material: The material of the drainage channel should be durable and able to withstand heavy loads and regular vehicle traffic. Commonly used materials include concrete, polymer, plastic, and metal. Consider the climate conditions and the maintenance required for each material option.
- Installation: The ease of installation is an important factor to consider. Opt for a drainage channel that is easy to install and can be customized to fit your driveway’s specific requirements. Consider whether you will be installing the channel yourself or hiring a professional for the job.
- Accessibility: Accessibility is crucial for maintenance and cleaning purposes. Ensure that the selected drainage channel allows easy access for debris removal and regular cleaning to prevent clogging and blockage.
Different types of drainage channels available in the market
There are various types of drainage channels available in the market, each designed to suit different applications and budgets. Here are a few popular options:
| Drainage Channel Type | Description |
|---|---|
| Trench Drain | A long, narrow channel with a grate covering that efficiently collects and diverts surface water. Suitable for driveways with heavy traffic. |
| Slot Drain | A discreet and stylish drainage solution that features a narrow slot on the surface to collect water. Ideal for driveways with an aesthetic focus. |
| Channel Drain | A versatile option that allows a wide range of design possibilities, accommodating different load-bearing capacities. Suitable for driveways with varying widths and slopes. |
These are just a few examples, and there are many more drainage channels available in the market. Make sure to consider your specific needs, budget, and the capacity required before making a decision.
By carefully considering the factors mentioned above and choosing the right drainage channel for your driveway, you can effectively manage water runoff, prevent damage, and enhance the durability and performance of your driveway for years to come.
Preparing Your Driveway For Drainage Channel Installation
Before you begin installing a drainage channel in your driveway, it is essential to properly prepare the area to ensure optimal performance and functionality. This involves evaluating the drainage needs of your driveway, as well as measuring and marking the installation area. By following these steps, you can ensure a successful and effective installation.
Evaluating the drainage needs of your driveway
The first step in preparing your driveway for a drainage channel installation is to evaluate its specific drainage needs. This involves taking into account factors such as the slope of your driveway, the volume of water runoff, and any existing drainage issues. By understanding the unique characteristics of your driveway, you can select the appropriate drainage channel system to effectively manage water flow.
Measuring and marking the installation area
Once you have assessed the drainage needs of your driveway, the next step is to measure and mark the installation area for the drainage channel. This ensures precision and accuracy during the installation process. To do this, you will need a measuring tape and spray paint or chalk. Start by measuring the length and width of the intended installation area. Then, use the spray paint or chalk to mark the boundaries of the channel, ensuring it is positioned in a location that allows for proper water flow towards the designated drainage outlet.
In addition to marking the boundaries, consider marking any additional areas where the channel might need to be cut or connected, such as around corners or at the entrance of your driveway. Taking the time to measure and mark the installation area properly will save you from potentially costly mistakes later on.
Once you have evaluated the drainage needs of your driveway and measured and marked the installation area, you are ready to proceed with the installation of the drainage channel. By properly preparing your driveway in these initial stages, you can ensure a smooth, efficient, and effective installation process, ultimately enhancing the drainage capabilities of your driveway.
Step-By-Step Guide To Installing A Driveway Drainage Channel
In order to prevent water from pooling and causing damage to your driveway, it is essential to install a drainage channel. This step-by-step guide will walk you through the process of installing a driveway drainage channel, ensuring effective water flow and protection for your driveway.
The first step in installing a driveway drainage channel is to excavate the installation trench. To dig the trench, follow these steps:
- Measure the length of the drainage channel you plan to install.
- Mark the boundaries of the trench using spray paint or stakes.
- Use a shovel or a trenching tool to excavate the marked area, ensuring the trench is wide enough to accommodate the drainage channel.
- Remove any excess soil or debris from the trench.
In order for the drainage channel to effectively channel water away from your driveway, it is important to ensure proper slope for water flow. Follow these steps to achieve the right slope:
- Measure the height difference between the starting point and the endpoint of the drainage channel.
- Calculate the slope by dividing the height difference by the length of the channel.
- Adjust the trench depth accordingly to achieve the desired slope.
Once the trench is properly excavated and the slope is determined, it is time to install the base and compact the soil. Here’s what you need to do:
- Add a layer of gravel or crushed stone to the bottom of the trench to create a stable base.
- Compact the gravel or crushed stone using a tamper or a compactor to ensure a solid foundation.
- Check the slope again to ensure it has not been disturbed during the base installation process.
With the base installed and compacted, it’s time to place the drainage channel in the trench. Follow these steps:
- Measure the length of the trench and cut the drainage channel to fit accordingly.
- Place the drainage channel in the trench, ensuring it sits securely on the base.
- Align the channel with the desired slope, making sure the inlet is at the lower end.
For the drainage channel to function properly, it needs to be connected to the existing drain system. Follow these steps to make the connection:
- Measure the distance between the drainage channel outlet and the existing drain system.
- Cut a section of the drainage channel to the appropriate length.
- Attach the cut section of the drainage channel to the existing drain system using compatible connectors or adapters.
Once the drainage channel is connected to the existing drain system, it’s time to backfill and compact the installation trench. Here’s how you can do it:
- Add backfill material, such as crushed stone or gravel, around the drainage channel, ensuring it is evenly distributed.
- Compact the backfill material using a tamper or a compactor, ensuring it is firmly packed.
- Continue adding backfill material until the trench is completely filled and level with the ground surface.
After completing the installation, it is important to test the functionality of the drainage channel. Follow these steps to ensure proper water flow:
- Pour water or use a hose to simulate rainfall and observe the flow of water through the drainage channel.
- Check for any leaks or blockages in the system.
- Make any necessary adjustments or repairs to ensure the drainage channel is functioning optimally.
By following this step-by-step guide, you can successfully install a driveway drainage channel, providing effective water flow and safeguarding your driveway from potential damage.
Excavating The Installation Trench
Excavating the installation trench is a crucial step in ensuring the proper installation of a driveway drainage channel. This step involves determining the depth and width of the trench, using appropriate tools for excavation, and removing any obstacles or debris from the trench.
Determining the depth and width of the trench
Before starting the excavation, it is important to determine the appropriate depth and width of the trench based on the specific requirements of the driveway drainage channel. The trench depth should allow for sufficient slope to ensure proper water flow. The width should be wide enough to accommodate the drainage channel and provide easy access for installation and maintenance.
Using appropriate tools for excavation
To ensure a successful excavation process, it is essential to use appropriate tools that make the job easier and more efficient. Tools such as a shovel, spade, or mini excavator can be used depending on the size and compactness of the area. These tools help to dig the trench to the required depth and width in a controlled manner.
Removing any obstacles or debris from the trench
Prior to installing the driveway drainage channel, it is important to clear the trench of any obstacles or debris that may hinder the proper functioning of the drainage system. This includes removing rocks, roots, and any other obstructions that may impede the flow of water or prevent the channel from fitting securely in place.
By taking the time to determine the appropriate depth and width of the trench, using the right tools for excavation, and removing any obstacles or debris, you can ensure a smooth and successful installation of your driveway drainage channel.

Ensuring Proper Slope For Water Flow
When it comes to installing a driveway drainage channel, ensuring proper slope for water flow is crucial. Without the right slope, water could pool and cause damage to your driveway and surrounding areas. In this section, we will discuss how to calculate the required slope for effective drainage, how to use a level to ensure proper slope, and how to adjust the trench depth to achieve the desired slope. By following these steps, you can ensure that water flows away from your driveway, protecting it from potential damage.
Calculating the required slope for effective drainage
The first step in ensuring proper slope for water flow is to calculate the required slope for effective drainage. The slope is measured as a percentage, which represents the amount of vertical drop over a horizontal distance. To calculate the slope, you will need to measure the length of the trench and the desired drop from the high end to the low end.
Once you have these measurements, you can use the following formula to calculate the slope:
| Formula: | Slope = (Drop / Length) * 100 |
|---|
For example, if you have a trench that is 10 feet long and you want a drop of 1 inch, the slope can be calculated as follows:
Slope = (1 inch / 10 feet) * 100 = 10%
Using a level to ensure proper slope
Once you have calculated the required slope, it is important to use a level to ensure that the trench is properly sloped. Start by placing the level at the high end of the trench and slowly move it towards the low end. Check the bubble on the level to ensure that it is centered, indicating that the slope is correct.
If the bubble is not centered, you will need to adjust the depth of the trench to achieve the desired slope. Use a shovel to either add or remove soil from the trench until the bubble on the level is centered. Keep checking the level as you make adjustments to ensure that the slope remains consistent along the entire length of the trench.
Adjusting the trench depth to achieve the desired slope
Adjusting the trench depth is an important step in ensuring the proper slope for water flow. If the trench is too shallow, the water will not be able to flow properly and may pool in certain areas. On the other hand, if the trench is too deep, the water may flow too quickly and cause erosion.
To achieve the desired slope, start by measuring the depth of the trench at both ends. If the depth is not consistent, you will need to adjust the depth by adding or removing soil. Use a shovel to make these adjustments, ensuring that the depth is consistent along the entire length of the trench.
By calculating the required slope for effective drainage, using a level to ensure proper slope, and adjusting the trench depth to achieve the desired slope, you can install a driveway drainage channel that effectively directs water away from your driveway. This will help protect your driveway from potential damage and ensure its longevity.
Installing The Base And Compacting The Soil
When it comes to installing a driveway drainage channel, one crucial step is to create a sturdy and level base. Without a proper base, the channel might not function effectively or could even become damaged over time. In this section, we will discuss the steps involved in adding a layer of gravel or crushed stone as a base and using a compactor to compact the base material. We will also touch on the importance of checking the levelness and stability of the base.
Adding a layer of gravel or crushed stone as a base
To begin, it is essential to prepare the ground by adding a layer of gravel or crushed stone as a base for the drainage channel. This layer serves as a stable foundation and helps to prevent sinking or shifting of the channel. Follow these steps:
- Clear the area where the drainage channel will be installed, removing any rocks, debris, or vegetation.
- Measure the width and depth of the channel, ensuring the trench is wide enough to accommodate the base layer and the channel itself.
- Add a layer of gravel or crushed stone to the bottom of the trench, filling it to a depth of at least 4-6 inches.
- Spread the gravel evenly, ensuring a smooth and level surface.
By adding this layer of gravel or crushed stone, you create a stable and permeable base for the drainage channel, allowing water to flow freely through the system.
Using a compactor to compact the base material
Once the base layer has been added, the next step is to compact the material using a compactor. This process helps to further stabilize the base and ensure its longevity. Follow these guidelines:
- Choose a compactor suitable for the size of the project and the type of base material.
- Start compacting from one end of the channel and work your way towards the other end, applying firm and even pressure as you go.
- Overlap each pass slightly to achieve uniform compaction.
- Continue compacting until the surface feels solid and there are no visible gaps or loose areas.
Remember to take breaks as needed to avoid overworking yourself or the compactor. Compacting the base material enhances its stability and helps to prevent any future shifting or settling.
Checking the levelness and stability of the base
After compacting the base material, it is crucial to check the levelness and stability of the base before proceeding with the installation of the drainage channel. This step ensures that the channel will sit properly and function effectively. Use the following steps as guidance:
- Use a level to check the flatness of the base, moving it horizontally and vertically along the trench.
- Make adjustments as necessary by adding or removing gravel to achieve a level surface.
- Step on the base to test its stability. It should feel solid and not shift or depress under your weight.
- Repeat the levelness and stability checks in multiple areas of the trench to ensure consistency.
By taking the time to check the levelness and stability of the base, you can ensure a proper installation of the drainage channel, reducing the risk of future problems.
Placing The Drainage Channel In The Trench
Positioning the drainage channel in the trench
Once you have dug the trench for your driveway drainage channel, it’s time to start placing the channel itself. This step is crucial as it ensures that the water flows smoothly and efficiently away from your driveway.
To position the drainage channel in the trench:
- Start by placing the channel at one end of the trench, ensuring that the bottom of the channel is level with the bottom of the trench. This will help create a seamless transition for the water as it enters the channel.
- Next, carefully align the channel with the desired slope of your driveway. This allows the water to flow naturally towards the lowest point, preventing any pooling or standing water.
- Use a spirit level to ensure that the channel is perfectly level. This is important for maintaining the functionality of the drainage system and preventing water from backing up or overflowing.
Making necessary adjustments for alignment
If the channel doesn’t align perfectly with the desired slope, you may need to make some adjustments. Here’s how:
- Start by loosening the screws on the channel brackets.
- Gently adjust the position of the channel until it is aligned with the desired slope.
- Tighten the screws back in place to secure the channel in its new position.
Ensuring proper fit and stability of the channel
To ensure the proper fit and stability of the drainage channel:
- Make sure that the channel fits tightly in the trench without any gaps or spaces. This ensures that water will flow directly into the channel and not seep into the surrounding soil.
- If necessary, use a rubber mallet to gently tap the channel into place. Be cautious not to damage the channel or cause it to crack.
- Once the channel is in position, step on it lightly to ensure that it is stable and secure. If it moves or wobbles, adjust the position or add additional support.
By following these steps, you can confidently place the drainage channel in the trench, ensuring optimal drainage for your driveway and preventing any potential water damage.
Connecting The Drainage Channel To The Existing Drain System
Once you have successfully installed the driveway drainage channel, it’s crucial to connect it to the existing drain system to ensure proper drainage. This step is essential as it allows the collected water from the channel to flow into the drainpipe and ultimately away from your driveway. Here’s how you can connect the drainage channel to the existing drain system.
Identifying the location of the existing drain system
The first step in connecting the drainage channel is to identify the location of the existing drain system. In most cases, this will be a drainpipe that is already present near your driveway. To locate the drainpipe:
- Inspect the area around your driveway to find any existing drain covers or grates.
- Follow the path of these drains to determine where the drainpipe is located.
- Use a measuring tape or a string to mark the location of the drainpipe.
Once the location has been identified, you’re ready to move on to the next step.
Cutting and connecting the drainage channel to the drainpipe
After identifying the location of the existing drain system, it’s time to cut and connect the drainage channel to the drainpipe. Follow these steps:
- Using a saw or a specialized channel cutting tool, carefully cut the drainage channel at the marked location.
- Trim the cut edge of the drainage channel to ensure a clean and precise fit with the drainpipe.
- Place the trimmed end of the drainage channel against the drainpipe, ensuring a snug fit.
Now that the drainage channel is connected to the drainpipe, it’s vital to secure the connection with appropriate fittings.
Securing the connection with appropriate fittings
The final step in connecting the drainage channel to the existing drain system is to secure the connection using appropriate fittings. Here’s how:
- Select fittings that are compatible with both the drainage channel and the drainpipe.
- Carefully attach the fittings to the drainage channel and the drainpipe, ensuring a tight and secure connection. You may need to use screws or clamps, depending on the type of fittings used.
- Test the connection by running water through the drainage channel and observe if it flows smoothly into the drainpipe.
- If any leaks or issues arise, readjust the fittings and ensure a proper seal.
By securing the connection with appropriate fittings, you can rest assured that water will be efficiently drained from your driveway.
With the drainage channel now successfully connected to the existing drain system, you have completed the installation process. Congratulations! Your driveway is now equipped with a robust and effective drainage system, ensuring that excess water is swiftly and efficiently diverted away from your property.
Backfilling And Compacting The Installation Trench
Once you have successfully installed your driveway drainage channel, the next step is to backfill and compact the installation trench. This crucial step ensures stability and support for your driveway drainage system, preventing any potential problems in the future. Proper backfilling and compaction not only helps to maintain the integrity of the installation, but also allows for efficient water flow and drainage.
Filling the trench with soil or gravel
In order to backfill the trench, you have two options to choose from – soil or gravel. Both materials have their benefits, and the choice depends on your specific requirements. Using soil as backfill provides a natural and cost-effective option. Ensure that the soil you use is free from any debris or rocks that could hinder the water flow. On the other hand, gravel is a popular choice due to its excellent drainage properties, as it allows water to flow freely through its porous structure. Whether you choose soil or gravel, fill the trench, ensuring that the material is evenly distributed and compacted.
Using a compactor to compact the backfill material
Once the trench is filled with soil or gravel, it is important to use a compactor to achieve proper compaction. A compactor is a valuable tool that helps to increase the density of the backfill material, ensuring stability and minimizing settling. Start by running the compactor over the backfill material in a parallel direction to the trench. Then, make a second pass perpendicular to the initial direction. This ensures that the compactor compresses the material from different angles, resulting in improved compaction.
Ensuring proper compaction for stability and support
Proper compaction is essential for maintaining stability and support for your driveway drainage channel. It helps to prevent the formation of air pockets and settling, which could lead to the channel shifting or sinking over time. As you compact the backfill material, pay attention to any uneven areas and adjust accordingly. Ensure that every part of the trench is compacted uniformly to provide consistent support. Regularly check the compaction level as you work to make sure it meets the desired standards.
In conclusion, backfilling and compacting the installation trench of your driveway drainage channel is a critical step that should not be overlooked. By using soil or gravel as backfill material and thoroughly compacting it with a compactor, you ensure stability and support for your drainage system. Following these steps will help you create a high-quality installation that efficiently drains water away from your driveway, protecting it from potential damage for years to come.
Testing The Functionality Of The Drainage Channel
Once you have successfully installed a driveway drainage channel, it is crucial to test its functionality to ensure proper water flow and prevent any future issues. Testing the drainage channel involves pouring water into the channel to assess the water flow, observing for any leaks or blockages, and making necessary adjustments for optimal performance. Let’s explore these steps in detail.
Pouring water into the channel to test water flow
One of the first steps in testing the functionality of a driveway drainage channel is to pour water into the channel and observe its flow. This will help determine if the channel adequately collects and directs water away from the driveway, preventing water buildup and potential damage. To test the water flow, follow these steps:
- Ensure the drainage channel is clean and free from any debris or obstructions.
- Pour a sufficient amount of water into the channel, taking care not to overflow.
- Observe how the water flows through the channel and check if it effectively drains away from the driveway.
If you notice any issues with water flow, such as water pooling or slow drainage, adjustments might be necessary to optimize the performance of the drainage channel.
Observing and checking for any leaks or blockages
While testing the functionality of the drainage channel, it is essential to closely observe and check for any leaks or blockages. Leaks can lead to water seepage or damage to the surrounding area, while blockages can hinder proper water flow. Follow these steps to ensure there are no leaks or blockages:
- Inspect the drainage channel for any signs of water leakage, such as dripping or damp spots.
- Check the joints and connections to ensure they are tightly sealed and free from any gaps or cracks.
- Run water through the channel and monitor it closely for any blockages.
- If you encounter any leaks or blockages, address them promptly by replacing damaged parts or removing obstructions.
Making necessary adjustments for optimal performance
To ensure the driveway drainage channel functions optimally, it might be necessary to make adjustments based on the outcome of the initial water flow test and observation. Consider the following steps to enhance the channel’s performance:
- If the water flow is slow or pooling occurs, check for any obstructions within the channel and remove them.
- Inspect the slope and alignment of the channel to ensure water flows downhill efficiently.
- Consider adding additional drainage channels or accessories to accommodate higher water volumes, especially in areas prone to heavy rainfall.
By making these necessary adjustments, you can optimize the functionality of your driveway drainage channel, effectively redirecting water away from your driveway and preventing potential damage.
Frequently Asked Questions
How Do I Channel Water Away From My Driveway?
To channel water away from your driveway, consider installing a driveway drain or trench drain. These drainage systems collect and redirect water, preventing it from pooling on your driveway. Another option is to create a slope or grading away from the driveway to guide water towards a designated drainage area.
Do Channel Drains Need To Be Cemented?
No, channel drains do not need to be cemented. They are typically installed with a proper slope to allow water to flow freely. Cementing is not necessary and can actually hinder the functionality of the drain. The channel drain should be securely fitted and leveled to ensure proper drainage.
How Do You Install Channel Drainage?
To install channel drainage, follow these steps: 1. Mark the area where the drainage is needed. 2. Dig a trench to the desired depth and width. 3. Lay the channel drain in the trench. 4. Connect the drain to the existing drainage system.
5. Backfill the trench with gravel or soil.
How Does A Driveway Channel Drain Work?
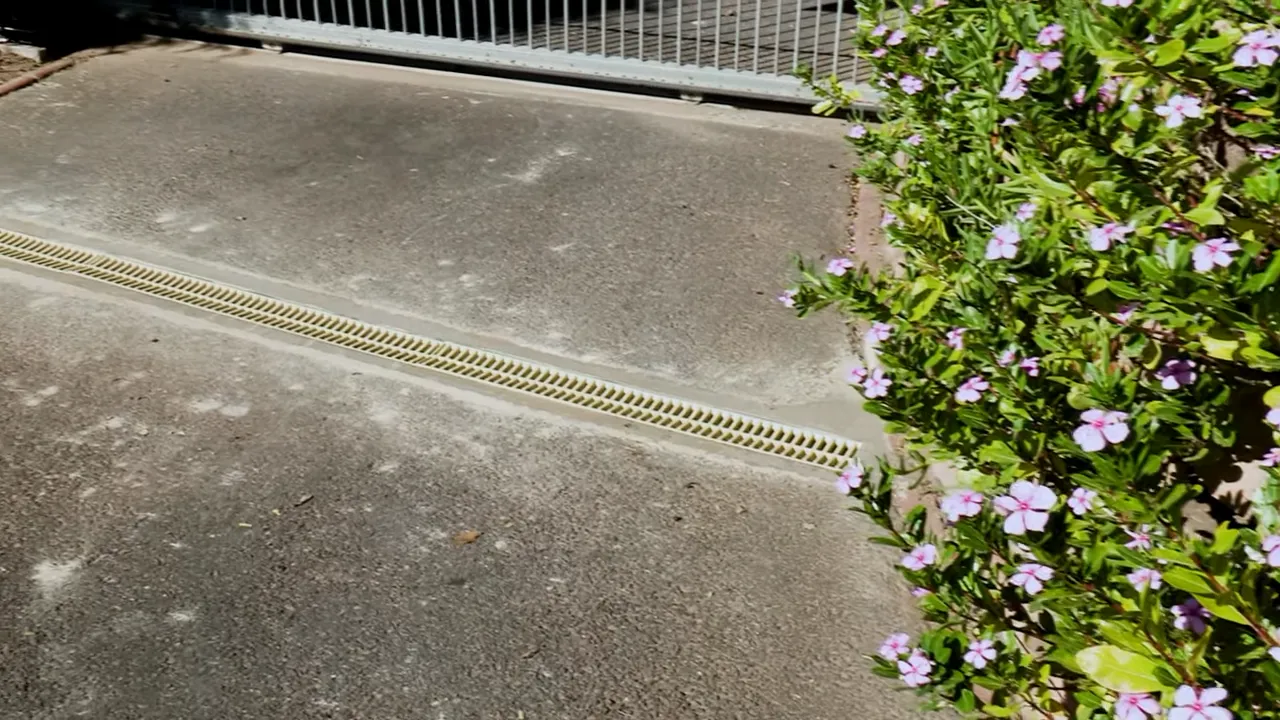
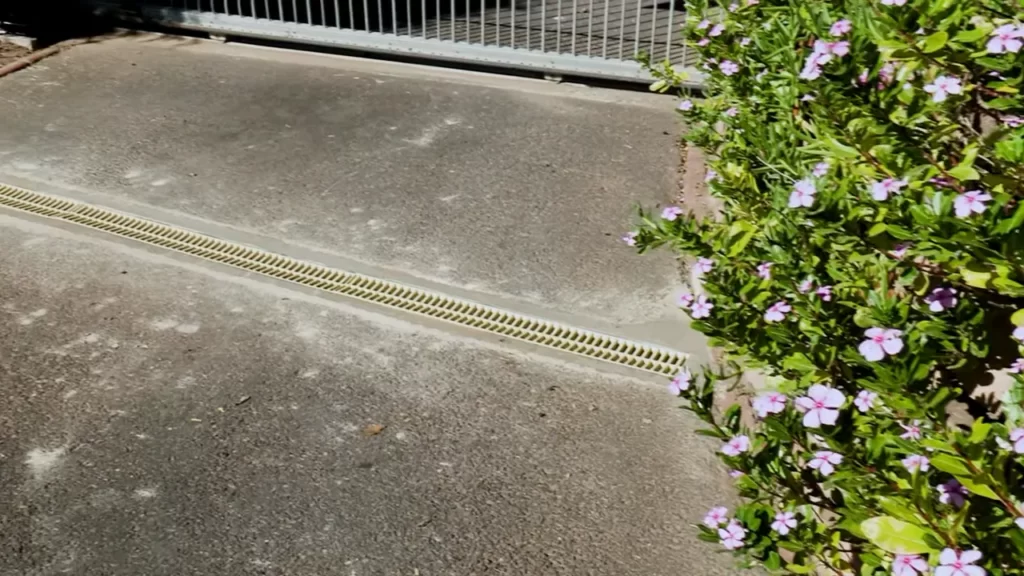
A driveway channel drain collects and redirects water from the surface to prevent pooling and flooding. The drain is installed in the driveway and contains a grate or slot that allows water to enter. The water then flows through the drain and is channeled away, keeping the driveway dry and safe.
Conclusion
Installing a driveway drainage channel is a crucial step in preventing water damage and maintaining the integrity of your driveway. By following the steps outlined in this guide and ensuring proper installation, you can effectively divert excess water away from your driveway, protecting it from potential cracks and erosion.
Regular maintenance and proper cleaning will also help prolong the lifespan of your drainage system. So go ahead and take the necessary steps to install a reliable and efficient driveway drainage channel today.