
Install downspout drains easily by following these simple steps: dig a trench near the downspout, lay the drain pipes in the trench, and connect them to the downspout and a drain outlet. These drains help direct rainwater away from your home’s foundation, preventing water damage and flooding.
Ensuring proper drainage is essential to protect your home from water damage. One effective way to achieve this is by installing downspout drains. These drains are designed to redirect rainwater away from your home’s foundation, preventing any potential flooding or water-related issues.
By following a few straightforward steps, you can install downspout drains and ensure the effective removal of rainwater. We will guide you through the installation process, offering valuable tips and insights to help you complete the project successfully. So, let’s dive in and learn how to install downspout drains effectively.
Planning Your Downspout Drain Installation
Planning is an essential step when it comes to installing a downspout drain. By carefully considering factors such as location, necessary tools, materials, and drainage capacity, you can ensure a successful and efficient installation process. In this section, we will discuss the important aspects of planning your downspout drain installation, which will lay the foundation for a functional and effective drainage system.
Selecting the Best Location for Downspout Drain
Choosing the right location for your downspout drain is crucial to effectively redirect rainwater away from your property. Take a walk around the exterior of your house, paying close attention to areas that have a tendency to accumulate water. These could include low-lying spots, areas near window wells, or places where water tends to pool during heavy rain. Once you have identified these trouble areas, consider the following tips for selecting the best location:
- Choose a spot that is at least ten feet away from your foundation to prevent water from seeping into your basement or causing damage to the structure.
- Ensure the downspout drain is positioned in a way that allows water to flow freely downhill, avoiding any obstacles such as trees or other buildings.
- Opt for a location that is easily accessible for maintenance, cleaning, and repairs in the future.
Gathering the Necessary Tools and Materials
Before starting your downspout drain installation, it’s important to gather all the tools and materials you will need. By having everything prepared ahead of time, you can simplify the installation process and avoid any unnecessary delays. Here is a list of the essential tools and materials required:
| Tools | Materials |
|---|---|
|
|
Measuring and Marking the Installation Area
Precise measurements and markings are necessary to ensure that the downspout drain is installed accurately. Here’s a step-by-step guide to measuring and marking the installation area:
- Start by measuring the distance between the downspout outlet and the desired location for the drain. Use a tape measure to get an accurate measurement.
- Mark the measured distance on the ground using spray paint or chalk. This will serve as your guide during the installation process.
- Consider the slope of the area and ensure that the drain will have a gradual downward gradient to facilitate proper water flow.
Calculating Drainage Capacity Needed
Calculating the drainage capacity needed will help determine the appropriate size and capacity of your downspout drain system. Here’s a simple method to calculate the drainage capacity:
- Measure the square footage of the roof area that will be directing water into the downspout drain system.
- Consider the local rainfall intensity in your area. This information can typically be obtained from your local weather station.
- Use an online rainwater collection calculator or a formula to determine the appropriate drainage capacity needed to handle the anticipated rainfall in your area.
By following the steps outlined above, you can effectively plan your downspout drain installation. Selecting the best location, gathering the necessary tools and materials, measuring and marking the installation area accurately, and calculating the drainage capacity needed will set you on the path to a functional and reliable downspout drain system.
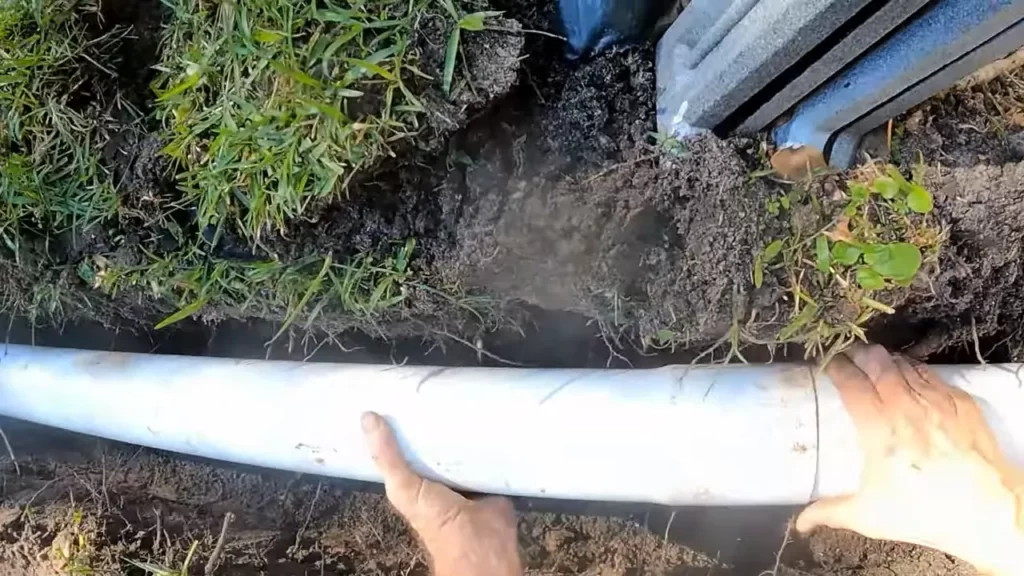
Excavating The Installation Area
Digging the Trench for the Downspout Drain
To install a downspout drain effectively, the first step is to dig a trench for the drain. The trench should be dug in a way that allows water to flow easily towards the desired drainage area. Start by marking the path where you want the drain to be installed, taking into consideration any existing structures or landscaping that might be in the way.
Removing Any Obstacles in the Trench Path
Once you have marked the path for the trench, it’s important to clear out any obstacles that may obstruct the installation of the downspout drain. This includes removing rocks, roots, or other debris that could hinder the proper functioning of the drain or cause blockages over time. Take the necessary time to thoroughly clear the trench, ensuring that there are no obstacles that could impede the flow of water.
When digging the trench, make sure to keep the sides as straight and even as possible. This will allow for a smooth installation process and minimize the risk of any issues down the line. It’s also important to determine the appropriate depth for the trench based on your specific drainage needs and local regulations. In general, the trench should be deep enough to accommodate the downspout drain and provide proper drainage, but not excessively deep that it becomes difficult to install or maintain.
Ensuring Proper Slope for Water Flow
One crucial aspect of excavating the installation area is ensuring that the trench has a proper slope for water flow. By creating a downward slope along the trench path, you can ensure that water will naturally drain away from your foundation and other vulnerable areas. Aim for a slope of at least 1/8 inch per foot of trench length to maximize the effectiveness of your downspout drain system.
Securing the Trench Sides
To prevent the walls of the trench from collapsing over time, it’s essential to secure the sides. This can be achieved by using materials such as landscape fabric, retaining wall blocks, or gravel. These reinforcements will help maintain the integrity of the trench, even during heavy rainfall or soil erosion. Additionally, securing the trench sides will make it easier to backfill the trench and complete the installation process smoothly.
Once the excavation is complete, the ground is cleared, and the trench is properly sloped and secured, you are ready to move on to the next step of installing the downspout drain. By taking the time to excavate the installation area correctly, you will lay the foundation for an efficient and long-lasting drainage system that will protect your property from water damage.
Installing The Downspout Drain System
Installing a downspout drain system is an essential step in effectively managing rainwater runoff from your home. By directing water away from the foundation, you can prevent potential damage and keep your basement or crawl space dry. In this section, we will walk you through the process of installing a downspout drain system, from connecting the downspout to the drain pipe to attaching the drainage pipe to the main sewer line, securing the connections with adhesive or clamps, and checking for proper slope and alignment.
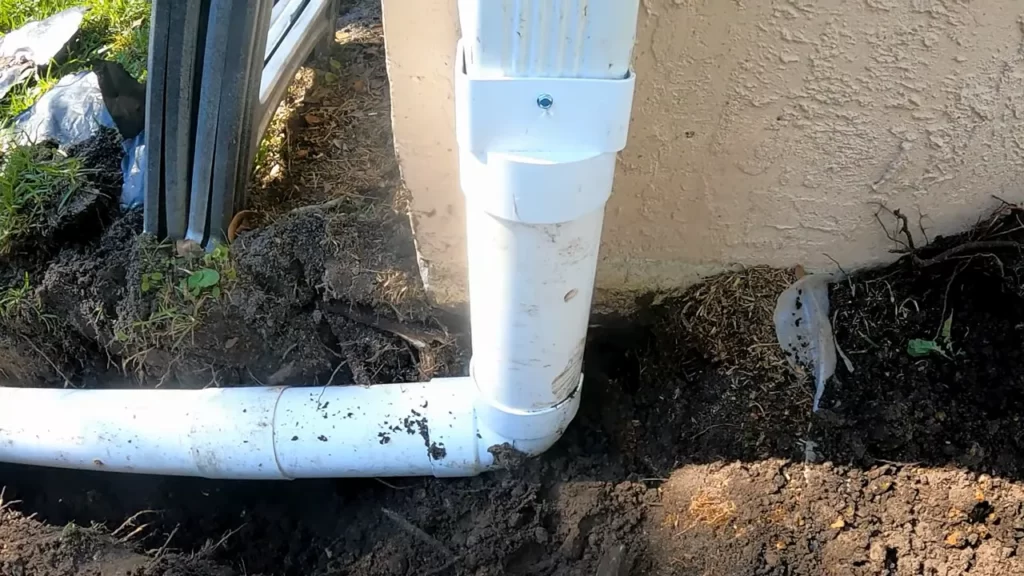
Connecting the Downspout to the Drain Pipe
Before you can start diverting water away from your home, you need to connect the downspout to the drain pipe. Here’s how you can do it:
- Locate the downspout outlet, which is typically located at the corner of your home’s eaves.
- Measure and cut a section of the drain pipe that will reach from the downspout outlet to the ground level.
- Attach the downspout elbow to the outlet using screws or brackets, ensuring a snug fit.
- Connect the other end of the downspout elbow to the drain pipe, securing it with screws or clamps.
- Ensure that the downspout is angled slightly away from the house to promote efficient water flow.
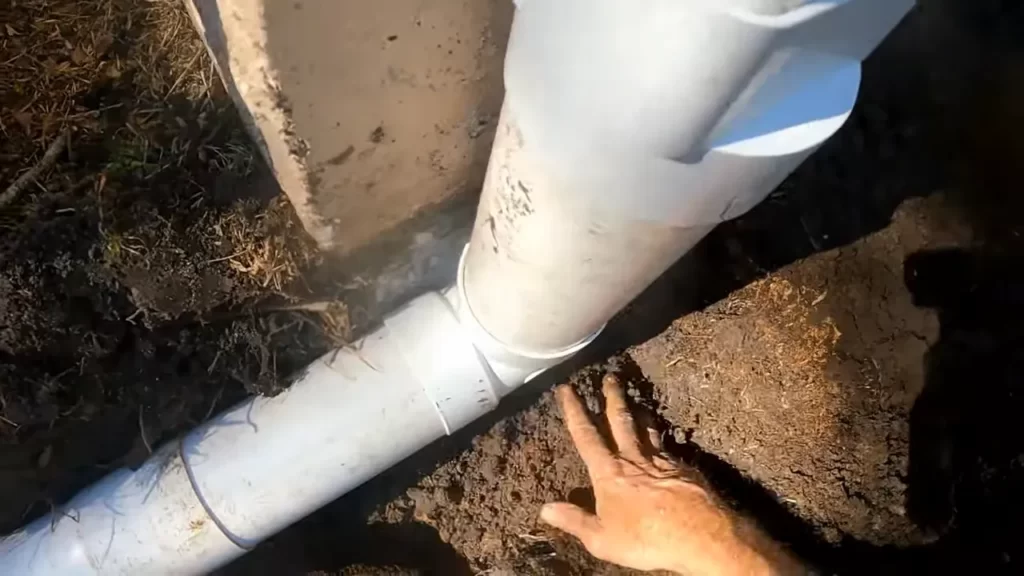
Attaching the Drainage Pipe to the Main Sewer Line
Once the downspout is connected to the drain pipe, you need to attach the drainage pipe to the main sewer line. Follow these steps:
- Locate the main sewer line connection point, which is usually found near the foundation or the lowest level of your home.
- Measure and cut a section of drainage pipe long enough to reach from the drain pipe to the main sewer line.
- Connect one end of the drainage pipe to the drain pipe using adhesive or clamps, ensuring a secure connection.
- Insert the other end of the drainage pipe into the main sewer line fitting, securing it firmly.
- Make sure that the drainage pipe slopes downward towards the main sewer line to allow for proper water flow.
Securing the Connections with Adhesive or Clamps
Ensuring a watertight connection is vital for the effectiveness of your downspout drain system. To secure the connections between the downspout, drain pipe, and main sewer line, consider these methods:
- Apply a generous amount of waterproof adhesive to the ends of the pipes and fittings before joining them together, following the manufacturer’s instructions.
- Use clamps or brackets to secure the connections, ensuring that they are tight and secure.
- Inspect the connections for any signs of leaks and make any necessary adjustments or repairs.
Checking for Proper Slope and Alignment
Proper slope and alignment are crucial for the effective drainage of rainwater. Here are the steps to ensure your downspout drain system is correctly sloped and aligned:
- Visually inspect the entire drain system, checking for any sagging or misaligned pipes.
- Ensure that the drain pipes are sloping down towards the main sewer line at a minimum slope of 1/8 inch per foot.
- Adjust the pipe angles or supports as needed to achieve the proper slope and alignment.
By following these steps and ensuring a secure and properly installed downspout drain system, you can effectively redirect rainwater away from your home, protecting its foundation and keeping your basement or crawl space dry.
Ensuring Proper Functionality
Ensuring proper functionality of your downspout drains is crucial for effective water drainage and preventing water damage to your property. In this section, we will discuss three important steps to ensure the optimum performance of your downspout drains:
Testing the Drainage System for Leaks
Before backfilling the trench, it is essential to test your drainage system for any leaks. This will help identify any potential issues that need to be addressed before completing the installation. To test for leaks, follow these simple steps:
- Plug the open end of the downspout with a stopper or a large rag.
- Fill the downspout with water using a hose or bucket.
- Observe the entire length of the downspout drain for any signs of leakage, such as dripping or running water.
- If you notice any leaks, carefully inspect the connections and joints for loose fittings or gaps.
- Tighten any loose fittings and seal any gaps with silicone caulk or waterproof tape to effectively eliminate leaks.
Backfilling the Trench and Compacting the Soil
Once you have ensured that there are no leaks in the drainage system, the next step is to backfill the trench and compact the soil around the downspout drains. This is important for stabilizing the drains and preventing future settling or shifting. Here’s how to properly backfill and compact the soil:
- Fill the trench with soil, ensuring it is evenly distributed and does not leave any gaps around the drains.
- Using a tamper or a hand compactor, gently compact the soil in layers, working your way up from the bottom of the trench.
- Continue compacting the soil until it is firmly packed around the drains, providing sufficient support and stability.
- Avoid overcompacting the soil, as it can restrict water flow through the drains.
Achieving Proper Landscaping and Aesthetic Integration
After completing the installation and ensuring the functionality of your downspout drains, it’s important to consider the aesthetic integration of the system into your landscaping. A well-integrated drainage system not only enhances the overall appearance of your property but also prevents any potential tripping hazards. Follow these tips for achieving proper landscaping and aesthetic integration:
- Consider using decorative rocks or mulch to cover the exposed portions of the downspout drains.
- Plant shrubs or small trees around the drains to create a visually appealing and natural barrier.
- Ensure that the downspout drains are positioned in a way that blends seamlessly with the existing landscape design.
- Regularly maintain and clean the drains to prevent clogging and maintain their overall appearance.
By adhering to these steps, you can ensure the proper functionality, stability, and aesthetic integration of your downspout drains. Take the time to test for leaks, properly backfill and compact the soil, and consider the overall landscaping to optimize the performance and appearance of your drainage system.
Frequently Asked Questions
How Deep Should Downspout Drains Be Buried?
Downspout drains should be buried at a depth of at least 5 to 6 feet to ensure proper drainage and prevent water damage. This depth allows the drains to be below the frost line, reducing the risk of freezing and clogging.
Proper burial depth is essential for effective water management around your property.
How Far Should Downspouts Drain From House?
Downspouts should drain at least 5-10 feet away from the house. This prevents water from pooling around the foundation, which can lead to basement leaks and other damage. By directing water away from your home, you can help maintain its structural integrity.
How Do You Connect A Downspout To A Drain?
To connect a downspout to a drain, position the downspout over the drain pipe opening and secure it with screws or brackets. Ensure a tight connection to avoid leaks. Use silicone caulk to seal any gaps. Maintain proper alignment and slope to ensure effective drainage.
What Is The Best Pipe For Downspout Drainage?
The best pipe for downspout drainage is PVC (polyvinyl chloride). It is durable, lightweight, and resistant to corrosion, making it ideal for redirecting rainwater away from your home. PVC pipes can handle heavy rainfall and are easy to install, providing efficient drainage for your downspouts.
Conclusion
Installing downspout drains can be a simple and effective solution for preventing water damage to your home’s foundation. By following the step-by-step process outlined in this blog post, you can ensure proper drainage and protect your property from costly repairs.
Remember to choose the right materials, plan the layout carefully, and consider consulting a professional if needed. With these tips, you’ll have a functional and efficient downspout drainage system in no time. Happy installing!