To install a Delta shower faucet, first, turn off the water supply. Then, follow the manufacturer’s instructions for assembling and securing the faucet components.
The installation process for a Delta shower faucet is relatively simple, but it’s important to follow the proper steps to ensure that everything is installed correctly. This guide will walk you through the necessary steps to install your new Delta shower faucet.
By following these instructions, you’ll be able to enjoy your new faucet and all of its features in no time. Before you begin the installation, make sure to gather all the necessary tools and materials. Additionally, ensure that you have shut off the water supply to avoid any potential leaks or accidents.
Understanding Your Delta Shower Faucet
Welcome to our comprehensive guide on how to install your Delta shower faucet. In this section, we will walk you through the process of understanding your Delta shower faucet, so you can successfully identify the specific model and differentiate between different types of shower faucets.
Differentiating between shower faucet types
Before you begin the installation process, it’s crucial to understand the different types of shower faucets that Delta produces. By identifying your specific shower faucet type, you can ensure a smooth and successful installation.
Table: Different Types of Delta Shower Faucets
| Type | Description |
|---|---|
| Single-handle | A single-handle shower faucet allows you to control both the water temperature and pressure with one handle. |
| Double-handle | A double-handle shower faucet has separate handles for hot and cold water, allowing you to adjust the temperature and pressure independently. |
| Thermostatic | A thermostatic shower faucet maintains a consistent water temperature, even if the water pressure changes. |
| Pressure-balanced | A pressure-balanced shower faucet ensures that the water temperature remains constant, even when there are fluctuations in the water pressure. |
Identifying the specific Delta shower faucet model
Once you have determined the type of Delta shower faucet you have or want to install, it’s essential to identify the specific model. This information is necessary to ensure you have the correct replacement parts and to follow the correct installation instructions.
- Inspect your faucet: Examine your shower faucet, looking for any visible branding or model numbers.
- Check the user manual: If you still can’t find the model number on the faucet itself, consult your user manual or installation guide. The model number is typically located on the documentation provided with your faucet.
- Visit the Delta website: If you’re still having trouble identifying the model number, visit the Delta website and use their product search tool. Enter any available information about your faucet, and it will provide a list of possible matches.
By taking these steps and identifying your specific Delta shower faucet model, you are one step closer to successfully installing your new faucet and enjoying a refreshing and functional shower experience.

Preparing For The Installation Process
Preparing for the Installation Process
Before installing a Delta shower faucet, it is essential to prepare yourself with the necessary tools and materials and ensure you take the proper safety precautions. By gathering the required tools, shutting off the water supply, and taking safety measures, you can ensure a successful and hassle-free installation process.
Gathering the necessary tools and materials
To install a Delta shower faucet, you will need a few essential tools and materials. Here is a handy checklist to help you gather everything you need:
- Adjustable wrench
- Phillips and flathead screwdrivers
- Plumber’s tape
- Plumber’s putty or silicone sealant
- Utility knife
- Caulking gun
- Bucket or rags to catch any water
- New Delta shower faucet kit
Shutting off the water supply
Before starting the installation process, it is crucial to shut off the water supply to avoid any potential water damage or accidents. Follow these steps to turn off the water supply:
- Locate the main water shut-off valve, usually found near the water meter or where the main water line enters your home.
- Turn the valve clockwise to shut off the water supply.
- Once the water is turned off, open a faucet to relieve any remaining water pressure in the pipes.
Taking safety precautions
When it comes to plumbing installations, safety should always be a priority. Here are some important safety measures to take before starting the installation process:
- Wear protective gloves and safety goggles to prevent any injuries while working.
- Ensure the area around the shower is well-lit and free from any obstacles that may hinder your work.
- If you are unsure about any aspect of the installation process, consult a professional plumber.
By gathering the necessary tools and materials, shutting off the water supply, and taking appropriate safety precautions, you are ready to begin the process of installing your Delta shower faucet. In the next section, we will guide you through the step-by-step installation process to ensure a successful outcome.
Step 1: Removing The Old Shower Faucet
If you’re looking to update your bathroom or fix a leaking faucet, removing the old shower faucet is the first step. This process can seem daunting, but with a little guidance, you’ll have it done in no time. In this step-by-step guide, we’ll walk you through the process of removing your old Delta shower faucet so you can move on to installing a new one. Ready to get started? Let’s dive in!
Locating and removing the handle
The first thing you need to do is locate and remove the handle of your shower faucet. Follow these steps:
- Turn off the water supply to your shower. This can usually be done by twisting the main water shut-off valve located near the shower.
- Once the water supply is turned off, locate the screw on the handle. This is typically located underneath a decorative cap or cover. Use a screwdriver or Allen wrench to remove the screw.
- Once the screw is removed, carefully pull the handle away from the wall. If the handle seems stuck, you can use a handle puller tool to help loosen it.
Removing the escutcheon plate
Now that you’ve removed the handle, it’s time to remove the escutcheon plate. Here’s how:
- Inspect the escutcheon plate for any visible screws or clips holding it in place. If you find any, use a screwdriver or pliers to remove them.
- If there are no visible screws or clips, gently pry the escutcheon plate away from the wall using a putty knife or flathead screwdriver. Be careful not to damage the wall surface.
- Once the escutcheon plate is loose, carefully pull it away from the wall. You may need to wiggle it back and forth to loosen it completely.
Disconnecting the water supply lines
With the handle and escutcheon plate removed, it’s time to disconnect the water supply lines. Follow these steps:
- Locate the water supply lines connected to your shower faucet. These are typically located behind the escutcheon plate.
- Use an adjustable wrench to loosen and remove the nuts connecting the water supply lines to the faucet. Turn the nuts counterclockwise to loosen them.
- Once the nuts are loosened, carefully disconnect the water supply lines from the faucet. You may want to place a towel or bucket underneath to catch any drips.
And that’s it! You’ve successfully completed step 1 of removing the old shower faucet. Now you’re ready to move on to the next step of installing your new Delta shower faucet. Stay tuned for our next blog post where we’ll walk you through the installation process.
Step 2: Installing The New Delta Shower Faucet
Now that you have successfully read the manufacturer’s instructions, it’s time to move on to the next step: installing the new Delta shower faucet. This step is crucial as it ensures the proper functionality and durability of your shower. Follow these easy steps to get the job done with precision and confidence.
Reading the manufacturer’s instructions
Before diving into the installation process, take a few minutes to read and understand the manufacturer’s instructions provided with your Delta shower faucet. This step will familiarize you with any specific requirements or unique features of the faucet, enabling you to tackle the installation seamlessly.
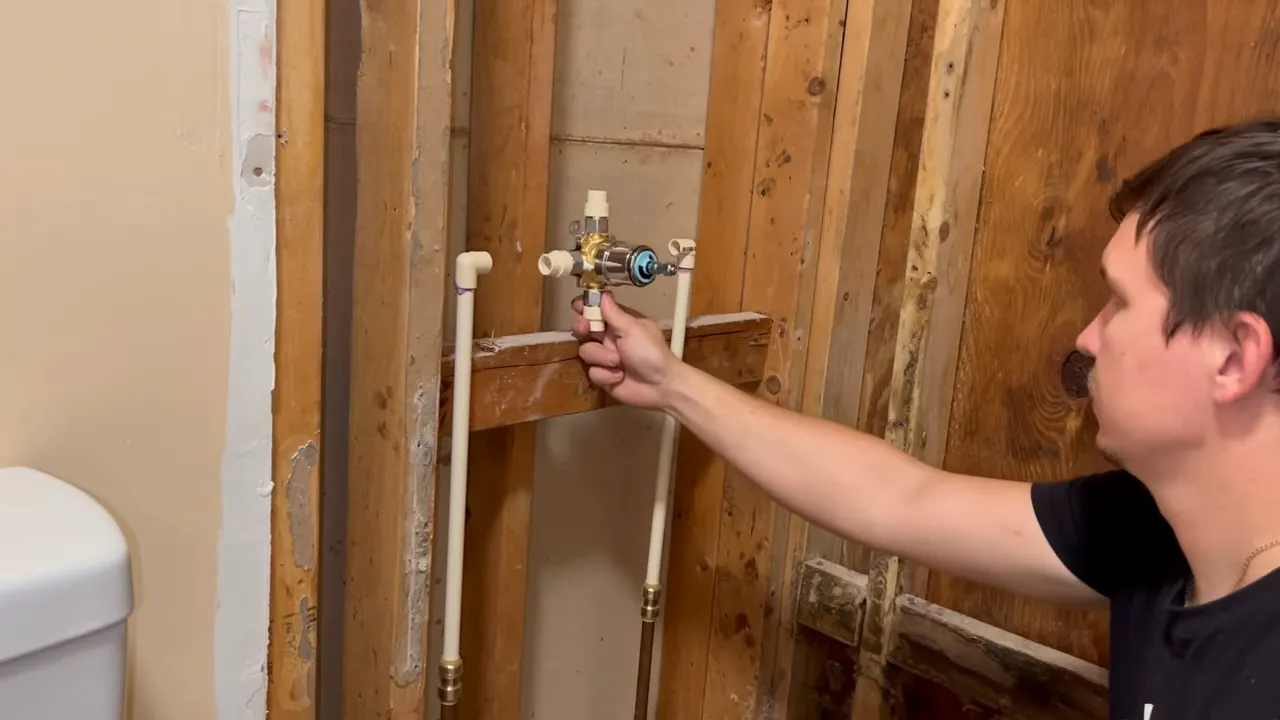
Preparing the shower valve for installation
Once you have a good grasp on the instructions, it’s time to prepare the shower valve for installation. This involves removing any remnants of the previous faucet, cleaning the area, and making sure the valve is in proper working condition.
- Start by turning off the main water supply to prevent any accidental leaks or damage.
- Remove the old faucet by unscrewing the mounting screws or nuts that secure it to the wall.
- Thoroughly clean the exposed shower valve area, removing any debris or old sealant.
- Inspect the valve for any signs of damage or corrosion. If necessary, replace the valve before proceeding.
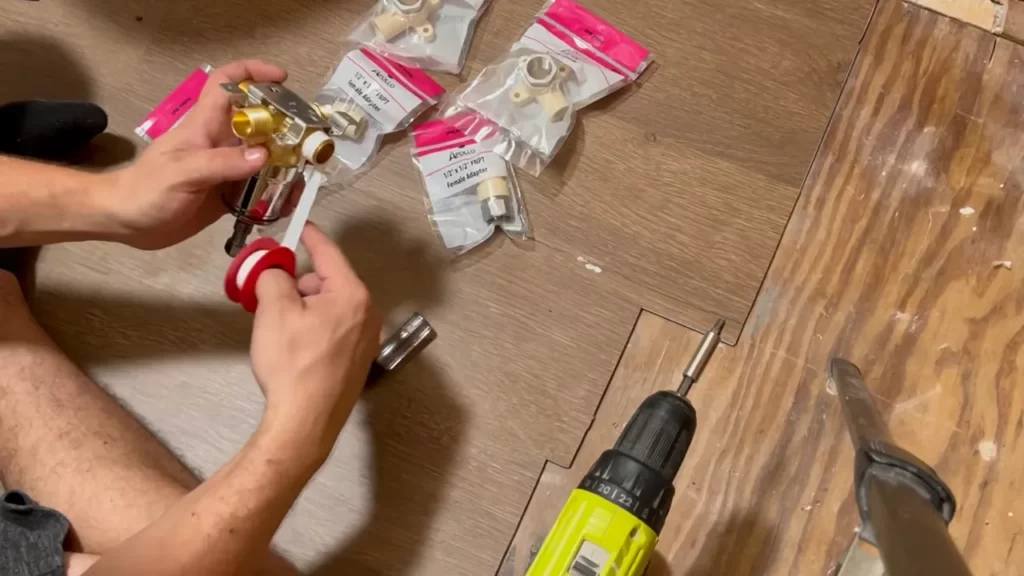
Connecting the water supply lines
With the shower valve prepared, it’s time to connect the water supply lines to the new Delta shower faucet.
- Locate the hot and cold water supply lines behind the wall and ensure they are properly shut off.
- Attach the flexible supply lines from the new faucet to the corresponding hot and cold supply lines.
- Use an adjustable wrench to tighten the connections, ensuring they are secure but not overly tight.
- Turn on the main water supply, then slowly open the faucets to check for any leaks. If leaks are detected, tighten the connections further until they are resolved.
Once the water supply lines are connected and leak-free, you have successfully installed the new Delta shower faucet!
Now you can move on to the next steps of the installation process or enjoy the satisfaction of a job well done.
Step 3: Testing And Finishing Up
Once you have successfully installed the handle and escutcheon plate of your Delta shower faucet, it’s time to move on to testing and finishing up the installation process. This step is crucial to ensure that your faucet is properly functioning without any leaks or issues.
Turning on the water supply
Before testing the faucet, it’s important to turn on the water supply. Locate the shut-off valve connected to the shower and rotate it counterclockwise to open it fully. This will allow the water to flow freely through the faucet once it’s turned on. Keep an eye out for any potential water leaks during this process as well.
Checking for leaks
Next, it’s time to check for leaks. Turn on the faucet by lifting the handle upwards to the “on” position. Observe the connections between the faucet and the plumbing pipes for any signs of water dripping or leaking. Additionally, check the handle and escutcheon plate for any potential leaks. If you notice any leaks, tighten the connections or replace any faulty parts as necessary.
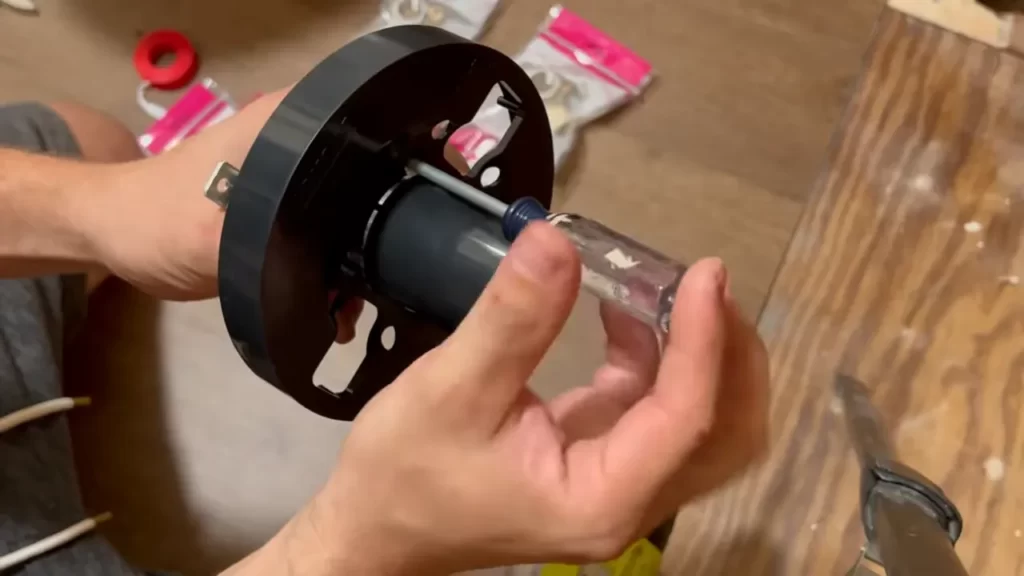
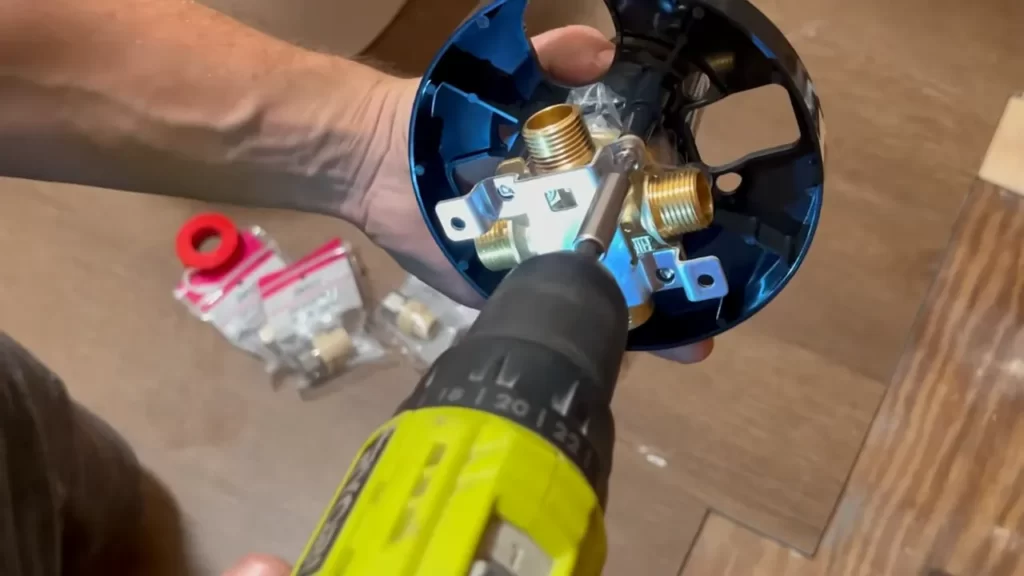
Installing the handle and escutcheon plate
Now, it’s time to install the handle and escutcheon plate. Begin by aligning the handle onto the valve cartridge and firmly push it downwards until it fits into place. Once the handle is secure, position the escutcheon plate over the handle and slide it onto the valve body. Use a screwdriver to tighten the screws on the plate, ensuring that it is firmly attached.
Finally, ensure that the handle is functioning correctly by testing the water temperature and adjusting it as needed. Turn the handle to the left for hot water and to the right for cold water. Test the water flow by gradually increasing and decreasing the handle’s position.
By following these steps and thoroughly testing and finishing up the installation process, you can ensure that your Delta shower faucet is properly installed and ready to provide you with a luxurious and functional shower experience.
Troubleshooting Common Issues
Installing a Delta shower faucet can be a great DIY project, but like any installation process, it can come with its fair share of challenges. To help you through the process, we’ve put together a troubleshooting guide to address some common issues you may encounter along the way. So, let’s dive in and find solutions to these problems.
Addressing leaks or dripping
One of the most common issues you might encounter is a leaky or dripping shower faucet. This not only leads to wasted water but can also be a major annoyance. Here are some steps to address this problem:
- Step 1: Turn off the water supply.
Before you start, make sure to shut off the water supply to your shower. This will prevent any unwanted leaks while you work. - Step 2: Inspect the faucet for loose connections.
Check if any connections are loose or if there are any gaps that could be causing the leak. Tighten the connections if necessary. - Step 3: Replace faulty components.
Ensure that all components, such as O-rings or washers, are in good condition. If you notice any damage or wear, replace them with new ones. - Step 4: Reassemble and test.
Once you have addressed the leaks, reassemble the faucet and turn on the water supply to check if the issue has been resolved.
Fixing temperature control problems
Another common issue you might face is difficulty controlling the water temperature. If you find that your shower water is too hot or too cold, follow these steps to troubleshoot the problem:
- Step 1: Check the hot and cold water supply valves.
Ensure that the hot and cold water supply valves are fully open. Sometimes, adjusting these valves can help in achieving the desired temperature. - Step 2: Inspect the cartridge.
The temperature control is handled by the cartridge in the faucet. Remove the cartridge and inspect it for any blockages or damage. If necessary, clean or replace the cartridge. - Step 3: Test the water temperature.
Reassemble the faucet and turn on the water supply. Check if the water temperature is now within the desired range. Adjust the temperature control handle if needed.
Handling other common installation challenges
While addressing leaks and temperature control problems are some of the most common issues, here are a few other challenges you might encounter during the installation process:
| Issue | Solution |
|---|---|
| Dripping from the showerhead | Inspect and clean the showerhead or replace it if necessary. |
| No water flow | Check for any obstructions in the water supply lines or the faucet. Clear the blockages or replace faulty parts. |
| Inconsistent water pressure | Ensure that the water supply valves are fully open. If the problem persists, consult a professional plumber to check for any issues with the plumbing system. |
Remember, each installation could have its unique set of challenges. If you encounter any difficulties beyond these troubleshooting steps, it’s always a good idea to consult the manufacturer’s instructions or seek help from a professional plumber. Happy installing!
Final Tips And Recommendations
Now that you have successfully installed your Delta shower faucet, here are some final tips and recommendations to ensure its longevity and optimal performance. By following these guidelines, you can enjoy a refreshing and hassle-free shower experience for years to come.
Maintaining your Delta shower faucet
Proper maintenance is essential to keep your Delta shower faucet in top condition. Regular cleaning and inspection can help prevent any potential issues and extend the lifespan of your faucet.
To clean your shower faucet, start by gently wiping the surface with a soft, damp cloth. Avoid using abrasive cleaners or scrub brushes, as they can damage the finish. If your faucet has mineral deposits or soap scum buildup, you can use a mild vinegar solution to dissolve them. Simply mix equal parts vinegar and water, soak a cloth in the solution, and gently wipe the affected areas. Rinse thoroughly with water afterward.
In addition to cleaning, it’s also important to regularly inspect the faucet for any leaks or drips. If you notice any water leakage, it could be a sign of worn-out seals or cartridges. In such cases, it’s best to replace the faulty components as soon as possible to avoid water damage and ensure smooth operation.
Exploring additional features and accessories
Delta offers a wide range of additional features and accessories to enhance your shower experience. These include:
| Showerheads | Choose from various showerhead designs, such as rain showerheads, handheld showerheads, or those with adjustable spray settings. |
| Body jets | Add a spa-like feel to your shower with strategically placed body jets that provide a massaging effect. |
| Thermostatic valves | Enjoy precise control over water temperature by installing a thermostatic valve, which keeps the water at a constant temperature. |
These additional features can help create a personalized showering experience tailored to your preferences. Explore Delta’s product catalog or consult with a professional to determine which options suit your needs best.
Seeking professional help if needed
If you encounter any difficulties during the installation process or notice any issues with your Delta shower faucet, don’t hesitate to seek professional help. Certified plumbers or Delta customer support can provide expert guidance and ensure that everything is functioning optimally.
Remember, when it comes to plumbing installations, it’s always better to be safe than sorry. By entrusting the expertise of professionals, you can avoid potential mistakes and enjoy peace of mind knowing that your shower faucet is in capable hands.
By adhering to these final tips and recommendations, you can maintain the performance, durability, and aesthetics of your Delta shower faucet for years to come. Enjoy your rejuvenating showers worry-free!
Frequently Asked Questions
How Do You Install A Delta Shower Faucet Cartridge?
To install a Delta shower faucet cartridge, first turn off the water supply. Remove the handle, trim, and unscrew the cartridge using pliers. Take out the old cartridge and insert the new one, aligning the notches. Reassemble the trim and handle, then turn on the water supply to complete the installation.
How Do You Replace A Delta Shower Head And Faucet?
To replace a Delta shower head and faucet, start by turning off the water supply. Remove the old shower head and faucet by unscrewing or detaching them. Clean the area and apply plumber’s tape to the new shower head and faucet connections.
Attach and tighten the new fixtures, then turn on the water supply to test for any leaks.
How To Install Delta Shower Valve Trim Kit?
To install a Delta shower valve trim kit, first, turn off the water supply. Next, remove the existing trim kit. Then, install the new valve trim, aligning it properly. Finally, tighten the screws to secure the trim kit in place.
Enjoy your upgraded shower experience!
How Can I Tell Which Delta Shower Faucet I Have?
To determine which Delta shower faucet you have, look for the faucet model number on the handle, spout, or valve. You can also check the official Delta website for a product identification tool or contact their customer service for assistance.
Conclusion
Installing a Delta shower faucet may seem challenging at first, but with the right steps and tools, it can be a smooth process. By following this comprehensive guide, you have learned how to prepare the area, remove the old faucet, install the new one, and test for any leaks.
With proper installation, your Delta shower faucet will provide you with a reliable and enjoyable shower experience for years to come. Enjoy your newly installed Delta shower faucet!