To install decomposed granite, start by preparing the area and removing any existing grass or vegetation. Then, spread a layer of landscape fabric to prevent weed growth.
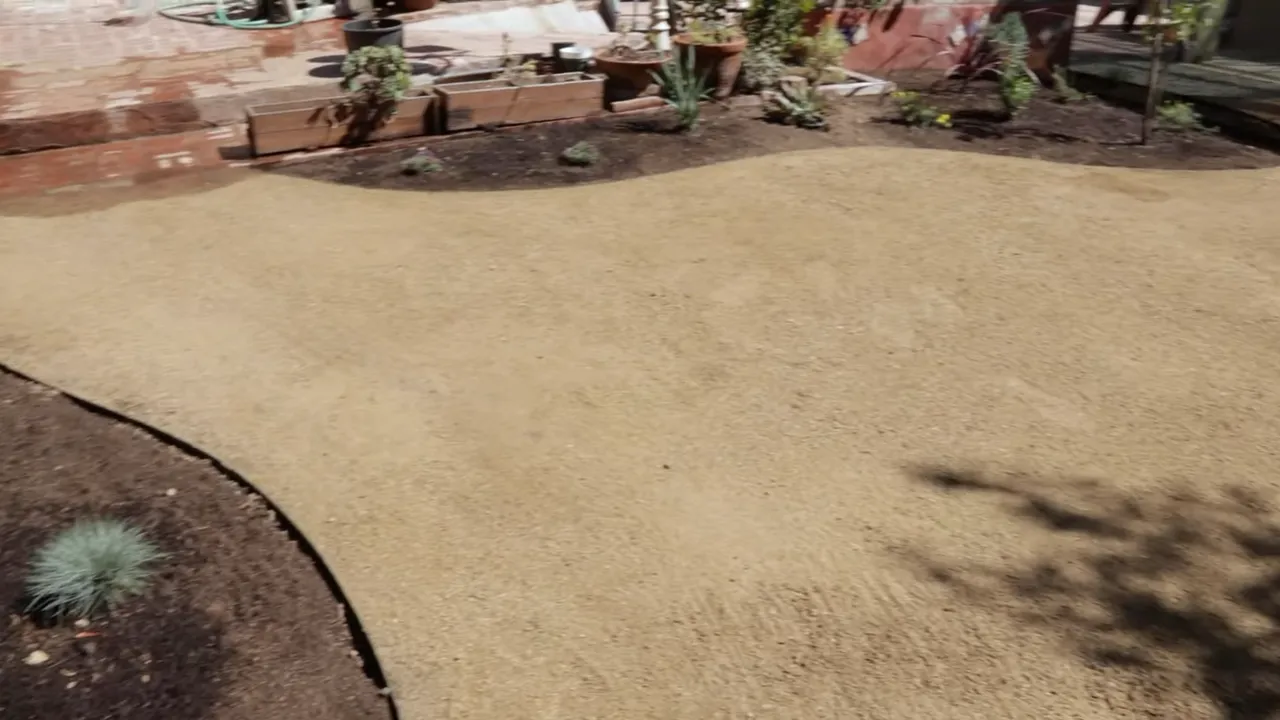
Next, evenly distribute the decomposed granite over the fabric and use a compactor to firmly compact the material. Finally, add a top layer of stabilizing sand to further secure the decomposed granite. Now you have successfully installed decomposed granite! Decomposed granite is a versatile and popular landscaping material known for its durability and natural appearance.
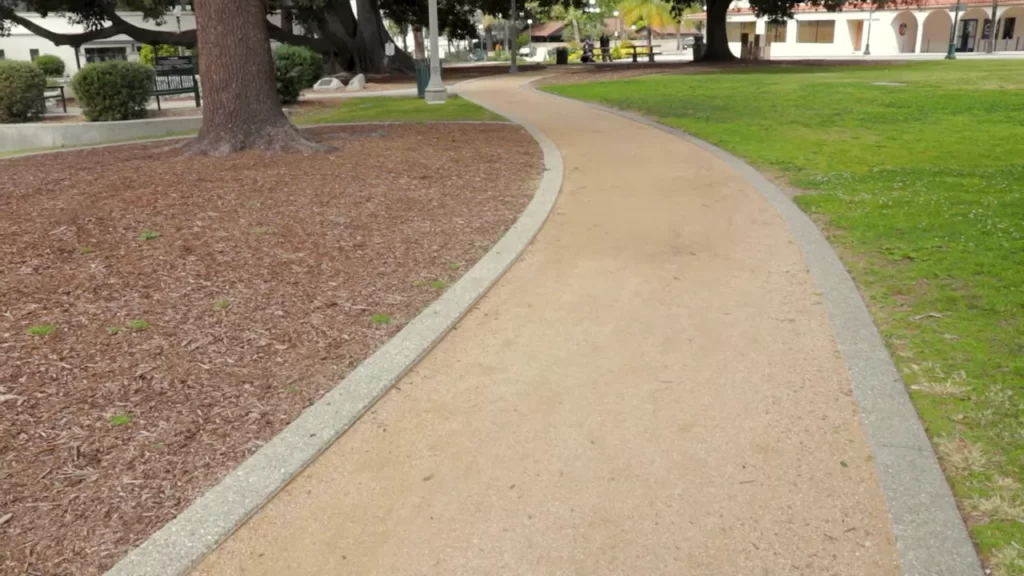
Whether you want to create a new walkway, patio, or driveway, installing decomposed granite can be a cost-effective and straightforward process. By following a few simple steps, you can transform your outdoor space with this attractive and low-maintenance material. We will provide you with a step-by-step guide on how to install decomposed granite, ensuring a long-lasting and aesthetically pleasing result. So, let’s get started and learn how to incorporate decomposed granite into your landscape design.
Preparing The Area For Installation
Before you start installing decomposed granite, it is essential to prepare the area properly. By taking the time to do this stage thoroughly, you can ensure that your installation is successful and long-lasting. In this article, we will walk you through the various steps involved in preparing the area for installation, including clearing the area of debris and marking the boundaries.
Clearing the Area of Debris
The first step in preparing the area for decomposed granite installation is to clear it of any debris. This includes removing any existing plants, rocks, or other obstacles that may be in the way. By doing this, you will create a clean canvas for your decomposed granite, allowing it to be laid evenly and firmly.
To clear the area effectively, follow these steps:
- Begin by removing any large rocks or boulders using a wheelbarrow or heavy-duty equipment.
- Next, use a rake or shovel to remove any smaller rocks, sticks, or leaves from the area.
- Once the larger debris has been cleared, you can use a leaf blower to remove any remaining loose material.
Marking the Boundaries
After clearing the area of debris, the next step is to mark the boundaries of your installation area. This will help you visualize where the decomposed granite will be laid and ensure you stay within the desired boundaries. To mark the boundaries effectively, you can follow these steps:
- Start by using stakes and string to outline the desired shape and size of your installation area.
- Measure and adjust the stakes and string until you are satisfied with the boundaries.
- Once you have finalized the boundaries, use spray paint or chalk to mark the lines on the ground.
By clearing the area of debris and marking the boundaries, you are now ready to move forward with the installation of your decomposed granite. Taking the time to prepare the area properly will ensure a smooth and successful installation process.

Calculating The Quantity Of Decomposed Granite Needed
Calculating the Quantity of Decomposed Granite Needed
When it comes to installing decomposed granite, it’s essential to calculate the right quantity required for your project. Knowing the correct amount of decomposed granite needed will ensure that you avoid the frustration of running short or wasting excess materials. In this section, we will guide you through the process of calculating the quantity needed in two simple steps: measuring the area and determining the depth of coverage.
Measuring the Area
Before you can determine how much decomposed granite is needed, you’ll need to measure the area that you plan to cover. This can be done by following these easy steps:
- Start by breaking down your project area into regular shapes, such as squares or rectangles. If you have a more complex area, you can divide it into smaller, manageable sections.
- Measure the length and width of each section using a tape measure or laser measuring tool. Ensure that you record the measurements in feet, as this is the standard unit of measurement for landscaping projects.
- Use the formula length x width to calculate the area of each section. For irregular-shaped areas, you can use online tools or consult a professional landscaper for guidance.
- Next, add up the areas of all the sections to determine the total area that needs to be covered with decomposed granite.
Determining the Depth of Coverage
Once you have measured the area, the next step is to determine the depth of coverage desired for your project. The depth of coverage refers to how thick the layer of decomposed granite will be once installed. This can vary depending on the purpose of the installation, such as a pathway or a patio area.
To determine the depth of coverage, consider the following factors:
- The intended use of the area – for foot traffic areas, a depth of 2-3 inches is generally sufficient, while driveways or areas with heavy traffic may require a deeper layer.
- The stability of the underlying soil – if the soil is soft or prone to erosion, a thicker layer of decomposed granite may be necessary to provide better stability and prevent shifting.
Once you have determined the desired depth of coverage, you can calculate the quantity of decomposed granite needed using the following formula:
Quantity (in cubic feet) = Area (in square feet) x Depth (in feet)
It is important to note that decomposed granite is typically sold by the cubic yard or ton. To convert the quantity from cubic feet to cubic yards or tons, you can use online conversion tools or consult with a local supplier.
By accurately measuring the area and determining the depth of coverage, you can confidently calculate the quantity of decomposed granite needed for your project. This will ensure a successful installation and a visually appealing result.
Choosing The Right Type Of Decomposed Granite
When it comes to installing decomposed granite, one of the most important considerations is choosing the right type. With various options available in the market, it can be overwhelming to make a decision. However, by considering a few key factors, you can ensure that you select the perfect type of decomposed granite for your project.
Factors to Consider
There are several factors to keep in mind when choosing the right type of decomposed granite:
- Color: Decomposed granite comes in a range of colors, from light beige and gold to dark brown and gray. Consider the overall aesthetic of your project and choose a color that complements the surrounding environment.
- Usage: Determine the intended use of the decomposed granite. Different types are suitable for various applications, such as pathways, driveways, patios, or garden beds. Make sure to select a type that is specifically designed for your desired purpose.
- Grade: Decomposed granite is available in different grades, ranging from fine to coarse. The grade you choose depends on the level of stability and drainage required for your project. Finer grades are ideal for areas with heavy foot traffic, while coarser ones work well for areas that need improved water drainage.
- Stabilizer: Consider using a stabilizer if your project requires enhanced durability and reduced erosion. Stabilized decomposed granite is mixed with a bonding agent that helps lock the grains together, providing a more solid surface.
Types of Decomposed Granite Available
Here are some popular types of decomposed granite commonly available:
| Type | Color | Grade | Usage |
|---|---|---|---|
| Crushed Granite | Varies | Coarse | Driveways, walkways, and heavy traffic areas |
| Stabilized Decomposed Granite | Varies | Medium to fine | Pathways, patios, and garden beds |
| Premium Decomposed Granite | Varies | Medium to fine | Enhanced aesthetic projects |
It’s important to note that availability of certain types may vary depending on your location and supplier. Consider consulting with a professional or local supplier for guidance on the best type of decomposed granite for your specific project.
By carefully considering factors such as color, usage, grade, and the option of a stabilizer, you can choose the right type of decomposed granite that suits your needs. Whether you’re enhancing the look of your garden or creating a durable pathway, selecting the right type will ensure successful installation and long-lasting results.
Step 1: Excavating The Area
If you’re planning to install decomposed granite in your outdoor space, the first step is to excavate the area. Excavating the area involves removing the top layer of soil and creating a level surface for the decomposed granite. This helps ensure that the installation is seamless and provides a stable foundation for your new surface. Let’s take a closer look at the important tasks involved in this step: Digging Out the Soil and Leveling the Ground.
Digging Out the Soil
The first task in excavating the area is to dig out the soil. Use a shovel or a garden hoe to break up the ground and remove any grass, plants, or debris that may be present. Start by outlining the area where you want to install the decomposed granite. This will help you stay within the desired boundaries and avoid unnecessary digging. Remove the soil to a depth of about 4-6 inches, or as recommended by your landscaping professional.
Leveling the Ground
Once you have dug out the soil, the next step is to level the ground. An uneven surface can lead to an unstable installation and potential drainage issues. To level the ground, use a rake or a garden leveling tool to distribute the soil evenly. Smooth out any bumps or mounds that may be present. This will help create a flat and even surface for the decomposed granite.
Note: It’s important to ensure that the excavated area is slightly sloped away from any structures or buildings to allow for proper water drainage.
To check if the ground is level, you can use a level tool or simply walk across the surface. If you feel any significant dips or bumps, make the necessary adjustments to achieve a smooth and level area.
By properly excavating the area and leveling the ground, you are now ready for the next step in installing decomposed granite. Stay tuned for the next section, where we will discuss how to prepare the base for your new surface.
Step 2: Installing Landscape Fabric
As part of the process of installing decomposed granite, landscape fabric plays a crucial role in ensuring the longevity and stability of your project. This step involves laying down landscape fabric before spreading the decomposed granite. In this section, we will discuss the purpose of landscape fabric and provide a step-by-step guide on how to lay it properly.
Purpose of Landscape Fabric
Landscape fabric serves as a barrier between the decomposed granite and the underlying soil. Its primary purpose is to prevent the growth of weeds and plants from below while still allowing water to drain through. By placing landscape fabric underneath the decomposed granite, you create a protective layer that helps maintain the integrity and aesthetics of your installation.
How to Lay Landscape Fabric
Follow these simple steps to lay landscape fabric effectively:
- Prepare the area: Clear any existing vegetation, rocks, or debris from the area where you plan to install the decomposed granite. Ensure the surface is firm and level for optimal results.
- Measure and cut: Roll out the landscape fabric over the prepared area. Use a measuring tape to determine the necessary dimensions, allowing for some overlap at the edges. Cut the fabric to the desired size using a utility knife.
- Secure the fabric: Start from one end of the area and firmly anchor the landscape fabric to the ground using landscaping stakes or metal anchors. Place them at regular intervals along the edges and throughout the fabric’s surface to prevent shifting or movement.
- Overlap seams: If multiple sections of fabric are required to cover the entire area, overlap the seams by at least 6 inches. This ensures a tight seal and prevents weeds from finding their way through exposed gaps.
- Trim excess fabric: Trim any excess fabric along the edges using a utility knife, ensuring a neat and tidy appearance.
Once the landscape fabric is securely in place, you’re ready to proceed with the next step of installing decomposed granite. The landscape fabric will act as a reliable barrier against unwanted growth, providing a low-maintenance and visually appealing surface for your outdoor space.
Step 3: Spreading And Compacting The Decomposed Granite
Step 3: Spreading and Compacting the Decomposed Granite
Now that you have prepared the surface and created the edge restraints, it’s time to spread and compact the decomposed granite. This step is crucial as it ensures a flat and stable surface for your landscaping project. Here are some tips and guidelines to follow:
Tips for Spreading Evenly
To achieve an even spread of decomposed granite, follow these tips:
- Start by pouring the decomposed granite at one end of the area you want to cover.
- Use a shovel or rake to spread the material evenly across the surface.
- Take your time and work in small sections, making sure each section is evenly covered.
- If you notice any uneven spots, adjust the amount of decomposed granite accordingly.
- Continue spreading the material until the entire area is covered.
Levels of Compaction
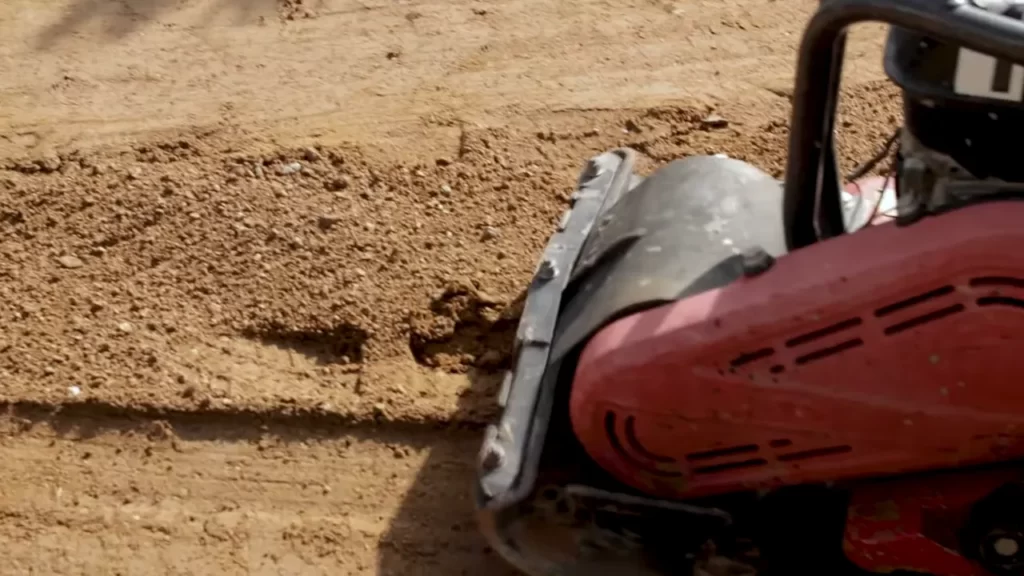
Compacting the decomposed granite is essential to create a stable and durable surface. Here are different levels of compaction you can consider:
| Level | Description |
|---|---|
| Light Compaction | Gently compact the decomposed granite using a plate compactor or hand tamper. This level of compaction is suitable for pedestrian areas. |
| Medium Compaction | For areas that will have light traffic or occasional vehicles, use a vibrating plate compactor to achieve medium compaction. This level provides better stability. |
| Heavy Compaction | If you anticipate heavy traffic or want maximum stability, opt for heavy compaction. Use a roller compactor or hire a professional to ensure proper compaction. |
Regardless of the level of compaction you choose, make sure to follow manufacturer instructions and safety guidelines when using compaction equipment.
By following these guidelines for spreading and compacting decomposed granite, you’ll create a solid foundation for your landscaping project. Take your time, pay attention to detail, and enjoy the process of transforming your outdoor space into a beautiful and functional area.
Step 4: Edging And Containing The Decomposed Granite
Edging and containing the decomposed granite is an essential step in the installation process. Properly edging and containing the decomposed granite not only adds a neat and finished look to your project, but it also helps to prevent the granite from spreading or shifting over time. Follow these instructions to ensure that your edging and containing is done correctly.
Materials for Edging
Before you begin installing the edging, gather all the necessary materials. Here’s what you’ll need:
| Materials | Quantity |
|---|---|
| Edging material (such as plastic, metal, or wood) | Enough to border your granite area |
| Landscape stakes or anchor pins | 1 stake/pin per foot of edging |
| Hammer | 1 |
| Utility knife | 1 |
Make sure you have all these materials ready before moving on to the next step.
Installing Borders and Edging
Once you have all the necessary materials, you can start installing the borders and edging for your decomposed granite. Follow these steps:
- Begin by placing the edging material along the outer perimeter of your granite area. Make sure it is positioned level and straight.
- Use landscape stakes or anchor pins to secure the edging into the ground. Place one stake or pin every foot along the length of the edging.
- Using a hammer, gently tap the stakes or pins into the ground until they are firmly in place.
- If necessary, trim the excess edging material using a utility knife to achieve a clean and precise fit.
- Once all the edging is installed, ensure that it is secure and stable.
By following these simple steps, you can effectively edge and contain your decomposed granite, adding both functionality and visual appeal to your project. Take your time during this step to ensure that the edging is properly installed and secure.
Step 5: Watering And Settling The Decomposed Granite
Step 5: Watering and Settling the Decomposed Granite
Once you have successfully spread and compacted the decomposed granite, the next crucial step is to water and settle the material. Watering and settling play a significant role in ensuring the stability and longevity of your decomposed granite installation. In this step, we will discuss the proper watering techniques as well as allowing for proper settling.
Proper Watering Techniques
Watering your decomposed granite is essential to activate the stabilizers present in the material and helps in setting it firmly. Here are some important tips to follow for watering your decomposed granite:
- Start with a light sprinkling: Begin by lightly sprinkling water over the entire area. This initial watering will help to moisten the decomposed granite and allow it to bond together.
- Water evenly: Ensure that you water the entire surface evenly, without creating any puddles or areas with excessive moisture. Uneven watering can lead to inconsistent settling and potential erosion.
- Avoid excessive watering: While it is important to water the decomposed granite, overwatering can cause the material to become mushy and lead to poor compaction. Use a conservative amount of water to prevent excessive saturation.
Allowing for Proper Settling
Settling is a crucial step in the installation process of decomposed granite. It helps to establish a solid and stable surface. Here are some important considerations for allowing proper settling:
- Patience is key: Allow the decomposed granite to settle naturally over time. Avoid walking or placing heavy objects on the surface until the material has fully settled to prevent displacement or uneven settling.
- Monitor for uneven areas: Check the surface regularly for any uneven areas or low spots. If you notice any inconsistencies, use a rake or shovel to redistribute the decomposed granite and promote even settling.
- Plan for additional compaction: Depending on the specific project requirements, you may need to schedule additional compaction after the initial settling period. This step ensures that the decomposed granite is firmly compacted and provides a durable surface.
By following proper watering techniques and allowing for adequate settling, you can ensure a strong and stable decomposed granite installation. These steps not only enhance the appearance of your outdoor space but also improve the overall durability of the surface. Take the time to properly water and settle your decomposed granite to enjoy long-lasting results.
Step 6: Maintaining And Refreshing The Decomposed Granite
Installing decomposed granite is a great investment for any outdoor space, as it offers many benefits such as durability, low maintenance, and a natural aesthetic appeal. However, to ensure its longevity and keep it looking fresh, regular maintenance and occasional refreshing of the surface are essential. In this step, we will explore the best practices for maintaining and refreshing your decomposed granite installation.
Regular Maintenance Practices
To keep your decomposed granite surface in pristine condition, regular maintenance practices are key. By incorporating these simple tasks into your routine, you can extend the lifespan of your installation:
- Remove any debris or leaves that accumulate on the surface to prevent them from decomposing and staining the granite. Use a leaf blower or a broom for quick and effective cleaning.
- Inspect the area periodically for any weed growth. Remove any weeds immediately by uprooting them or using an appropriate weed killer to prevent them from spreading.
- Ensure proper drainage by periodically checking and clearing any clogged or obstructed drains. This will prevent water pooling and potential damage to the decomposed granite surface.
- Address any minor cracks or uneven areas promptly. Fill the cracks with additional decomposed granite and compact it to level the surface. This will help maintain a smooth and even appearance.
Refreshing the Surface Over Time
Over time, the surface of your decomposed granite installation will naturally wear down due to foot traffic, weather elements, and other factors. Refreshing the surface is necessary to restore its beauty and functionality. Here’s how you can do it:
- Start by thoroughly cleaning the surface of any dirt, debris, or loose material. Use a broom or a leaf blower to ensure a clean and clear surface.
- If there are any compacted or hardened areas, loosen the material by raking it gently. This will help break up the compressed granite and allow for better infiltration of the topdressing material.
- Apply a topdressing material, such as freshly crushed decomposed granite or decomposed granite fines, to the surface. This will replenish the worn-out material and restore its original appearance.
- Spread the topdressing material evenly across the surface using a rake or a shovel. Make sure to cover any bare spots or areas that require additional filling.
- Once the topdressing material is spread, water the area lightly to help settle it. Avoid excessive watering, as it may cause erosion or pooling.
By following these maintenance practices and periodically refreshing the surface, you can enjoy the benefits of your decomposed granite installation for years to come. Remember to prioritize regular inspections, cleaning, and addressing any issues promptly to ensure the longevity and beauty of your outdoor space.
Frequently Asked Questions
Does Decomposed Granite Need To Be Compacted?
Yes, decomposed granite needs to be compacted.
Do You Need Drainage Under Decomposed Granite?
No, drainage is not required under decomposed granite. It is a permeable material that allows water to filter through naturally.
How Do You Stabilize Decomposed Granite?
To stabilize decomposed granite, you can use stabilizing additives or materials like organic binders, asphalt emulsion, or polymeric sand. Apply the chosen substance on top of the decomposed granite, then compact it using a compactor or roller. This helps to bind the particles and prevent erosion.
What Are The Disadvantages Of Decomposed Granite?
Disadvantages of decomposed granite include poor stability for heavy traffic, tendency to erode during heavy rain, and difficulty in controlling weed growth. It can also become dusty and muddy, requiring regular maintenance to keep the surface clean and even.
Conclusion
The installation process of decomposed granite is straightforward and can enhance the aesthetic appeal of your landscaping project. By following the steps outlined in this guide, you can create a durable and low-maintenance surface that will withstand the test of time.
Remember to choose the right type of decomposed granite for your specific needs, properly prepare the area, and carefully install and maintain the material. With proper care, your decomposed granite installation will provide beauty and functionality for years to come.