To install chair rail, measure and mark the desired height, then use a level to draw a straight line along the wall. Install the chair rail using finishing nails and a nail gun, making sure it is level and securely attached.
A chair rail is a decorative feature that can add elegance and protection to your walls. It is typically installed at a certain height along the wall to prevent chairs from damaging the wall surface. Installing chair rail can be a simple and rewarding DIY project that can instantly enhance the look of your space.
We will provide you with step-by-step instructions on how to install chair rail and give your room a touch of sophistication. So let’s get started and transform your space with this stylish addition.
Factors To Consider When Selecting Chair Rail Materials
Installing chair rail is an excellent way to add elegance and charm to any room. Not only does it provide protection against scratches and marks on your walls, but it also serves as a decorative feature. When selecting chair rail materials, there are several factors to consider. In this article, we will discuss the key factors to keep in mind to help you choose the right materials for your chair rail installation.
Durability and Maintenance
One of the first factors to consider when selecting chair rail materials is durability and maintenance. The material you choose should be able to withstand daily wear and tear, as well as be easy to clean and maintain. Here are some popular chair rail materials to consider:
- Wood: Wood is a classic choice for chair rail materials. It is durable, easy to maintain, and can be painted or stained to match your existing décor. However, keep in mind that wood may require periodic refinishing to maintain its appearance.
- MDF: MDF, or medium-density fiberboard, is a cost-effective alternative to wood. It is highly durable, resistant to moisture and warping, and requires minimal maintenance. MDF chair rails are available in various designs and can be painted to achieve a desired look.
- Polyurethane: Polyurethane chair rails are a lightweight and moisture-resistant option. They are easy to install, require little maintenance, and come in a wide range of styles and finishes. Polyurethane chair rails are also an eco-friendly choice.
Aesthetic Appeal and Style
Another crucial factor to consider when selecting chair rail materials is aesthetic appeal and style. The chair rail you choose should complement your existing décor, enhancing the overall look and feel of your space. Here are some points to keep in mind:
- Color and Finish: Consider the color and finish of the chair rail materials. Whether you prefer a natural wood look, a bright pop of color, or a classic white finish, make sure it aligns with your desired aesthetic.
- Design and Pattern: Chair rails come in a variety of designs and patterns, from simple and understated to intricate and ornate. Choose a design that complements the style of your room, whether it’s traditional, modern, or somewhere in between.
- Proportion and Scale: Consider the size and scale of your room when selecting chair rail materials. Opt for wider chair rails in larger rooms to create a visually balanced look, while narrower chair rails work well in smaller spaces.
Cost and Budget
Lastly, consider the cost and your budget when selecting chair rail materials. The price can vary depending on the material, design complexity, and installation requirements. Here are some considerations to keep in mind:
| Material | Approximate Cost |
|---|---|
| Wood | $$ |
| MDF | $ |
| Polyurethane | $ |
When determining your budget, factor in the cost of additional supplies such as adhesives, nails, or screws. It’s also a good idea to compare prices from different suppliers to ensure you’re getting the best value for your money.
By considering durability and maintenance, aesthetic appeal and style, as well as cost and budget, you can make an informed decision when selecting chair rail materials. Choose wisely, and enjoy the added beauty and protection that chair rail can bring to your home.
Measuring And Marking: Key Steps For Accuracy
Installing chair rail is a wonderful way to enhance the beauty and elegance of any room. It not only adds a touch of sophistication, but also protects your walls from scuffs and scratches. One of the most important aspects of a successful chair rail installation is the careful measuring and marking process. By following these key steps, you can ensure accuracy and achieve flawless results.
Determining the Height and Length of the Chair Rail
The first step in measuring and marking for chair rail installation is determining the appropriate height and length. The standard height for a chair rail is usually around one-third of the wall’s total height. For example, if your wall is 9 feet tall, your chair rail should be installed at about 3 feet from the floor. However, this is not a hard and fast rule – you can adjust the height based on your personal preference or the design of the room.
Next, measure the length of the walls where you plan to install the chair rail. It’s important to factor in any corners, doorways, or windows as these will affect the total length of the chair rail you need. To ensure accuracy, double-check your measurements and make a note of the total length required.
Marking the Wall for Placement
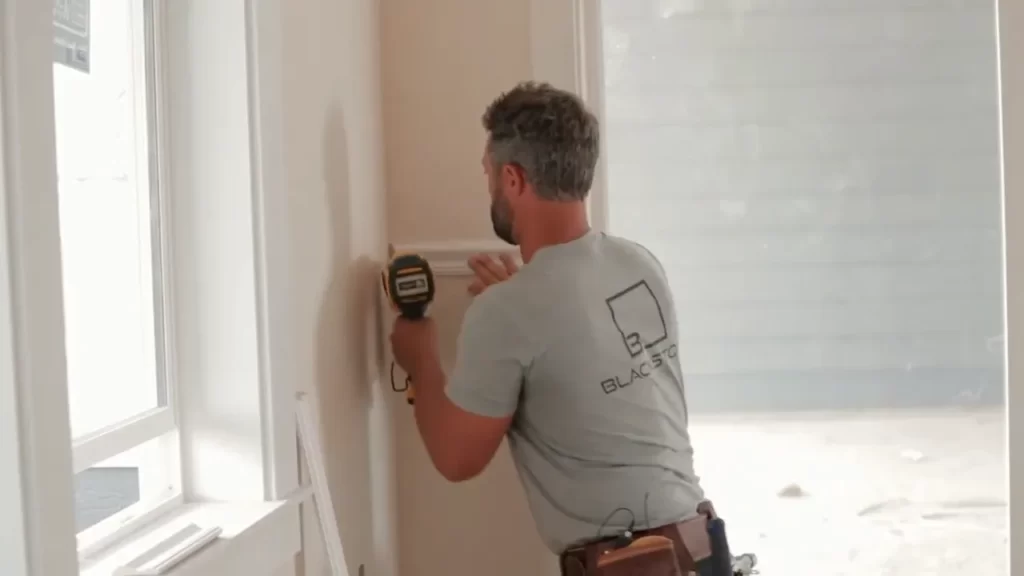
Once you have determined the height and length of the chair rail, it’s time to mark the wall for placement. Start by finding the studs along the wall using a stud finder. Mark the location of each stud using a pencil, as these are the points where you will anchor the chair rail. This step is crucial for ensuring the chair rail is securely attached to the wall.
Next, using a level and a pencil, mark a horizontal line at the desired height of the chair rail. Make sure the line is straight and level by checking it with the level. This line will serve as a guide for the placement of the chair rail.
Taping Off the Area for Clean Lines
Before you start installing the chair rail, it’s a good idea to tape off the area to ensure clean, straight lines. Using painter’s tape, carefully apply tape along the marked horizontal line. This will protect the wall from any accidental paint or adhesive marks and help you achieve precise installation.
Additionally, if you plan on painting the chair rail a different color than the wall, you can also use painter’s tape to create clean, crisp edges along the top and bottom edges of the chair rail. This technique will provide a professional finish to your chair rail installation.
By following these key steps for measuring and marking, you can ensure accuracy and achieve a flawless chair rail installation. Take the time to measure carefully, mark the wall accurately, and tape off the area for clean lines. These simple yet essential steps will result in a visually appealing and well-installed chair rail that enhances the elegance of your space.
Gathering The Necessary Tools And Materials
Before starting the installation process for your beautiful new chair rail, it is crucial to gather all the necessary tools and materials. This will ensure a smooth and efficient installation, allowing you to create a stunning upgrade to your room’s décor. In this section, we will discuss the essential tools needed for chair rail installation, as well as the different types of materials and fasteners that you can choose from.
Essential Tools for Installation
Having the right tools at your disposal is vital when it comes to installing chair rail. Here are some essential tools that you should have on hand before you begin:
| Tools | Description |
|---|---|
| Circular Saw | A circular saw will help you make precise cuts on the chair rail. |
| Miter Saw | A miter saw is essential for cutting precise angles for the corners. |
| Measuring Tape | A measuring tape will help you accurately measure the length of the chair rail. |
| Level | Use a level to ensure that the chair rail is straight and evenly aligned. |
| Hammer and Nails | You’ll need a hammer and nails to secure the chair rail to the wall. |
| Adhesive or Construction Adhesive | Depending on your preference, you can use adhesive or construction adhesive to provide additional stability to the chair rail. |
Types of Chair Rail Materials and Fasteners
Chair rails are available in various materials, each with its own unique characteristics and aesthetic appeal. Here are some common types of chair rail materials:
- Wood: Wood is a popular choice for chair rails due to its classic look and durability.
- MDF (Medium-Density Fiberboard): MDF is an affordable alternative to wood and can be easily painted or stained to match your room’s decor.
- Plastic: Plastic chair rails are lightweight and resistant to moisture, making them suitable for areas prone to dampness.
When it comes to fasteners, you have a few options to choose from:
- Nails: Traditional nails are commonly used to secure chair rails to the wall.
- Brad Nails: Brad nails are smaller and thinner than traditional nails, resulting in less noticeable holes.
- Construction Adhesive: Construction adhesive can be used in combination with nails or as an alternative method for securing the chair rail.
By familiarizing yourself with these materials and fasteners, you can choose the ones that best suit your desired aesthetic and installation preferences.
Now that you have gathered the necessary tools and materials, you are ready to move on to the next step: measuring and marking the position of the chair rail.
Removing Baseboards And Preparing The Wall
Safely Removing Baseboards
Before installing chair rail, it’s important to remove the existing baseboards from the wall. This will create a clean and smooth surface for the chair rail to be installed. To safely remove baseboards, follow these steps:
- Start by protecting the floor. Lay down a drop cloth or old sheets to catch any debris that may fall during the removal process.
- Use a utility knife to cut along the top of the baseboard where it meets the wall. This will help break the paint or caulk seal.
- Next, use a putty knife or a small pry bar to gently pry the baseboard away from the wall. Work slowly and be careful not to damage the wall or the baseboard.
- If the baseboard is stubborn and doesn’t easily come off, use a small block of wood and a hammer to tap it from the back. This will help loosen it from the wall.
- Continue this process along the entire length of the baseboard until it is fully removed.
Patching and Sanding Wall Imperfections
Once the baseboards are removed, it’s common to find imperfections on the wall surface. These imperfections can include nail holes, dents, or cracks. Before installing the chair rail, it’s important to patch and sand these wall imperfections. Here’s how:
- Start by filling in any nail holes or small cracks with a lightweight spackling compound. Apply the compound using a putty knife, and then smooth it out with a damp sponge or sandpaper once it dries.
- If there are larger holes or dents, it may be necessary to use a patching compound. Follow the manufacturer’s instructions for mixing and applying the compound, and then sand it smooth once it dries.
- After patching, use a sanding block or sandpaper to smooth out any rough areas. Sand the entire wall surface, paying extra attention to the patched areas, until it feels smooth to the touch.
- Once you’ve sanded the wall, use a damp cloth or sponge to wipe away any dust. This will ensure a clean surface for the chair rail installation.
By safely removing the baseboards and patching any wall imperfections, you’ll be well-prepared to install the chair rail and achieve a polished look for your walls. Follow the next steps in our guide to complete the installation process seamlessly.
Cutting And Fitting The Chair Rail
Installing a chair rail can add elegance and sophistication to any room. Cutting and fitting the chair rail properly is crucial to achieving a polished look. This section will guide you through the necessary steps to measure, cut, miter, dry-fit, and adjust the chair rail to ensure a precise fit. So, let’s dive into the details of each step:
Measuring, Cutting, and Mitering the Chair Rail
Before you begin, it’s essential to measure the length of the wall where you plan to install the chair rail. To do this, use a measuring tape and measure from corner to corner, accounting for any obstacles such as windows or doors.
Once you have your measurements, transfer them to the chair rail. Mark the exact length using a pencil or a marker, ensuring the marks are accurate and easily visible.
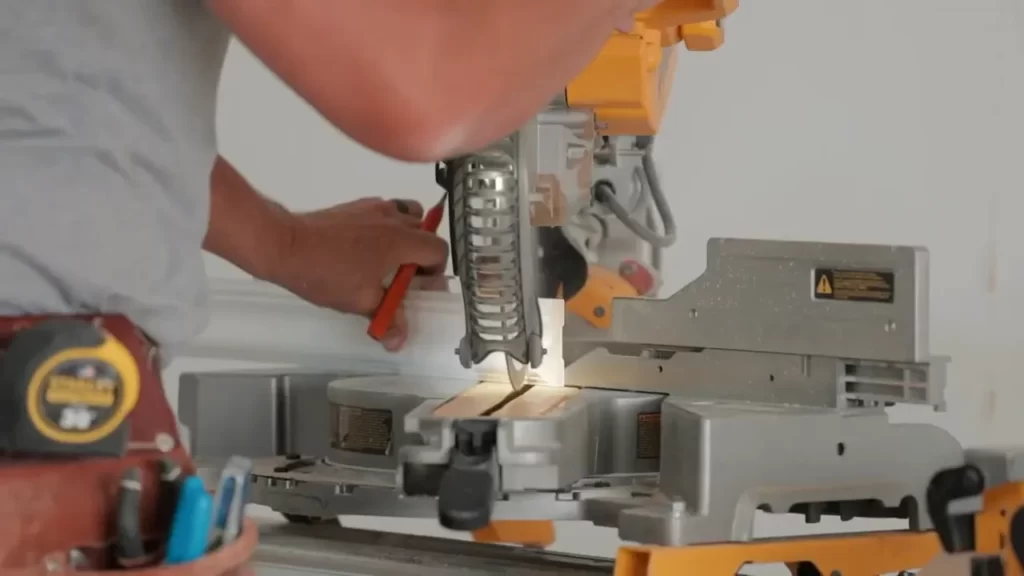
Now it’s time to cut the chair rail to the correct length. Secure the chair rail firmly using clamps or a vise to ensure stability. Next, use a miter saw to make precise cuts at a 45-degree angle according to your measurements. Remember to use safety goggles and follow the instructions provided by the manufacturer.
Mitering the ends of the chair rail is crucial to achieving a seamless fit at corners. To do this, set your miter saw to a 45-degree angle and carefully make the necessary cuts at both ends of the chair rail. Ensure that the miter cuts are aligned properly for a clean and professional-looking joint.
Dry-Fitting and Adjusting for a Precise Fit
Once you have cut and mitered the chair rail, it’s time to dry-fit the pieces before permanently attaching them to the wall. Dry-fitting allows you to make any necessary adjustments for a precise fit without damaging the wall or the chair rail.
Start by placing the chair rail pieces against the wall where they will be installed. Ensure that the corners align perfectly and that there are no gaps. If there are any gaps or misalignments, use a coping saw or a file to trim the edges until the pieces fit together seamlessly.
Pro tip: Apply a small amount of wood glue to the mitered ends for added stability and durability.
After adjusting the chair rail pieces to achieve a perfect fit, you can now move on to the installation process. Use finishing nails or a brad nailer to secure the chair rail to the wall, making sure to hit the wall studs for maximum support.
In conclusion, cutting and fitting the chair rail accurately requires proper measurements, precise cuts, and careful adjustments. By following these steps, you can achieve a professional installation that enhances the beauty of your space.
Attaching The Chair Rail To The Wall
Attaching the chair rail to the wall is a crucial step in its installation process. This step ensures that the chair rail is securely fastened and adds stability to the overall structure. There are two primary methods for attaching the chair rail: using adhesive or nails. In this section, we will discuss the different options for selecting adhesive or nails for installation and provide tips for securing the chair rail for maximum stability.
Selecting Adhesive or Nails for Installation
When it comes to attaching the chair rail to the wall, there are various options available – adhesive or nails. The choice between the two will depend on several factors, including personal preference, wall type, and budget. Here are some considerations for each option:
| Adhesive | Nails |
|---|---|
| – Adhesive can offer a seamless and clean look without visible nail heads. | – Nails provide a more traditional and sturdy attachment method. |
| – Choose an adhesive specifically designed for chair rail installation. | – Select nails that are suitable for your wall type to prevent any damage. |
| – Apply the adhesive evenly along the back of the chair rail, following the manufacturer’s instructions. | – Nail the chair rail into the wall studs or use wall anchors if studs are not available. |
- Consider using adhesive if you want a seamless look or if you’re working with delicate wall materials.
- If you prefer a more traditional look or have walls that can handle nails, opt for using nails.
- Always follow the manufacturer’s guidelines when using adhesive or nails for chair rail installation.
Securing the Chair Rail for Stability
Securing the chair rail properly is essential to ensure its stability and longevity. Here are some tips to help you achieve a secure attachment:
- Measure and mark the desired height for your chair rail, ensuring it is level throughout the length of the wall.
- Use a stud finder to locate the wall studs. If studs are not available, use wall anchors to provide additional support.
- Apply adhesive or drive nails into the chair rail, making sure they penetrate the wall sufficiently for a secure attachment.
- Check for any gaps or unevenness along the chair rail. Use shims or additional adhesive/nails to fill in any gaps and maintain a uniform appearance.
- Once the chair rail is attached, use a level to ensure it is perfectly straight.
By following these steps, you can successfully attach the chair rail to the wall and create a stylish and functional addition to your space.
Finishing Touches And Maintenance
Once you have successfully installed the chair rail in your space, it’s time to focus on the finishing touches and maintenance to ensure it looks its best and lasts for years to come. This section will guide you through the important steps of filling nail holes and sealing gaps, as well as painting or staining the chair rail to match your decor. Additionally, we will provide some valuable tips on how to care for and maintain your chair rail installation.
Filling Nail Holes and Sealing Gaps
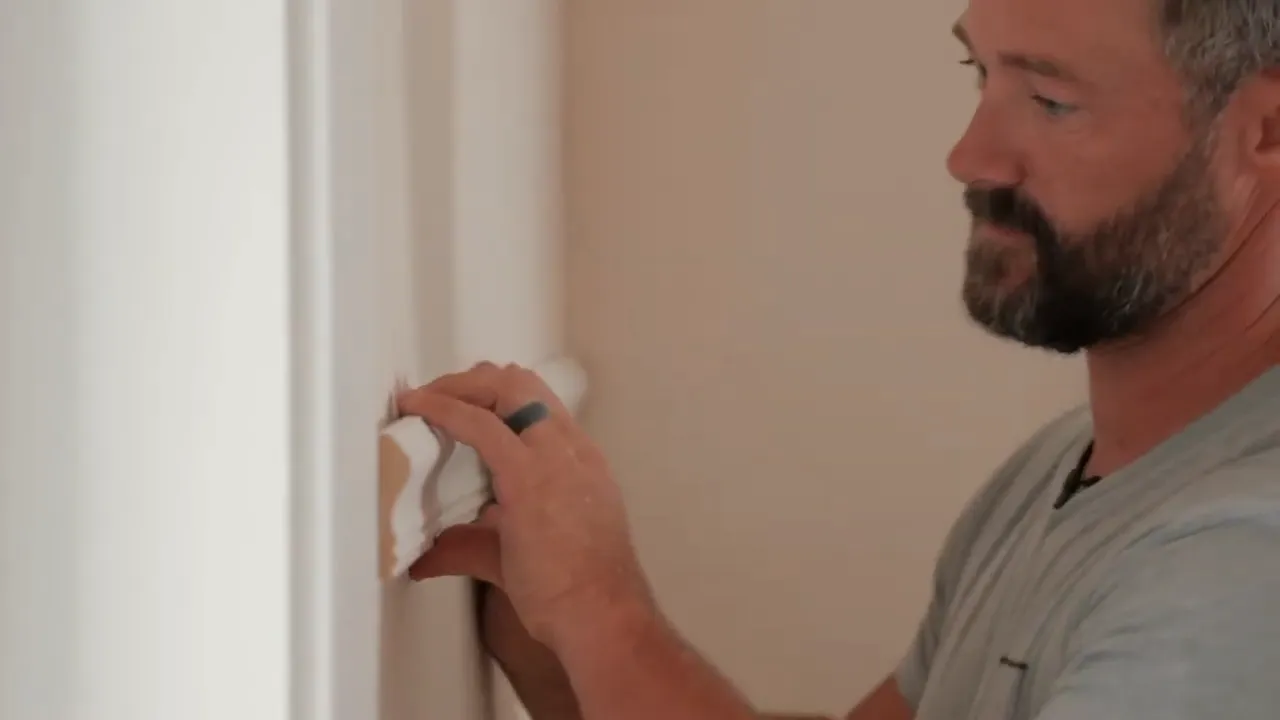
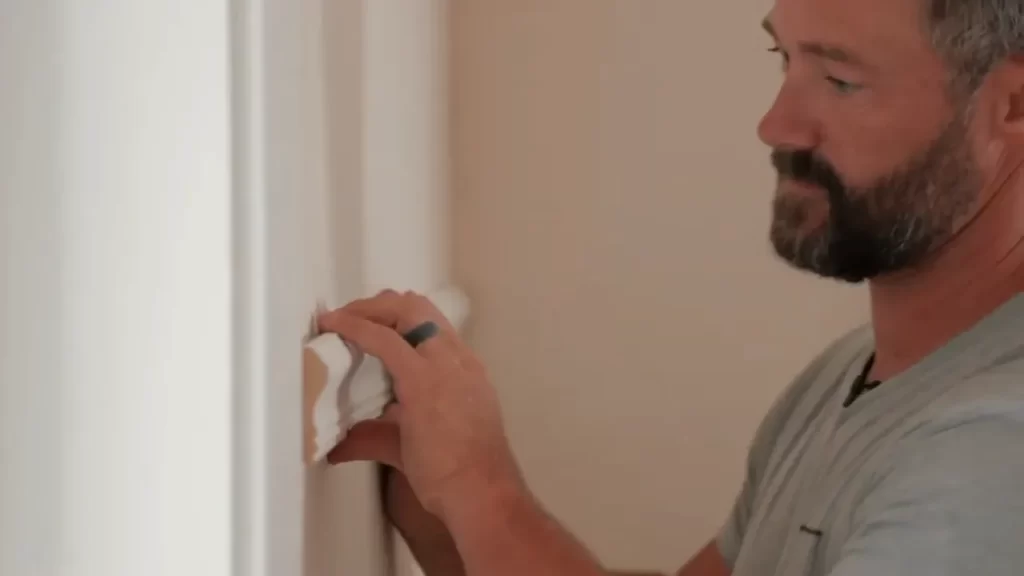
After installing the chair rail, you may notice some unsightly nail holes or gaps between the rail and the wall. Don’t worry, these can be easily fixed with a few simple steps. To fill nail holes, start by selecting a high-quality wood filler that matches the color of your chair rail. Apply a small amount of the filler to each hole using a putty knife, ensuring the hole is completely filled. Once the filler has dried, gently sand it down until it is flush with the surface of the rail.
Sealing gaps is equally important to achieve a seamless look. Use a paintable caulk that matches the color of your chair rail and apply it to any visible gaps between the rail and the wall. Smooth the caulk using a caulk smoothing tool or your finger, ensuring it blends in seamlessly with the surrounding surfaces. Allow the caulk to dry completely before moving on to the next step.
Painting or Staining the Chair Rail
One of the final steps in finishing your chair rail installation is painting or staining it to match your overall decor. Before you begin, make sure the chair rail is clean and free from any dust or debris. If you choose to paint the chair rail, start by applying a primer to ensure the paint adheres properly. Once the primer is dry, use a high-quality paintbrush or roller to apply a coat of paint in smooth, even strokes. Allow the first coat to dry completely before applying a second coat if necessary.
Alternatively, if you prefer to highlight the natural beauty of the wood, you can opt for staining. Begin by sanding the chair rail to remove any imperfections or rough spots. Wipe away any dust and apply the stain using a brush or rag, following the manufacturer’s instructions. Allow the stain to penetrate the wood and wipe away any excess with a clean cloth. For a deeper color, you can apply additional coats of stain, making sure to let each coat dry thoroughly.
Caring for and Maintaining Your Chair Rail Installation
Proper care and maintenance are essential to ensure the longevity of your chair rail. Keep the chair rail clean by regularly dusting it with a soft cloth or using a gentle vacuum attachment. Avoid using harsh chemical cleaners or abrasive materials that could damage the finish.
Inspect the chair rail periodically for any signs of damage, such as cracks or chips, and address them promptly. If needed, touch up the paint or stain to maintain its appearance. Additionally, be mindful of any moisture or humidity in the surrounding area, as excessive moisture can cause the wood to warp or rot. If you notice any water damage, make the necessary repairs immediately.
By following these simple steps for finishing touches and maintenance, you will be able to enjoy the beauty of your chair rail for many years to come.
Frequently Asked Questions
Is Chair Rail Hard To Install?
Chair rail installation is not difficult. It can be easily installed with basic tools and some DIY knowledge. Follow instructions carefully for a hassle-free installation.
How Should Chair Rail Be Installed?
To install chair rail, follow these steps: 1. Determine the appropriate height for the chair rail and mark the wall accordingly. 2. Measure and cut the chair rail molding to fit the wall length. 3. Use adhesive and nails to secure the chair rail to the wall.
4. Fill any gaps or cracks with wood filler and sand them smooth. 5. Paint or stain the chair rail to finish the installation.
How Do You Attach A Chair Rail To The Wall?
To attach a chair rail to the wall, follow these steps: 1. Measure and mark the desired height for the chair rail. 2. Cut the chair rail to the required length and angle. 3. Use a level to ensure straight installation.
4. Apply construction adhesive to the back of the rail. 5. Secure the rail to the wall using finishing nails or screws.
What Angle Do You Cut Chair Rail?
The angle of the chair rail cut depends on the corner you are working with. For inside corners, cut at a 45-degree angle. For outside corners, cut at a 45-degree angle in the opposite direction.
Conclusion
Installing chair rail is a simple and effective way to add visual interest and protection to your walls. This blog post has provided a step-by-step guide on how to install chair rail, from measuring and marking the wall to cutting and installing the rail.
By following these instructions, you can easily transform the look of any room in your home. Don’t be afraid to get creative with the design of your chair rail, as it can serve as a stylish accent to your decor.
So go ahead and give it a try, and enjoy the beautiful results!