To install a Bio Bidet, first locate the water supply valve and turn it off. Next, connect the bidet’s water supply hose to the valve and tighten it.
Factors To Consider When Selecting A Bio Bidet
Finding the right bio bidet for your bathroom can be a daunting task. With so many options available on the market, it’s important to consider a few key factors before making your decision. In this article, we will explore the factors to consider when selecting a bio bidet, focusing on budget, features, and compatibility with your existing toilet.
Budget
When it comes to purchasing a bio bidet, determining your budget is an essential first step. Bidet prices can vary significantly, so it’s important to decide how much you are willing to spend. Consider the features you need and how often you will use the bidet. If you’re on a tight budget, you may want to look for more basic models that offer the essential functions at a lower cost. On the other hand, if you’re looking for a bidet with all the bells and whistles, be prepared to invest a bit more.
Features
Before making your final decision, take some time to research and understand the different features available. Bidets come with a wide range of features, from basic water spray and temperature control to advanced functions like heated seats, air drying, and even remote control operation. Think about what features are important to you and your household. If you have any specific requirements or preferences, make sure to look for bidets that offer those features. Remember, the more features the bidet has, the higher the price tag will be.
Compatibility with Existing Toilet
Another crucial factor to consider when selecting a bio bidet is its compatibility with your existing toilet. Not all bidets are designed to fit every toilet type. Before making your purchase, make sure to check the bidet’s specifications and ensure it is compatible with the shape and size of your toilet bowl. Additionally, consider any electrical requirements for the bidet’s installation. Some bidets may require electrical outlets nearby for power, while others may run on battery power.
Now that you are aware of the factors to consider when selecting a bio bidet, take some time to evaluate your needs and preferences. Determine your budget, identify the features you desire, and ensure compatibility with your existing toilet. By considering these factors, you can make an informed decision and find the perfect bio bidet for your bathroom.
Gather The Necessary Tools And Materials
Before installing your Bio Bidet, you’ll need to gather a few essential tools and materials. Having everything ready beforehand will save you time and ensure a smooth installation process. Here are the items you’ll need:
Screwdriver
A screwdriver is an essential tool that will help you loosen and tighten screws throughout the installation process. Make sure to have both a flathead and a Phillips head screwdriver in your toolkit to accommodate different types of screws.
Adjustable Wrench
An adjustable wrench is necessary to tighten and loosen nuts and bolts. This versatile tool allows you to adjust the jaw size to fit different sizes of fasteners. Having an adjustable wrench on hand will make it easier to connect the water supply and secure the bidet to the toilet.
Teflon Tape
Teflon tape, also known as plumber’s tape, is an important material for preventing leaks in threaded connections. Wrap a few layers of Teflon tape around the threads before screwing on any plumbing connections to create a watertight seal.
Bio Bidet Kit
Lastly, you’ll need a Bio Bidet kit, which typically includes the bidet attachment, mounting hardware, and installation instructions. Ensure that you have all the components provided in the kit before beginning the installation process.
By gathering these necessary tools and materials, you’ll be well-prepared to install your Bio Bidet and enjoy the benefits of a luxurious and hygienic bathroom experience.
Shutting Off The Water Supply
Before installing your Bio Bidet, it is essential to shut off the water supply to prevent any leaks or accidents. By following a few simple steps, you can locate the water shut-off valve and safely turn off the water supply in no time.
Locating the Water Shut-off Valve
To begin shutting off the water supply, you must first locate the water shut-off valve. This valve is typically located near your toilet, typically on the wall or beneath the toilet tank.
Here is a step-by-step guide to locating the water shut-off valve:
- Start by checking behind the toilet for a water supply line. This line connects the toilet tank to the water supply.
- Follow the water supply line towards the wall until you find a valve. This valve is usually a round knob or lever.
- Once you have located the valve, familiarize yourself with its operation by turning it clockwise and counterclockwise a few times.
- If you cannot find the shut-off valve behind the toilet, try looking in the basement or crawl space beneath your home. In some cases, the shut-off valve may be located there.
Turning off the Water Supply
Now that you have located the water shut-off valve, it’s time to turn off the water supply. Follow these simple steps:
- Make sure you have a bucket or towels handy to catch any residual water that may drip from the valve.
- Gently grip the valve handle or lever and turn it clockwise until it stops. This will shut off the water supply to your toilet and prevent any water from flowing.
- Once the valve is fully closed, double-check by flushing the toilet. If there is no water coming out, you have successfully shut off the water supply.
- Remember to turn off the valve completely and avoid overtightening, as it may damage the valve.
Congratulations! You have successfully located the water shut-off valve and turned off the water supply to prepare for the installation of your Bio Bidet. With the water supply safely shut off, you can now proceed with the next steps of the installation process.
Unscrewing The Seat From The Toilet Bowl
When it comes to installing a Bio Bidet, one of the first steps is to unscrew the seat from the toilet bowl. This is necessary in order to make way for the bidet attachment and ensure a proper installation. In this article, we’ll walk you through the process of unscrewing the seat, from identifying the seat attachment points to removing the seat.
Identifying the Seat Attachment Points
The first step in unscrewing the seat is to identify the attachment points. Most toilet seats are secured to the bowl with two plastic screws or bolts that can be found at the back of the seat. Look for these screws or bolts, as they will need to be loosened in order to remove the seat.
Loosening the Screws
Once you have identified the attachment points, it’s time to loosen the screws or bolts. To do this, you will need a screwdriver or a wrench, depending on the type of fasteners used. Place the tool onto the screw head or bolt head and turn it counterclockwise to loosen the screws. Keep turning until the screws or bolts are loose enough to remove the seat.
Removing the Seat
With the screws or bolts loosened, you can now proceed to remove the seat. Gently lift the seat and separate it from the toilet bowl. Be cautious not to apply too much force, as this could damage the toilet bowl or the seat itself. Once the seat is detached, place it aside and prepare for the next steps in the installation process.
Cleaning And Disinfecting The Toilet Bowl
Welcome to the complete guide on how to install a Bio Bidet! In this section, we will discuss the essential steps for cleaning and disinfecting the toilet bowl. Keeping your toilet clean is not only important for maintaining hygiene but also for prolonging the lifespan of your Bio Bidet. With proper cleaning techniques, you can ensure a sanitary and comfortable bathroom experience. Let’s dive right in!
Using a Toilet Cleaner
The first step in cleaning your toilet bowl is to use an effective toilet cleaner. Choose a cleaner that is specifically designed for toilets and contains powerful disinfecting agents. Look for one that targets common germs and bacteria, ensuring a thorough clean. Here’s how you can use a toilet cleaner effectively:
- Start by wearing gloves to protect your hands from any chemicals.
- Squeeze the toilet cleaner around the rim of the bowl, making sure to cover the entire circumference.
- Allow the cleaner to sit for a few minutes to penetrate and disinfect the bowl.
- Alternatively, you can use a toilet brush to spread the cleaner evenly across the bowl’s surface.
Scrubbing the Bowl
Once the toilet cleaner has had time to work its magic, it’s time to start scrubbing the bowl. This step will help remove any stubborn stains or buildup, ensuring a sparkling clean toilet. Follow these steps to effectively scrub the bowl:
- Take a toilet brush with sturdy bristles and begin scrubbing the inside of the bowl.
- Start from the top and work your way down, applying moderate pressure to remove stains and deposits.
- Pay extra attention to hard-to-reach areas, such as under the rim and around the water outlets.
- Continue scrubbing until the bowl is clean and free from any visible residue.
Rinsing the Bowl
After scrubbing the bowl, it’s crucial to rinse away any remaining residue or cleaner. This final step will leave your Bio Bidet toilet bowl spotless and ready for use. Follow these simple steps to rinse the bowl effectively:
- Using a bucket or jug, pour water into the bowl, starting from the rim and working your way towards the drain.
- Make sure to pour enough water to thoroughly rinse the entire surface of the bowl.
- Repeat the process if necessary to ensure no cleaner or debris is left behind.
- Finally, flush the toilet to remove all the rinsed water from the bowl.
Cleaning and disinfecting your toilet bowl is a vital part of maintaining a clean and healthy bathroom environment. By following the steps outlined above, you can ensure that your Bio Bidet is kept in excellent condition and provides a pleasant experience for all users. Now that you have learned how to clean the toilet bowl, you can enjoy your Bio Bidet with peace of mind!
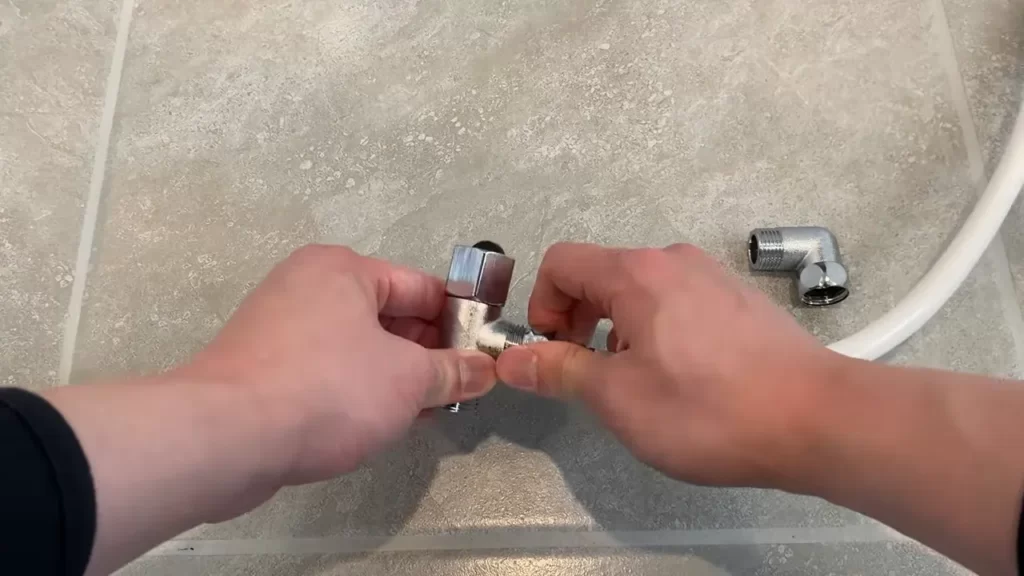
Attaching The Bio Bidet Water Hose
When it comes to installing a Bio Bidet, one of the crucial steps is attaching the water hose. This step ensures that the bidet can function properly and provide you with a refreshing and hygienic experience. In this section, we will guide you through the process of connecting the water hose to the water supply and ensuring a secure connection.
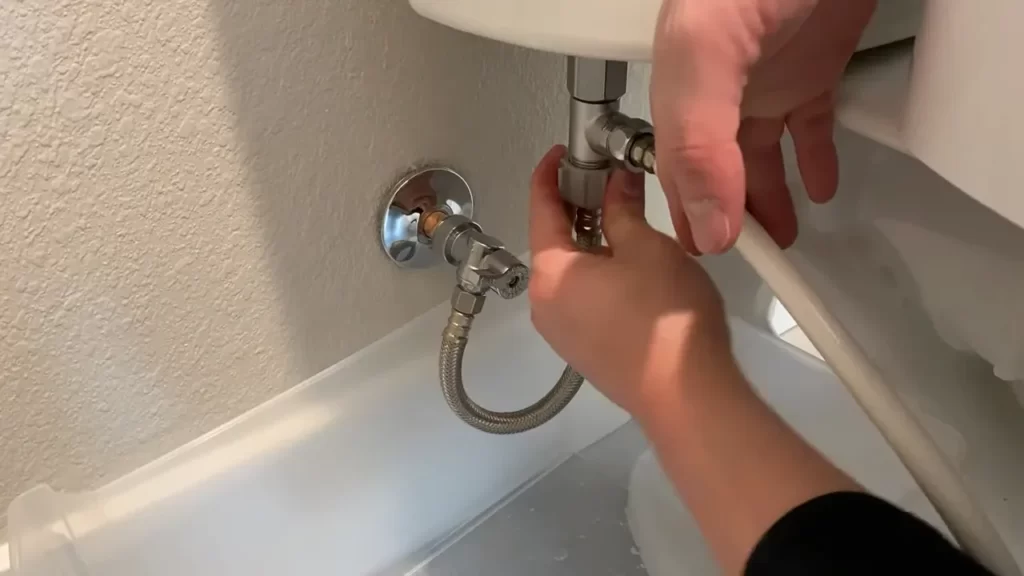
Connecting the Water Hose to the Water Supply
Before you begin, make sure you have gathered all the necessary tools and materials. You will need a wrench, Teflon tape, and the water hose included with your Bio Bidet. Once you have everything ready, follow these steps:
- Locate the water supply valve behind your toilet. It is usually located near the floor or the wall.
- Using the wrench, turn the valve clockwise to shut off the water supply. This step is important to prevent any water leakage during the installation process.
- Take the water hose provided with your Bio Bidet and attach one end to the water supply valve. Make sure the connection is tight, but be careful not to overtighten it.
- Wrap Teflon tape around the threaded end of the water hose. This tape helps create a watertight seal and prevents any potential leaks.
- Next, find the water inlet valve on the back of your Bio Bidet. It is usually labeled for easy identification. Unscrew the cap from the valve.
- Attach the other end of the water hose to the water inlet valve on your Bio Bidet. Again, ensure that the connection is secure but not overly tight.
Ensuring a Secure Connection
After you have attached the water hose, it is essential to check that the connection is secure to avoid any water leakage or pressure issues. Follow these steps to ensure a firm connection:
- Turn the water supply valve counterclockwise to gradually restore the water flow.
- Keep an eye on the connection points for any signs of leakage. If you notice any water droplets, gently tighten the connections with the wrench until the leakage stops.
- Once you are confident that the water hose is securely attached and there are no leaks, test the functionality of your Bio Bidet. Activate the spray and check if the water flows seamlessly and consistently.
- If you experience any issues with the water flow or notice persistent leaks, consult the user manual or contact the customer support of Bio Bidet for further assistance.
By following these step-by-step instructions, you can easily attach the water hose to your Bio Bidet and ensure a secure connection for optimal performance. Now that you have completed this crucial installation process, you are one step closer to enjoying the luxuries of a bidet in your own bathroom.
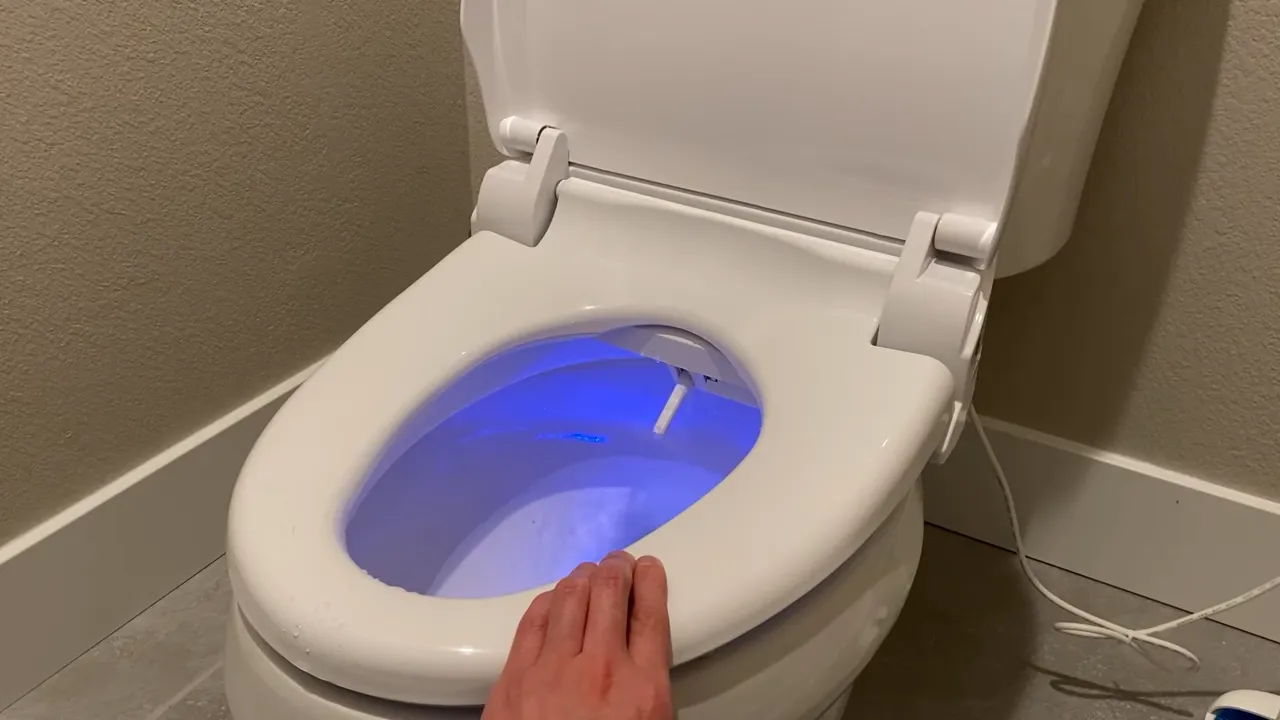
Installing The Bio Bidet Seat
Installing a Bio Bidet seat is a quick and straightforward process that can greatly enhance the functionality and comfort of your toilet. With a few simple steps, you’ll be able to enjoy the luxurious features that the Bio Bidet has to offer.
Aligning the Seat with the Toilet Bowl
The first step in installing a Bio Bidet seat is to align it properly with your toilet bowl. To do this, follow these steps:
- Remove the existing toilet seat by unscrewing the bolts located on the underside of the seat.
- Clean the toilet bowl thoroughly to ensure a clean base for the Bio Bidet seat.
- Take the Bio Bidet seat and position it over the bolt holes on the toilet bowl.
- Adjust the seat so that it is centered and aligned properly with the bowl.
- Ensure that the seat is level and securely positioned before proceeding to the next step.
Securing the Seat in Place
Once the seat is aligned with the toilet bowl, it’s time to secure it in place. Follow these steps to ensure a secure installation:
- Locate the mounting holes on the Bio Bidet seat and match them with the bolt holes on the toilet bowl.
- Insert the bolts through the mounting holes on the seat and the bolt holes on the toilet bowl.
- Tighten the nuts onto the bolts using a wrench, ensuring that the seat is securely fastened to the bowl.
- Double-check the tightness of the nuts to avoid any future loosening of the seat.
Once the seat is securely installed, make sure to test its functionality by trying the different features offered by the Bio Bidet. Adjust the settings to your preference and enjoy the added comfort and cleanliness that the Bio Bidet seat brings to your bathroom routine.
Identifying The Power Source
When it comes to installing your Bio Bidet, one of the first steps is to identify and ensure you have a suitable power source nearby. This is crucial for the proper functioning of your bidet and to ensure a hassle-free installation process. Here, we will discuss the key aspects of identifying the power source, including determining if an outlet is nearby and examining the power cord length.
Determining if an Outlet is Nearby
The first step in identifying the power source for your Bio Bidet is to determine if there is an outlet available near your toilet. This will allow you to connect the bidet to a power supply conveniently. Take a careful look around your bathroom and inspect the wall closest to the toilet. Look for any electrical outlets in the vicinity. It’s essential to have an electrical outlet within a reasonable distance to ensure easy access and prevent the need for additional wiring.
Examining the Power Cord Length
Once you have located a nearby outlet, it’s crucial to examine the power cord length of your Bio Bidet. This will help ensure that the bidet can reach the outlet comfortably without any strain or tension on the cord. Measure the distance between the outlet and the installation area of the bidet. Keep in mind that you may require some extra length to allow for maneuverability during the installation process. If the power cord seems too short, it’s recommended to use an extension cord that is suitable for bathroom use and meets safety standards.
Examining the power cord length not only helps in determining if the cord can reach the outlet but also assists in planning the bidet’s position for optimal usage and accessibility. Be mindful of any obstacles or furniture that could interfere with the cord’s free movement.
By identifying the power source and assessing the outlet’s proximity and the power cord length, you will be well-prepared to proceed with the installation of your Bio Bidet. This preliminary step will help ensure a smooth installation process, avoiding any unnecessary complications or delays.
Plugging In The Bio Bidet
Installing a Bio Bidet in your bathroom can enhance your comfort and hygiene greatly. After successfully connecting the water supply and attaching the bidet to your toilet, the next step is to plug it in for power. With the proper electrical connection, you can enjoy the full benefits of your new bidet. In this guide, we will go through the steps of inserting the power cord into the outlet and confirming a proper electrical connection.
Inserting the Power Cord into the Outlet
Before plugging in the Bio Bidet, locate a nearby electrical outlet that is easily accessible. Make sure the outlet is compatible with the voltage requirements of your bidet. A voltage mismatch can lead to damage or malfunction of the bidet. Once you have identified the appropriate outlet, follow these steps to insert the power cord:
- Ensure that the bidet is in the off position by turning off the main power or unplugging it from the wall, if applicable.
- Take the power cord provided with the Bio Bidet and inspect it for any signs of damage or wear. A damaged cord should not be used and should be replaced.
- Insert the plug end of the power cord into the outlet. Make sure the connection is secure and there is no loose fit that can accidentally disconnect the bidet.
- If the outlet has a switch, turn it on to supply power to the bidet. Otherwise, move to the next section to confirm the electrical connection.
Confirming a Proper Electrical Connection
Once the power cord is plugged in, it is important to confirm that the electrical connection is proper to ensure the bidet operates safely and efficiently. Follow these steps to check the electrical connection:
- Look for the power indicator light on the Bio Bidet control panel. This light should be illuminated to indicate that the bidet has a successful electrical connection.
- If the light is not on, check if the outlet is providing power. Plug in a different device, such as a lamp, into the same outlet to test its functionality.
- If the outlet is working but the bidet still does not have power, double-check the power cord connection. Ensure it is securely plugged into the outlet and there are no loose or bent pins.
- In case the bidet is still not receiving power, consult the user manual or contact the manufacturer’s customer support for further assistance.
By following these steps, you can easily plug in your Bio Bidet and ensure a proper electrical connection. Once the bidet has power, you can start enjoying the comfort and convenience it provides. Remember to always adhere to safety precautions and consult the user manual for any specific instructions provided by the manufacturer.
Checking For Leaks
Turning on the Water Supply
Before checking for leaks, it is essential to turn on the water supply to your Bio Bidet. Locate the shut-off valve on the wall behind your toilet and turn it clockwise until it is fully closed. Once closed, gradually turn the valve counterclockwise to open the water supply. This will ensure a gradual and controlled flow of water to the bidet, minimizing the chances of any sudden leaks or bursts.
Inspecting for any Leaks
Once the water supply is turned on, the next step is to inspect the area around the bidet for any signs of leaks. Carefully observe the connections between the bidet and the water supply valve, as well as the bidet and the toilet bowl. Check if there are any visible drips, moisture, or puddles around these connections. Remember to also inspect the water supply hose and the wash sprayer nozzle for any signs of leakage.
If you notice any leaks during the inspection, it is important to address them immediately to prevent any further issues. Tighten the connections that appear to be loose using a wrench or a pair of pliers. If the leak persists, try replacing the faulty gasket or washer. In case you are uncertain about making these repairs, it is advisable to seek professional assistance to ensure the proper installation and functionality of your Bio Bidet.
In addition to the visual inspection, it is also recommended to run a test cycle of the bidet’s functions to check for any hidden leaks. Activate the various features of the bidet, such as the washing and drying functions, and pay close attention to any unexpected water drips or leaks. This thorough check will guarantee that the bidet is installed correctly and functioning without any issues.
Conclusion
By turning on the water supply and inspecting for leaks, you ensure that your Bio Bidet installation is leak-free and functioning optimally. Taking these steps not only helps prevent any water damage to your bathroom but also ensures a seamless and enjoyable bidet experience. Remember, if you encounter any persistent leaks or difficulties during the installation process, it is always best to consult a professional plumber for assistance.
Adjusting The Settings
Adjusting the Settings
When installing your Bio Bidet, it’s important to know how to adjust the settings to ensure a comfortable and personalized experience. In this section, we will guide you through the process of customizing water pressure and temperature, as well as adjusting the spray direction and position. By mastering these settings, you’ll be able to optimize your bidet experience and truly make it your own.
Customizing Water Pressure and Temperature
One of the great features of the Bio Bidet is the ability to customize the water pressure and temperature to your liking. With just a few simple steps, you can find the perfect combination that suits your personal preferences. To adjust the water pressure, locate the control panel on the side of your bidet. Here, you will find a designated button or dial for adjusting the pressure. Start by pressing or turning it to the desired level, starting from low to high. Remember that different individuals have different sensitivities, so it’s important to find the pressure that feels most comfortable to you.
To adjust the water temperature, use the designated temperature control button or dial on the control panel. This function may vary depending on the model of your Bio Bidet, but the general process remains the same. Press or turn the button or dial to increase or decrease the temperature until you find the ideal setting. It’s worth noting that the temperature range may also vary depending on the bidet model, with some offering a wider range of options than others. Experiment with different temperatures to find what works best for you.
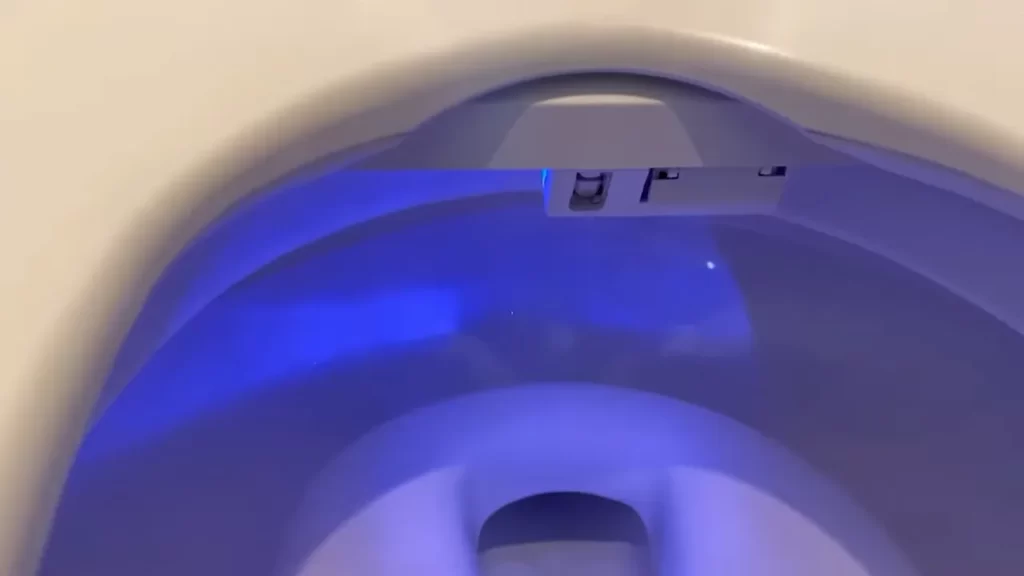
Adjusting Spray Direction and Position
In addition to water pressure and temperature, you can also adjust the spray direction and position to optimize your comfort during each use. The Bio Bidet provides multiple options for tailoring the spray to your liking. To adjust the spray direction, look for the control panel or remote with designated buttons for this purpose. Press the corresponding button to move the nozzle forward or backward, left or right, until it aligns perfectly with your body.
To further refine your experience, consider adjusting the spray position. This feature allows you to position the nozzle precisely where you want it to clean. On the control panel or remote, look for the buttons or settings specifically designed for spray position adjustment. Use these controls to move the nozzle forward or backward, up or down, ensuring that it targets the desired area effectively.
Remember to take your time and experiment with different settings to find what works best for you. Everyone’s preferences are different, so don’t be afraid to try various combinations until you discover your personal sweet spot. Additionally, familiarize yourself with other available settings and functions that might further enhance your experience, such as oscillation and pulsation modes.
By mastering the art of adjusting the settings on your Bio Bidet, you can transform each bathroom visit into a uniquely comfortable and refreshing experience. Take full advantage of the customizable features of your bidet, and enjoy the benefits of improved hygiene and unparalleled comfort.
Cleaning The Bio Bidet
Proper cleaning and maintenance of your Bio Bidet is essential to ensure optimal functionality and longevity. By following these simple guidelines, you can effortlessly keep your bidet in top-notch condition. Read on to discover the best practices for cleaning your Bio Bidet.
Using Mild Soap and Water
When it comes to cleaning your Bio Bidet, keeping it simple is key. The most effective and gentle way to clean your bidet is by using mild soap and water. Start by mixing a small amount of mild soap with warm water in a clean container or spray bottle. Dip a soft cloth or sponge into the soapy mixture and gently wipe down the surfaces of the bidet, including the seat, nozzle, and control panel. Be sure to rinse the cloth or sponge frequently to avoid spreading dirt and grime.
After cleaning, use a separate, damp cloth to remove any soap residue from the bidet. Pay extra attention to areas with hinges and crevices, as these can often accumulate debris. Finally, wipe dry with a clean, dry cloth to prevent water spots.
Avoiding Abrasive Cleaners or Chemicals
When it comes to cleaning the sensitive surfaces of your Bio Bidet, it’s crucial to avoid abrasive cleaners or harsh chemicals. These substances can cause damage to the bidet’s finish and potentially lead to malfunctions. Instead, stick to mild soap and water, as mentioned earlier. This gentle solution will effectively remove dirt and grime without compromising the integrity of your bidet.
Additionally, stay away from bleach, ammonia, or any acidic cleaners, as they can corrode the bidet’s components and void the warranty. Opting for natural cleaning agents is always a safer alternative, ensuring a clean and eco-friendly experience.
By regularly cleaning your Bio Bidet with mild soap and water and avoiding any abrasive cleaners or harsh chemicals, you can keep your bidet looking and functioning beautifully for years to come. Now that you know the best practices for cleaning your Bio Bidet, make it a part of your routine maintenance to enjoy a fresh and hygienic bathroom experience every time.
Troubleshooting Common Issues
Installing a Bio Bidet can greatly enhance your bathroom experience by providing comfort and convenience. However, like any other electronic device, it may encounter some common issues that can be easily resolved. In this section, we will discuss two of the most common troubleshooting problems that you may encounter with your Bio Bidet: Water Pressure Problems and Malfunctioning Controls.
Water Pressure Problems
Water pressure issues are one of the most common problems that users face when installing a Bio Bidet. If you are experiencing low water pressure, there are a few steps you can take to troubleshoot and resolve the issue:
- Check the water supply valve: Ensure that the water supply valve is fully open. Sometimes, due to accidental adjustments or maintenance work, the valve may not be fully open, resulting in low water pressure. Make sure the valve is turned all the way to the “On” position.
- Clear any blockages: Check for any blockages in the water supply line or the bidet nozzle. Debris, dirt, or mineral buildup can obstruct the water flow, resulting in reduced pressure. Clean any blockages using a soft brush or by soaking the nozzle in vinegar for a few hours to dissolve any calcium or mineral deposits.
- Adjust the water pressure settings: Most Bio Bidet models offer adjustable water pressure settings. Check the user manual to locate the water pressure adjustment knob or button. Increase the pressure gradually to find the optimal level for your comfort.
If you have followed these troubleshooting steps and are still experiencing water pressure issues, it may be helpful to contact the manufacturer’s customer support for further assistance.
Malfunctioning Controls
Another common issue that users may face while installing a Bio Bidet is malfunctioning controls. If you are unable to operate or control the bidet functions properly, consider the following troubleshooting steps:
- Check the power source: Ensure that the bidet is properly connected to a power source. Check if the power cord is securely plugged in and if the power outlet is functioning correctly. Sometimes, a loose connection or a tripped circuit breaker can cause control malfunctions.
- Reset the bidet: Some Bio Bidet models have a reset button that restores the bidet to its default settings. Press and hold the reset button for a few seconds to reset the bidet’s controls.
- Replace batteries: If your Bio Bidet is battery-operated, check the batteries. Low battery power can lead to control malfunctions. Replace the batteries if necessary, following the manufacturer’s recommendations.
- Error codes or indicator lights: Pay attention to any error codes or indicator lights on the bidet’s control panel. Consult the user manual or the manufacturer’s website for a list of error codes and troubleshooting instructions specific to your model.
If you have followed these troubleshooting steps and are still experiencing control malfunctions, it is advisable to reach out to the manufacturer’s customer support for further assistance. They will be able to provide you with additional troubleshooting guidance or arrange for repairs if necessary.
Frequently Asked Questions
Is Bio Bidet Easy To Install?
Yes, bio bidet is easy to install. It requires minimal effort and can be set up quickly without any professional assistance.
How Do You Attach A Bidet To An Existing Toilet?
To attach a bidet to an existing toilet, follow these steps: 1. Turn off the water supply to the toilet. 2. Remove the toilet seat and clean the area. 3. Attach the bidet fixture to the toilet bowl using the provided hardware.
4. Connect the bidet hose to the water supply valve. 5. Turn on the water supply and test the bidet for proper functioning.
How To Install Bio Bidet Ultimate 770?
To install the Bio Bidet Ultimate 770, follow these steps: 1. Turn off the water supply. 2. Remove the existing toilet seat. 3. Attach the mounting bracket to the toilet bowl. 4. Hook the bidet onto the bracket. 5. Connect the water supply line.
6. Turn the water supply back on.
How To Install Bio Bidet Bb 600?
To install the bio bidet BB 600, follow these steps: 1) Shut off the water valve and disconnect the existing toilet seat. 2) Place the T-adapter on the water supply valve and connect the water hose to it. 3) Attach the bidet seat to the toilet bowl and secure it tightly.
4) Connect the bidet seat’s water hose to the T-adapter. 5) Turn on the water valve and test the bidet’s functionality.
Conclusion
Installing a Bio Bidet is a simple process that can enhance your bathroom experience. With a step-by-step guide and the right tools, you can easily install it yourself without the need for professional help. Enhance your hygiene and comfort with the Bio Bidet installation.
Start enjoying the benefits it offers today!