To install a bike inner tube, first remove the wheel, then remove the old tube, insert the new tube, and finally reattach the wheel. Installing a bike inner tube is an essential skill for any cyclist.
Whether you’re a seasoned rider or a beginner, knowing how to correctly install a new inner tube is crucial for maintaining the functionality and safety of your bike. A damaged or punctured tube can lead to flat tires, making your ride uncomfortable and potentially dangerous.
Thankfully, replacing a bike inner tube is a straightforward process that can be completed with a few simple steps. In this guide, we will provide you with clear instructions on how to install a bike inner tube quickly and efficiently, ensuring a smooth and enjoyable riding experience.
Factors To Consider When Selecting Inner Tubes
Choosing the right inner tube for your bike is a crucial step in ensuring a smooth and safe ride. The inner tube not only holds the air pressure that keeps your tires inflated but also plays a significant role in determining the overall performance of your bike. There are several factors to consider when selecting inner tubes, including tire size, valve type, and tube material.
Tire Size
One of the most important factors to consider when selecting an inner tube is the tire size. Inner tubes come in different sizes to fit various tire widths, so it’s essential to choose the correct size for your bike. To determine the appropriate tire size, you can refer to the sidewall of your tire, which usually displays the tire size specifications. It is typically represented in a series of numbers, such as “700x25c” or “26×1.95”. The first number represents the diameter of the tire, and the second number denotes the tire width in millimeters. Ensure that you select an inner tube that matches both the tire diameter and width to ensure a proper fit.
Valve Type
The valve type is another crucial factor to consider when selecting an inner tube. Different bikes and rims may require specific valve types, so it’s important to choose one that is compatible. There are two common valve types found on inner tubes:
- Schrader Valve: This is the most common valve type, often found on mountain bikes and most recreational bicycles. The Schrader valve resembles a car tire valve and requires a Schrader pump for inflation. It has a spring-loaded valve core that needs to be unscrewed before inflation and screwed back after.
- Presta Valve: The Presta valve is thinner and usually found on higher-end road bikes and some mountain bikes. It features a narrow valve stem with a lock nut at the top. To inflate a tube with a Presta valve, you need a Presta valve adapter or a pump with a Presta valve head.
Before purchasing an inner tube, ensure that you choose the valve type that is compatible with your bike and pump.
Tube Material
The material of the inner tube can also affect its durability and performance. Inner tubes are primarily made of two materials:
- Butyl Rubber: Butyl rubber is the most commonly used material for inner tubes. It offers excellent air retention and resistance to punctures, making it a popular choice for most riders.
- Latex: Latex inner tubes are known for their low rolling resistance, providing a smoother and faster ride. However, they are more prone to punctures and require more frequent inflation, making them better suited for racing or performance-oriented riders.
Consider your riding style and preferences when choosing the material of the inner tube. For everyday riders seeking durability and reliability, a butyl rubber tube is a suitable option, while performance-driven riders may opt for the lower rolling resistance of a latex tube.
By considering these factors and selecting the appropriate inner tube for your bike, you can enhance your riding experience and minimize the risk of flats and other tire-related issues. Remember to carefully measure your tire size, choose the correct valve type, and select the material that best suits your needs. With the right inner tube, you’ll be ready to hit the road or trail with confidence.

How To Measure Your Tire Size
If you’re new to cycling or simply need a refresher, understanding how to measure your bike’s tire size is crucial when it comes to choosing the right inner tube. Without the correct tire size, you risk installing a tube that is either too big or too small, which can lead to poor performance, flat tires, or even accidents on the road. In this guide, we will walk you through the step-by-step process of measuring your tire size accurately.
Locate the Tire Size Information
Before you begin measuring, it’s important to locate the tire size information that is typically printed on the sidewall of your bike tire. This information is often represented as a series of numbers and letters, such as “700 x 25c” or “27.5 x 2.2”. Once you’ve found this information, you can proceed to measure the outer diameter and width of your tire.
Measure the Outer Diameter of the Tire
To measure the outer diameter of your tire, you will need a flexible measuring tape or a ruler. Start by positioning your bike in a way that allows you to easily access the tire. Then, place the measuring tape or ruler at the center of the tire’s tread and extend it to the outer edge. Take note of the measurement in millimeters or inches.
Determine the Width of the Tire
Next, you’ll want to determine the width of your tire. This measurement is critical as it will help you choose the appropriate inner tube that fits snugly. Similar to measuring the outer diameter, use your measuring tape or ruler to measure the distance between the sidewalls of the tire. Make sure to take this measurement at the widest point of the tire.
Once you have obtained both the outer diameter and width measurements of your tire, you can confidently select the right inner tube that matches these dimensions. Remember, using an inner tube with the correct size will not only provide a smoother ride, but it will also minimize the risk of punctures or blowouts.
Now that you know how to measure your tire size accurately, you can proceed with confidence when it comes time to replace your bike’s inner tube. Taking the time to measure your tire properly will ensure a safer and more enjoyable cycling experience.
Essential Tools
Tire Levers
Tire levers are essential tools for removing the tire from the bike wheel. These small, sturdy tools help you pry the tire off the rim without damaging the inner tube. They come in various designs, but the most common type has a hooked end that you can use to catch onto the edge of the rim. If you don’t have tire levers, you can try using plastic spoons, but be careful not to damage the tire or tube in the process.
Pump
A reliable pump is another crucial tool necessary for installing a bike inner tube. There are two main types to consider:
- Floor Pump: This type of pump is larger and typically requires you to use your foot to stabilize it while inflating the tube. It usually comes with a pressure gauge, allowing you to inflate the tube to the recommended pressure level.
- Mini Pump: A smaller portable pump that is easy to carry with you during rides. While it may not have a pressure gauge, it’s still capable of inflating the tube effectively.
No matter which type you choose, make sure it has the correct valve attachment to fit your bike’s inner tube valve. The two common valve types are Presta (thin, threaded) and Schrader (thicker, like a car tire valve).
Wrench
A wrench is necessary for loosening and tightening the nuts that secure the wheel to the bike frame. Depending on your bike, you may need an adjustable wrench or a specific size wrench that matches the nuts on your bike. Make sure you have the right size wrench to avoid damaging the nuts or bolts.
Before proceeding with the installation, ensure you have all these essential tools handy. With these tools and a bit of patience, you’ll be on your way to successfully installing a bike inner tube.
Additional Materials
When it comes to installing a new bike inner tube, there are a few additional materials you’ll need to ensure a successful and hassle-free installation. These materials will not only help you install the inner tube correctly but also aid in preventing any future punctures or damage to your bike tires.
Patch Kit
A patch kit is an essential tool in every cyclist’s arsenal. It consists of various patches, vulcanizing solution, and a piece of sandpaper. This kit comes in handy when you encounter a minor puncture on your bike inner tube. With the patch kit, you can easily repair the puncture and get back on the road in no time.
Talcum Powder
Talcum powder or baby powder is a useful material to have during the installation process. Applying a thin layer of talcum powder on the inner tube before inserting it into the tire helps in preventing friction and aids in easier installation. The talcum powder acts as a lubricant, allowing the tube to slide smoothly inside the tire without snagging or getting pinched.
Rag
A rag or a clean cloth is another important material to have on hand while installing a bike inner tube. When working with bike tires, it’s common for your hands to get a little dirty or greasy. Having a rag nearby helps you keep your hands clean and allows you to wipe away any excess dirt or debris from the inner tube or tire.
Deflating The Tire
Before installing a new bike inner tube, it’s important to deflate the tire properly. This ensures a smoother installation process and reduces the risk of damaging the tube or the tire itself. In this section, we’ll take a look at the steps involved in deflating the tire, starting from removing the valve cap to completely deflating the tire.
Remove the Valve Cap
The first step in deflating the tire is to remove the valve cap. This small cap protects the valve from dirt and debris, helping to maintain proper air pressure in the tire. Use your fingers to unscrew the valve cap in an anticlockwise direction until it comes off. Place it in a safe location, so it doesn’t get lost during the deflation process.
Press Down on the Valve Core
Once the valve cap is removed, locate the valve core. The valve core is a small rubber piece inside the valve stem that controls the flow of air in and out of the tire. To begin deflating the tire, press down on the valve core with your fingers or use a valve core tool if necessary. Press down firmly until you hear a hissing sound indicating that the air is being released from the tire.
Completely Deflate the Tire
To ensure a successful installation of the bike inner tube, it’s essential to completely deflate the tire. While keeping the valve core pressed down, gently squeeze the sides of the tire to release any remaining air. Continue doing this until the tire feels flat with no resistance left. It’s crucial to ensure the tire is completely deflated before proceeding with the inner tube installation.
By following these steps, you can safely and efficiently deflate your bike tire, preparing it for the installation of a new inner tube. Remember, taking the time to properly deflate the tire will make the rest of the installation process much smoother and help preserve the longevity of your bike’s tires and inner tubes.
Removing The Old Inner Tube
Removing the Old Inner Tube
When it comes to bike maintenance, knowing how to install a new inner tube is a skill every cyclist should have. But before you can install a new tube, you need to remove the old one. In this section, we will guide you through the process of removing the old inner tube in three simple steps. So let’s get started and learn how to remove the old inner tube from your bike tire.
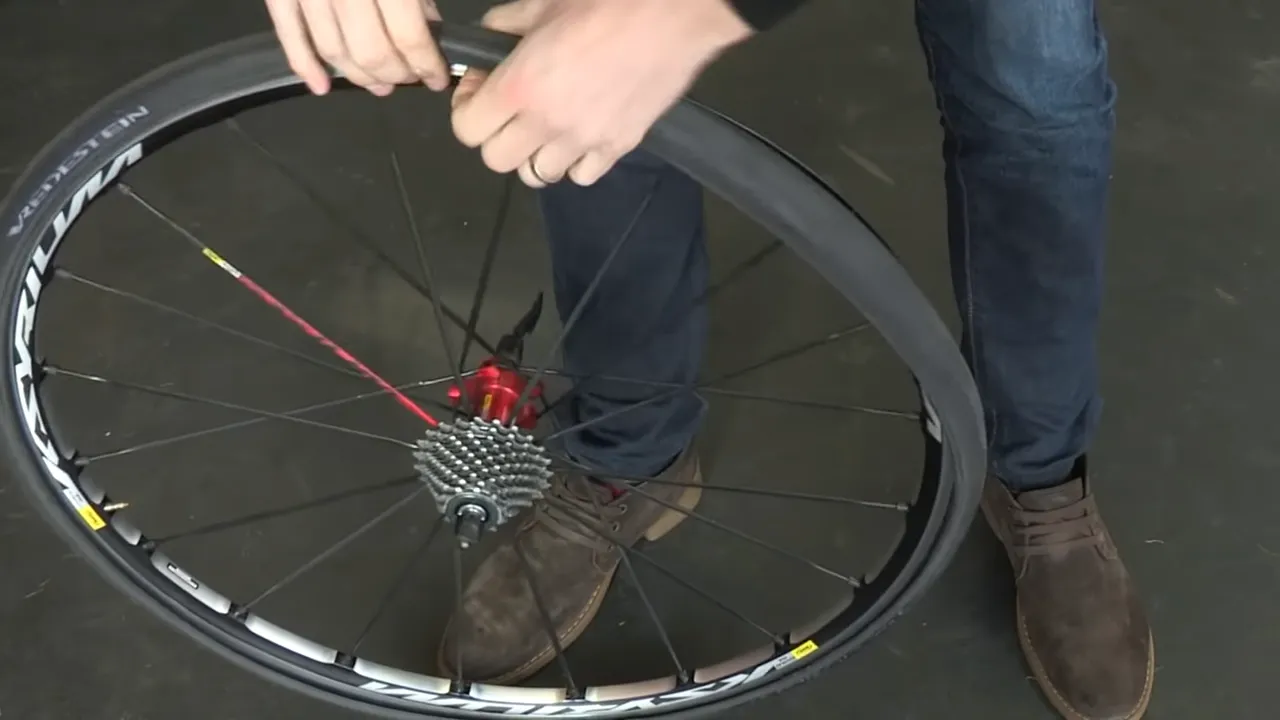
Loosen the Nuts on the Wheel
The first step in removing the old inner tube is to loosen the nuts on the wheel. Using a wrench or a pair of pliers, turn the nuts counterclockwise. Make sure to loosen them enough so that the wheel can be easily removed from the frame. If your bike has quick-release mechanisms, you can simply pull the lever to release the wheel. Once the nuts are loosened, move on to the next step.
Pry the Tire Sidewall Off the Rim
With the nuts loosened, it’s time to pry the tire sidewall off the rim. Start by inserting a tire lever between the tire and the rim. Apply firm pressure and slide the lever around the rim to separate the tire from the rim on one side. Repeat this process on the other side of the tire until you can easily remove the tire from the rim. Be careful not to damage the inner tube while prying the tire off.
Slide Out the Old Inner Tube
Now that the tire is free from the rim, it’s time to slide out the old inner tube. Start by locating the valve stem on the tube. Gently pull the valve stem through the hole in the rim until the tube is completely free. Slowly and carefully remove the tube from the tire, making sure not to snag it on any sharp edges or spokes. Once the old inner tube is out, you can proceed with installing a new one.
In conclusion, removing the old inner tube is a straightforward process that can be done with a few simple steps. By following these instructions, you can easily remove the old inner tube from your bike tire without any hassle. Make sure to take your time, be gentle, and pay attention to details to avoid any unnecessary damage. Now that you’ve successfully removed the old inner tube, you’re one step closer to installing a new one and getting back on the road.
Checking The Inside Of The Tire
Before installing a bike inner tube, it’s crucial to check the inside of the tire for any debris or damage. This step is essential to ensure a smooth and safe ride. By inspecting the inside of your tire, you can identify any potential issues that may affect the performance and durability of your bike’s inner tube.
Inspect the Tire for Debris or Damage
The first step in checking the inside of your tire is to thoroughly inspect it for any debris or damage. Debris such as small pebbles, glass shards, or thorns can cause punctures and flats, so it’s important to remove them before installing your new inner tube. Additionally, inspecting the tire for any signs of damage, such as cuts, tears, or bulges, is crucial to ensure the overall integrity of the tire. Any signs of damage can weaken the tire and increase the risk of a blowout while riding.
Remove any Debris
If you find any debris inside the tire during your inspection, it’s essential to remove them before proceeding with the installation of the inner tube. Use a pair of tweezers, pliers, or even your fingers to carefully remove any foreign objects lodged in the tire. Be cautious not to damage the inner lining of the tire while removing the debris. Once you have removed all the debris, give the tire a quick wipe down with a cloth or brush to ensure that it’s clean and ready for the next step.
Check for Tire Damage
While inspecting the tire, pay close attention to any signs of damage. Look for cuts, tears, or bulges on both the inside and outside of the tire. These can be indications of wear and tear or underlying issues that may compromise the tire’s integrity. If you notice any considerable damage, it’s best to replace the tire before proceeding with the inner tube installation. Remember, a damaged tire can increase the risk of accidents and detract from your overall biking experience.
By thoroughly checking the inside of your tire, you can ensure a smooth and worry-free ride. Take the time to inspect for debris or damage, remove any foreign objects, and assess the overall condition of the tire. By adhering to these steps, you’ll be better equipped to install your bike’s inner tube safely and securely.
Preparing The New Inner Tube
Before installing a new inner tube on your bike, it’s important to properly prepare it for a secure and long-lasting fit. Preparing the new inner tube involves a few simple steps that ensure optimal performance and minimize the risk of punctures or damage. This section will guide you through the process of preparing the new inner tube, including applying talcum powder and inflating it slightly before inserting the valve into the rim.
Apply Talcum Powder to the Inner Tube
One of the first steps in preparing the new inner tube is to apply talcum powder. Talcum powder helps to reduce friction between the inner tube and the tire, allowing for easier installation and preventing the inner tube from sticking to the tire. To apply talcum powder:
- Begin by dusting a small amount of talcum powder onto your hands.
- Rub your hands together to evenly distribute the powder.
- Take the new inner tube and lightly dust it with the talcum powder, ensuring all areas are covered.
- Smooth out the powder to create an even layer, removing any excess if necessary.
Applying talcum powder to the new inner tube will not only facilitate installation but also help prevent the inner tube from sticking, increasing its lifespan.
Inflate the New Inner Tube Slightly
After applying talcum powder to the new inner tube, the next step is to inflate it slightly. This step helps to ensure that the inner tube is in good shape and free of any defects before installing it on the bike. To inflate the new inner tube slightly:
- Attach the pump valve to the air valve on the inner tube.
- Pump the tube gently to inflate it to a small size, making sure it holds air properly.
- Check for any visible signs of damage or leaks, such as hissing sounds or air escaping.
- If there are no issues, release the air from the inner tube.
Inflating the new inner tube slightly allows you to inspect it for any potential problems before installing it on your bike, ensuring a safer and smoother ride.
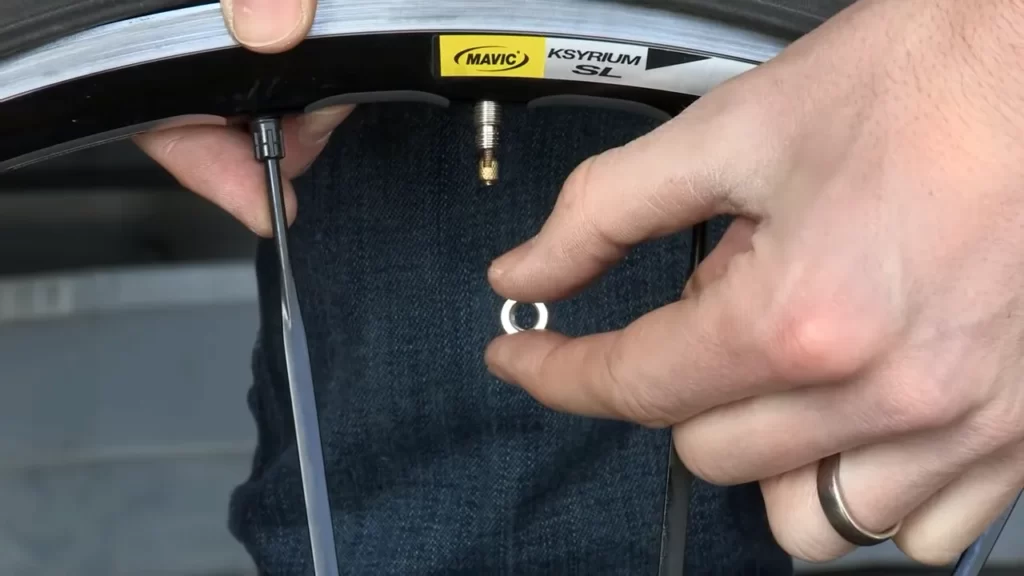
Insert the Valve into the Rim
Once you have applied talcum powder to the inner tube and ensured it is in good condition, the final step is to insert the valve into the rim. Properly inserting the valve prevents air leakage and ensures a secure fit. To insert the valve into the rim:
- Align the valve hole on the rim with the valve stem.
- Push the valve stem into the rim until it is fully seated.
- Make sure the valve is centered and straight for optimal performance.
- If necessary, tighten the valve nut to secure it in place, being careful not to overtighten.
Inserting the valve into the rim correctly is crucial for maintaining proper tire pressure and ensuring a smooth ride while minimizing the risk of air leakage.
By following these steps to prepare the new inner tube, you are setting the foundation for a successful installation and maximizing the performance and longevity of your bike’s inner tube. Now that you have prepared the new inner tube, it’s time to move on to the next steps of installing it on your bike.
Installing The New Inner Tube
Installing a new inner tube on your bike is a straightforward process that can make a huge difference in the overall performance of your ride. Whether you’re an experienced cyclist or just starting out, knowing how to properly install a new inner tube is essential for keeping your tires in optimal condition.
Place the New Inner Tube Inside the Tire
Before you install the new inner tube, make sure to examine your tire for any debris or sharp objects that may cause the new tube to puncture. Once you’ve checked your tire, it’s time to insert the new inner tube. Here’s how:
- Start by inflating the new inner tube slightly to give it some shape. This will make it easier to fit inside the tire.
- Place the valve of the inner tube through the valve hole in the rim and align it with the corresponding hole in the tire.
- Gradually work your way around the tire, tucking the inner tube inside. Make sure to press the tube against the rim, ensuring it sits smoothly and evenly.
- As you go, be mindful of any twists or folds in the tube, as these can cause pinch flats.
- Once the inner tube is completely inserted, move on to the next step: tucking the valve into the rim.
Tuck the Valve into the Rim
Positioning the valve correctly is an important step in preventing air leaks and maintaining proper tire pressure. Follow these steps to ensure the valve is securely tucked into the rim:
- Make sure the valve is in an upright position and isn’t bent or twisted.
- With one hand, hold the valve steady while using your other hand to gently push the tire sidewall towards the rim, guiding the valve into the rim hole.
- Continue pushing until the valve is fully tucked inside the rim. Be careful not to pinch or damage the inner tube while doing this.
- Once the valve is secure, you can move on to the final step: mounting the tire back onto the rim.
Carefully Mount the Tire Back onto the Rim
The final step in installing your new inner tube is to mount the tire back onto the rim, ensuring a tight and secure fit. Follow these steps:
- Starting opposite the valve, use your thumbs to push the tire bead over the rim, working your way around the entire circumference of the tire.
- Once you’ve mounted one side of the tire, it’s time to move on to the other side.
- With your thumbs, push the remaining portion of the tire bead over the rim, again working your way around the tire until it is fully mounted.
- Once the tire is securely mounted, use your hands to check that it is evenly seated on the rim and there are no bulges or twists.
- Finally, inflate the tire to the recommended pressure and give it a quick spin to ensure everything is in place and functioning properly.
By following these steps, you can confidently install a new inner tube on your bike without any hassle. Remember to always check your tire for debris and take your time to ensure proper installation. With a well-maintained inner tube, you’ll be ready to hit the road or trail with confidence!
Inflating The Tire
Inflating the tire is an important step when installing a bike inner tube. It ensures that the tire is properly aligned on the rim and provides a smooth and comfortable ride. In this section, we will guide you through the process of inflating the tire, step by step.
Partially Inflate the Tire
Before fully inflating the tire, it is recommended to partially inflate it first. This helps to prevent the inner tube from getting pinched or twisted during the inflation process.
To partially inflate the tire, follow these steps:
- Insert the valve of the inner tube through the valve hole in the rim.
- Make sure the tire bead is sitting evenly on both sides of the rim.
- Attach the pump to the valve and start inflating the tire.
- Stop inflating when the tire starts to take shape and holds its form. At this point, the tire should be firm but not fully inflated.
Check the Alignment of the Tire on the Rim
After partially inflating the tire, it is important to check the alignment of the tire on the rim. This ensures that the tire is centered and properly seated.
To check the alignment, follow these steps:
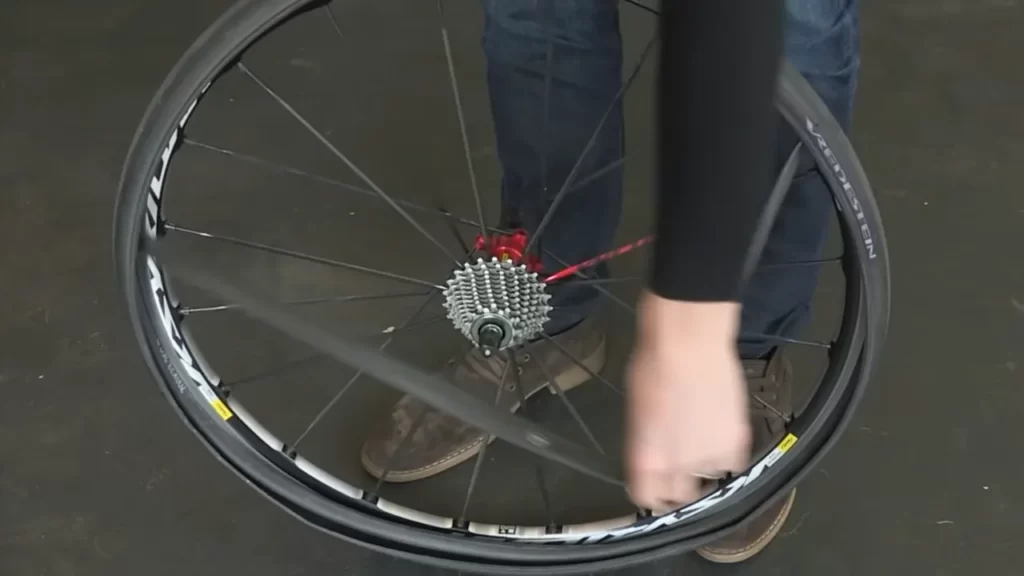
- Spin the wheel and observe if the tire wobbles or spins unevenly.
- If you notice any wobbling or uneven spinning, deflate the tire slightly and adjust the positioning of the tire on the rim.
- Repeat this process until the tire spins smoothly and evenly.
Fully Inflate the Tire
Once the alignment of the tire on the rim is correct, it is time to fully inflate the tire to the recommended pressure. This provides optimal performance and prevents flat tires.
To fully inflate the tire, follow these steps:
- Attach the pump to the valve.
- Pump air into the tire until it reaches the recommended pressure, which is usually indicated on the side of the tire or in the bike’s user manual.
- Remove the pump from the valve and quickly close the valve to prevent air from escaping.
- Give the tire a final check to ensure it feels firm and properly inflated.
Congratulations! You have successfully inflated your bike tire. It is now ready for the road.
Checking For Leaks
Once you have successfully installed a new inner tube on your bike tire, it is crucial to check for any leaks before hitting the road. Riding with a leaking inner tube can lead to unexpected flat tires, which can ruin your cycling experience. In this section, we will guide you through the process of checking for leaks, ensuring that your inner tube is secure and ready for a smooth ride.
Submerge the Inflated Tire in Water
Submerging the inflated tire in water is an effective way to identify any leaks in the inner tube. Here’s what you need to do:
- Inflate the tire: Before submerging the tire, ensure that it is properly inflated. This helps to increase the visibility of any escaping air bubbles.
- Prepare a bucket of water: Fill a bucket or basin with enough water to completely submerge the tire when placed inside.
- Dip the tire: Carefully lower the inflated tire into the water, ensuring that it is fully submerged. Hold it underwater for a few seconds.
Look for Bubbles
Once the tire is submerged, it’s time to inspect it for any bubbles or air escaping from the tube. Keep an eye out for the following:
- Bubbles: Check the entire circumference of the tire and pay close attention to spots where bubbles appear. They indicate the presence of a leak.
- Air escaping: Listen for any hissing sounds or look for small streams of bubbles rising to the water surface. These are signs of potential leaks.
- Valve area: Pay extra attention to the valve area, as it is a common spot for leaks to occur. Inspect the valve stem and its connection to the tube for any signs of escaping air.
Patch any Leaks with a Patch Kit
If you discover any leaks during the inspection process, don’t panic! You can easily patch them up using a patch kit. Follow these steps:
- Identify the leaks: Use a dry cloth to dry the area around the leak. Feel for any air escaping or listen for a hissing sound.
- Prepare the patch: Cut a round or oval patch from the patch kit, ensuring it is slightly larger than the damaged area.
- Apply the patch: Peel off the backing from the patch to expose the adhesive side. Carefully place the patch over the leak, pressing down firmly and ensuring it is securely attached.
- Smooth out the patch: Use your fingers or a roller to flatten the patch and remove any air bubbles trapped beneath it.
- Allow the patch to set: Leave the patched area undisturbed for the recommended amount of time specified on the patch kit packaging. This allows the adhesive to bond properly.
By following these steps, you can effectively check for leaks in your bike inner tube and successfully patch any identified leaks. Remember, a well-maintained inner tube ensures a smooth and enjoyable biking experience.
Tips For Easier Installation
When it comes to installing a bike inner tube, a few simple tips and tricks can make the process much easier and less frustrating. In this section, we’ll cover three key techniques that will help you install your bike inner tube with ease. By using tire levers, applying talcum powder, and inflating the tube slightly, you’ll be back on your bike in no time.
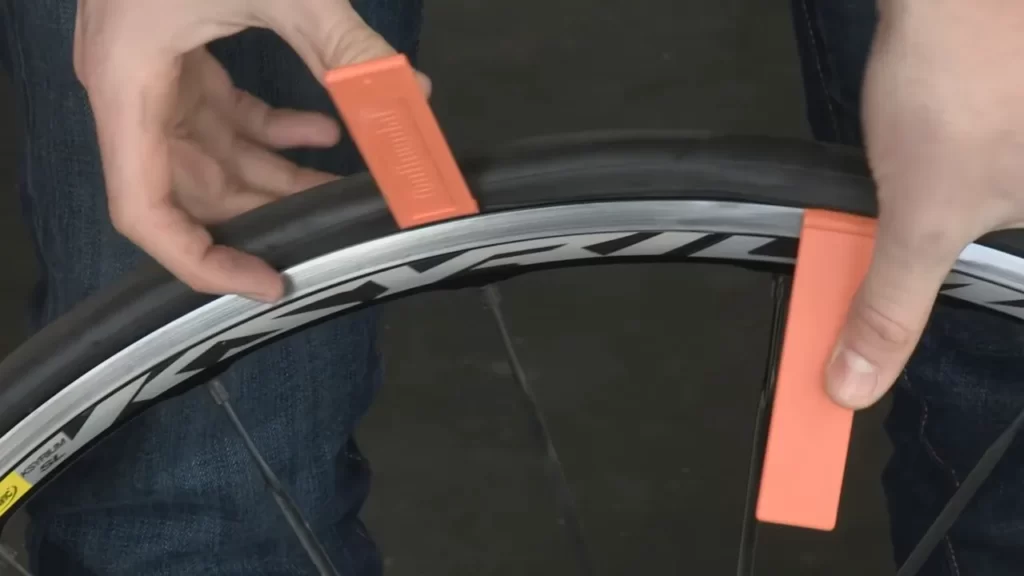
Use Tire Levers
One of the most helpful tools for installing a bike inner tube is a set of tire levers. These small, curved tools are designed to fit under the edge of the tire and help you remove it from the wheel rim. Start by deflating the tire completely, then insert a tire lever between the tire and the rim. Use the lever to pry the tire away from the rim, working your way around the wheel until one side of the tire is completely off. Repeat the process on the other side, and you’ll be able to easily remove the tire and access the inner tube.
Apply Talcum Powder
Another handy trick is to apply talcum powder to the inner tube before installing it. Talcum powder helps to reduce friction between the tube and the tire, making it easier to slide the tube into place. Start by lightly coating the tube with a thin layer of talcum powder, focusing on the areas that will come into contact with the tire. Then, carefully insert the tube into the tire, making sure it is evenly distributed and not twisted or folded. The talcum powder will help the tube slide easily into position, ensuring a smooth installation process.
Inflate the Tube Slightly
Prior to fully installing the tire, it’s a good idea to slightly inflate the tube. This will help give the tube shape and make it easier to position properly inside the tire. Use a hand pump or a bike pump to add a small amount of air to the tube, just enough to give it some form but not fully inflate it. This slight inflation will also help prevent the tube from getting caught or pinched between the tire and the rim, reducing the risk of a puncture during installation.
By following these three tips – using tire levers, applying talcum powder, and inflating the tube slightly – you’ll find that installing a bike inner tube becomes a much simpler task. These techniques not only make the process easier but also help to protect the tube from damage, ensuring a longer lifespan for your bike’s inner tube. Give these tips a try and get ready to enjoy smooth and hassle-free bike rides!
Common Mistakes To Avoid
When it comes to installing a bike inner tube, there are a few common mistakes that many people make. By avoiding these mistakes, you can ensure that the installation process goes smoothly and that your bike is ready to hit the road in no time. In this section, we will discuss some of the most common mistakes to avoid when installing a bike inner tube.
1. Pinching the Tube
One of the most common mistakes when installing a bike inner tube is pinching it. This can happen if you don’t take the necessary precautions when placing the tube inside the tire. To avoid pinching the tube, follow these steps:
- Deflate the tire completely before removing it from the rim.
- Inspect the rim tape to ensure it’s in good condition and properly aligned.
- Place the deflated tube inside the tire, making sure it is evenly distributed.
- Starting from the valve, carefully tuck the tube into the tire, ensuring that it doesn’t get pinched between the tire bead and the rim.
By taking your time and being careful, you can prevent pinching the tube, which can lead to punctures or blowouts during your ride.
2. Over-Inflating the Tire
Over-inflating the tire is another common mistake that can cause problems when installing a bike inner tube. When the tire is over-inflated, it becomes more prone to damage from road hazards, and it can also put excess strain on the tube, increasing the risk of punctures. To avoid over-inflating the tire, follow these guidelines:
- Refer to the tire’s sidewall for the recommended pressure range.
- Use a reliable pressure gauge to ensure you are inflating the tire within the recommended range.
- If unsure, start at the lower end of the recommended range and make adjustments accordingly based on your riding preferences and conditions.
- Regularly check the tire pressure to maintain optimal inflation levels.
By properly inflating the tire, you can ensure a smooth and comfortable ride while minimizing the risk of tube damage.
3. Neglecting to Check for Debris
When installing a bike inner tube, it’s essential to check the tire and rim for any debris that could cause punctures or damage to the tube. Failing to do so can result in unnecessary flats and compromised riding safety. Follow these steps to check for debris:
|
 |
By taking a few moments to inspect the tire and rim for debris, you can prevent unnecessary flats and ensure a smooth and uninterrupted ride.
By avoiding these common mistakes when installing a bike inner tube, you can save time, effort, and prevent potential damage or accidents while riding. Remember to always take your time, be careful, and follow the recommended guidelines for a successful and hassle-free installation.
Frequently Asked Questions
How Do You Attach An Inner Tube To A Bike?
To attach an inner tube to a bike: deflate the old tube, remove the tire and tube, check for any damage, place the new tube inside the tire, reinsert the tire onto the rim, inflate the tube slowly and ensure it is seated properly, and finally, check the tire pressure.
How Do You Put A Tube Back In A Bike Tire?
To put a tube back in a bike tire, follow these steps: 1. Remove the wheel from the bike. 2. Deflate the tire and remove the tire bead from the rim. 3. Insert the tube into the tire, making sure it matches the size and valve type.
4. Push the valve through the rim hole and seat the tube properly. 5. Reinstall the tire bead, inflate the tire, and reattach the wheel to the bike.
How Do You Install A Bike Tube Without Pinching It?
To install a bike tube without pinching it, follow these steps: 1. Deflate the tube completely. 2. Insert one side of the tube inside the tire, tucking it in neatly. 3. Carefully place the other side of the tube into the tire, avoiding any twists or folds.
4. Gradually inflate the tube, checking for pinches or wrinkles. 5. Make sure the tube is evenly positioned before fully inflating the tire.
How Do You Pump A Presta Valve?
To pump a Presta valve, first unscrew the valve cap. Next, press the pump head firmly onto the valve, ensuring it’s secure. Then, start pumping air into the valve, using a consistent and controlled motion. Finally, remove the pump head and screw the valve cap back on tightly.
Conclusion
To sum up, installing a bike inner tube is an essential skill every cyclist should have. By following the step-by-step guide provided in this blog post, you can easily replace a damaged inner tube and get back on the road in no time.
Remember to inflate the new inner tube properly and double-check for any leaks. Keep your bike in optimal condition by regularly inspecting and maintaining its components. With these tips, you can ensure a smooth and enjoyable riding experience. Happy cycling!