
To install a Bemis toilet seat, start by removing the old seat and cleaning the area. Then, position the new seat and secure it by tightening the nuts underneath.
Introducing a new toilet seat can be a simple and effective way to upgrade your bathroom. Whether you’re replacing an old seat or installing a new one, it’s important to follow the right steps to ensure a secure and comfortable fit.
In this guide, we’ll walk you through the process of installing a Bemis toilet seat. By following these steps, you’ll be able to enjoy a stylish and functional toilet seat in no time. So, let’s dive in and learn how to install a Bemis toilet seat efficiently.
Gathering The Required Tools And Materials
Before you begin the installation process, it’s important to gather all the necessary tools and materials. Having everything ready will help ensure a smooth and efficient installation of your Bemis toilet seat. Here’s a list of the tools needed and materials required:
List of Tools Needed
- Adjustable wrench
- Screwdriver (flathead or Phillips, depending on the seat type)
- Measuring tape
- Marker or pencil
- Level
- Drill (if required for specific seat model)
- Plastic bag or container for small parts
These tools will provide you with the necessary versatility and precision to complete the installation process. Make sure to have them easily accessible before you begin.
List of Materials Needed
- Bemis toilet seat (ensure it is compatible with your toilet model)
- Hinges and hardware (usually included with the seat)
- Plastic anchors (if needed for installation)
- Washers and nuts (if not included with the seat)
- Plumber’s putty (for some seat models)
These materials are essential for securing the toilet seat and ensuring a snug and stable fit. Check your Bemis toilet seat packaging or manual to ensure you have all the necessary items within reach.
By gathering all the tools and materials beforehand, you’ll be prepared to seamlessly install your Bemis toilet seat without any interruptions. So, take a moment to double-check that you have everything you need, and let’s move on to the next step of the installation process.
Removing The Old Toilet Seat
Before installing a new Bemis toilet seat, it’s important to properly remove the old one. This step-by-step guide will walk you through the process, ensuring a smooth transition to your new seat. Keep in mind that these instructions are specifically tailored for Bemis toilet seats, so the steps might vary if you have a different brand.
Step-by-step guide to removing the old toilet seat
Follow these simple instructions to safely remove your old toilet seat:
- Start by locating the hinges that attach the seat to the toilet bowl. These are usually located at the back of the seat.
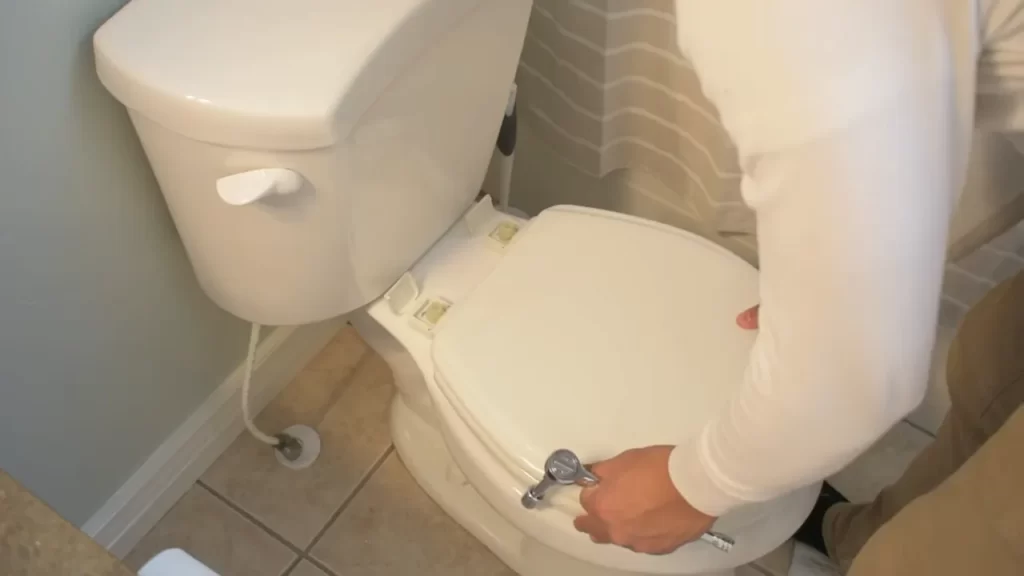
- Using a screwdriver, carefully unscrew the nuts or screws on the hinges. Hold onto the top of the screw to prevent it from spinning and turning the nut beneath the bowl.
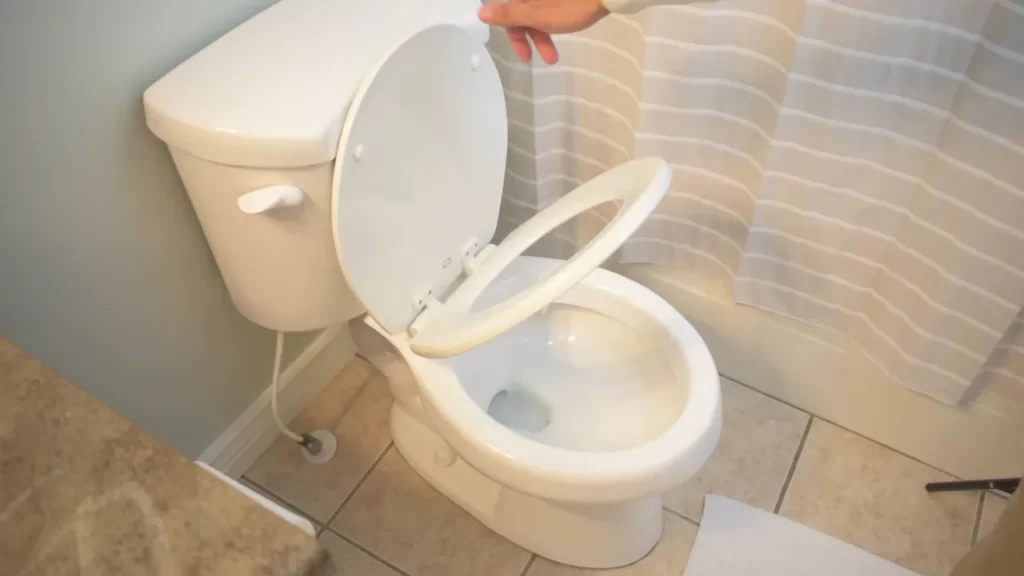
- Once the nuts or screws are fully loosened, lift the old seat and cover straight up to detach it from the hinges.
- Inspect the area for any remaining adhesive or debris. Clean it thoroughly using a mild cleaner and a soft cloth.
Tips for dealing with stubborn seat attachments
Removing an old toilet seat can sometimes be challenging, especially if the attachments are stubborn. If you encounter any difficulties, try these tips:
- Applying lubricant: If the nuts or screws are rusted or stuck, applying a lubricant such as WD-40 can help loosen them.
- Using pliers: If the screws are stripped or damaged, you can grip them with pliers to gain more leverage.
- Heat application: Applying gentle heat to the attachments using a hairdryer can sometimes make them easier to remove.
- Seeking professional help: If all else fails, it’s always a good idea to consult a professional plumber who can safely remove the old seat for you.
By following these steps and tips, you’ll be able to remove your old Bemis toilet seat efficiently, making way for your new one. Stay tuned for our next blog post, where we’ll guide you through the installation process of your brand new Bemis toilet seat!
Familiarizing Yourself With The Bemis Toilet Seat
Before getting into the installation process, it’s important to familiarize yourself with the Bemis toilet seat and its features. Understanding the components and benefits of choosing a Bemis seat will make the installation much smoother. Let’s dive into it!
Exploring the features and components of the Bemis toilet seat
The Bemis toilet seat is designed with utmost attention to detail, ensuring both functionality and comfort. Let’s take a closer look at its features and components:
1. High-Quality Material:
The Bemis toilet seat is made from premium materials like durable molded wood or sturdy plastic. This ensures longevity and stability, giving you peace of mind knowing your toilet seat will last for years to come.
2. Easy Installation:
With user-friendly instructions and the necessary hardware included, installing a Bemis toilet seat is a breeze. No need to hire a professional; you can easily do it yourself without any hassle.
3. Adjustable Hinges:
To cater to different toilet designs and sizes, Bemis toilet seats come with adjustable hinges. These hinges ensure a secure fit, preventing any wobbling or slipping that may cause discomfort during use.
4. Slow-Close Technology:
Gone are the days of accidentally slamming the toilet seat down. Bemis seats are equipped with slow-close technology, allowing for a gentle and quiet closing motion. Say goodbye to loud noises and potential damage to your toilet bowl.
5. Easy Cleaning:
Bemis toilet seats are designed with hygiene in mind. They come with a durable and easy-to-clean surface, making maintenance a breeze. Regular cleaning is as simple as wiping the seat with a damp cloth, keeping it sparkling clean.
Now that we’ve explored the various features and components of the Bemis toilet seat, let’s move on to understanding the benefits of choosing a Bemis seat.
Understanding the benefits of choosing a Bemis seat
When it comes to toilet seats, Bemis stands out from the competition. Here are some notable benefits of choosing a Bemis seat:
- Durability: The high-quality materials used in Bemis toilet seats ensure long-lasting performance, providing you with value for your money.
- Comfort: With their ergonomic design and comfortable seating surface, Bemis seats offer maximum comfort during use.
- Hygiene: The easy-to-clean surface of Bemis toilet seats makes it effortless to maintain a clean and sanitary bathroom environment.
- Quiet-Close Mechanism: The slow-close technology of Bemis seats prevents loud slamming noises and potential damage to your toilet bowl, ultimately enhancing the overall bathroom experience.
- Universal Fit: Bemis toilet seats are designed to fit most standard toilet bowls, ensuring compatibility and easy installation.
With all these benefits, it’s no wonder why Bemis is a popular choice among homeowners. Now that you are familiar with the features and benefits of the Bemis toilet seat, you’re ready to proceed with the installation process. Let’s get started!
Measuring And Preparing The Toilet Bowl
Properly measuring the toilet bowl for the new seat
Before installing a Bemis toilet seat, it’s important to measure the toilet bowl to ensure a proper fit. Here’s a step-by-step guide on how to measure the toilet bowl:
- Ensure the toilet bowl is clean and free of any debris.
- Measure the width of the toilet bowl from one side of the inner rim to the other.
- Next, measure the length of the toilet bowl from the back of the tank to the front of the bowl.
- Take note of these measurements before purchasing a Bemis toilet seat to ensure it will fit your toilet perfectly.
Properly measuring the toilet bowl is essential to prevent any installation issues and ensure a snug and stable fit for your new Bemis toilet seat.
Cleaning and preparing the toilet bowl before installation
Before installing a Bemis toilet seat, it’s essential to clean and prepare the toilet bowl properly. Follow these steps to ensure a clean and hygienic installation:
- Start by thoroughly cleaning the inside of the toilet bowl using a toilet brush and a mild cleaning solution. Make sure to scrub the entire surface, including under the rim and around the waterline.
- Rinse the toilet bowl with clean water to remove any residue from the cleaning solution.
- If there are any stains or stubborn residue, consider using a toilet bowl cleaner specifically designed for removing tough stains. Follow the instructions on the cleaner and rinse thoroughly afterwards.
- Dry the toilet bowl using a clean cloth or paper towels before proceeding with the installation.
Properly cleaning and preparing the toilet bowl before installing the Bemis toilet seat is crucial for maintaining hygiene and ensuring optimal installation results.
Attaching The Toilet Seat To The Bowl
Step-by-step guide to installing the Bemis toilet seat
Attaching the toilet seat to the bowl is a crucial step in your toilet installation process. By securely attaching the seat and hinges, you can ensure both stability and comfort. To assist you in this task, we have prepared a step-by-step guide on how to install the Bemis toilet seat.
- Start by gathering all the necessary tools and materials. You will need a wrench, a screwdriver, and of course, the Bemis toilet seat itself.
- Clean the area around the mounting holes on the toilet bowl. This will ensure a clean and secure attachment for the seat.
- Position the toilet seat on top of the bowl, aligning it with the mounting holes. Take note of the alignment markers on the seat, which serve as guidance for proper positioning.
- Insert the bolts provided with the Bemis toilet seat through the mounting holes, keeping them in an upright position. These bolts will serve as the foundation for attaching the seat and hinges.
- Gently place the hinges onto the bolts, ensuring that they are aligned with the mounting holes on the seat itself.
- Use your wrench to secure the bolts tightly, ensuring the seat and hinges are securely attached to the bowl. Be cautious not to overtighten the bolts, as it may cause damage to the toilet.
- Double-check the stability of the seat by gently rocking it back and forth. If there is any wobbling or instability, adjust the bolts accordingly until the seat is firmly in place.
- Finally, test the seat by sitting on it and applying some weight. Ensure it remains stable and comfortable.
Tips for securely attaching the seat and hinges
To ensure the longevity and stability of your Bemis toilet seat, here are some useful tips for securely attaching the seat and hinges:
- Always follow the manufacturer’s instructions provided with the product. Each toilet seat may have specific installation guidelines.
- Inspect the mounting holes on the bowl for any damage or debris. Clean them thoroughly before installation.
- Apply anti-slip washers or rubber pads between the seat and the toilet bowl to enhance stability.
- If necessary, use an adjustable wrench to ensure proper tightening of the bolts while avoiding over-tightening that may cause damage.
- Regularly check and tighten the bolts to prevent any loosening over time. This will maintain the stability of the seat.
By following these step-by-step instructions and implementing these tips, you can confidently attach your Bemis toilet seat to the bowl, ensuring a secure and comfortable experience. Now, you can enjoy your new toilet seat without any worries about its stability.
Adjusting And Aligning The Seat
Proper adjustment and alignment are essential when installing a Bemis toilet seat to ensure comfort, functionality, and longevity. This section will guide you through the process of ensuring the seat is perfectly aligned with the toilet bowl and adjusted for optimal comfort.
Ensuring proper alignment of the seat on the toilet bowl
Before installing your Bemis toilet seat, it’s important to ensure that the seat is properly aligned with the toilet bowl. An improperly aligned seat can lead to discomfort and potential damage. Follow these steps to ensure proper alignment:
- Step 1: Start by cleaning the toilet bowl and the seat mounting area. Remove any dirt or debris that may hinder the alignment process.
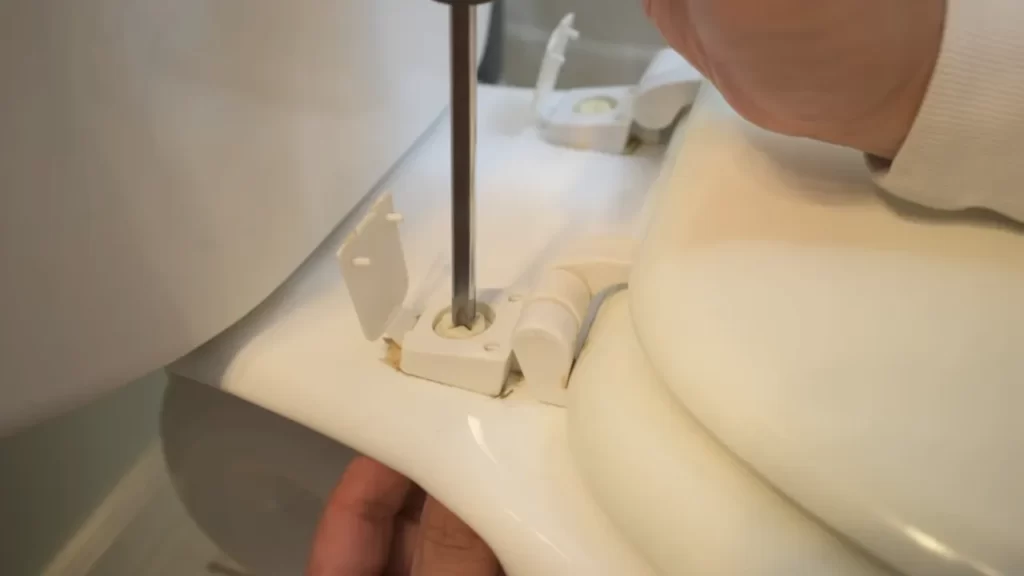
- Step 2: Loosen the seat mounting screws located on the underside of the seat using a screwdriver or the provided tool. These screws are typically found at the back of the seat.
- Step 3: Position the seat on the toilet bowl, aligning it with the mounting holes. Ensure that the seat sits snugly and evenly on the bowl, without any wobbling.
- Step 4: Once aligned, tighten the seat mounting screws gradually, alternating between them. Be careful not to over-tighten, as this can cause damage to the seat or toilet bowl.
- Step 5: Test the seat by gently moving it back and forth to ensure it is secure and stable. If any adjustments are needed, loosen the screws and realign the seat before tightening again.
Adjusting the seat for optimal comfort and functionality
After ensuring proper alignment, it’s time to adjust the Bemis toilet seat for optimal comfort and functionality. The following steps will help you customize the seat to meet your specific needs:
- Step 1: Determine the desired position and angle of the seat. Sit on the toilet and adjust the seat accordingly to ensure maximum comfort.
- Step 2: Locate the hinge covers on the sides of the seat. These covers can usually be removed by applying gentle pressure or using a small tool like a flathead screwdriver.
- Step 3: Once the hinge covers are removed, you will find adjustment screws or dials underneath. These allow you to change the seat position forward, backward, or side to side.
- Step 4: Use the adjustment screws or dials to customize the seat position. Experiment with different angles and positions until you find the one that provides optimal comfort.
- Step 5: Once you are satisfied with the seat position, replace the hinge covers by aligning them with the hinges and applying gentle pressure until they snap into place.
By following these steps, you can ensure that your Bemis toilet seat is properly adjusted and aligned for optimal comfort and functionality. Take the time to make these adjustments to enhance your overall bathroom experience.
Cleaning The Bemis Toilet Seat
Cleaning your Bemis toilet seat regularly is important to maintain its hygiene and prolong its lifespan. By following the recommended cleaning methods and using the right products, you can effectively remove any stains or residue that may accumulate over time. In this section, we will provide you with some easy-to-follow tips for cleaning your Bemis toilet seat.
Recommended cleaning methods and products
To keep your Bemis toilet seat clean and free from germs, it’s important to use the appropriate cleaning methods and products. Here are some recommended options:
- Warm soapy water: Mix a small amount of mild liquid soap with warm water. Gently scrub the toilet seat using a soft cloth or sponge. Rinse thoroughly and wipe dry with a clean towel.
- Antibacterial wipes: Use pre-moistened antibacterial wipes specifically designed for toilet seat cleaning. These wipes are convenient and effective at eliminating germs and dirt.
- Vinegar solution: Create a solution by combining equal parts white vinegar and water. Spray the mixture onto the toilet seat and let it sit for a few minutes. Scrub gently with a soft cloth or sponge, then rinse and dry.
- Disinfectant sprays: Look for disinfectant sprays that are safe for use on plastic surfaces. Spray the disinfectant onto the toilet seat, let it sit for the recommended time, then wipe it clean with a cloth or paper towel.
Tips for removing stubborn stains or residue
If you encounter stubborn stains or residue on your Bemis toilet seat, don’t worry. There are a few tips and tricks you can use to effectively remove them:
- Baking soda paste: Create a paste by mixing baking soda with water. Apply the paste to the stained area and let it sit for at least 15 minutes. Scrub gently with a sponge or brush, then rinse thoroughly and dry.
- Lemon juice: Squeeze fresh lemon juice onto the stained area and let it sit for a few minutes. Scrub gently with a cloth or sponge, then rinse and dry.
- Hydrogen peroxide: Dilute hydrogen peroxide with water in a 1:1 ratio. Apply the mixture to the stain, let it sit for a few minutes, then scrub gently and rinse thoroughly.
- Toothpaste: Apply a small amount of non-gel toothpaste to the stained area. Gently scrub with a soft cloth or sponge, then rinse and dry.
Remember to always read the manufacturer’s instructions for your specific Bemis toilet seat model, as some cleaning methods or products may not be suitable. By following these tips and regularly cleaning your Bemis toilet seat, you can ensure its cleanliness and longevity.
Maintaining The Seat Hinges And Hardware
Lubricating the hinges for smooth operation
Maintaining the hinges of your Bemis toilet seat is essential for ensuring smooth and quiet operation. Over time, friction and wear can cause the hinges to become stiff and noisy. However, you can easily fix this issue by regularly lubricating the hinges.
To lubricate the hinges, follow these simple steps:
- Clean the hinges thoroughly using a mild soap solution and a soft cloth. This will remove any dirt or residue that may hinder the lubrication process.
- Apply a silicone-based lubricant to the hinges. Avoid using petroleum-based products as they can damage the plastic components.
- Use a small brush or a cloth to evenly distribute the lubricant on the hinges, making sure to reach all the moving parts.
- Open and close the toilet seat several times to ensure the lubricant is evenly spread and to help it penetrate into the hinge mechanism.
By lubricating the hinges regularly, you will not only prolong the lifespan of your toilet seat but also enhance the overall user experience.
Inspecting and tightening the seat hardware periodically
Another crucial aspect of maintaining your Bemis toilet seat is inspecting and tightening the seat hardware on a regular basis. Loose seat hardware can lead to wobbling, instability, and discomfort. To ensure the seat remains secure, follow these steps:
- Inspect the seat hardware for any signs of looseness or damage, such as loose screws or bolts.
- If you find any loose hardware, use a screwdriver or a wrench to tighten it. Ensure not to overtighten, as it may cause damage to the seat or the toilet bowl.
- Check the position of the seat to ensure it is properly aligned with the toilet bowl. Adjust the seat if necessary.
Regularly inspecting and tightening the seat hardware will help maintain stability and prevent any potential accidents or discomfort associated with a loose toilet seat.
Troubleshooting Common Issues
Installing a Bemis toilet seat may seem like a simple task, but like any home improvement project, it can come with its fair share of challenges. In this section, we will address some common issues that you may encounter during the installation process. By following these troubleshooting tips, you’ll be able to solve problems such as seat wobbling or loose hinges, ensuring that your Bemis toilet seat is securely in place for optimal comfort and functionality.
Solutions for Common Problems like Seat Wobbling or Loose Hinges
One of the most common issues you may face when installing a Bemis toilet seat is seat wobbling or loose hinges. This can be frustrating, as it can compromise the stability and comfort of the seat. Fortunately, there are simple solutions to tackle these problems:
1. Tightening Loose Hinges:
If you notice that the hinges of your Bemis toilet seat are loose, follow these steps to tighten them:
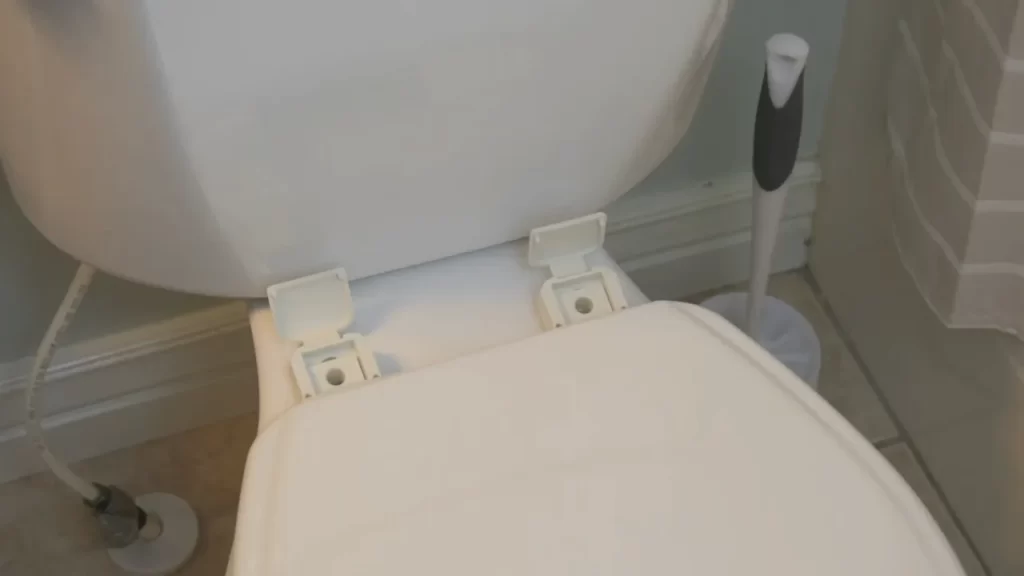
- Locate the hinge covers on the back of the seat.
- Use a flathead screwdriver to gently pry open the hinge covers.
- Once the hinge covers are removed, you will see the hinges and mounting bolts.
- Using a wrench or pliers, tighten the mounting bolts by turning them clockwise.
- Make sure not to overtighten the bolts, as this may cause damage to the seat or toilet.
- Replace the hinge covers and ensure they are securely in place.
- Test the seat for stability by sitting on it and gently rocking back and forth.
Troubleshooting Tips for Other Potential Issues
In addition to seat wobbling and loose hinges, there may be other potential issues you encounter while installing a Bemis toilet seat. Here are some troubleshooting tips to address these problems:
1. Proper Alignment:
Ensure that the toilet seat is properly aligned with the toilet bowl before tightening the hinges. If it is misaligned, reposition the seat to achieve a proper fit.
2. Damaged or Missing Parts:
Inspect all components of the Bemis toilet seat kit to ensure that there are no damaged or missing parts. If any parts are missing or damaged, contact Bemis customer support for assistance.
3. Tightening Hinge Bolts:
If the seat continues to wobble even after tightening the hinge bolts, remove the seat and reinstall it by ensuring the bolts are securely tightened.
By following these troubleshooting tips, you’ll be able to overcome common issues that may arise during the installation of your Bemis toilet seat. Remember, a properly installed seat not only enhances your bathroom experience but also ensures long-lasting durability and comfort.
Choosing The Right Bemis Toilet Seat Model
Factors to consider when selecting a Bemis toilet seat
When it comes to choosing the right Bemis toilet seat model, there are several factors to consider. Having a toilet seat that meets your needs and preferences is essential for a comfortable and functional bathroom experience. Here are some factors to take into account before making your decision:
- Bowl shape and size: Bemis offers a range of toilet seats to fit different bowl shapes and sizes, including round-front and elongated options. Measure your toilet bowl accurately to ensure a proper fit.
- Material: Bemis toilet seats come in various materials, such as plastic, wood, and cushioned options. Plastic seats are affordable and easy to clean, while wood seats offer a classic look. Cushioned seats provide extra comfort.
- Hinge type: Consider the type of hinge you prefer. Bemis offers different hinge options, including standard hinges and slow-close hinges that prevent slamming.
- Added features: Some Bemis toilet seats come with additional features, such as built-in night lights, antimicrobial additives, or adjustable settings. Determine which features are important to you.
Recommended Bemis models based on specific needs and preferences
Now that you know the key factors to consider, let’s explore some recommended Bemis toilet seat models based on specific needs and preferences:
Bemis Model X:
This model is perfect for those seeking a durable plastic seat with standard hinges. It fits most round-front toilets and comes in a variety of color options to match your bathroom decor.
Bemis Model Y:
If you’re looking for a luxurious wood seat with slow-close hinges, Model Y is the ideal choice. Its elegant design and comfortable seating make it a popular option among homeowners seeking a touch of sophistication.
Bemis Model Z:
For added comfort and convenience, Model Z offers a cushioned seat with antimicrobial properties. Its soft padding provides a cozy experience while protecting against bacteria and odors.
Remember, these are just a few examples from Bemis’s extensive range of toilet seat models. Take your time to explore and select the model that best suits your specific needs and preferences.
Frequently Asked Questions
Installing a Bemis toilet seat is a simple process that can be completed by following a few easy steps. However, like any installation, there might be questions or concerns that come up along the way. In this section, we address some of the common questions and provide additional tips for successful installation.
Common questions and answers related to installing a Bemis seat
Q: Is it necessary to remove the old seat before installing a Bemis seat?
A: Yes, it is recommended to remove the old seat before installing a new Bemis seat. This ensures a proper fit and prevents any excessive strain on the hinges or other parts.
Q: How do I remove the old seat?
A: To remove the old seat, locate the two bolts at the back of the toilet bowl that secure the seat. Using a screwdriver or pliers, carefully unscrew the nuts while holding the bolts in place. Once the nuts are removed, lift the old seat straight up to detach it from the bowl.
Q: Are Bemis seats compatible with all toilet models?
A: Bemis produces a wide range of seats to fit most standard toilet models. However, it is essential to check the specifications and measurements of both your toilet bowl and the Bemis seat you intend to purchase to ensure compatibility.
Q: How do I properly align the Bemis seat during installation?
A: To align the Bemis seat correctly, start by placing it on the toilet bowl, ensuring the hinges align with the mounting holes. Gently press the seat down to secure it in place. Then, tighten the bolts using a screwdriver or pliers, being careful not to overtighten and risk damaging the seat or the toilet.
Additional tips and advice for successful installation
While installing a Bemis toilet seat is a straightforward process, here are some additional tips to ensure a successful installation:
- Before purchasing a Bemis seat, measure the distance between the mounting holes at the back of your toilet bowl. This will help you select the correct seat size for a perfect fit.
- Ensure the toilet bowl is clean and dry before installing the Bemis seat. This allows for better adhesion and prevents any unwanted movement or slipping.
- Refer to the instruction manual provided with the Bemis seat for any specific installation guidelines or recommendations.
- If you encounter any difficulties during the installation process, it is advisable to contact the Bemis customer support team or consult a professional plumber for assistance.
- Regularly clean and maintain your Bemis seat according to the manufacturer’s instructions to ensure its longevity and optimal performance.
By following these tips and addressing any concerns during the installation process, you can enjoy a secure and comfortable Bemis toilet seat for years to come.
Frequently Asked Questions
How Do You Install A Bemis Toilet Seat Video?
To install a Bemis toilet seat, follow these steps: Prepare the area and gather necessary tools. Remove the old seat by unscrewing the bolts. Align the new seat with the holes on the toilet bowl. Insert and tighten the bolts.
Attach the seat cover if applicable. Test for stability.
How Do You Install A Bemis Click & Clean Toilet Seat?
To install a Bemis Click & Clean toilet seat, follow these steps: 1) Remove the old seat by unscrewing the bolts. 2) Position the new seat over the holes on the toilet bowl. 3) Insert the bolts into the holes and tighten them with the included wrench.
That’s it!
How Do You Install A Bemis Toilet Seat With Metal Hinges?
To install a Bemis toilet seat with metal hinges, first, lift your current seat and clean the toilet rim. Then, position the new seat over the mounting holes and align the hinges. Insert and tighten the provided screws into the holes using an adjustable wrench or screwdriver.
Finally, firmly close the seat to test its stability.
How To Install A Mayfair By Bemis Toilet Seat?
To install a Mayfair by Bemis toilet seat, follow these steps: 1. Remove the existing seat by unscrewing the nuts on the underside of the toilet bowl. 2. Align the new seat with the holes on the bowl and insert the bolts.
3. Screw the nuts onto the bolts and tighten them securely. 4. Test the seat for stability before use.
Conclusion
Installing a Bemis toilet seat is a simple and easy process that can be completed in just a few steps. By carefully following the instructions provided, you can ensure a secure and comfortable seat for your toilet. Remember to gather all the necessary tools and materials before starting, and take your time to avoid any mistakes.
With proper installation, you can enjoy a well-functioning and reliable toilet seat for years to come. Start the installation process today and experience the benefits of a Bemis toilet seat firsthand.