
To install a bathtub spout, first, remove the old spout by twisting it counterclockwise. Then, apply plumber’s tape to the thread of the new spout and screw it on clockwise until it is tight.
Understanding The Types Of Bathtub Spouts
When it comes to updating your bathroom or replacing a worn-out bathtub spout, it’s important to understand the different types of spouts available. Each type has its own unique features and installation requirements, so determining the type of spout you have is crucial. In this section, we will explore the various types of bathtub spouts and guide you through the process of identifying the right one for your needs.
Different types of bathtub spouts
There are several types of bathtub spouts, each designed to suit different plumbing configurations and personal preferences. Let’s take a look at the most common ones:
1. Wall-Mounted Diverter Spouts
This type of spout is installed on the wall above your bathtub and includes a diverter mechanism that allows water to be redirected to your showerhead. Wall-mounted diverter spouts often come in a variety of styles and finishes, making them a popular choice for those who want to add a touch of elegance to their bathroom.
2. Deck-Mounted Spouts
If your bathtub is equipped with a deck or ledge, a deck-mounted spout is the way to go. These spouts are installed directly on the deck and come in a range of styles and finishes to complement your bathroom décor. Deck-mounted spouts are ideal if you have a freestanding or clawfoot bathtub.
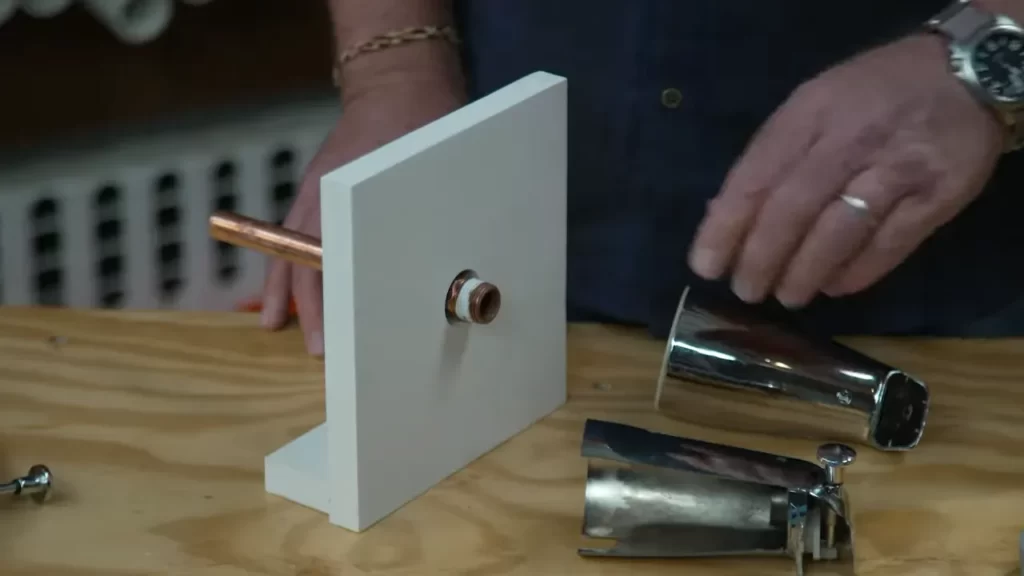
3. Slip-On Spouts
The easiest type of spout to install, slip-on spouts simply slide onto the existing plumbing pipe. They are secured in place using a set screw or a compression fitting. Slip-on spouts are a convenient option if you are looking for a quick and affordable way to update your bathtub without extensive plumbing work.
4. Threaded Spouts
Threaded spouts are another common type of spout that requires a threaded pipe connection for installation. These spouts screw onto the threaded pipe, ensuring a secure and leak-free connection. They are available in different lengths to accommodate various wall thicknesses and plumbing setups.
5. Handheld Shower Diverter Spouts
If you enjoy the convenience of a handheld showerhead, a handheld shower diverter spout is the perfect choice. These spouts feature a built-in diverter valve that allows you to switch between the spout and the handheld showerhead with ease. Handheld shower diverter spouts can be wall-mounted or deck-mounted, depending on your preference.
Determining the type of spout you have
To determine the type of spout you have, you can follow these simple steps:
- Inspect the area around your bathtub to determine if the spout is wall-mounted or deck-mounted.
- Examine the spout for any visible screws or set screws that indicate a slip-on or threaded installation method.
- If you have a diverter spout, look for a lever or knob that controls water flow between the spout and showerhead.
By considering these factors, you can easily identify the type of bathtub spout you have, which will help you choose the right replacement or proceed with installation if needed
Now that you are familiar with the different types of bathtub spouts and how to determine the type you have, you can confidently move forward with your bathtub spout installation. In the next section, we will guide you through the installation process, step by step.
Gathering The Necessary Tools And Materials
Before you begin installing a bathtub spout, it’s essential to gather all the necessary tools and materials. Having everything on hand will make the installation process smoother and more efficient. In this section, we’ll discuss the essential tools you’ll need and the required materials for the installation.
Essential tools for installing a bathtub spout
Here are the tools you’ll need to install a bathtub spout:
- Adjustable wrench
- Pipe cutter
- Teflon tape
- Plumber’s putty
- Screwdriver
- Plumbers’ grease
- Utility knife
- Tub spout puller (if necessary)
These tools are crucial for a successful installation and will help ensure that the bathtub spout is securely attached and functions properly.
Required materials for the installation process
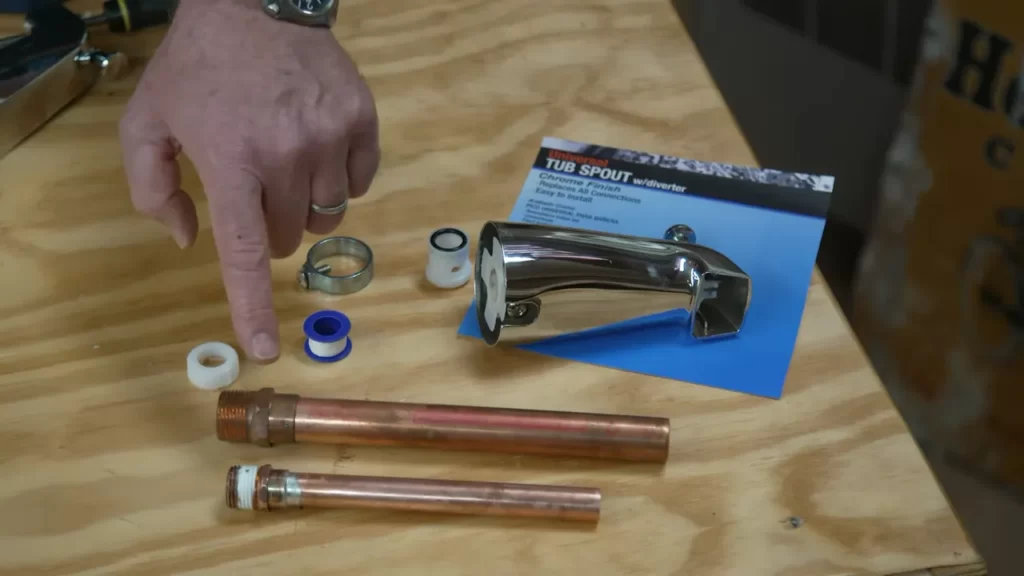
In addition to the tools mentioned above, you’ll need the following materials:
- New spout
- Plumber’s tape
- Plumber’s putty
- New pipe (if necessary)
- Sealant (silicone-based)
The new spout is the main component you’ll be installing, while plumber’s tape, plumber’s putty, and the silicone-based sealant help create a watertight seal. If the existing pipe is damaged or incompatible with the new spout, you’ll also need a new pipe to complete the installation.
By gathering all the necessary tools and materials beforehand, you’ll be well-prepared to install a bathtub spout. This preparation will ensure a smooth installation process and help avoid any unnecessary delays or complications.
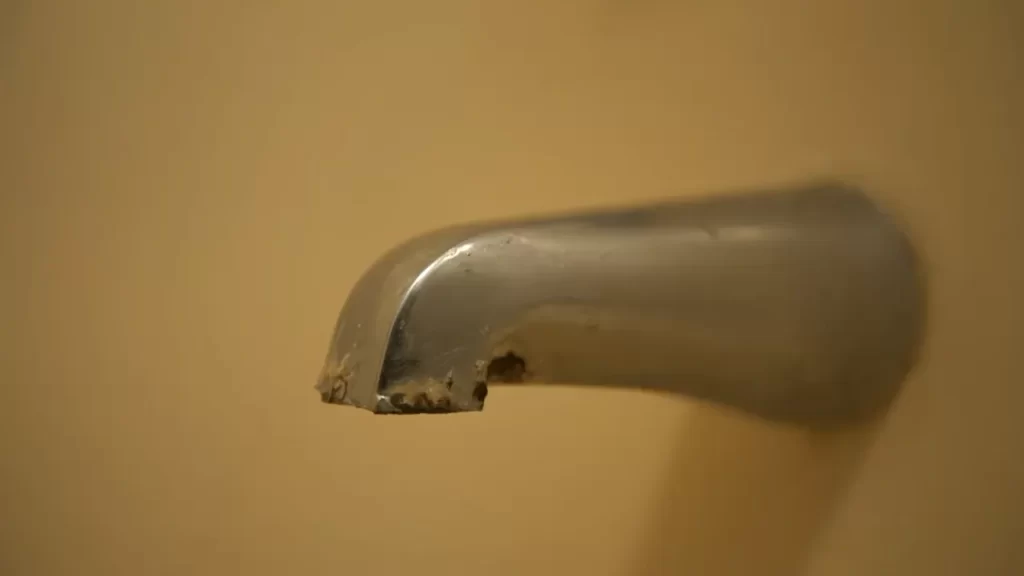
Removing The Old Bathtub Spout
Before you can install a new bathtub spout, you’ll need to remove the existing one. This process may seem daunting at first, but with the right steps and troubleshooting techniques, you’ll be able to complete the task with ease. In this section, we’ll walk you through the steps for removing the existing spout and highlight some common challenges you may encounter along the way.
Steps for removing the existing spout
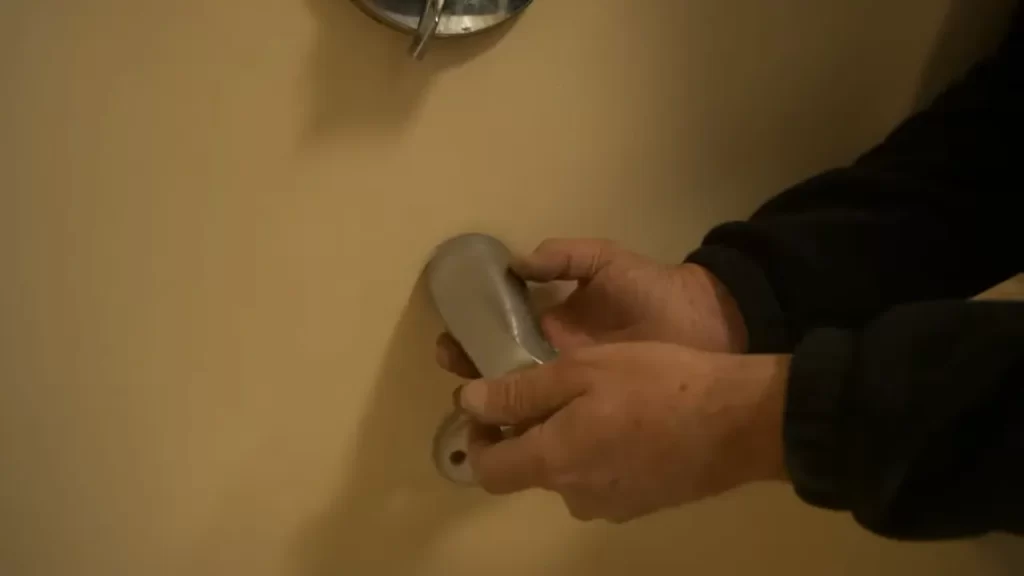
- Locate the set screw: Start by finding the set screw that holds the spout in place. This screw is typically located on the bottom side of the spout near the wall. Use a screwdriver, hex wrench, or Allen wrench to loosen and remove the set screw.
- Twist and pull the spout: Once the set screw is removed, you’ll need to twist and pull the spout away from the wall. This may require some force, as the spout could be attached to the pipe with sealant or caulking. If necessary, use a pair of pliers or a strap wrench to help you grip and turn the spout.
- Inspect the pipe and threads: After removing the spout, take a moment to inspect the pipe and threads. Look for any signs of damage or corrosion that may hinder the installation of the new spout. If needed, clean the pipe and threads to ensure a smooth installation.
Troubleshooting common challenges during removal
While removing the old bathtub spout is usually a straightforward process, there can be some common challenges that you may encounter. Here are a few troubleshooting techniques to help you overcome these challenges:
| Challenge | Troubleshooting Technique |
|---|---|
| The set screw is stuck or stripped | Try using penetrating oil to loosen the set screw. If it’s stripped, you may need to use a screw extractor tool. Alternatively, consult a professional plumber for assistance. |
| The spout is difficult to twist or pull | Apply heat to the spout using a hairdryer or heat gun. The heat will help loosen any sealant or caulking. Use pliers or a strap wrench for added grip or leverage. |
| The spout breaks or does not come off | If the spout breaks during removal or simply won’t budge, you may need to use a hacksaw or reciprocating saw to cut it off. Be cautious not to damage the pipe in the process. |
By following these steps and troubleshooting techniques, you should be able to successfully remove the old bathtub spout and prepare for the installation of a new one. Remember, if you’re unsure or uncomfortable with any step of the process, it’s always best to seek professional help to avoid any potential damage or further complications.
Installing The New Bathtub Spout
Installing a new bathtub spout can be a quick and straightforward process that can greatly enhance your bathing experience. Whether you’re replacing an old, worn-out spout or upgrading to a more modern design, this step-by-step guide will help you install your new bathtub spout with ease.
Preparing the spout for installation
The first step in installing your new bathtub spout is to prepare it for installation. Follow these steps:
- Remove the old spout: Start by removing the old spout from your bathtub. To do this, locate the screws or set screw securing the spout to the wall and use a screwdriver or Allen wrench to loosen and remove them.
- Clean the pipe: Once the old spout is removed, take a moment to clean the pipe that connects to the spout. Use a soft brush or cloth to remove any debris or residue that may have accumulated.
- Measure and clean the new spout: Measure the length of the pipe and compare it to the new spout. If necessary, trim the pipe to ensure a proper fit. Clean the inside of the new spout with a cloth to remove any dirt or packaging residue.
Connecting the spout to the water supply
After preparing the spout, the next step is to connect it to the water supply. Follow these steps:
- Apply plumber’s tape: Wrap plumber’s tape around the threads of the pipe to create a tight seal. This will help prevent any leaks.
- Insert the spout onto the pipe: Carefully slide the new spout onto the pipe, aligning the threads. Use gentle pressure to twist the spout clockwise until it is securely attached. Avoid over-tightening, as this may cause damage to the spout or pipe.
- Tighten the spout: If your spout has a set screw or screws, use a screwdriver or Allen wrench to tighten them and secure the spout in place. This will ensure that the spout remains stable during use.
Securing the new spout in place
The final step in installing your new bathtub spout is to secure it in place. Follow these steps:
- Check for leaks: Turn on the water supply and check for any leaks around the spout. If you notice any leaks, gently tighten the spout until the leaks stop.
- Test the functionality: Once you have confirmed there are no leaks, test the functionality of the spout. Turn on the water and ensure that the water flows smoothly through the spout.
- Make any necessary adjustments: If you encounter any issues with the spout’s functionality, such as low water pressure or improper flow, make any necessary adjustments, such as adjusting the position or tightness of the spout.
That’s it! By following these simple steps, you can easily install a new bathtub spout and enjoy an upgraded bathing experience. Remember to take your time, follow the instructions, and always consult a professional if you encounter any difficulties or uncertainties during the installation process.
Testing And Verifying The Installation
Once you have successfully installed your new bathtub spout, it is important to test and verify that the installation has been done correctly. This step is crucial as it ensures that there are no leaks and that the water flow is smooth and consistent. In this section, we will walk you through two important steps to perform after installation: checking for leaks and ensuring proper water flow, as well as troubleshooting any potential issues that may arise.
Checking for leaks and ensuring proper water flow
After installing the bathtub spout, the first thing you should do is check for any leaks. Even a small leak can lead to significant water waste and potential damage to your bathroom. To check for leaks, follow these steps:
- Turn on the water supply to the bathtub.
- Observe the spout and surrounding areas closely for any signs of water leakage.
- If you notice water dripping or pooling around the spout, there may be a leak.
- Tighten any loose connections or fittings using a wrench or pliers to ensure a secure seal.
- Use a dry cloth to wipe away any excess water and observe the area for a few minutes to ensure the leak has been resolved.
Once you have confirmed that there are no leaks, it is important to ensure proper water flow through the bathtub spout. To do this, follow these steps:
- Turn on the water supply and allow water to flow through the spout.
- Check for any irregularities in the water flow, such as low pressure or sputtering.
- If you notice any issues with the water flow, it could indicate a blockage or a faulty installation.
- Inspect the spout for any debris or obstructions and remove them if necessary.
- Double-check that all connections and fittings are secure and properly aligned.
- If the water flow issues persist, it may be necessary to consult a professional plumber for further assistance.
Troubleshooting potential issues
While the installation process for a bathtub spout is generally straightforward, issues may arise that require troubleshooting. Here are a few potential issues that you may encounter and how to address them:
| Potential Issue | Solution |
|---|---|
| The spout is loose or wobbly |
|
| Water is leaking from the wall behind the spout |
|
| The spout does not divert water to the showerhead |
|
By carefully checking for leaks, ensuring proper water flow, and troubleshooting any potential issues, you can verify that your bathtub spout installation is successful. Remember, if you encounter any difficulties or are uncertain about the installation process, it is always best to consult a professional for assistance.
Tips And Tricks For A Successful Installation
**Tips and Tricks for a Successful Installation**
Installing a bathtub spout may seem like a simple task, but it requires attention to detail and careful execution to ensure a successful outcome. To help you navigate this process with ease, we have compiled a list of tips and tricks that will assist you in achieving a flawless installation. By following these best practices and avoiding common pitfalls, you can enjoy a functional and aesthetically pleasing bathtub spout.
Best practices to ensure a smooth installation process
When it comes to installing a bathtub spout, there are certain best practices that can significantly improve your chances of success. By following these guidelines, you will be well-equipped to tackle the installation process:
- Gather all the necessary tools and materials: Before you begin the installation, make sure you have all the required tools and materials within easy reach. This will save you valuable time and prevent any unwanted delays during the process. Common tools include an adjustable wrench, plumbers tape, and a pipe cutter, while materials may include a new spout, caulking, and pipe fittings.
- Read the manufacturer’s instructions: One of the most important steps in any installation process is reading and understanding the manufacturer’s instructions. This will give you a clear understanding of the specific requirements for your particular spout and prevent any missteps along the way. Pay close attention to any specific steps or precautions mentioned in the instructions.
- Prepare the installation area: Before installing the new spout, make sure the installation area is clean and free from any debris. Use a gentle cleaner and a cloth to wipe down the surface and remove any residue that may interfere with the installation. Additionally, ensure that the pipe is in good condition and free from any damage or corrosion.
**Common mistakes to avoid during the installation**
While a bathtub spout installation may seem straightforward, there are some common mistakes that can easily be avoided by being aware of them. By taking note of these potential pitfalls, you can ensure a seamless installation:
- Inadequate use of plumbers tape: Plumbers tape, also known as Teflon tape, is a crucial component in preventing leaks at the connection points. Many amateur installers fail to apply enough tape, resulting in leaks and water damage. Make sure to wrap several layers of plumbers tape tightly around the pipe threads for a secure seal.
- Over-tightening the spout: While it is important to secure the spout firmly, over-tightening can lead to damage to the threads or the spout itself. Use an adjustable wrench to tighten the spout until it is snug, but be cautious not to apply excessive force.
- Ignoring caulking: Caulking is necessary to create a watertight seal between the spout and the wall. Failing to apply caulk or using an inadequate amount can result in water seeping behind the spout, causing damage to the wall and potential mold growth. Be sure to apply a generous bead of caulk around the base of the spout to create an effective barrier against water penetration.
By following these best practices and avoiding common mistakes, you can ensure a successful installation of your bathtub spout. Remember to take your time, follow the instructions carefully, and double-check your work to achieve a professional-looking result that will stand the test of time.
Frequently Asked Questions
How Do You Attach A Tub Spout?
To attach a tub spout, follow these steps: 1. Remove the old spout by twisting it counterclockwise. 2. Clean the pipe threads. 3. Apply plumber’s tape to the threads. 4. Attach the new spout by twisting it clockwise. 5. Use pliers to tighten it if needed.
How Far Should Pipe Stick Out For Tub Spout?
The pipe should stick out around 1/2 to 3/4 inches for the tub spout to properly fit and function.
How Do I Know If My Tub Spout Is Slip On Or Threaded?
To determine if your tub spout is slip-on or threaded, visually inspect the spout where it connects to the pipe. If you see a threaded section protruding from the wall, it is threaded. If there are no threads, it is slip-on.
Do You Need To Caulk A Tub Spout?
Yes, caulk is necessary for a tub spout. It helps prevent water leaks and ensures a tight seal. Applying caulk around the base of the spout helps protect against moisture damage and promotes durability. Regularly checking and reapplying caulk when needed is essential for maintaining a well-functioning tub spout.
Conclusion
To summarize, installing a bathtub spout may seem like a daunting task, but with the right tools and step-by-step instructions, it can be easily accomplished. By following our guide, you can ensure a successful installation, preventing any potential leaks or issues.
Remember to shut off the water supply, remove the old spout, and attach the new one securely. With a little patience and attention to detail, you’ll have a functional and stylish bathtub spout in no time. Happy DIY-ing!