To install a bathroom exhaust fan with light, follow these steps: select the location and cut a hole in the ceiling, wire the fan and light to a switch, attach the fan housing and ductwork, secure the fan motor in place, and finally install the light cover and grille. Installing a bathroom exhaust fan with light is a crucial step in ensuring proper ventilation and illumination in your bathroom.
With these simple steps, you can easily install the fan and light, promoting fresh air circulation and reducing moisture buildup. We will provide a detailed guide on how to install a bathroom exhaust fan with light, ensuring a comfortable and functional bathroom space.
Importance Of Proper Ventilation In The Bathroom
Importance of Proper Ventilation in the Bathroom
Proper ventilation is crucial to maintaining a healthy and comfortable bathroom environment. When a bathroom lacks proper airflow, it can create a breeding ground for mold and mildew, resulting in unsightly stains and potentially harmful health issues. Additionally, moisture and odors can become trapped, leading to a stuffy and unpleasant atmosphere. Installing a bathroom exhaust fan with a light is an effective solution to combat these problems and improve the overall air quality in your bathroom.
Prevent Mold and Mildew Growth
Mold and mildew thrive in warm and moist environments, making bathrooms the perfect breeding ground for these unwelcome invaders. When steam from hot showers or baths lingers in the air without sufficient ventilation, it can settle on surfaces and encourage the growth of mold and mildew. Over time, this can lead to discoloration, foul odors, and even structural damage to your bathroom. By installing a bathroom exhaust fan, you can quickly and effectively remove excess humidity from the air, preventing mold and mildew from taking hold in the first place.
Remove Odors and Moisture
Let’s face it – bathrooms can sometimes develop unpleasant odors. Whether it’s from bodily functions, cleaning products, or damp towels, these odors can linger and waft throughout your home. An exhaust fan with a light helps to eliminate these odors by drawing them out and venting them outside, leaving your bathroom smelling fresh and clean. Moreover, it also aids in removing excess moisture from the air, preventing dampness and condensation that can lead to musty smells and potential damage to your bathroom fixtures and finishes. With a bathroom exhaust fan in place, you can say goodbye to unwanted odors and excessive humidity.
Improve Air Quality
Ensuring good air quality in your bathroom is not just about eliminating odors and preventing mold growth. It also contributes to your overall well-being. When a bathroom is poorly ventilated, the air can become stale and filled with impurities. These impurities may include volatile organic compounds (VOCs) from cleaning products or formaldehyde emissions from certain materials. Breathing in such contaminants can be harmful and may exacerbate existing respiratory conditions. By installing a bathroom exhaust fan, you can improve the air quality, ensuring fresh, clean air for you and your family to breathe.

Determining The Required Fan Size
Considering the bathroom size and layout
The first step in determining the required fan size for your bathroom exhaust fan with light is to consider the size and layout of your bathroom. The size of your bathroom will directly affect the effectiveness of the fan in ventilating the space, so it’s important to take this into account.
Start by measuring the square footage of your bathroom. This can be easily done by multiplying the length and width of the room. Once you have the square footage, refer to the following table to determine the appropriate fan size:
| Bathroom Size (Square Footage) | Recommended Fan Size (CFM) |
|---|---|
| 0-50 | 50 |
| 51-100 | 70 |
| 101-150 | 100 |
| 151-200 | 150 |
| 201-300 | 200 |
| 301-400 | 250 |
As you can see, the larger the bathroom, the higher the recommended CFM (cubic feet per minute) rating of the fan. This is because larger bathrooms require more ventilation to effectively remove moisture and odors.
Calculating the required CFM
Now that you have determined the appropriate fan size based on your bathroom’s square footage, the next step is to calculate the required CFM. The CFM rating of a fan indicates the volume of air it can move per minute, and it’s important to ensure that the fan is capable of meeting the ventilation needs of your bathroom.
To calculate the required CFM for your bathroom, you need to consider the following factors:
- The number of fixtures in your bathroom: Each fixture, such as a toilet, shower, or bathtub, has a corresponding CFM rating that determines the amount of air that needs to be exhausted. Add up the CFM ratings of all the fixtures in your bathroom.
- The length of ductwork: If your bathroom exhaust fan requires ductwork to vent outside, the length and configuration of the ductwork can impact the fan’s performance. Longer ductwork may require a more powerful fan to ensure proper ventilation.
- The bathroom’s use: If your bathroom is heavily used or frequently experiences high humidity levels, you may need to increase the required CFM to adequately remove moisture and prevent mold and mildew growth.
By considering these factors and calculating the appropriate CFM requirement, you can ensure that the bathroom exhaust fan with light you choose is capable of effectively ventilating your bathroom.
Evaluating Different Exhaust Fan Types
When it comes to installing a bathroom exhaust fan with light, there are several types to consider. Each type has its own unique features and installation requirements. In this section, we will evaluate three popular types of exhaust fans: ceiling-mounted fans with integrated lights, wall-mounted fans with integrated lights, and inline fans with separate light fixtures.
Ceiling-mounted fans with integrated lights
Ceiling-mounted fans with integrated lights are a popular choice for many bathrooms. These fans are installed directly into the ceiling and come with built-in light fixtures. They are typically designed to be efficient in both ventilation and lighting. The advantage of this type of fan is that it provides a neat and compact solution, saving space in your bathroom. The installation process involves cutting a hole in the ceiling, connecting the fan to your electrical wiring, and securing it in place. Once installed, these fans effectively remove excess moisture and odors from your bathroom while providing ample lighting.
Wall-mounted fans with integrated lights
For bathrooms where a ceiling-mounted fan is not feasible, wall-mounted fans with integrated lights are a great alternative. These fans are mounted on the wall and also come with integrated light fixtures. They are particularly suitable for bathrooms with low ceilings or limited ceiling space. The installation process involves cutting a hole in the wall, connecting the fan to your electrical wiring, and securely mounting it on the wall. Wall-mounted fans with integrated lights offer the same benefits as ceiling-mounted fans, efficiently ventilating your bathroom while providing sufficient lighting.
Inline fans with separate light fixtures
Inline fans are another option to consider when installing a bathroom exhaust fan with light. Unlike ceiling- or wall-mounted fans, inline fans are installed in the ductwork and are not visible within the bathroom. These fans are typically more powerful and quieter than other types, making them ideal for larger bathrooms. While inline fans do not come with integrated light fixtures, they can be paired with separate light fixtures to meet your lighting needs. The installation process involves connecting the fan to the existing ductwork and wiring the separate light fixtures. Inline fans with separate light fixtures are a versatile and discreet option for efficient ventilation and customizable lighting in your bathroom.
Assessing The Existing Electrical Wiring And Components
Assessing the existing electrical wiring and components is an essential step when it comes to installing a bathroom exhaust fan with a light. This crucial process ensures that the fan is compatible with the existing electrical system while also determining if any additional wiring or circuits are required.
Checking for compatibility and capacity
Before proceeding with the installation, it is important to check the compatibility and capacity of the existing electrical wiring and components. This involves inspecting the electrical panel to ensure that there is enough capacity to support the new exhaust fan and light. If the panel is already overloaded, it may be necessary to upgrade the electrical system before proceeding with the installation.
In addition to capacity, it is also important to ensure that the existing wiring is compatible with the exhaust fan and light. This includes checking the voltage and amperage requirements of the fan and light, as well as the wire size and type. The manufacturer’s instructions should provide guidance on the specific requirements for the installation.
Determining the need for additional wiring or circuits
Once the compatibility and capacity of the existing electrical system have been assessed, it is necessary to determine if any additional wiring or circuits are required for the installation of the bathroom exhaust fan with light. This involves evaluating the distance between the fan and the electrical panel, as well as the current circuit load. If the distance is too great or the circuit is already heavily loaded, it may be necessary to install a new circuit or additional wiring to ensure proper operation of the fan and light.
It is important to consult with a licensed electrician during this process, as they will have the expertise to assess the electrical system and determine the best course of action. They will also ensure that all work is done in compliance with local electrical codes and regulations, providing a safe and efficient installation of the bathroom exhaust fan with light.
Measuring And Marking The Fan And Light Placement
Installing a bathroom exhaust fan with light is a great way to improve the ventilation in your bathroom and add extra lighting. Before you start the installation process, it’s important to measure and mark the placement of the fan and light fixtures. This will ensure that they are positioned correctly and function effectively. In this guide, we will walk you through the steps of choosing the suitable location for installation and marking the ceiling or wall for the fan and light fixtures.
Choosing the Suitable Location for Installation
The first step in installing a bathroom exhaust fan with light is to choose the right location. Installing the fan in the correct spot will maximize its performance and efficiency. Here are a few factors to consider when selecting the suitable location:
- Airflow: Find a spot where the fan can draw air efficiently from the entire bathroom.
- Wiring: Make sure there is access to electrical wiring in the chosen location.
- Distance from Obstacles: Ensure that the fan and light fixtures are clear from any obstructions such as beams or ductwork.
- Noise Level: Position the fan away from living areas to minimize noise disturbances.
By taking these factors into account, you can select the best location for optimal performance and functionality of your bathroom exhaust fan with light.
Marking the Ceiling or Wall for the Fan and Light Fixtures
Once you have chosen the suitable location for installation, it’s time to mark the ceiling or wall for the fan and light fixtures. This step ensures that the fixtures are installed correctly, aligned, and centered. Follow these steps to mark the placement:
- Measure: Use a tape measure to determine the center point of the chosen location. Measure and mark this point on the ceiling or wall.
- Template: Most exhaust fan kits come with a template that can be used to trace the outline of the fixture. Place the template on the marked point and trace its shape onto the surface.
- Mounting Holes: Locate the mounting holes on the template where the fan and light will be secured. Mark these holes on the ceiling or wall for accurate installation.
Once you have marked the placement for the fan and light fixtures, you are ready to proceed with the installation process. These markings will serve as your guide, ensuring a seamless installation of your bathroom exhaust fan with light.
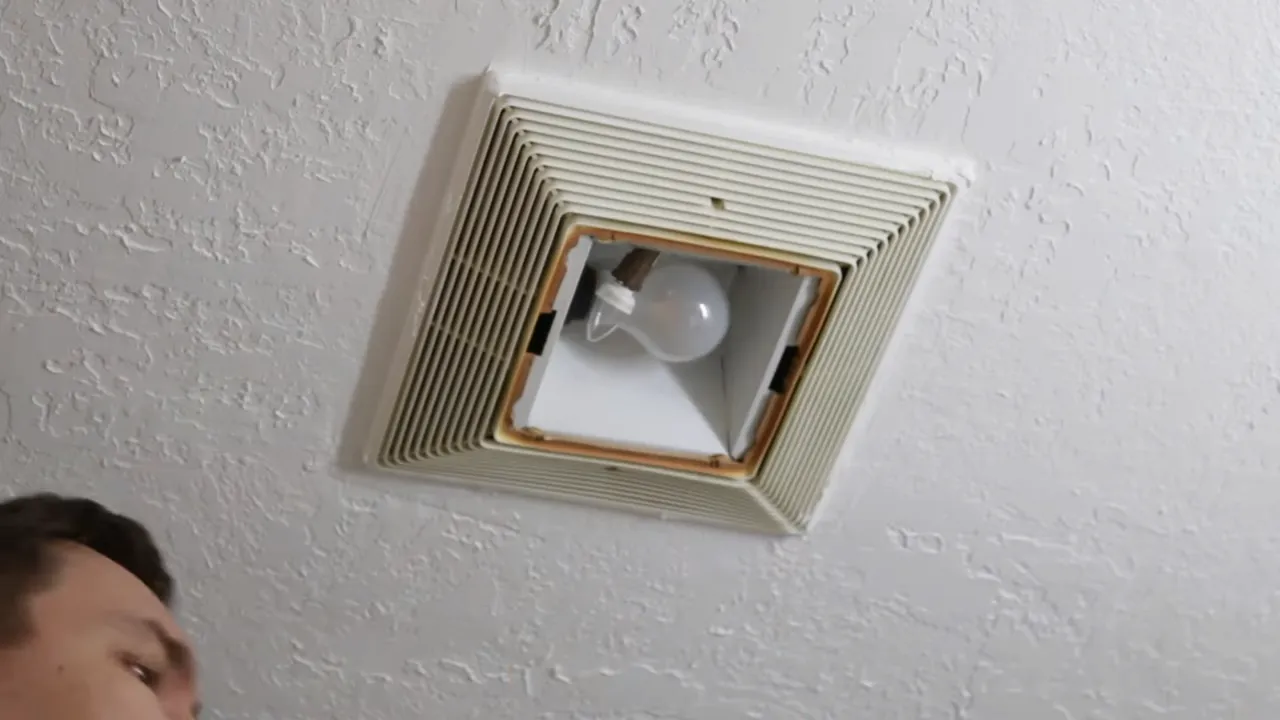
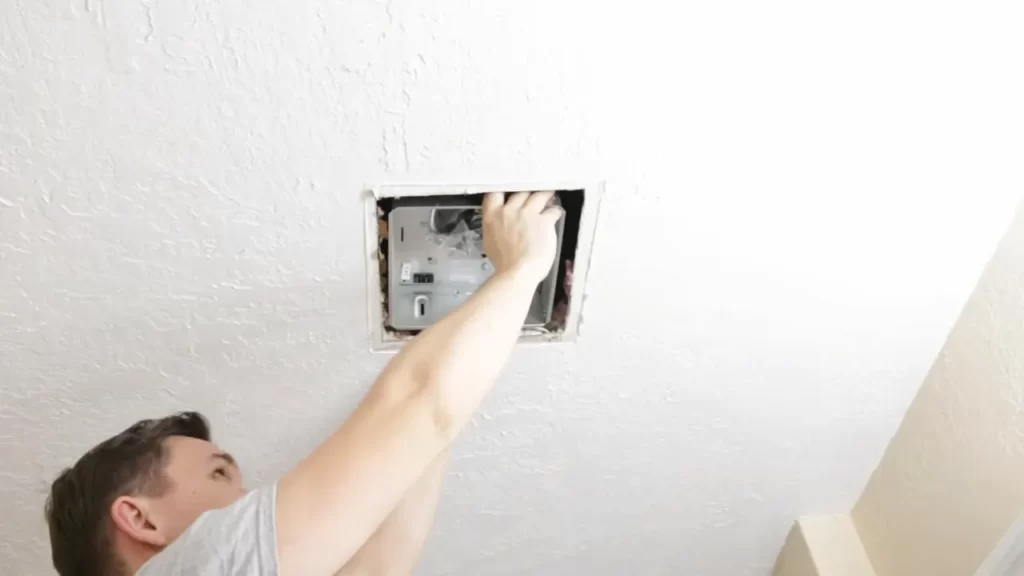
Removing The Old Fan Or Light Fixture
Before you can install a new bathroom exhaust fan with a light, you first need to remove the old fan or light fixture. This step is crucial to ensure a smooth and safe installation process. In this section, we will guide you through the necessary steps to remove the old fan or light fixture effectively.
Switching off the power
The first and most important step when removing any electrical appliance is to switch off the power supply. You don’t want to risk getting an electric shock while working on your bathroom exhaust fan. Refer to the electrical panel in your home and turn off the corresponding circuit breaker that supplies power to the fan or light fixture. Double-check to ensure the power is completely off before proceeding.
Disconnecting the existing fan or light
Once the power is off and you’ve taken the necessary safety precautions, it’s time to disconnect the existing fan or light from its electrical connections. Here’s a step-by-step guide:
- Locate the electrical junction box where the fan or light is connected. This box is usually located in the ceiling or the wall near the fixture.
- Remove the cover plate or trim of the junction box, if applicable, to expose the wiring inside.
- Identify the wires that are connected to the fan or light. They are typically color-coded, with black representing the hot wire, white representing the neutral wire, and green or bare copper representing the ground wire.
- Using a screwdriver or wire nuts, carefully disconnect the wires by unscrewing the wire nuts or loosening the screws that secure them.
- Once the wires are disconnected, gently remove the fan or light fixture from the mounting brackets or housing.
Ensure that you disconnect the wiring properly and avoid tugging on the wires to prevent any damage. It’s always a good idea to label the wires or take a picture before disconnecting them to make the reinstallation process easier.
By following these clear and precise steps, you can successfully remove the old fan or light fixture in preparation for the installation of your new bathroom exhaust fan with a light.
Wiring The New Fan And Light Fixtures
Connecting the electrical wires correctly
Wiring the new fan and light fixtures is an essential step in the installation process. Properly connecting the electrical wires ensures the safe and efficient functioning of your bathroom exhaust fan with light. To guide you through this crucial step, follow the instructions below:
1. Turn off the power: Before starting any electrical work, ensure the power to the bathroom is turned off from the circuit breaker. This step guarantees your safety and prevents accidents while working.
2. Prepare the wires: Strip the insulation from the ends of the wires using wire strippers, exposing about half an inch of bare wire at each end. This will allow for a secure connection.
3. Identify the wires: In most cases, you will have three wires to work with: black (hot), white (neutral), and copper or green (ground). However, always consult the manufacturer’s instructions or a licensed electrician to ensure you correctly identify the wires for your specific fan and light fixtures.
4. Match the wire colors: Once you have identified the wires, match the corresponding colors together. Connect the black wires, white wires, and ground wires using wire nuts. Twist the wires together clockwise, then screw the wire nut onto the connection until it is secure. Make sure no bare wire is exposed outside the wire nut.
5. Double-check your connections: After securing the wires with wire nuts, gently tug on each connection to ensure they are tightly connected. Loose connections can cause issues with the functioning of your fan and light fixtures.
6. Wrap the connections: To further protect the connections and ensure their longevity, wrap them with electrical tape. This step helps to prevent accidental disconnections and ensures greater safety.
Securing the wiring with wire nuts
Properly securing the wiring with wire nuts is crucial to maintain the overall safety and performance of your bathroom exhaust fan with light. Follow these steps to ensure a secure and worry-free installation:
1. Select the appropriate wire nuts: Wire nuts come in various sizes, each suitable for different wire gauge combinations. Make sure you choose the correct size for the wires you are connecting. This will ensure a tight and secure fit.
2. Position the wire nuts: With the wires twisted together, position the wire nut over the connection. Ensure that all exposed wire ends are covered completely.
3. Twist clockwise: Twist the wire nut clockwise until it is snugly in place. This action will create a firm connection and prevent the wires from coming loose.
4. Inspect the connections: Once you have secured all the connections with wire nuts, take a moment to inspect each one. Ensure that all wire ends are completely enclosed within the wire nuts and that there are no exposed bare wires.
5. Secure the wire nuts: To further safeguard the connections, gently tug on each wire nut to ensure it is tightly secured. Any loose wire nuts should be re-twisted until they are securely fastened.
With these steps, you can confidently wire your new bathroom exhaust fan with light fixtures. Remember to always prioritize safety and consult a licensed electrician if you have any concerns or are unsure about any step in the process.
Mounting The Fan And Light Fixtures
HTML Heading 2: Mounting the fan and light fixtures
While installing a bathroom exhaust fan with a light can seem like a daunting task, mounting the fan and light fixtures is actually quite straightforward. In this section, we will discuss two crucial steps: attaching the fan housing and brackets and installing the light fixture securely. By following these steps, you can ensure that your bathroom exhaust fan with light is installed correctly and operates efficiently.
HTML Heading 3: Attaching the fan housing and brackets
The first step in mounting your bathroom exhaust fan with a light is to attach the fan housing and brackets. This ensures that the fan and its components are properly secured and aligned for optimal functionality. To do this, follow these simple steps:
1. Identify the location: Choose the ideal spot on the bathroom ceiling where you want to install the exhaust fan. Make sure it is near the area that requires ventilation and has access to power.
2. Mark the outline: Using a pencil, mark the outline of the fan housing on the ceiling. This will serve as a guide for the next steps.
3. Cut the opening: Following the outlined area, carefully cut a hole in the ceiling using a jigsaw or a reciprocating saw. Remember to wear appropriate safety gear, such as goggles and a dust mask, during this process.
4. Position the housing: Place the fan housing into the hole and ensure it sits flush against the ceiling. Use a level to make sure it is positioned correctly.
5. Attach the brackets: Secure the fan housing to the ceiling by attaching the brackets provided with the exhaust fan. Follow the manufacturer’s instructions to ensure proper attachment. Usually, brackets can be screwed into the ceiling joists or using toggle bolts for added stability.
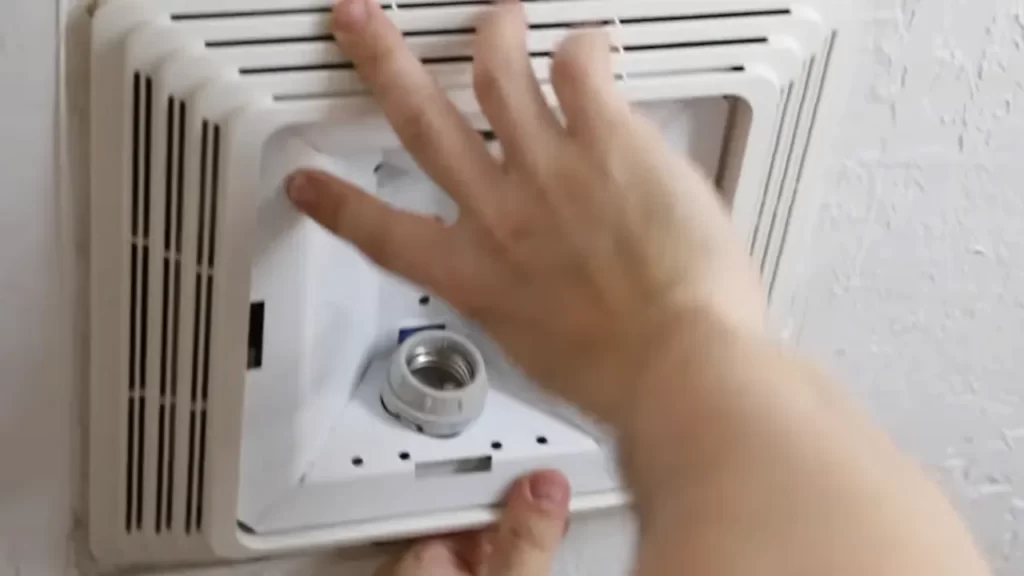
HTML Heading 3: Installing the light fixture securely
Once the fan housing and brackets are securely attached, it’s time to install the light fixture. This step adds both functionality and ambiance to your bathroom. Here’s how you can proceed:
1. Connect the wiring: Before mounting the light fixture, make sure the power is turned off at the breaker box. Then, connect the electrical wiring from the light fixture to the wires in the housing. Ensure that the connections are secure and follow the color-coding provided in the instructions.
2. Secure the light fixture: Carefully position the light fixture onto the housing. Depending on the design, it may require twisting or snapping into place. Refer to the manufacturer’s instructions for the specific method.
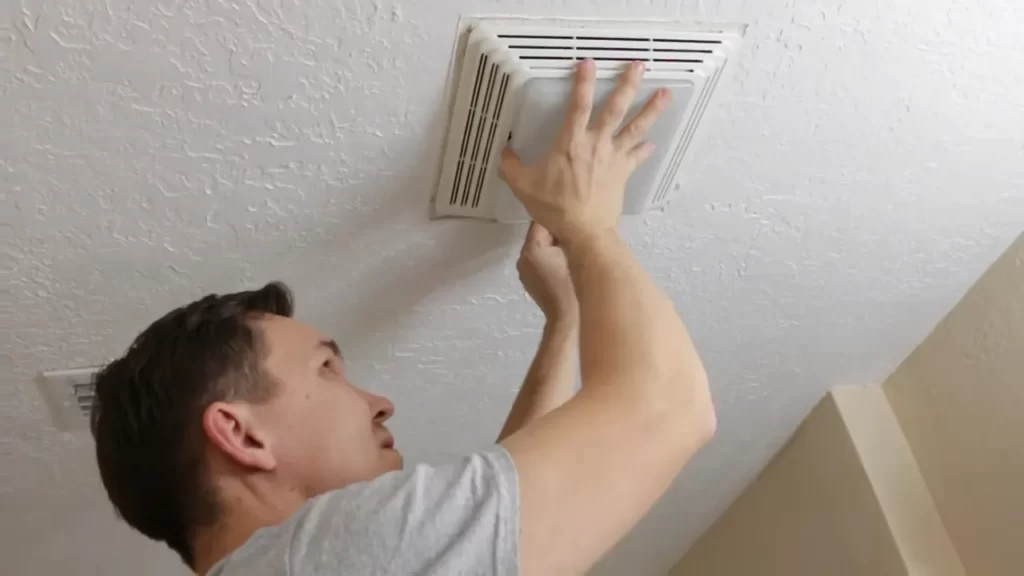
3. Secure the light cover: If your light fixture comes with a cover or a lens, secure it in place. This not only protects the bulbs but also enhances the aesthetic appeal of the fixture.
4. Test the functionality: Once the light fixture is securely installed, restore power to the bathroom and test the functionality of both the fan and the light. Ensure that everything is in proper working condition before finishing up the installation.
By following these steps, you can confidently mount your bathroom exhaust fan with light, improving the air quality and lighting in your bathroom. Remember to consult the manufacturer’s instructions for any specific details pertaining to your particular model.
Connecting The Ductwork And Venting
Attaching the duct pipe to the fan housing
After securing the bathroom exhaust fan with light into the ceiling, the next crucial step is connecting the ductwork and venting to ensure proper airflow. The first task is to attach the duct pipe to the fan housing. This pipe is responsible for carrying the moist air out of your bathroom, keeping it fresh and free from dampness. Follow these steps to connect the duct pipe seamlessly:
- Measure the diameter of the exhaust port on the fan housing. This will help you choose the correct size of the duct pipe for a snug fit.
- Trim the duct pipe to the appropriate length using a hacksaw or tin snips, ensuring it aligns with the exhaust port.
- Fit one end of the duct pipe firmly over the exhaust port, ensuring it is fully inserted and secure. Many duct pipes have pre-drilled holes, making this step even easier.
- If necessary, use metal foil tape or HVAC duct sealant to seal any gaps between the duct pipe and the exhaust port. This will prevent air leaks and maximize the efficiency of your bathroom exhaust fan with light.
- Double-check the connection to ensure it is tight and secure. A loose connection could lead to air leaks and decreased functionality.
By following these steps, you’ll be able to properly attach the duct pipe to the fan housing, providing a solid foundation for the rest of the venting process.
Ensuring proper venting outside the house
Proper venting is essential to ensure the bathroom exhaust fan with light effectively removes moisture and odors from your bathroom. Here are some important considerations to keep in mind when venting outside the house:
- Choose the appropriate venting route: Determine the best path for the ductwork to travel from the fan housing to the exterior of your home. Ideally, this route should be as short and straight as possible to minimize resistance and maximize airflow.
- Avoid any sharp turns or bends in the ductwork, as these can restrict airflow and lead to inefficiency. If necessary, use adjustable elbow joints to ensure a smooth and direct path.
- Make sure the vent cap is installed correctly: The vent cap is the exterior component of the venting system and plays a vital role in keeping out pests, drafts, and water. Attach it securely to the end of the ductwork, making sure it is properly sealed and angled downward to prevent rain or snow from entering.
- Inspect for obstructions: Before finalizing the venting process, check for any obstructions, such as tree branches or exterior walls, that could hinder the airflow. Trim any vegetation or make necessary adjustments to ensure unobstructed venting.
- Test the venting system: Once the ductwork and vent cap are in place, test the system by turning on the bathroom exhaust fan with light and observing the air movement outside. Ensure there is a steady flow of air and that it is being expelled away from windows, doors, and nearby vents.
By following these guidelines, you can ensure your bathroom exhaust fan with light is properly vented outside the house, effectively removing excess moisture and improving the overall air quality of your bathroom.
Turning On The Power And Testing The Fan And Light
Verifying the functionality of the fan and light
Now that you have successfully installed your bathroom exhaust fan with light, it’s time to turn on the power and test its functionality. This step is crucial to ensure that both the fan and light are working as expected.
- Start by locating the power source for the fan and light. This is usually a circuit breaker or a switch designated for the bathroom. Flip the switch or turn on the circuit breaker to supply power to the fan and light.
- If the fan has a pull chain, pull it to start the fan. You should hear the gentle hum of the fan motor, indicating that it is functioning properly.
- Checking for any noise or vibration issues is the next step. Listen carefully for any unusual noises or excessive vibrations coming from the fan. If you notice any such issues, it could be a sign of improper installation or a defect. It’s important to address these problems as they can affect the fan’s performance and longevity. If everything sounds normal, proceed to the next step.
- To test the light, simply flip the switch designated for the light fixture. The bathroom should illuminate with a warm glow, enhancing the overall ambiance of the space.
- Observe the light fixture closely for any flickering or dimming issues. Such problems may indicate a loose connection or a faulty bulb. Address them accordingly by tightening loose connections or replacing the bulb if necessary.
- Now that you have verified the functionality of both the fan and light, ensure that the power is turned off before proceeding with any further adjustments or modifications. This step is crucial for your safety and to prevent any electrical accidents.
By following these steps, you can confidently test your bathroom exhaust fan with light and address any potential issues that may arise. Regularly checking the functionality of your fan and light ensures the optimal performance of your bathroom ventilation system, keeping your space fresh and comfortable for years to come.
Troubleshooting Common Installation Problems
Identifying and fixing wiring issues
One common problem that may arise during the installation of a bathroom exhaust fan with light is wiring issues. These issues can hinder the proper functioning of the fan and light, leading to frustration and inconvenience. If you encounter any problems with the wiring, it is important to identify and fix them promptly to ensure that your bathroom ventilation system operates efficiently.
Here are some steps you can take to troubleshoot and resolve wiring problems:
- Check the power source: Start by ensuring that the power to the exhaust fan and light is turned off. Locate the circuit breaker or fuse box and switch off the corresponding circuit. This step is essential to prevent any accidents or injuries during the troubleshooting process.
- Inspect the wires: Thoroughly examine the wiring connections to identify any loose, damaged, or improperly connected wires. Use caution while working with electrical components and always wear safety gloves.
- Tighten connections: If you find any loose connections, use a screwdriver to carefully tighten them. Make sure the wires are securely fastened to their respective terminals.
- Replace damaged wires: If you discover any damaged wires, it is crucial to replace them. Cut off the damaged section and strip the insulation from the ends of the new wire. Connect the new wire securely to the appropriate terminal.
- Test the wiring: Once you have addressed any wiring issues, it is important to test the connections. Switch on the power and check whether the fan and light are functioning properly. If they are not, double-check the wiring and consult a professional if needed.
Ensuring proper ventilation and airflow
Another common problem that can occur during the installation of a bathroom exhaust fan with light is inadequate ventilation and airflow. Poor ventilation can lead to a buildup of moisture and unpleasant odors, affecting the overall air quality in your bathroom. To ensure proper ventilation and airflow, follow these steps:
- Choose the right fan size: Select a fan that is suitable for the size of your bathroom. Manufacturers provide guidelines for choosing the appropriate fan size based on the bathroom’s square footage.
- Install the fan at the correct location: Position the exhaust fan in an area that allows for optimal airflow. Ideally, it should be installed near the shower or bath area to effectively remove steam and moisture.
- Check for obstructions: Ensure that there are no obstructions blocking the airflow path of the exhaust fan. Remove any items such as curtains, towels, or furniture that may impede the movement of air.
- Clean the fan regularly: To maintain proper airflow, clean the exhaust fan regularly. Over time, dust and debris can accumulate on the fan blades, hindering its performance. Wipe the blades with a soft cloth or use a vacuum cleaner to remove any buildup.
- Test the fan’s operation: After installation, test the fan to ensure it is operating efficiently. Observe whether there is sufficient airflow and if the fan effectively removes moisture and odors from the bathroom.
By troubleshooting and addressing any wiring issues as well as ensuring proper ventilation and airflow, you can install a bathroom exhaust fan with light that functions optimally. Following these guidelines will help create a comfortable and healthy environment in your bathroom.
Frequently Asked Questions
Can I Install A Bathroom Exhaust Fan Myself?
Yes, you can install a bathroom exhaust fan yourself. It’s a simple process and can be done with basic tools. Just make sure to follow the instructions carefully and ensure proper electrical connections for safety.
How Much Does It Cost To Install A Bathroom Exhaust Fan With Light?
Installing a bathroom exhaust fan with light can cost around $150 to $400, depending on factors like the fan model and installation complexity. It’s best to consult a professional for a specific cost estimate.
Does A Bathroom Exhaust Fan Need To Be On Its Own Switch?
Yes, a bathroom exhaust fan should have its own switch. This allows you to control the fan separately from the light fixture, giving you the option to use the fan when needed and conserve energy when it’s not necessary.
Is There A Bathroom Fan That Doesn’T Vent Outside?
Yes, there are bathroom fans available that don’t require outside venting. These fans use charcoal filters to eliminate odors and pollutants before recirculating the air back into the room. They are a convenient option for bathrooms where ducting is not possible or desired.
Conclusion
Installing a bathroom exhaust fan with a light is a crucial step for maintaining good air quality and preventing moisture-related issues. With the step-by-step guide provided in this blog post, you can tackle the installation process with confidence. By ensuring that your bathroom is properly ventilated, you can enjoy a fresh and comfortable environment.
Don’t delay, invest in an exhaust fan with a light and experience the benefits today!