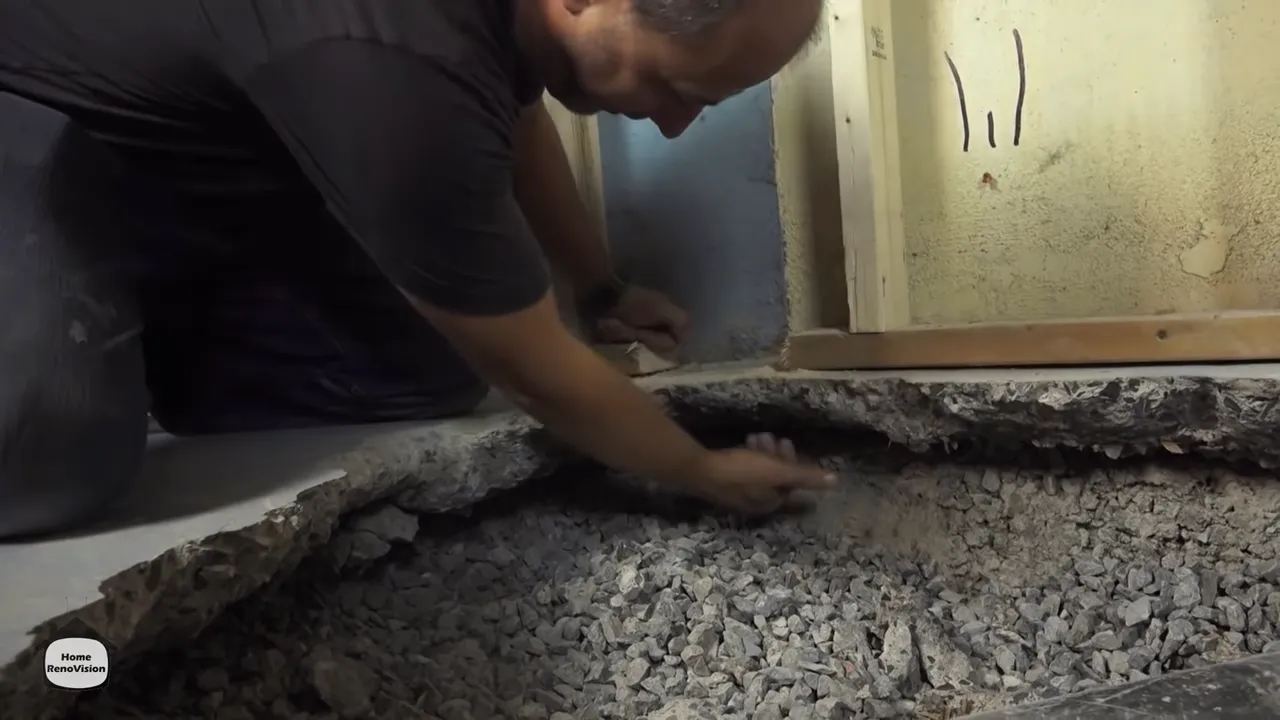
To install a basement shower drain, start by marking the drain location on the concrete floor and cutting through the floor using a concrete saw. Then, install the drain pipe, attach the drain base, and connect the drain to the plumbing system.
Make sure to secure all connections tightly, test the drain for any leaks, and fill the hole with concrete to finish the installation. Installing a basement shower drain is an essential task when creating a functional and comfortable living space.
Whether you’re renovating an existing basement or adding a new bathroom, a properly installed shower drain is crucial for efficient drainage and preventing water damage. In this guide, we’ll walk you through the step-by-step process of installing a basement shower drain. By following these instructions and investing a bit of time and effort, you’ll have a fully functional and safe shower in your basement. So, let’s dive in and learn how to install a basement shower drain.
Why A Proper Shower Drain Is Vital For Basements
In a basement, installing a proper shower drain is of utmost importance. The unique characteristics of basements make it susceptible to water damage and mold growth. By ensuring that your shower drain is installed correctly, you can prevent such issues and enjoy a functional, safe, and valuable basement.
Preventing Water Damage and Mold Growth
Adequate drainage is essential in basements to prevent water accumulation. Without a properly installed shower drain, the excess water from showers can seep into the basement floor, leading to pooling and potential water damage. Standing water not only poses a risk to the structural integrity of the basement but also creates a breeding ground for mold and mildew.
Mold growth is a serious concern as it can cause a range of health issues, such as allergies, respiratory problems, and even infections. By installing a reliable shower drain, you can effectively eliminate standing water, reducing the risk of water damage and mold growth in your basement.
Ensuring Proper Drainage and Avoiding Flooding
A basement shower drain plays a crucial role in ensuring proper drainage. It allows the water to flow efficiently from the shower, preventing any backup or overflow. Without a functional drain, you run the risk of flooding your basement, which can result in significant damage to your property and belongings.
With a properly installed shower drain, you can confidently enjoy your shower knowing that the water will be effectively channeled away, protecting your basement from potential floods and associated expenses.
Enhancing the Functionality and Value of the Basement
A well-designed basement can significantly enhance the functionality and value of your home. By installing a proper shower drain, you can create a practical space that adds value to your property.
Imagine transforming your basement into a guest suite or an entertainment area. With a functional shower and a reliable drain system, you can offer your guests a comfortable and convenient bathroom experience. Moreover, the peace of mind that comes with a properly draining shower will enable you to fully utilize your basement without worrying about potential water damage.

Choosing The Right Shower Drain For Your Basement
When it comes to installing a shower drain in your basement, it’s crucial to choose the right one that suits your specific needs. A proper shower drain not only ensures efficient drainage but also prevents any potential water damage. With different types of drains available in the market, selecting the right one can be overwhelming. In this section, we will explore the different types of drains available and the factors to consider in order to make an informed decision.
Different types of drains available in the market
Before diving into the factors to consider, let’s take a look at the various types of shower drains you can find in the market:
| Type of Drain | Description |
|---|---|
| Traditional Point Drain | Classic, circular drain with a strainer that directs water to a single drain pipe. |
| Linear Drain | A sleek, rectangular drain that runs along the shower wall, allowing for a seamless and modern aesthetic. |
| Tile Insert Drain | Designed to blend seamlessly with your tiled floor, this type of drain features a removable top that can be replaced with a tile of your choice, creating a seamless look. |
Factors to consider when selecting a drain
When choosing a shower drain for your basement, it’s important to take the following factors into consideration:
- Drainage Capacity: Consider the flow rate of your showerhead to determine the appropriate drain size. It’s crucial to choose a drain that can handle the water volume without causing any backups.
- Material: Opt for a drain made of durable materials such as stainless steel or PVC, ensuring longevity and resistance to corrosion.
- Installation Method: Different drains require different installation methods. Ensure you choose a drain that aligns with your installation preferences and capabilities.
- Grate Style: The grate style not only affects the aesthetics but also impacts the functionality of the drain. Select a grate that suits your style preferences while providing proper water drainage.
- Maintenance: Consider the ease of cleaning and maintenance. Choose a drain that allows easy access for regular cleaning to prevent any clogs.
Ensuring compatibility with your basement layout
In addition to the above factors, it’s crucial to ensure that the shower drain is compatible with your basement layout. Take into consideration the following:
- Location: Determine the ideal location for the drain based on the floor layout, plumbing connections, and accessibility.
- Bathroom Size: Consider the size of your basement bathroom and choose a drain that allows for efficient water drainage without causing any overflow issues.
- Piping: Ensure the drain you choose is compatible with your existing plumbing system. This will help prevent any complications during the installation process.
By carefully considering these factors and selecting the appropriate shower drain, you can ensure a successful installation that not only enhances the functionality of your basement shower but also adds to its aesthetic appeal.
Assessing The Basement Conditions
Before installing a shower drain in your basement, it’s important to assess the conditions of the space to ensure a successful and leak-free installation. This step is crucial as it helps identify potential issues that could arise during the installation process and may impact the long-term functionality of the drain. By carrying out a thorough assessment, you can address any existing problems and make the necessary preparations to create a suitable environment for your new basement shower.
Checking for Moisture and Water Leaks
Prior to installing a shower drain, it is essential to determine if your basement has any moisture or water leak issues. Excess moisture can lead to a range of problems, including mold growth and structural damage. To check for moisture and water leaks, you can:
- Inspect the walls and floors for any signs of dampness or water stains.
- Use a moisture meter to measure the levels of moisture in different areas of the basement.
- Look for any visible signs of water leaks, such as water dripping or pooling.
- Ensure that the basement is adequately waterproofed, especially if it is prone to flooding or has a history of water-related issues.
Evaluating the Floor Structure and Access Points
Another important aspect to consider when installing a basement shower drain is evaluating the floor structure and access points. This step helps determine the feasibility of installing a drain in a specific location and ensures that the floor can support the weight of the shower and drain system. Here’s what you need to do:
- Examine the floor structure and identify any weak areas or uneven surfaces that may require additional reinforcement.
- Check if there is suitable access to the plumbing lines and main drainage system for easy installation and maintenance.
- Consider any existing fixtures, such as utility lines or HVAC systems, that could interfere with the installation process.
- Consult with a professional if you’re unsure about the floor’s capabilities or if you need assistance in evaluating the structural integrity.
Determining the Best Location for the Shower Drain
When installing a basement shower drain, determining the best location is crucial to ensure proper drainage and functionality. Here are some factors to consider:
- Identify the most suitable spot for the shower drain based on the existing plumbing lines and the desired location of the shower area.
- Ensure that the chosen location allows for efficient drainage and does not impede the flow of water.
- Consider the proximity to existing access points and plumbing connections to minimize installation complexities.
- Account for any structural limitations or obstructions that may affect the placement of the drain.
By thoroughly assessing the basement conditions, checking for moisture and water leaks, evaluating the floor structure and access points, and determining the best location for the shower drain, you can ensure a successful installation and enjoy a functional and leak-free basement shower for years to come.
Essential Tools And Materials
List of tools needed for the installation process
Before you dive into installing a basement shower drain, be sure to gather all the essential tools and materials you’ll need. This will not only make the installation process smoother but also ensure a secure and efficient outcome. Here’s a list of tools to get you started:
- Tape Measure
- Hacksaw
- Adjustable Wrench
- Screwdriver Set
- Plumbers’ Pliers
- Pipe Cutter
- Level
- Pencil
- Rubber Mallet
- Plumbers’ Putty Knife
- Drain Key
Recommended materials for a secure and efficient installation
A successful basement shower drain installation depends not only on the tools but also on the quality of the materials you use. Here are the recommended materials that will ensure a secure and efficient installation:
- Shower Base: Choose a durable and corrosion-resistant shower base that is suitable for a basement environment.
- PVC Drain Pipe: Opt for a sturdy PVC drain pipe that is designed to withstand the test of time.
- Shower Drain Assembly: Invest in a high-quality shower drain assembly that offers a secure fit and efficient water drainage.
- Pipe Primer and Cement: Use pipe primer and cement to create leak-proof connections between the various components of your shower drain system.
- Plumbers’ Tape: This handy tape helps create a watertight seal between threaded connections, preventing any potential leaks.
Additional supplies for sealing and waterproofing
In addition to the tools and materials mentioned above, it’s essential to have the following supplies for proper sealing and waterproofing:
- Waterproofing Membrane: Apply a waterproofing membrane to the shower walls and floor to prevent water penetration and protect against moisture damage.
- Grout and Caulk: Use high-quality grout to fill the gaps between tiles and prevent water from seeping through. Caulk is ideal for sealing joints and corners to create a watertight barrier.
- Silicone Sealant: Apply silicone sealant around the shower drain and other areas prone to water leakage to maintain a secure and watertight installation.
- Shower Pan Liner: Install a shower pan liner beneath the shower base to provide an additional layer of protection against water leaks.
With the right tools, materials, and supplies at your disposal, you’re well-equipped to install a basement shower drain that ensures both functionality and longevity.

Understanding The Removal Process
Before you begin installing a new basement shower drain, it’s important to understand the removal process. This step is crucial in ensuring a smooth installation and preventing any future issues. In this section, we will discuss how to assess the condition of the old drain, remove any obstructions or debris, and properly dispose of the old drain components.
Assessing the condition of the old drain
The first step in the removal process is to assess the condition of the old drain. This will help you determine if any repairs or replacements are needed. Here are some key points to consider:
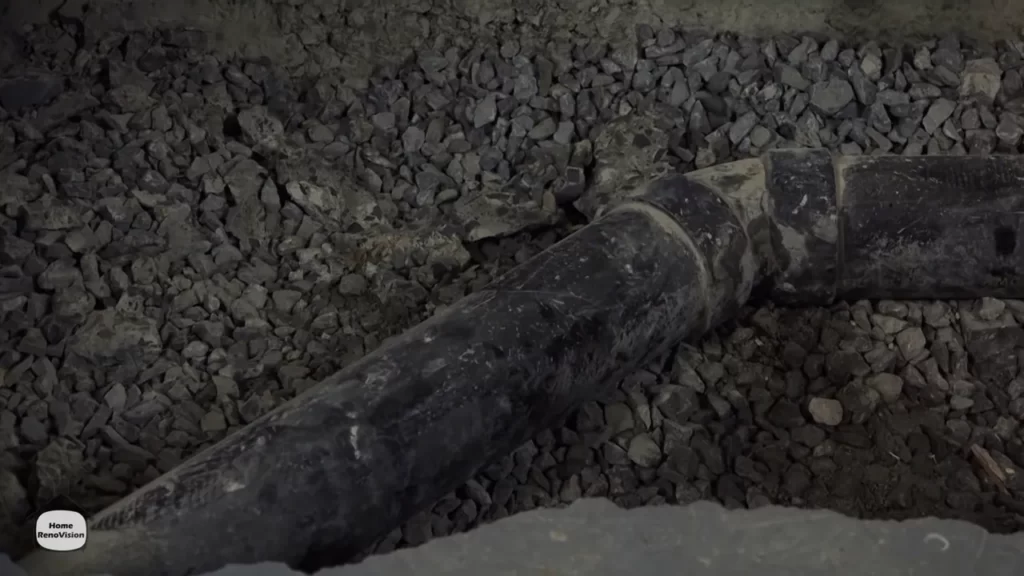
- Inspect the drain pipe for any signs of damage, such as cracks or leaks.
- Check for any corrosion or rust on the drain assembly.
- Look for any signs of blockages or clogs in the drain system.
If you notice any significant issues during the assessment, it’s best to consult a professional plumber who can provide expert advice and assistance.
Removing any obstructions or debris
Before removing the old drain, it’s important to clear any obstructions or debris that may be blocking the drain system. Here’s how:
- Begin by wearing protective gloves and using a plunger to try and dislodge any visible clogs. Apply firm pressure in an up-and-down motion to create suction.
- If the plunger doesn’t work, you can try using a drain snake to remove the blockage. Insert the snake into the drain and twist it clockwise to break up the clog. Pull out any debris that comes up with the snake.
- Once you’ve cleared any blockages, run water down the drain to ensure it flows freely. This will indicate that you’ve successfully removed any obstructions.
Proper disposal of the old drain components
After removing the old drain, it’s crucial to dispose of the components properly. Here are some guidelines to follow:
- Place the old drain components, such as the drain assembly and accompanying parts, in a sturdy bag or container.
- Seal the bag or container tightly to prevent any leaks or spills.
- Check with your local waste management facility or recycling center to determine the proper method of disposal for these materials.
- Follow any specific instructions provided by your waste management facility to ensure environmentally friendly disposal.
By following these guidelines, you can ensure a safe and efficient removal process for your basement shower drain. Remember to always prioritize safety and seek professional help if needed.
Checking The Shower Base Compatibility
Before installing a basement shower drain, it is crucial to ensure that the shower base is compatible with the drain requirements. This step is necessary to prevent any future complications and to ensure a seamless installation process. In this section, we will discuss the key considerations to keep in mind when checking the shower base compatibility.
Ensuring the dimensions and layout match the drain requirements
One of the first things to do when checking the shower base compatibility is to ensure that the dimensions and layout of the base match the drain requirements. Take accurate measurements of the shower base and compare them to the specifications provided by the drain manufacturer.
If there are any discrepancies, adjustments might need to be made to either the shower base or the drain. It is essential to address these issues before moving forward with the installation to avoid any complications later on.
Making necessary adjustments for a proper fit
If the dimensions or layout of the shower base do not align with the drain requirements, it may be necessary to make adjustments. This could involve modifying the base by cutting or extending it to achieve a proper fit.
Keep in mind that making adjustments to the shower base should be done carefully and accurately to maintain its structural integrity. Consult with a professional if needed to ensure that the modification is done correctly.
Creating a level and stable base for the drain
Once the shower base is compatible with the drain requirements, the next step is to create a level and stable base for the drain. This is crucial to ensure proper drainage and to prevent any leaks or water damage.
Start by inspecting the subfloor and ensuring that it is level. Use a leveling tool to check for any uneven areas and make necessary adjustments, such as adding shims or leveling compound.
After addressing the subfloor, place the drain on the designated area of the base and ensure it is level. Use a leveling tool again to make any adjustments if needed.
Additionally, it is important to ensure that the base is stable to support the weight of the shower and its users. Reinforce the base if necessary, considering factors such as the materials used and the construction of the base.
By creating a level and stable base for the drain, the installation process will be smoother and more effective, reducing the risk of future issues.
Connecting The Drain To The Plumbing System
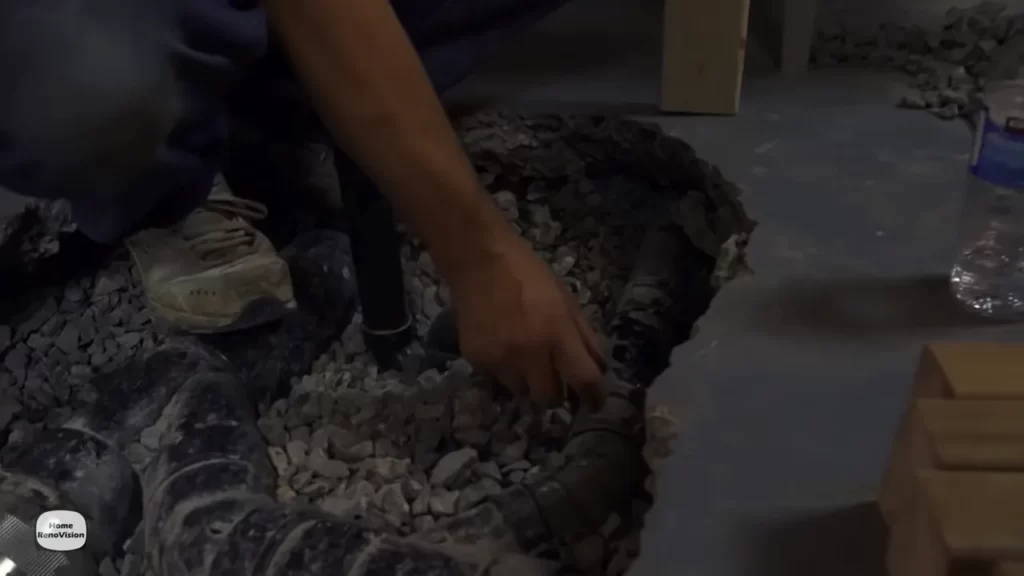
Properly aligning the drain with the existing pipe
Before connecting the shower drain to the plumbing system in your basement, it is crucial to ensure proper alignment with the existing pipe. This will help prevent any future issues related to clogging or leakage. To align the drain correctly:
- Carefully measure the location of the existing pipe to determine the precise placement of the drain.
- Use a level to ensure the drain is perfectly aligned with the slope of the pipe, which facilitates proper drainage.
- Make any necessary adjustments to achieve the correct alignment, ensuring that the bottom of the drain matches the height of the existing pipe.
Securing the connections with appropriate fittings
Once you have properly aligned the drain with the existing pipe, the next step is to secure the connections using suitable fittings. This is important to prevent any leaks or disconnections. Follow these steps:
- Choose the appropriate fittings based on the materials of the drain and the existing pipe. Common options include PVC, ABS, or brass fittings.
- Apply plumber’s tape or thread sealant to the threaded connections to ensure a tight seal and prevent any leakage.
- Hand-tighten the fittings initially, and then use an adjustable wrench or pliers to firmly tighten them. Avoid overtightening, as it may cause damage to the fittings or the pipe.
Testing for leaks and ensuring proper drainage flow
After securely connecting the shower drain to the plumbing system, it is essential to test for leaks and ensure that proper drainage flow is maintained. Follow these steps to complete the installation:
- Plug the drain temporarily to prevent debris or water from obstructing the pipe during the testing process.
- Fill the shower base or basin with water to check for any leaks at the connections. Observe any signs of water leakage or seepage.
- If there are no leaks, remove the temporary plug and allow the water to drain completely. Observe if the drainage flow is smooth and uninterrupted.
- If there are leaks or poor drainage flow, revisit the connections and ensure they are properly secured. Make any necessary adjustments to achieve a watertight seal and proper drainage.
By following these steps, you can connect the shower drain to the existing plumbing system in your basement effectively. This ensures a secure connection, prevents leaks, and promotes proper drainage flow, providing you with a functional and reliable basement shower.
Sealing And Waterproofing The Drain
When installing a basement shower drain, one of the most crucial steps is to ensure proper sealing and waterproofing. This is essential to prevent any potential water leakage and protect the structural integrity of your basement. In this section, we will discuss two essential measures to achieve effective sealing and waterproofing: applying a waterproofing membrane around the drain area and sealing any gaps or openings.
Applying a Waterproofing Membrane Around the Drain Area
To create a watertight seal around the basement shower drain, it is recommended to apply a waterproofing membrane. This membrane acts as an additional layer of protection, preventing any water from seeping into your basement. Here’s how you can apply a waterproofing membrane around the drain:
- Start by cleaning the area around the drain thoroughly to remove any dust, debris, or residue.
- Next, apply a primer to the drain area. This helps to improve the adhesion of the waterproofing membrane.
- Using a paintbrush or roller, apply the waterproofing membrane evenly around the drain area, ensuring complete coverage. Pay extra attention to the joints and corners.
- Allow the membrane to dry completely before proceeding to the next step.
Applying a waterproofing membrane is an effective way to create a barrier and protect the drain area from water damage. It is important to follow the manufacturer’s instructions for the specific waterproofing membrane you are using to ensure proper application.
Sealing any Gaps or Openings to Prevent Water Leakage
In addition to the waterproofing membrane, it is crucial to seal any gaps or openings around the basement shower drain. This further enhances the water-tightness of the installation, effectively preventing any potential leaks. Here’s what you need to do to seal gaps or openings:
- Carefully inspect the drain area for any visible gaps or openings.
- Use an appropriate waterproof sealant or caulk to fill in these gaps. Make sure to choose a sealant that is specifically designed for use in wet areas.
- Apply the sealant in a steady, continuous motion, ensuring complete coverage of the gaps.
- Smooth out the sealant using a caulk smoothing tool or your finger.
- Allow the sealant to dry completely according to the manufacturer’s instructions.
By sealing any gaps or openings, you are reinforcing the waterproofing measures around the basement shower drain and minimizing the risk of water leakage.
Verifying the Effectiveness of the Waterproofing Measures
Once you have applied the waterproofing membrane and sealed any gaps, it is crucial to verify the effectiveness of these measures. You want to ensure that your basement shower drain installation is truly watertight. Here are a few steps to help you verify the effectiveness:
- Fill the shower basin with water.
- Observe the drain area for any signs of water leakage, such as drips or puddles.
- If you notice any leakage, re-examine the drain area to identify the source.
- Make necessary adjustments, such as applying additional sealant or reapplying the waterproofing membrane, to address any issues.
By verifying the effectiveness of the waterproofing measures, you can have peace of mind knowing that your basement shower drain is properly sealed and protected against water damage.
Conducting A Thorough Inspection
Conducting a thorough inspection
Before proceeding with the installation of a basement shower drain, it is crucial to conduct a thorough inspection to ensure that the drainage system is in optimal condition. This inspection will help identify any leaks or drainage issues that might disrupt the functionality of the drain. Additionally, testing the flow rate and functionality of the drain will help determine if any adjustments or repairs are necessary. By taking these steps, you can ensure a seamless installation and avoid potential issues in the future.
Checking for any leaks or drainage issues
In order to prevent future complications with your basement shower drain, it is important to carefully check for any leaks or drainage issues in the existing system. Here are a few key steps to follow:
- Inspect the pipes and connectors for any visible signs of leakage, such as water stains or dampness.
- Feel for any moisture accumulation around the pipes, as this can indicate potential leaks.
- Check for any unusual odors coming from the drain, as this may indicate clogs or improper ventilation.
- Run water through the existing drain and observe if there is any water backing up or pooling.
If you notice any leaks or drainage issues during this inspection, it is crucial to address and repair them before proceeding with the installation. This will help ensure the proper functionality of your new basement shower drain.
Testing the flow rate and functionality of the drain
One important aspect of installing a basement shower drain is to test its flow rate and functionality. By doing so, you can identify any potential issues and make any necessary adjustments. Here’s what you can do to test the drain:
- Run water through the drain and observe how quickly it drains. A slow drainage rate may indicate a clog or inadequate slope in the pipes.
- Check if the drain is able to handle a large volume of water without overflowing or backing up.
- Test the drain’s ability to remove debris by introducing small particles, such as pieces of paper or hair, into the drain and observing if it can efficiently flush them out.
If any issues are identified during the testing process, it is important to make the necessary adjustments or repairs to ensure the proper functionality of the basement shower drain.
By conducting a thorough inspection, checking for leaks or drainage issues, and testing the flow rate and functionality of the drain, you are taking proactive steps to ensure a successful installation. This will help you avoid potential issues in the future and ensure a reliable and efficient basement shower drain.
Frequently Asked Questions
Does A Basement Shower Drain Need A Trap?
Yes, a basement shower drain needs a trap. A trap is essential as it prevents sewer gases from entering your home. It also helps to prevent clogs by catching debris and preventing it from flowing further into the plumbing system.
Without a trap, you may experience foul odors and potential plumbing issues.
Can A Basement Drain Be Used For A Shower Drain?
Yes, a basement drain can be used for a shower drain. The drainage system can be connected to the existing basement drain, allowing for proper water disposal. It is essential to ensure proper plumbing and installation to avoid any clogging or drainage issues.
How Much Does It Cost To Install A Shower Drain In A Basement?
The cost of installing a shower drain in a basement varies depending on factors like location and complexity of the project. On average, you can expect to spend around $200 to $500 for the installation.
How Do You Install A Shower Drain Without Breaking Concrete?
To install a shower drain without breaking concrete, follow these steps: 1. Locate the existing drain pipe and determine the new drain position. 2. Use a drill to create a starter hole and gradually enlarge it using a hammer drill. 3.
Connect the new drain to the existing pipe using fittings and secure them tightly. 4. Seal the area around the new drain with waterproofing material. 5. Test the installation for leaks before covering the concrete.
Conclusion
Installing a basement shower drain may seem like a daunting task, but with the right guidance, it can be accomplished successfully. By following the steps outlined in this guide, you can ensure a hassle-free installation process. Remember to assess your needs, gather the necessary materials, and carefully plan the layout before proceeding.
With proper preparation and attention to detail, you’ll have a functional and efficient basement shower drain in no time. Happy DIY-ing!