
To install a ball valve, first, shut off the water supply and drain the system. Then, remove any piping or fittings connected to the valve and thread the valve onto the pipe until it’s tight.
Finally, reconnect the piping and fittings and turn on the water supply. Installing a ball valve is a simple process that involves shutting off the water supply, removing connections, threading the valve onto the pipe, and reconnecting everything before turning the water supply back on.
By following these steps, you can easily install a ball valve and ensure smooth water flow control in your system.
Why Choose A Ball Valve For Your Plumbing Needs?
Benefits of using a ball valve over other valve types
A ball valve is a popular choice for many plumbing needs due to its numerous benefits and advantages. Unlike other valve types, such as gate valves or globe valves, ball valves offer unique features that make them a preferred option. Let’s explore some of the key benefits of using a ball valve:
- Efficient Flow Control: Ball valves have a simple mechanism that allows for easy and efficient flow control. The spherical ball with a hole in it allows the fluid or gas to pass through smoothly when the valve is open, and quickly stops the flow when closed.
- Quick Operation: With just a quarter-turn of the handle, ball valves can be swiftly opened or closed, providing prompt flow control. This quick operation is particularly handy in emergency situations or when immediate shut-off is required.
- Durability: Ball valves are known for their durability and long lifespan. The solid ball and sturdy construction make them resistant to wear and tear, making them suitable for both high-pressure and high-temperature applications.
- Leakage Prevention: The design of a ball valve ensures a secure seal when closed, minimizing the chances of leakage. This can be crucial in plumbing systems where leakage can lead to costly repairs and water wastage.
- Versatility: Ball valves can be used for a wide range of applications in residential, commercial, and industrial plumbing systems. They are suitable for controlling the flow of various substances, including water, oil, gas, and chemicals.
- Low Maintenance: Due to their simple design and fewer moving parts, ball valves require minimal maintenance. This makes them a cost-effective option in the long run.
- Compact Size: Ball valves are compact in size compared to other valve types, making them easier to install in tight spaces or crowded plumbing systems.
Introduction to ball valves and their functionality
Before delving into the importance of proper valve installation, it’s essential to understand what ball valves are and how they function. Ball valves are quarter-turn valves that control the flow of fluids or gases by using a hollow, perforated, pivoting ball within the valve body. By turning the handle or lever, the ball rotates, allowing the flow of substance or blocking it completely.
Ball valves operate on the principle of a simple yet effective design. When the handle is perpendicular to the pipe, the valve is closed, and the flow is blocked. Turning the handle parallel to the pipe opens the valve, allowing the substance to move through the pipe.
The functionality of ball valves makes them efficient in controlling fluid flow in plumbing systems. Their straightforward design eliminates the need for complex mechanisms, minimizing the chances of malfunction or failure. This simplicity, combined with their numerous benefits, makes ball valves a reliable choice for various plumbing needs.
Understanding the importance of proper valve installation
Proper valve installation is crucial to ensure optimal performance and longevity of a ball valve and the overall plumbing system it is a part of. Even the most efficient and durable valve can underperform if not installed correctly. That’s why it is essential to pay attention to the installation process and follow these guidelines:
- Choose the Correct Valve: Before installing a ball valve, ensure that it is the right fit for the plumbing system and its intended purpose. Assess factors such as pressure, temperature, material compatibility, and size requirements.
- Prepare the Installation Site: Clear the installation area of any obstructions, debris, or residues that may hinder the proper installation of the valve. Ensure that surrounding pipes and components are in good condition to prevent any interference or damage during installation.
- Use Proper Tools and Equipment: Use the appropriate tools and equipment to install the ball valve. This may include wrenches, pipe sealant, thread tape, or other specialized tools based on the specific requirements of the installation.
- Follow Manufacturer’s Instructions: Read and follow the manufacturer’s instructions carefully to ensure correct installation. Each valve may have specific guidelines regarding tightening torque, sealing methods, or compatibility with different pipe materials.
- Inspect for Leaks: After installation, thoroughly inspect the valve and surrounding connections for any signs of leaks. Perform a pressure test if necessary to ensure the valve is functioning properly and there are no leaks in the system.
By adhering to proper valve installation practices, you can maximize the performance and longevity of your ball valve, ensuring reliable flow control and minimizing the risk of plumbing issues.
Selecting The Right Ball Valve For The Job
When it comes to installing a ball valve, selecting the right type for the job is crucial. A ball valve is a versatile valve that is commonly used for controlling the flow of liquids or gases. It is important to consider the different types of ball valves available and their applications, as well as the factors to consider when choosing a ball valve for installation and the key specifications to look for in a quality ball valve. This article will provide an overview of these considerations to help you make an informed decision for your specific needs.
Different Types of Ball Valves and Their Applications
There are various types of ball valves available, each designed for specific applications. The following table highlights the different types of ball valves and their common applications:
| Ball Valve Type | Applications |
|---|---|
| Full Port Ball Valve | Used when maximum flow capacity is required |
| Standard Port Ball Valve | Commonly used in general applications |
| Vented Ball Valve | Used in applications where pressure relief is necessary |
| Three-Way Ball Valve | Used for diverting flow between different ports |
Factors to Consider When Choosing a Ball Valve for Installation
When selecting a ball valve for installation, there are several factors to consider. These include:
- The material of the ball valve: Different materials offer varying levels of resistance to corrosion and can withstand specific operating conditions.
- The size and end connections: Ensure that the ball valve is compatible with the existing piping system.
- The pressure and temperature rating: Consider the maximum pressure and temperature the ball valve needs to withstand in the application.
- The flow rate requirement: Determine the minimum and maximum flow rates needed to select the right ball valve with the appropriate flow capacity.
- The type of actuator: Depending on whether manual or automated operation is desired, choose a ball valve with the appropriate actuator type.
Key Specifications to Look for in a Quality Ball Valve
When searching for a quality ball valve, it is essential to pay attention to key specifications that ensure optimal performance and durability. These specifications include:
- The valve material: Choose a ball valve made from high-quality materials to ensure longevity and resistance to corrosion.
- The valve pressure rating: Ensure the ball valve is rated for the maximum pressure requirements of the system.
- The valve temperature rating: Verify that the ball valve can handle the expected temperature range without compromising performance.
- The valve seals: Look for ball valves with reliable seals to prevent leaks and achieve tight shut-off.
- The valve certification: Consider ball valves that meet industry standards and have appropriate certifications to ensure quality and compliance.
By considering the different types of ball valves and their applications, the factors to consider when choosing a ball valve for installation, and the key specifications to look for in a quality ball valve, you can make an informed decision that meets the specific requirements of your installation job.
Preparing For Installation
Before installing a ball valve, it’s crucial to prepare adequately. This involves gathering the necessary tools and materials, shutting off the water supply, draining the system, and assessing the valve placement and determining the appropriate size.
Gathering the necessary tools and materials
Having the right tools and materials on hand will make the installation process smoother and more efficient. Here’s a list of items you’ll need:
- Adjustable wrench
- Pipe cutter
- Teflon tape or pipe joint compound
- Ball valve
- Copper tubing or PVC pipe, depending on your system
- Pipe fittings
- Measuring tape
- Marker
- Bucket or towels for water spillage
Shutting off the water supply and draining the system
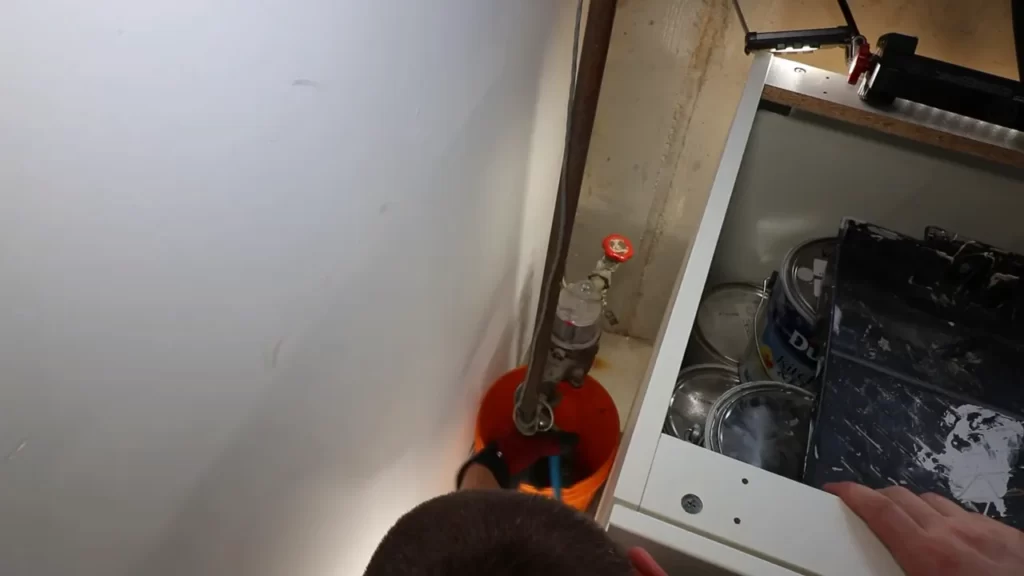
In order to avoid any mishaps during the installation process, it is essential to shut off the water supply to the system and drain any remaining water. Follow these steps:
- Locate the main water shutoff valve, usually found near the water meter.
- Turn the shutoff valve clockwise until it is completely closed.
- Open all the faucets in your house to allow the water to drain out of the system.
- Wait for a few minutes until there is no more water flowing from the faucets, indicating that the system is drained.
Assessing the valve placement and determining the appropriate size
Proper valve placement and sizing are crucial for the ball valve to function optimally. Follow these steps:
- Identify the section of the pipeline where you want to install the ball valve.
- Measure the diameter of the pipeline accurately to determine the appropriate valve size.
- Ensure that there is enough space around the valve for easy installation and maintenance.
- Mark the spots where the valve will be installed using a marker.
It’s important not to rush through the preparation process and to pay attention to detail. By following these steps and properly preparing for the installation of a ball valve, you can save time and avoid potential issues down the line.

Step-By-Step Guide: How To Install A Ball Valve
Installing a ball valve is an essential skill for any homeowner or DIY enthusiast. Whether you’re replacing an old valve or installing a new one, it’s important to follow the correct steps to ensure a watertight connection and proper valve operation. In this guide, we’ll walk you through the installation process, covering everything from removing the old valve (if applicable) to checking for leaks. Let’s get started!
Removing the old valve (if applicable) and cleaning the pipes
If you’re replacing an old valve, the first step is to remove it. To do this, follow these steps:
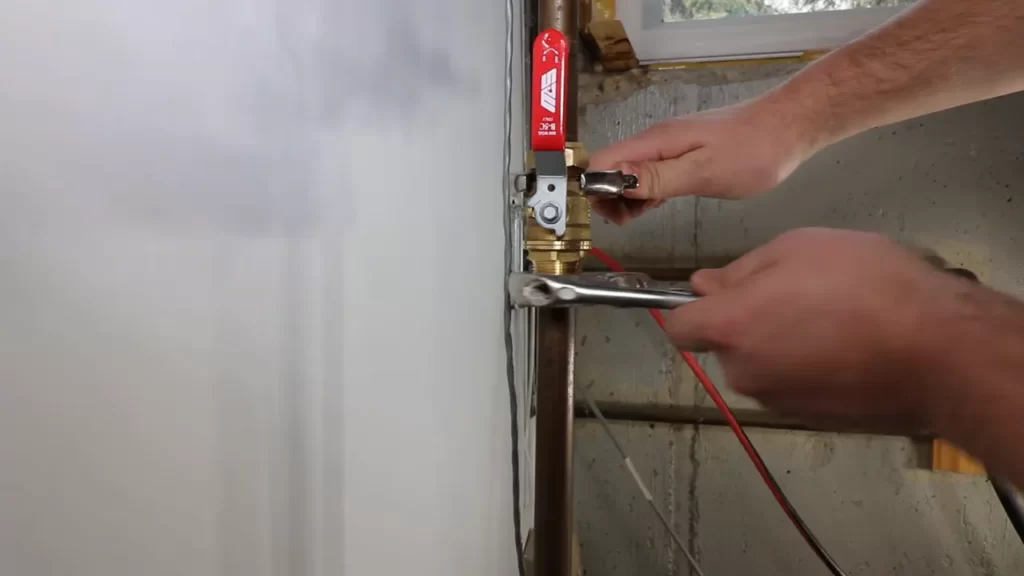
- Shut off the water supply to the valve. This can usually be done by turning off the main water supply to your house.
- Use a pipe wrench to loosen the fittings connecting the valve to the pipes. Be careful not to damage the pipes or surrounding fixtures.
- Once the fittings are loosened, carefully remove the old valve from the pipes.
After removing the old valve, it’s important to clean the pipes before installing the new one. This will help ensure a secure and leak-free connection. To clean the pipes, follow these steps:
- Use a pipe cleaning brush or sandpaper to remove any debris or corrosion from the pipe ends.
- Wipe the pipe ends with a clean cloth to remove any remaining dirt or debris.
- Inspect the pipe ends to ensure they are smooth and free from any burrs or rough edges.
Applying pipe tape or sealant to ensure a watertight connection
To ensure a watertight connection between the ball valve and the pipes, it’s important to apply pipe tape or sealant. Here’s how:
- Ensure the pipe ends are clean and dry.
- If using pipe tape, wrap it clockwise around the threaded portion of the pipe, making sure to cover the entire thread.
- If using sealant, apply a thin, even layer to the threaded portion of the pipe.
- Hand-tighten the fittings onto the pipe, making sure they are snug and secure.
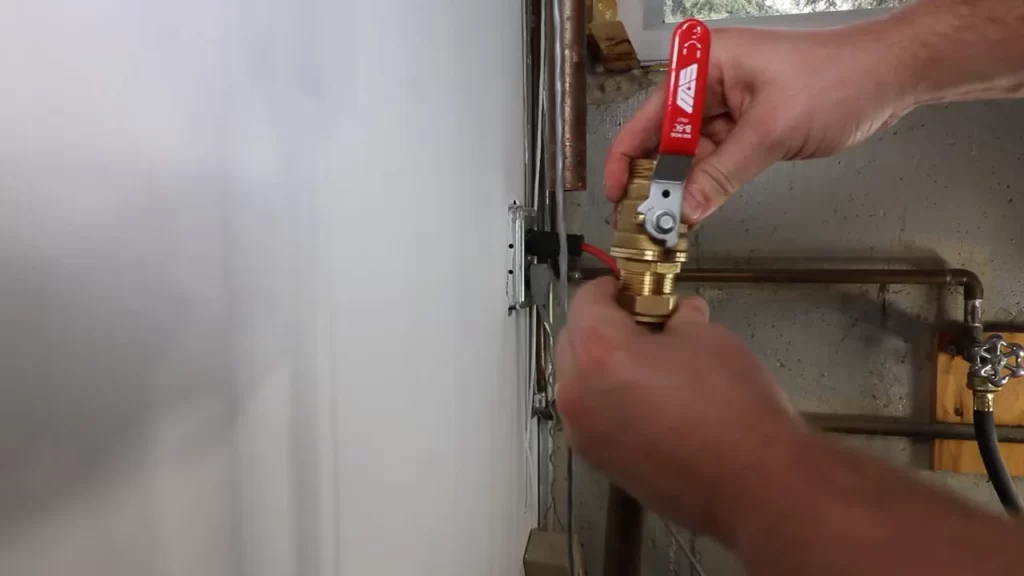
Attaching the valve to the pipes using appropriate fittings and connectors
Now that the pipes are clean and have the necessary tape or sealant, it’s time to attach the ball valve. Follow these steps:
- Identify the correct fittings and connectors for your specific valve and pipe configuration.
- Apply pipe tape or sealant to the threaded portion of the fitting or connector.
- Screw the fitting or connector onto the pipe, making sure it is tight and secure.
Repeat this process for all remaining fittings and connectors until the ball valve is securely attached to the pipes.
Checking for leaks and ensuring proper valve operation
Once the ball valve is installed, it’s important to check for leaks and ensure proper valve operation. Follow these steps:
- Turn on the water supply and check for any leaks around the valve and fittings. If you notice any leaks, tighten the fittings or connectors as needed.
- Open and close the valve to ensure it operates smoothly and without any sticking or binding.
- Check for any signs of leakage or dripping when the valve is open or closed.
If you detect any leaks or issues with the valve, it may be necessary to recheck the installation steps or seek professional assistance.
By following this step-by-step guide, you can confidently install a ball valve and ensure a reliable and watertight connection. Remember to always prioritize safety and consult manufacturer guidelines for your specific valve and pipe configuration. Happy installing!
Troubleshooting Common Installation Issues
Even with careful installation, it’s not uncommon to encounter issues when installing a ball valve. This section will guide you through troubleshooting common installation problems, providing solutions for leaks, valve operation and flow control issues, and potential compatibility problems.
Dealing with leaks and how to fix them
A leak in a ball valve can significantly impact its performance. If you notice a leak after installation, don’t worry. Here are some steps you can take to fix the issue:
- Inspect the coupling connections: Start by checking the connections between the ball valve and the pipes or fittings. Ensure that they are tight and secure. Use a wrench to tighten any loose connections.
- Check the ball valve seals: The ball valve has seals that prevent leakage. If you suspect a seal is faulty, turn off the water supply and disassemble the valve. Inspect the seals for any signs of damage or wear. If necessary, replace the seals.
- Apply thread seal tape: If the leak persists, try applying thread seal tape to the threaded connections. This can help create a tight seal and prevent leakage.
- Consider pipe dope or joint compound: If thread seal tape doesn’t solve the problem, you can try using a pipe dope or joint compound. Apply a thin layer to the threaded connections and assemble the valve. This can provide additional sealing.
Addressing issues with valve operation and flow control
When installing a ball valve, it’s essential to ensure smooth operation and proper flow control. If you encounter any issues in this regard, follow these steps to troubleshoot:
- Inspect the handle or lever: The handle or lever of the ball valve is responsible for opening and closing the valve. Make sure it moves freely and without any obstructions. If it’s stiff or difficult to operate, lubricate the mechanism with a suitable lubricant.
- Check for debris or blockages: Sometimes, debris or blockages can interfere with the flow control of the ball valve. Remove the valve from the pipeline and inspect it for any buildup or foreign objects. Clean the valve thoroughly before reinstalling it.
- Examine the ball and seats: The ball and seats are vital components that control the flow in a ball valve. If they are damaged or worn, it can affect the valve’s operation. Inspect the ball and seats for signs of wear, cracks, or corrosion. Replace them if necessary.
- Verify the direction of installation: Ball valves typically have an arrow on the body indicating the flow direction. Make sure you have installed the valve in the correct orientation and that the flow aligns with the arrow.
Identifying and resolving potential compatibility problems
Compatibility issues can arise when installing a ball valve, especially when dealing with different materials or fluids. Here’s how to identify and address potential compatibility problems:
- Check material compatibility: Ensure that the ball valve material is compatible with the fluids it will handle. Some fluids or chemicals may corrode or damage certain materials. Consult the manufacturer’s guidelines or seek professional advice to ensure the proper material selection.
- Consider pressure and temperature limitations: Ball valves have specific pressure and temperature limitations that must be considered during installation. Install the valve within the recommended limits to avoid issues with valve performance or failure.
- Assess the flow rate: High flow rates can cause turbulence and affect the functionality of a ball valve. If you’re experiencing flow control issues, consider using a valve with a higher flow rate rating or consult a professional for further guidance.
By following these troubleshooting steps, you can overcome common installation issues associated with ball valves. Properly addressing leaks, valve operation, and compatibility problems will ensure the optimal performance and longevity of your ball valve installation.
Maintenance And Care For Long-Lasting Performance
Introduction:
Maintaining and caring for your ball valve is crucial for its long-lasting performance. Regular inspection, cleaning, lubrication, and knowing when to replace or repair the valve are essential steps to ensure optimal functioning. In this article, we will delve into these aspects and provide a comprehensive guide on how to properly maintain and care for your ball valve.
Regular inspection and cleaning of the ball valve
Regular inspection and cleaning of your ball valve are necessary to prevent any debris or build-up that may hinder its performance. Follow these steps to ensure your valve stays clean:
1. Visual inspection: Start by visually inspecting the valve for any signs of leaks, corrosion, or damage. Pay special attention to the seals, valve body, and connections.
2. Cleaning the valve: Use a soft cloth or brush to remove any dirt or debris from the valve’s exterior. For stubborn residue, you can use a mild detergent solution. Be cautious not to use abrasive materials that could damage the valve.
3. Inspecting the interior: Carefully open the valve to inspect the ball and seats. Remove any foreign objects or deposits that may affect its operation. You may use a clean cloth or a non-abrasive brush for this task.
4. Reassembling the valve: Once cleaned, reassemble the valve and ensure that all parts are correctly aligned and tightened. Regular inspection and cleaning will keep your ball valve in optimal condition and prevent any potential issues.
Lubricating moving parts to prevent sticking or seizing
Lubrication plays a crucial role in maintaining the smooth operation of your ball valve. Follow these guidelines to ensure proper lubrication:
1. Selecting the right lubricant: Choose a lubricant recommended by the valve manufacturer. Common options include silicone-based or Teflon-based lubricants.
2. Application: Apply a thin layer of lubricant to the stem, seats, and other moving parts of the valve. Ensure even coverage but avoid excessive application, as it can attract dirt or debris.
3. Schedule: Establish a regular lubrication schedule based on the valve’s usage and manufacturer’s recommendations.
4. Monitoring: Keep an eye on the valve’s performance after lubrication. If you notice any sticking or resistance, it may indicate the need for additional lubrication or inspection.
Knowing when to replace or repair the valve
Despite proper maintenance, there may come a time when your ball valve needs replacement or repair. Consider these factors to determine whether it’s time to take action:
1. Leakage: If you observe persistent leaks even after inspection and cleaning, it may indicate a faulty valve that requires replacement.
2. Corrosion or damage: Excessive corrosion or physical damage to the valve may compromise its functionality. In such cases, repairing or replacing the valve becomes necessary.
3. Limited range of motion: If the valve becomes difficult to turn or shows restricted movement, it may require repair or replacement.
4. Age and lifespan: Valves have a typical lifespan, varying based on usage and quality. If your valve is older or nearing its expected lifespan, consider replacing it to avoid potential failures.
By regularly inspecting, cleaning, lubricating, and knowing when to replace or repair your ball valve, you can ensure its long-lasting performance. Taking these steps will not only extend the lifespan of your valve but also prevent potential disruptions in your operations. So, prioritize the maintenance and care of your ball valve and enjoy its efficient functionality for years to come.
Frequently Asked Questions
Which Way Does A Ball Valve Face?
A ball valve should face with the lever or handle in a vertical position, pointing upward. The lever or handle should be perpendicular to the pipe when the valve is fully open.
Why Are Ball Valves Directional?
Ball valves are directional because they have a quarter-turn operation. When the handle or lever is turned, it opens or closes the valve, allowing or preventing the flow of fluid in one direction. This directional flow control makes ball valves suitable for applications where flow needs to be regulated or shut off efficiently.
Does A Ball Valve Need To Be Fully Open?
A ball valve does not need to be fully open. It can be adjusted to control the flow of liquids or gases.
Can I Install Ball Valve Vertically?
Yes, you can install a ball valve vertically.
Conclusion
To sum up, installing a ball valve may seem like a daunting task at first, but with the right knowledge and steps, it can be easily accomplished. By following this guide, you can ensure a smooth installation process, allowing for efficient control of your fluid systems.
Remember to carefully select the appropriate valve size, use the proper tools, and check for any leaks once the installation is complete. With this information, you are well-equipped to install a ball valve confidently and accurately. Happy plumbing!