
To install a ball joint without a press, you can follow these steps: use a ball joint separator to remove the old ball joint, clean the ball joint housing, place the new ball joint into the housing, and use a large socket and hammer to press the ball joint into place. Installing a ball joint without a press can be a daunting task, but with the right tools and technique, it can be accomplished successfully.
Ball joints are an essential component of a vehicle’s suspension system, connecting the control arm to the steering knuckle. Over time, these joints may become worn or damaged, requiring replacement. While a hydraulic press is commonly used to install new ball joints, it is possible to complete the installation without it.
We will explore a step-by-step guide on how to install a ball joint without a press, enabling you to save time and money on complex equipment or professional services.
Understanding The Function Of Ball Joints
When it comes to the suspension system of your vehicle, ball joints play a crucial role in maintaining stability and ensuring a smooth ride. These small but mighty components act as the connecting link between the control arms and the steering knuckles, allowing for the articulation and rotation necessary for comfortable and controlled driving.
What are Ball Joints and why are they important?
Ball joints are spherical bearings that provide a flexible joint between the control arms and the steering knuckles. They allow for the up and down movement of the suspension while also allowing the wheels to steer left or right. These components are essential for maintaining proper alignment and ensuring that the tires make consistent and stable contact with the road surface.
The role of Ball Joints in the suspension system
Ball joints are integral to the suspension system of a vehicle as they act as pivots, allowing the suspension to move freely while also supporting the weight of the vehicle. Without properly functioning ball joints, the suspension system would have limited mobility and would compromise the overall stability and control of the vehicle.
Ball joints are designed to withstand the constant forces and pressures exerted on them during the vehicle’s operation. They must be able to withstand the weight of the vehicle, the forces encountered during turns, and the impact of uneven road surfaces. Additionally, they must remain flexible enough to allow for smooth articulation and steering.
Common signs of faulty Ball Joints
As with any mechanical component, ball joints can wear out over time due to constant use and exposure to the elements. It is important to be aware of the common signs of faulty ball joints so that you can address the issue before it causes further damage to your vehicle. Here are some common indicators of worn or failing ball joints:
- Clunking or knocking noises coming from the front suspension
- Excessive vibration or shaking felt through the steering wheel
- Uneven tire wear, especially on the front tires
- Poor handling and decreased stability while driving
- Difficulty steering or a feeling of looseness in the steering
If you notice any of these signs, it is important to have your ball joints inspected and replaced if necessary. Ignoring faulty ball joints can lead to further damage to your suspension system and can compromise the safety and performance of your vehicle.
Proper maintenance and regular inspections of your ball joints are essential for ensuring the longevity and performance of your suspension system. By understanding the function of ball joints and being aware of the signs of faulty ones, you can take proactive steps to keep your vehicle running smoothly and safely.

Tools And Equipment Required
In order to install a ball joint without a press, you will need a few essential tools and equipment. It’s important to have the right tools on hand to ensure a smooth and successful installation process. Additionally, it’s crucial to follow proper safety precautions to protect yourself from any potential injuries or accidents.
Essential tools required for Ball Joint installation
When it comes to installing a ball joint without a press, having the right tools can make all the difference. Here are the essential tools you will need:
- Ball Joint Separator Tool: This tool is designed to separate the ball joint from the steering knuckle or control arm. It easily applies pressure and releases the joint.
- Needle Nose Pliers: Needle nose pliers are useful for removing the retaining clips or other small components that may be in the way.
- Socket or Wrench Set: Depending on your vehicle’s specifications, you will need a socket or wrench set to loosen and remove the necessary bolts.
- Hammer: A hammer can be used to tap on the ball joint or control arm to loosen any rust or corrosion that may be present.
- Jack and Jack Stands: A jack and jack stands are essential for safely raising and supporting your vehicle while working on the ball joint.
Safety equipment and precautions
Ensuring your safety while working on your vehicle is crucial. Here are a few safety equipment and precautions to keep in mind:
- Safety Glasses: Always wear safety glasses to protect your eyes from any debris or particles that may be dislodged during the installation process.
- Gloves: Wearing gloves can provide a better grip and protect your hands from any sharp edges or potential injuries.
- Work in a Well-ventilated Area: Working in a well-ventilated area can help minimize the inhalation of any harmful fumes or chemicals that may be present.
- Secure the Vehicle: Before starting any work, ensure that the vehicle is securely parked and supported on jack stands. This will help prevent any accidents or injuries while working underneath the vehicle.
- Follow the Manufacturer’s Instructions: Always refer to the manufacturer’s instructions specific to your vehicle for the correct procedures and torque specifications to follow during the installation process.
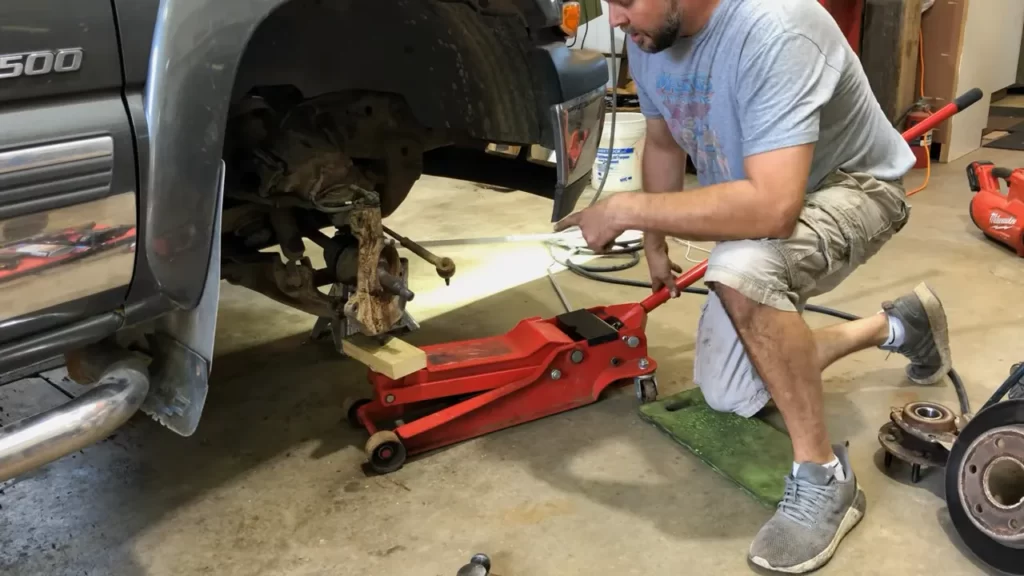
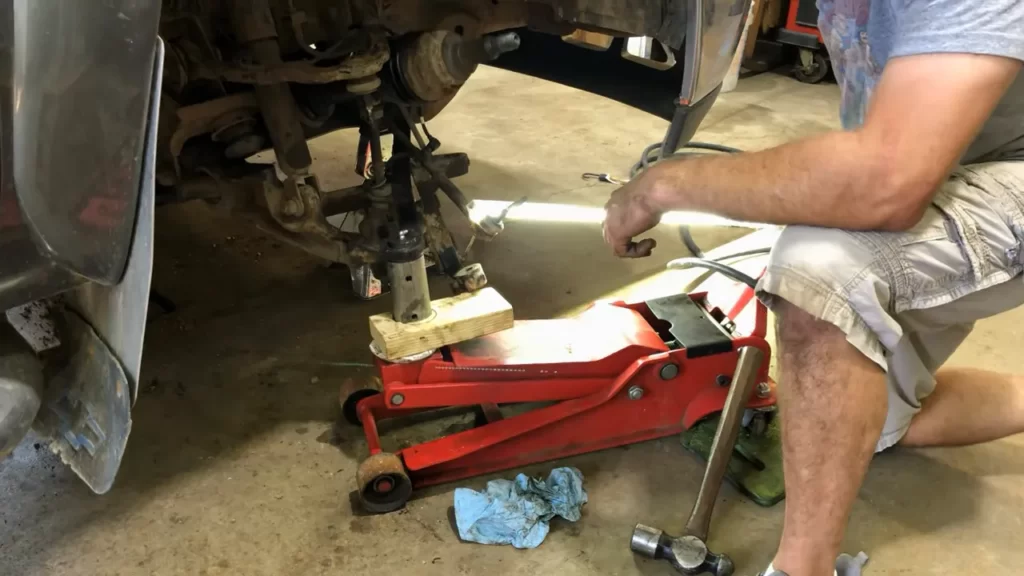
Removing The Old Ball Joint
Step-by-step instructions to remove the old Ball Joint without a press
Removing the old ball joint from your vehicle doesn’t always require a press, as there are alternative methods that can be equally effective. While using a press might be the quickest and easiest way to get the job done, not everyone has access to one. Whether you’re working on a tight budget or simply don’t have a press on hand, don’t worry! In this guide, we will provide you with step-by-step instructions to remove the old ball joint without a press, along with common challenges you might encounter and how to overcome them.
-
Prepare the necessary tools
Before starting the removal process, gather the following tools:
- A ball joint separator tool
- A hammer
- A wrench or socket set
- A pry bar
- A jack and jack stands
-
Secure the vehicle
Park your vehicle on a flat and stable surface. Engage the parking brake and place wheel chocks behind the rear wheels to prevent the vehicle from moving.
-
Loosen the ball joint nut
Locate the ball joint nut on the control arm or steering knuckle and use a wrench or socket set to loosen it. Do not remove the nut completely at this point.
-
Separate the ball joint
Position the ball joint separator tool between the control arm or steering knuckle and the ball joint housing. Use a hammer to strike the tool firmly until the ball joint separates from the component. This may require several strikes, so be patient and ensure the tool is properly positioned.
-
Remove the ball joint
Once the ball joint is separated, use a pry bar to pry it out from the control arm or steering knuckle. Apply gentle force and avoid damaging any surrounding components.
Common challenges and how to overcome them
Removing a ball joint without a press can come with its own set of challenges. Here are some common difficulties you might encounter and how to overcome them:
| Challenge | Solution |
|---|---|
| The ball joint is rusted or seized | Apply penetrating oil to the joint and let it sit for a few hours to loosen the rust. Use a hammer to tap the ball joint separator tool more forcefully if needed. |
| The ball joint refuses to separate | If the separator tool doesn’t work, heat the surrounding area of the ball joint with a torch to expand the metal. Be cautious not to overheat and damage any nearby components. Try the separator tool again while the metal is still warm. |
| Insufficient clearance to use a separator tool | In some cases, there might not be enough clearance to fit a separator tool. In such situations, using a hydraulic jack to exert pressure on the control arm or steering knuckle can help break the joint free. |
By following these step-by-step instructions and being aware of common challenges, you can successfully remove the old ball joint from your vehicle without the need for a press. Remember to exercise caution and take your time to ensure a safe and effective removal process.
Preparing The New Ball Joint
Once you have removed the old ball joint from your vehicle, it’s time to prepare the new ball joint for installation. This step is crucial to ensure a secure and long-lasting fit. In this section, we will discuss how to inspect the new ball joint for any defects and how to apply lubricant and prepare it for installation.
Inspecting the new Ball Joint for any defects
Before proceeding with the installation, it’s important to carefully inspect the new ball joint for any defects. Even a small defect can compromise the performance and safety of your vehicle. Here are a few steps to follow when inspecting the new ball joint:
- Check the ball joint housing for any cracks or damage. A damaged housing can lead to premature failure of the joint.
- Inspect the ball stud for any signs of wear or deformities. Ensure that the stud is smooth and has no visible defects.
- Verify that the grease fitting is intact and not damaged. A damaged grease fitting can hinder proper lubrication of the joint.
By thoroughly inspecting the new ball joint, you can identify any potential problems before installation. If you notice any defects, it is highly recommended to replace the ball joint with a new one.
Applying lubricant and preparing for installation
Proper lubrication is essential for the smooth operation of the ball joint and to prevent premature wear. Additionally, preparing the ball joint for installation ensures a secure fit. Follow these steps to apply lubricant and prepare the new ball joint:
- Apply a generous amount of grease to the ball stud and the inside of the ball joint housing. This will help reduce friction and ensure smooth movement.
- Insert the grease fitting into the fitting hole and tighten it using a wrench. This will allow for future lubrication if needed.
- If the ball joint has a snap ring, ensure it is properly seated in its groove.
By applying lubricant and preparing the new ball joint, you are creating the ideal conditions for a successful installation. These simple steps can significantly improve the performance and longevity of the ball joint.
Installing The Ball Joint Without A Press
Installing ball joints without a press can be a daunting task for many DIY car enthusiasts. However, with the right alternative methods and a step-by-step guide, it is possible to install ball joints without the need for a press. In this article, we will explore various methods and provide an overview of their pros and cons. So, let’s dive in and discover how to install a ball joint without a press.
Alternative methods for installing Ball Joints without a press
When it comes to installing ball joints without a press, there are a few alternative methods that you can consider. While these methods may require some additional tools and effort, they can be effective alternatives for those who don’t have access to a press. Here are three popular methods you can try:
Step-by-step guide to each method
Method 1: Using a ball joint installation tool kit
If you decide to use a ball joint installation tool kit, follow these steps:
- Begin by removing the old ball joint from the control arm and clean the mounting surface thoroughly.
- Position the new ball joint in place and secure it as directed by the manufacturer.
- Insert the installation cup from the tool kit over the ball joint and align it with the mounting surface.
- Use a ball joint press tool to apply pressure and slowly press the ball joint into the control arm until it is fully seated.
- Double-check the positioning and tightness of the ball joint before proceeding to the next step.
Method 2: Utilizing a hydraulic jack and ball joint adapter set
If you choose to go with a hydraulic jack and ball joint adapter set, follow these steps:
- Safely raise the vehicle using a hydraulic jack and support it with jack stands.
- Remove the wheel and locate the ball joint that needs to be replaced.
- Position the hydraulic jack under the control arm close to the ball joint.
- Use the ball joint adapter from the set and fit it over the ball joint.
- Use the hydraulic jack to apply gentle and gradual pressure while tapping the adapter with a hammer until the ball joint is fully installed.
- Lower the vehicle, tighten any bolts or nuts, and perform a final check to ensure proper installation.
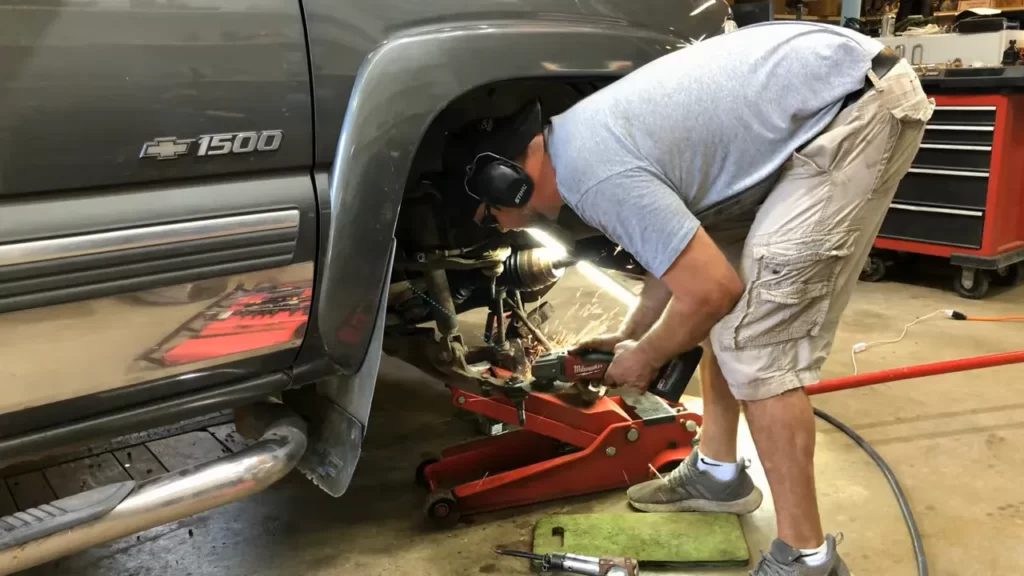
Method 3: Employing a hammer and a heavy-duty socket
For those who prefer a more straightforward approach, the hammer and a heavy-duty socket method can be employed. Here’s a step-by-step guide to follow:
- Begin by removing the old ball joint, cleaning the area, and preparing the control arm for installation.
- Position the new ball joint in place and secure it temporarily with a nut.
- Place a heavy-duty socket slightly larger than the ball joint on top of the joint.
- Using a hammer, strike the socket firmly and repeatedly to drive the ball joint into the control arm until it is fully seated.
- Ensure the ball joint is securely in position, remove the temporary securing nut, and continue installing any retaining hardware.
Pros and cons of each method
Now that we have gone through the step-by-step guide for each method, here’s a quick overview of the pros and cons of installing ball joints without a press using these alternative methods:
| Method | Pros | Cons |
|---|---|---|
| Ball Joint Installation Tool Kit | Provides precision and control during installation | Requires an additional tool kit investment |
| Hydraulic Jack and Ball Joint Adapter Set | Relatively cost-effective option | Requires access to a hydraulic jack |
| Hammer and Heavy-Duty Socket | Simpler and more accessible method | May require more effort and precision |
By considering these pros and cons, you can determine which alternative method suits your needs and preferences the best. Remember, ensuring the proper installation of ball joints is crucial for the safety and performance of your vehicle.
Testing And Adjusting The Installed Ball Joint
Ensuring the Proper Alignment and Functionality of the Ball Joint after Installation
After successfully installing a ball joint without the use of a press, it is crucial to perform various tests and adjustments to ensure its proper alignment and functionality. Ensuring that the ball joint is correctly installed and functioning optimally is vital for the overall performance and safety of your vehicle.
Recommended Tests and Adjustments
To test and adjust the installed ball joint, follow these recommended steps:
- Visual Inspection:
- Range of Motion Test:
- Load Testing:
- Wheel Alignment Check:
- Torque Verification:
Start by visually inspecting the ball joint to check for any signs of misalignment, damage, or excessive wear. Look for any unusual movement, looseness, or irregularities that may indicate a faulty installation or a defective ball joint.
Next, check the range of motion of the installed ball joint. Gently pivot or rotate the joint back and forth to ensure it moves smoothly without any binding or restrictions. This will help identify any resistance or stiffness that might affect its performance in the long run.
To simulate the actual load conditions on the ball joint, apply a controlled force or load to the joint. This can be done using specific equipment designed to mimic real-life conditions or by carefully driving the vehicle over various terrains. Pay close attention to any noise, vibration, or excessive movement while conducting the load test.
After installing the ball joint, make sure to check the wheel alignment to ensure the joint hasn’t caused any changes or deviations in the vehicle’s alignment settings. A misaligned joint can lead to premature tire wear, handling issues, and overall vehicle instability. If required, adjust the alignment accordingly.
Lastly, verify that all mounting bolts and fasteners are torqued to the manufacturer’s specifications. Use a torque wrench to ensure proper tightening, as over-tightening or under-tightening can lead to joint failure or unnecessary stress on adjacent components.
Troubleshooting Common Issues
While testing and adjusting the installed ball joint, it’s important to be aware of common issues that may arise. Here are a few troubleshooting tips to consider:
- If the ball joint fails any of the tests or inspections, it may be necessary to reinstall or replace the joint. Consult a professional mechanic if you are unsure or if the joint shows signs of significant damage or wear.
- Ensure that all other suspension components are in proper working order. Sometimes, issues with other parts of the suspension system can affect the performance of the ball joint, leading to premature failure or misalignment.
- If you notice any unusual noises, vibrations, or handling problems after the installation, recheck the ball joint’s installation and perform additional tests to identify the source of the issue.
By diligently testing and adjusting the installed ball joint, you can help prevent potential problems, ensure optimal performance, and maintain the safe operation of your vehicle. Regular inspections and maintenance are essential to address any issues promptly, preserving the longevity of your ball joint and overall suspension system.
Maintenance Tips For Long-Lasting Ball Joint Performance
Regular Inspection and Maintenance Practices for Ball Joints
To ensure the long-lasting performance of your ball joints, it is essential to adopt regular inspection and maintenance practices. By incorporating these simple steps into your routine, you can minimize wear and tear, prolong the life of your ball joints, and ensure optimal vehicle performance.
Signs of Wear and When to Replace Ball Joints
Regularly inspecting your ball joints for signs of wear is crucial in avoiding potential safety hazards on the road. Here are a few key indicators to watch out for:
- Excessive play or looseness in the ball joint
- Uneven tire wear, such as cupping or feathering
- Unusual noises, such as clunking or squeaking when going over bumps or making turns
- Vibration or steering wheel shimmy at high speeds
If you notice any of these signs, it’s important to replace your ball joints promptly to prevent further damage to your vehicle and ensure your safety on the road.
Importance of Proper Lubrication and Greasing
Proper lubrication and greasing of ball joints are vital for their smooth operation and longevity. When installing ball joints without a press, ensuring sufficient lubrication becomes even more crucial. Here are a few reasons why proper lubrication is essential:
- Reduced friction: Lubrication helps minimize friction between the moving parts, preventing excessive wear and ensuring smooth movement.
- Corrosion prevention: Lubrication creates a protective barrier, preventing the ball joints from rusting and corroding.
- Temperature regulation: The lubricating grease helps dissipate heat generated during operation, preventing overheating and potential damage.
When installing ball joints without using a press, applying a suitable lubricant, such as lithium-based or synthetic grease, to the ball joint surfaces and inside the joint housing is crucial. This will ensure proper lubrication and minimize friction, allowing the joint to move freely and reducing the risk of premature wear and failure.
By regularly inspecting your ball joints, recognizing signs of wear, and ensuring proper lubrication, you can significantly enhance their longevity and maintain optimal vehicle performance. Don’t overlook the importance of these maintenance tips for long-lasting ball joint performance!
Frequently Asked Questions
How Do You Get A Ball Joint Out Without A Press?
To remove a ball joint without a press, you can use a hammer and a pickle fork or a ball joint separator tool. Secure the control arm with a jack, strike the steering knuckle to loosen the joint, and separate it by leveraging the fork or tool.
Do I Need A Press For Ball Joints?
Yes, a press is needed for ball joints. It is essential to properly install and remove ball joints from a vehicle’s suspension. A press applies the necessary force to press the ball joint in or out without causing damage. Its use ensures safe and efficient maintenance of your vehicle.
How Do You Press A Ball Joint With A Tool?
Pressing a ball joint with a tool requires a specific approach. First, secure the ball joint in place. Next, use a ball joint press tool to exert pressure and press the joint out. This process should be done with caution and following the proper steps to ensure a successful outcome.
Are Ball Joints Easy To Install?
Yes, ball joints are generally easy to install. They require basic tools and can be done without professional assistance. However, it is important to follow proper instructions and guidelines for a successful installation.
Conclusion
Installing a ball joint without a press is a feasible option for those who may not have access to specialized tools. By following the step-by-step guide provided, you can successfully replace the ball joint using common household items. Remember to prioritize safety throughout the process, and seek professional help if you encounter any difficulties.
With these tips, you can save time and money while tackling this repair on your own.