To install an RV waste gate valve with an insulated underbelly, first locate the valve’s position and ensure the area is clean and debris-free. Next, remove the old valve, taking care to disconnect any attached pipes.
Install the new valve by carefully aligning it with the existing plumbing system, ensuring a secure fit. Finally, reattach the pipes and tighten all connections to prevent leaks. Remember to consult the manufacturer’s instructions for specific guidelines. Installing an RV waste gate valve with an insulated underbelly is essential for efficient waste management and preventing freezing in cold weather.
This valve allows you to control the flow of waste and keeps the underbelly protected from extreme temperatures. By following a few simple steps, you can easily install a new valve and ensure your RV’s waste system functions properly. We will guide you through the process, providing clear instructions and tips to make the installation seamless. Keep reading to learn how to master this important task and enjoy hassle-free waste management in your RV.
Why Choose An Rv Waste Gate Valve With Insulated Underbelly?
When it comes to your RV’s waste management system, it is essential to have reliable components that can withstand even the harshest weather conditions. This is why choosing an RV waste gate valve with insulated underbelly offers significant advantages. From protecting your wastewater system against freezing temperatures to preventing damage to the valve itself, and providing better insulation for efficient heating in your RV, this innovative solution is a must-have for any adventure-seeking RV owner.
Protects the wastewater system against freezing temperatures
One of the biggest concerns for RV owners when traveling in cold climates is freezing temperatures causing damage to the wastewater system. The waste gate valve, located beneath your RV, is particularly vulnerable to freezing due to its exposure to the external environment. By choosing an RV waste gate valve with insulated underbelly, you can safeguard your wastewater system against freezing temperatures.
Prevents any damage to the valve due to cold weather
In addition to protecting the overall wastewater system, an insulated underbelly also ensures that the waste gate valve itself remains undamaged in cold weather. When exposed to freezing temperatures, regular waste gate valves can become brittle and susceptible to cracks or leaks, leading to costly repairs or replacements. By opting for an RV waste gate valve with an insulated underbelly, you can prevent any damage that cold weather may otherwise cause.
Provides better insulation for efficient heating in the RV
An insulated underbelly not only protects your wastewater system but also provides better insulation for efficient heating in your RV. When your RV is well-insulated, you can maintain a comfortable and cozy interior even in the coldest climates. This means a more enjoyable travel experience for you and your loved ones, without worrying about fluctuating temperatures or uneven heating.
In conclusion, choosing an RV waste gate valve with insulated underbelly is a practical and wise investment for any RV owner. It protects your wastewater system against freezing temperatures, prevents damage to the valve, and provides you with better insulation for efficient heating in your RV. Don’t compromise on the quality and performance of your RV’s waste management system – opt for an RV waste gate valve with insulated underbelly today.

Important Considerations Before Installation
Before you install an RV waste gate valve with an insulated underbelly, there are some important considerations to keep in mind. Understanding the existing wastewater system in your RV, determining the type and size of waste gate valve required, and assessing the underbelly insulation are crucial steps in ensuring a successful installation. Let’s dive into each of these considerations in detail.
Understand the existing wastewater system in your RV
The first step before installing an RV waste gate valve is to gain a thorough understanding of your RV’s existing wastewater system. Familiarize yourself with the location of the current valve, the pipe connections, and the overall flow of the system. This knowledge will be important for successful installation.
Determine the type and size of waste gate valve required
Once you are aware of your RV’s wastewater system, the next step is to determine the type and size of waste gate valve that is required. Different RV models may have different specifications, so it is important to choose a waste gate valve that is compatible with your specific RV.
Consider the material of the valve, such as plastic or brass, and also evaluate the valve’s features, such as ease of use and durability. Make sure to take accurate measurements of the existing valve to ensure that the new valve will fit properly.
Assess the underbelly insulation and make any necessary upgrades or repairs
The underbelly insulation of your RV plays a crucial role in protecting the waste gate valve and the plumbing system from extreme temperatures and potential damage. Before installing a waste gate valve with an insulated underbelly, assess the condition of the existing insulation.
If there are any signs of wear and tear, such as holes or gaps, it is important to make the necessary repairs or upgrades. Replace damaged insulation with high-quality materials to ensure optimal performance and protection.
Inspect the insulation for any potential areas where heat could escape or cold air could enter. Take steps to seal these areas and enhance the overall insulation of the underbelly. This will help in maintaining the desired temperature of the wastewater system.
By thoroughly understanding the existing wastewater system in your RV, determining the appropriate waste gate valve, and assessing and upgrading the underbelly insulation, you can ensure a successful installation. These important considerations will not only help protect your RV’s plumbing system but also contribute to a smoother and more efficient camping experience. Now that you are armed with this knowledge, you can proceed confidently with the installation of your RV waste gate valve with an insulated underbelly.
List Of Required Tools
When it comes to installing an RV waste gate valve with an insulated underbelly, having the right tools is crucial. These tools will ensure a smooth and successful installation process. In this section, we will provide you with a comprehensive list of the required tools for this project.
Wrench
A wrench is an essential tool for loosening and tightening nuts and bolts. It is used throughout the installation process to connect and secure the waste gate valve components. Make sure to choose a wrench that fits the size of the nuts and bolts you will be working with.
Screwdriver
A screwdriver is another indispensable tool for this installation. It is necessary for removing and attaching screws that hold the underbelly insulation in place. Additionally, a screwdriver may be needed to attach specific components of the waste gate valve. Select a screwdriver with the appropriate type and size of bits to match the screws you will encounter.
Pipe Cutter
A pipe cutter is required to cut the RV’s waste pipe to the desired length during the installation process. This tool ensures precise and accurate cuts, allowing for a proper connection between the waste gate valve and the existing plumbing system. Look for a pipe cutter that is compatible with the size of your RV’s waste pipe.
Drill
A drill is necessary for creating holes in specific parts of the RV’s underbelly. These holes may be required to access the waste pipe or to attach the waste gate valve components securely. Choose a drill with the appropriate drill bits and ensure they are suitable for the materials you will be drilling into.
Sealant
Sealant plays a crucial role in preventing leaks and ensuring a watertight connection between the waste gate valve and the RV’s waste pipe. It is essential to choose a high-quality sealant that is compatible with the materials involved and suitable for outdoor use. Apply the sealant generously to create a durable and secure seal.
Measuring Tape
A measuring tape is necessary for accurate measurements during the installation process. This tool helps ensure that the waste gate valve is aligned properly and fits snugly into the RV’s plumbing system. It is important to measure precisely to avoid any issues with the installation. Choose a measuring tape with clear markings and a suitable length for your needs.
Materials Needed For The Installation
When it comes to installing an RV waste gate valve with an insulated underbelly, there are a few key materials that you’ll need to have on hand. These materials will ensure that your installation is smooth and successful, allowing you to efficiently manage and dispose of your RV’s waste. In this section, we’ll take a look at the essential materials you’ll need to complete the installation process.
RV Waste Gate Valve with Insulated Underbelly
One of the most critical components for this installation is the RV waste gate valve with an insulated underbelly. This specialized valve is designed to provide both insulation and protection for your RV’s plumbing system. It prevents freeze-ups and keeps your pipes safe from extreme temperatures, allowing for smooth operation even in cold weather conditions. This valve is a must-have for any RV owner looking to enhance the efficiency and durability of their waste management system.
PVC Pipes and Connectors
To connect the waste gate valve to your RV’s plumbing system, you’ll need PVC pipes and connectors. PVC pipes are known for their durability and resistance to corrosion, making them an ideal choice for RV plumbing applications. These pipes come in various lengths and sizes, so be sure to measure and choose the appropriate ones for your specific installation needs. Along with the pipes, you’ll also need connectors to join them together securely, ensuring a watertight seal that will prevent leaks and maintain smooth wastewater flow.
Hose Clamps
Hose clamps are essential for securing the connections between the PVC pipes and the waste gate valve. These clamps provide a tight grip and prevent any movement or separation, ensuring a secure and reliable plumbing system. When selecting hose clamps, opt for those made from stainless steel or other corrosion-resistant materials that can withstand the harsh outdoor elements. With the right hose clamps in place, you can have peace of mind knowing that your waste gate valve installation is securely fastened and will last for years to come.
Insulating Foam
Insulating foam is a crucial material for ensuring the efficiency of your RV waste gate valve installation. This foam helps to provide an extra layer of insulation, reducing heat loss and minimizing the risk of freezing during cold weather. It acts as a barrier between the external environment and your RV’s plumbing system, helping to maintain optimal temperature conditions for the smooth flow of wastewater. Apply the insulating foam generously around the waste gate valve and pipes, paying extra attention to any areas where heat loss may be more likely to occur.
Electrical Tape
Electrical tape is a handy tool for securing and protecting electrical connections during the waste gate valve installation. This tape is designed to be highly resistant to extreme temperatures and moisture, making it suitable for outdoor use. It is recommended to wrap the electrical tape around connections between electrical components, ensuring a secure and reliable electrical connection. By using electrical tape, you can keep your RV waste gate valve installation safe and functional, even in challenging weather conditions.
PVC Primer and Glue
Lastly, PVC primer and glue are essential materials for creating secure and leak-proof connections between the pipes and connectors. The primer helps to clean the PVC surfaces, preparing them for proper adhesion of the glue. The PVC glue is then applied, forming a strong and permanent bond that ensures the integrity of the plumbing system. When using PVC primer and glue, it’s crucial to follow the manufacturer’s instructions carefully to achieve the best results. With these materials in your toolkit, you can confidently complete the installation of your RV waste gate valve with an insulated underbelly.
Preparing For The Installation
Turn off the water supply and empty the RV’s wastewater tanks
Before starting the installation process, it is essential to turn off the water supply and empty the RV’s wastewater tanks. This step ensures that there are no leaks or spills during the installation, minimizing any mess or damage.
Here’s how to complete this step:
- Locate the water supply shutoff valve either inside or outside the RV.
- Turn the valve clockwise to shut off the water supply.
- Next, empty the wastewater tanks by locating the tank release valves.
- Connect a sewer hose to the valve and direct the other end into a designated waste disposal area.
- Open the tank release valves and allow all the wastewater to drain out completely.
- Once the tanks are empty, close the release valves and remove the sewer hose.
Remove any obstructions or debris from the existing waste valve
Prior to installing the new RV waste gate valve with an insulated underbelly, it’s crucial to remove any obstructions or debris from the existing waste valve. This step ensures smooth operation and prevents any issues in the future.
Follow these instructions to accomplish this:
- Inspect the existing waste valve for any visible debris, such as toilet paper or other waste materials.
- Using protective gloves, gently remove any obstructions from the valve, ensuring not to damage or force anything.
- If the valve appears to be stuck or not functioning correctly, use a lubricant specifically designed for RV waste valves.
- Apply the lubricant according to the manufacturer’s instructions and allow it to penetrate before attempting to move the valve.
- After removing any debris and ensuring the valve moves freely, inspect the surrounding area for any leaks or damage.
By turning off the water supply and emptying the RV’s wastewater tanks, you are preparing the installation area for a smooth and hassle-free process. Additionally, removing any obstructions or debris from the existing waste valve ensures optimal functioning and durability of the newly installed RV waste gate valve with an insulated underbelly.
Removing The Old Waste Valve
When it comes to maintaining your RV’s waste system, one of the most important tasks is removing the old waste valve. This step is crucial in order to install a new waste gate valve with an insulated underbelly. Using the appropriate tools and following the correct procedure will ensure a smooth removal process without any spills or leaks.
Use the appropriate tools to disconnect the existing waste valve from the RV’s plumbing system
To successfully remove the old waste valve, it is essential to have the right tools on hand. These tools will help you disconnect the existing waste valve from the RV’s plumbing system without causing any damage. Here are the tools you’ll need:
- Adjustable wrench
- Channel-lock pliers
- Screwdriver (both flathead and Phillips head)
- Thread seal tape
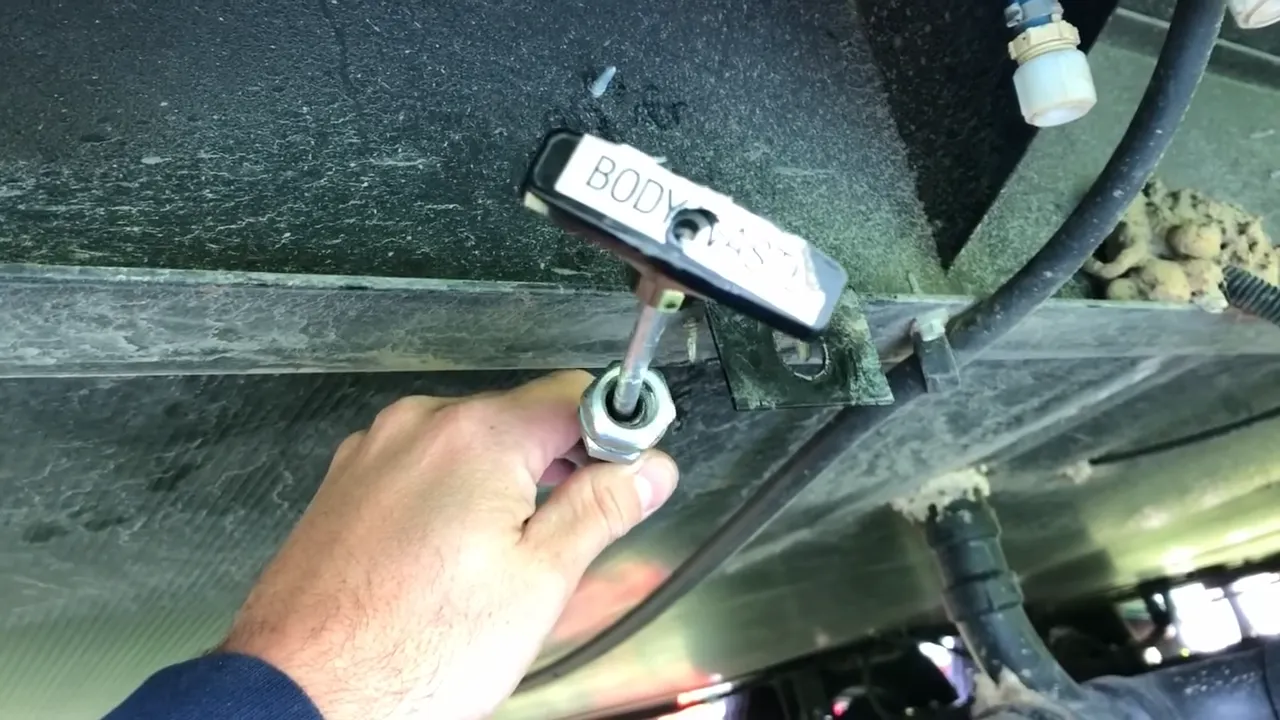
Remove the valve carefully to avoid any spills or leaks
Once you have gathered the necessary tools, it’s important to proceed with caution to avoid any spills or leaks during the removal process. Follow these steps:
- Turn off the RV’s water supply and remove any pressure build-up by opening the faucets.
- Locate the existing waste valve, which is usually located near the RV’s sewage tank.
- Using an adjustable wrench, carefully loosen the nuts connecting the waste valve to the RV’s plumbing system.
- Once the nuts are loose, use channel-lock pliers to finish detaching the waste valve from the plumbing system.
- Inspect the valve for any residual waste and clean it thoroughly to prevent any contamination during the installation of the new waste gate valve.
By removing the old waste valve carefully and taking the necessary precautions, you can complete this step without any incidents. Remember to handle the valve with care to avoid spills or leaks that could result in an unpleasant and messy situation.
Installing The Rv Waste Gate Valve With Insulated Underbelly
Installing an RV waste gate valve with an insulated underbelly can help improve the efficiency and performance of your RV’s plumbing system, especially during colder temperatures. By insulating the underbelly of your RV, you can prevent freezing and damage to the waste valve, ensuring smooth and uninterrupted wastewater flow. In this guide, we will walk you through the step-by-step process of installing the RV waste gate valve with an insulated underbelly, so you can enjoy worry-free camping adventures.
Measure and cut the PVC pipes to the appropriate lengths
The first step in installing the RV waste gate valve with an insulated underbelly is to measure and cut the PVC pipes to the appropriate lengths. To ensure accuracy, we recommend using a tape measure or ruler to determine the required lengths. Mark the measurements on the PVC pipes, and then, using a saw or PVC pipe cutter, carefully cut the pipes to the desired lengths. Make sure to wear appropriate safety gear, such as goggles and gloves, when working with PVC pipes.
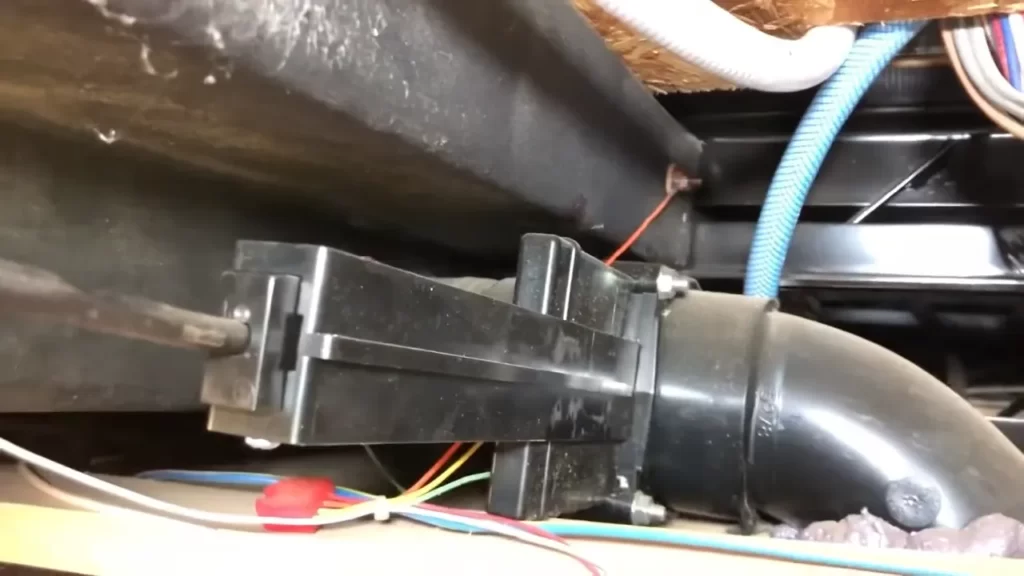
Attach the PVC pipes and connectors to the waste valve and RV’s plumbing system
Once you have cut the PVC pipes to the appropriate lengths, it’s time to attach them to the waste valve and RV’s plumbing system. Begin by applying a small amount of PVC primer to the ends of the pipes and the inside of the connectors. This primer creates a stronger bond between the PVC surfaces. Wait a few seconds for the primer to dry, and then apply PVC cement to the primed areas. Quickly and firmly join the pipes and connectors together, ensuring they are properly aligned. Hold them in place for a few seconds to allow the cement to set.
If you’re unsure about the correct positioning of the pipes and connectors, refer to the RV’s plumbing system diagram or consult the manufacturer’s instructions. It’s important to make sure the connections are secure and watertight to prevent leakage.
Secure the connections using hose clamps and sealant
After attaching the PVC pipes and connectors, it’s essential to secure the connections using hose clamps and sealant. Hose clamps help hold the pipes and connectors in place, providing additional support and preventing any unintended movement. Position the hose clamps over the connections and tighten them using a screwdriver or wrench. Be careful not to overtighten, as this can damage the PVC pipes.
To further ensure a watertight seal, apply a generous amount of sealant to the connections. This will help prevent any potential leaks or drips. Use a sealant suitable for PVC pipes and follow the manufacturer’s instructions for application. Allow the sealant to dry completely before testing the system for any leaks or issues.
By following these steps, you can successfully install an RV waste gate valve with an insulated underbelly. Remember to take proper safety precautions and consult any relevant guides or instructions provided by the manufacturer. With a properly installed waste gate valve and an insulated underbelly, you can have peace of mind knowing that your RV’s plumbing system is well-equipped to handle the demands of your adventures.
Securing And Insulating The Waste Valve
Welcome to the next section of our guide on how to install an RV waste gate valve with an insulated underbelly. In this section, we will focus on securing and insulating the waste valve to ensure optimum performance and protection against leaks. Apply insulating foam around the waste valve and pipes, wrap electrical tape around the connections, and securely fasten the waste valve to the RV’s underbelly for a reliable and durable installation.
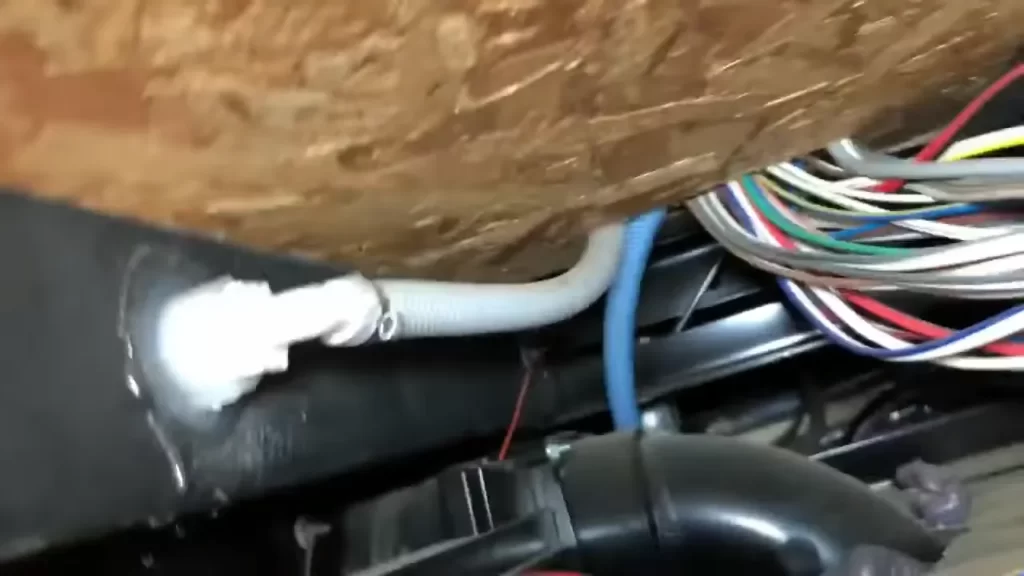
Apply insulating foam around the waste valve and pipes to provide additional insulation
One important step in securing and insulating the waste valve is to apply insulating foam around the valve and pipes. This foam acts as a protective barrier, preventing heat loss and reducing the risk of freezing during colder temperatures.
- Carefully inspect the waste valve and pipes for any gaps or openings that may need sealing.
- Choose a high-quality insulating foam suitable for RV applications.
- Following the manufacturer’s instructions, apply the foam evenly around the waste valve and pipes, ensuring complete coverage.
- Allow the foam to dry and cure according to the recommended time.
Wrap electrical tape around the connections for added protection against leaks
A leaky connection can lead to messy and potentially damaging situations. To further safeguard against leaks, it’s crucial to wrap electrical tape around the connections of the waste valve.
- Inspect the connections between the waste valve, pipes, and other components for any signs of wear or possible leaks.
- Start by cleaning the connections using a cloth or alcohol wipe to ensure a clean surface.
- Wrap electrical tape tightly around each connection, overlapping the tape to create a solid seal.
- Check the connections again for any gaps or areas that might still require additional taping.
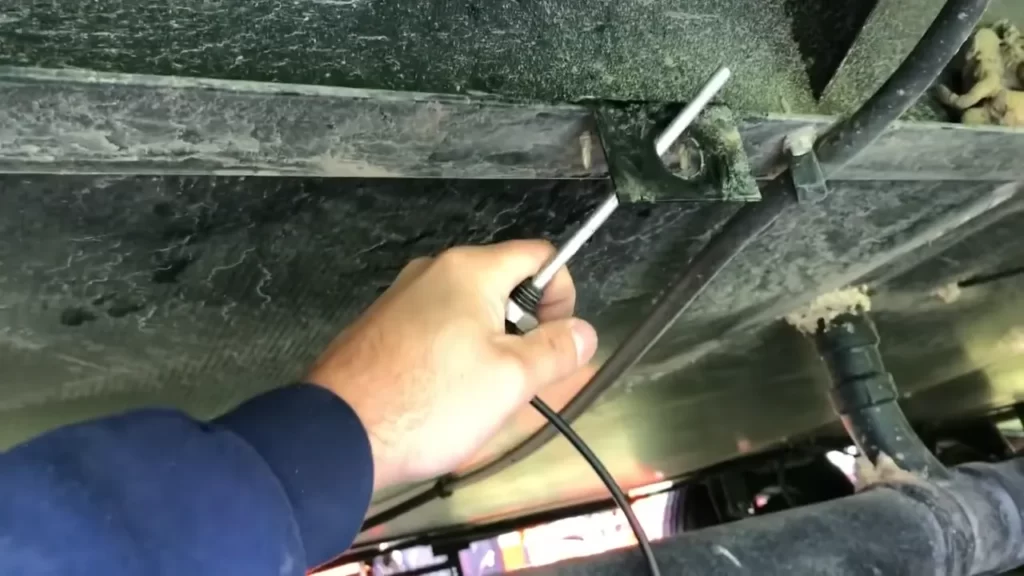
Ensure that the waste valve is securely fastened to the RV’s underbelly
To complete the process, it’s essential to securely fasten the waste valve to the RV’s underbelly. This ensures stability and prevents the valve from shifting or coming loose during travel.
| Steps to Secure the Waste Valve |
|---|
| Locate the mounting brackets for the waste valve on the underbelly of your RV. |
| Align the valve with the brackets and screw it into place using the appropriate screws or bolts. |
| Check the stability of the valve by gently applying pressure and ensuring it remains firmly attached. |
| If necessary, make adjustments or add additional support brackets for extra stability. |
By following these steps to secure and insulate your RV’s waste valve, you can ensure a reliable and efficient system that will provide peace of mind and trouble-free RVing.
Testing And Troubleshooting
After successfully installing an RV waste gate valve with an insulated underbelly, it’s time to put it to the test. Testing and troubleshooting this essential component will ensure that it functions properly and any potential issues are addressed. In this section, we will walk you through the necessary steps to test the waste valve for proper functionality, check for leaks or signs of improper installation, and troubleshoot any issues that may arise during the testing phase.
Turn on the water supply and test the waste valve for proper functionality
The first step in testing an RV waste gate valve with an insulated underbelly is to turn on the water supply. Once the water is flowing, you can proceed to test the functionality of the waste valve. Follow these steps:
- Slowly open the waste valve by turning the handle or using the lever, depending on the type of valve you have installed.
- Observe the flow of water through the valve. It should be smooth and consistent, with no signs of blockage or restriction.
- Allow the water to flow for a few minutes to ensure that the valve is working properly.
- If the water flow is not as expected, double-check the installation to ensure everything is correctly aligned and connected.
Check for any leaks or signs of improper installation
Once you have tested the functionality of the waste valve, it’s important to check for any leaks or signs of improper installation. Leaks can lead to water damage and other issues if left unaddressed. Follow these steps to inspect the valve:
- Visually inspect the valve and surrounding areas for any signs of water leakage.
- Feel around the valve connections for any moisture or dampness.
- If you notice any leaks, tighten the connections or replace any faulty parts as necessary.
- Check the insulation of the underbelly to ensure it is secure and properly covering the waste valve. Any gaps or tears should be repaired immediately.
Troubleshoot any issues that may arise during the testing phase
During the testing phase, it’s possible that you may encounter some issues. Troubleshooting these problems is essential to ensure the waste valve operates smoothly. Here are some common troubleshooting steps:
- If the valve is not opening or closing properly, check for any obstructions or debris that may be preventing it from functioning correctly. Remove any blockages and retest.
- If the waste valve is leaking, inspect the gaskets or seals for any damage or wear. Replace them if necessary.
- If the water flow is weak or inconsistent, check for any kinks or restrictions in the plumbing lines leading to the waste valve. Straighten out any kinks and remove any restrictions.
- If the waste valve is making unusual noises, such as clanking or grinding, it may be a sign of a mechanical issue. Inspect the valve for any visible damage or misalignment. If needed, consult a professional for further assistance.
By following these testing and troubleshooting steps, you can ensure that your RV waste gate valve with an insulated underbelly is installed correctly and performing optimally. Regular maintenance and inspections will help prevent any potential issues and keep your RV’s waste system working smoothly throughout your adventures.
Maintenance And Care Tips For An Rv Waste Gate Valve With Insulated Underbelly
When it comes to maintaining an RV waste gate valve with an insulated underbelly, regular maintenance and care are key. These components play a crucial role in the proper functioning of your RV’s waste management system and insulation. In this section, we will explore some important tips for maintaining and caring for your RV waste gate valve with insulated underbelly to ensure optimal performance and longevity.
Regularly inspect the valve and surrounding pipes for any signs of wear or damage
Inspecting the waste gate valve and its surrounding pipes regularly is essential to catch any signs of wear or damage early on. This proactive approach can help you address any potential issues before they become major problems. Here are some key points to keep in mind when inspecting your waste gate valve and pipes:
- Check for any visible cracks, leaks, or rust on the valve and pipes.
- Ensure the valve is opening and closing smoothly without any sticking or resistance.
- Look out for loose connections and tighten them if necessary.
- Inspect the seals and gaskets for any signs of deterioration or leaks.
Clean the valve and pipes to prevent buildup and clogs
To maintain optimal performance of your waste gate valve and prevent buildup or clogs, regular cleaning is essential. Here are some tips to keep in mind when cleaning your valve and pipes:
- Use a mild detergent and warm water to clean the valve and surrounding pipes.
- Remove any debris or residue that may have accumulated inside the valve or pipes.
- Ensure that the valve and pipes are thoroughly rinsed and dried before reassembly.
- Consider using a specialized RV waste tank cleaner to remove any stubborn buildup or odors.
Keep the underbelly insulation in good condition to maintain effective insulation
The underbelly insulation of your RV plays a crucial role in maintaining effective insulation and protecting the waste gate valve and pipes. Here are some care tips to ensure the insulation remains in good condition:
- Regularly inspect the underbelly insulation for any signs of damage, such as tears or moisture buildup.
- Repair any damaged insulation promptly to prevent heat loss and potential damage to the waste gate valve and pipes.
- Avoid placing excessive weight on the underbelly to prevent compression or damage to the insulation.
- Consider using insulation covers or blankets during extreme weather conditions to provide extra protection.
By regularly inspecting, cleaning, and maintaining your RV waste gate valve with an insulated underbelly, you can ensure optimal performance and longevity of these crucial components. Don’t forget to follow these maintenance and care tips to keep your waste management system in top shape and enjoy your RV adventures to the fullest.
Frequently Asked Questions
How Do You Insulate An Rv Underbelly?
To insulate an RV underbelly, you can use foam board insulation or spray foam insulation. Apply the insulation material to the underbelly, ensuring complete coverage and sealing any gaps. This helps regulate temperature, prevent drafts, and protect plumbing and tanks from freezing.
How Do You Replace An Rv Gate Valve?
To replace an RV gate valve, follow these steps: 1. Turn off the water supply. 2. Remove the screws holding the old valve in place. 3. Disconnect the valve from the plumbing system. 4. Install the new valve and secure it with screws.
5. Turn on the water supply and check for any leaks.
Can A Gate Valve Be Installed Horizontally?
Yes, a gate valve can be installed horizontally.
What Is The Correct Orientation Of A Gate Valve?
The correct orientation of a gate valve is determined by the position of the handle. When the handle is in a parallel position to the pipe, the valve is open, allowing flow through the pipe. When the handle is perpendicular to the pipe, the valve is closed, preventing flow.
Conclusion
Installing an RV waste gate valve with an insulated underbelly is a practical and efficient solution for RV owners. This installation not only helps in managing and disposing of waste effectively but also provides thermal protection to the RV’s underbelly.
By following the step-by-step guide provided in this blog post, RV enthusiasts can easily install this valve and ensure a hassle-free camping experience. Remember, RV maintenance is crucial for ensuring the longevity and functionality of your vehicle, and installing an RV waste gate valve with an insulated underbelly is just one way to achieve that.