To install an outside faucet with Pex, first turn off the main water supply and drain the system. Then, cut the Pex tubing to the desired length and attach it to the existing plumbing.
Connect the other end to the faucet and secure it using a clamp. Finally, turn on the water supply and check for leaks. Are you looking to install an outside faucet with Pex? This guide will provide you with simple steps to follow, ensuring a successful installation.
Before starting, remember to turn off the main water supply and drain the system to avoid any accidents. Using Pex tubing, cut it to the required length and connect it to the existing plumbing. Attach the other end to the faucet, securing it in place with a clamp. Once everything is in position, turn on the water supply and carefully inspect for any leaks. With these easy instructions, you’ll have a functioning outside faucet in no time.
What Tools And Materials Are Required For The Installation Process?
Installing an outside faucet with Pex tubing is a relatively straightforward task that requires a few essential tools and materials. By having all the necessary supplies on hand, you can ensure a smooth and successful installation process. In this section, we will discuss the main tools and materials that you will need for this project.
Choosing the appropriate Pex tubing size and type
Before starting the installation, it is crucial to select the right Pex tubing size and type for your outside faucet. Pex tubing is available in various sizes, including 1/2 inch, 3/4 inch, and 1 inch, among others. The size you choose will depend on the water flow requirements of your specific application. It’s always a good idea to consult a professional or refer to your local plumbing codes to determine the appropriate size for your project.
Additionally, consider the type of Pex tubing that is suitable for outdoor use. Pex-Al-Pex tubing is a popular choice for outdoor installations as it offers enhanced durability and resistance to UV rays. This type of tubing is constructed with multiple layers, including an aluminum core, which provides added strength and protection against freezing temperatures.
Brass Pex fittings and connectors
Another essential component for installing an outside faucet with Pex tubing is brass Pex fittings and connectors. These components are necessary for creating secure connections between the Pex tubing and the faucet assembly. Brass fittings are preferred due to their corrosion resistance and durability. They can withstand the outdoor elements and ensure a long-lasting installation.
Pex crimp rings and crimping tool
Pex crimp rings and a crimping tool are vital for securing the brass fittings onto the Pex tubing. Crimp rings are small metal rings that are placed over the tubing and fittings to create a watertight seal. The crimping tool is then used to compress the ring, creating a secure and leak-free connection. Make sure to choose crimp rings and a crimping tool that are compatible with the size of your Pex tubing.
Adjustable wrench
An adjustable wrench is a versatile tool that will come in handy during the installation process. It is used to tighten and loosen threaded connections that may be present in the faucet assembly. Having an adjustable wrench with you will ensure that you have the necessary flexibility to handle various fitting sizes.
Tubing cutter
A tubing cutter is an essential tool for cutting the Pex tubing to the desired length. This tool provides a clean and precise cut, ensuring that the tubing fits perfectly into the fittings. It is important to use a tubing cutter specifically designed for Pex tubing to avoid any damage to the material.
By gathering all the required tools and materials mentioned above, you will be well-prepared to install an outside faucet with Pex tubing. This will help you complete the installation efficiently and ensure a reliable and long-lasting outdoor water source.
How To Locate The Ideal Spot For Installing The Outside Faucet?
Identifying a Suitable Location Near the Water Source
Choosing the right spot for installing an outside faucet with Pex is crucial to ensure optimal functionality and convenience. By locating a suitable spot near the water source, you can minimize the length of piping required, reducing the risk of pressure loss and maintaining a steady water supply.
When identifying a suitable location, consider the following:
- Proximity to the Water Source: Look for an area close to the main water line or existing plumbing connections. This will help minimize the distance between the faucet and the water source, allowing for efficient water flow.
- Accessibility: Ensure easy access to the faucet for maintenance and repairs. This includes considering factors such as the distance from walls, obstructions, and the height at which the faucet will be installed.
- Water Pressure: Take into account the water pressure available at the chosen location. Installing the faucet at a spot where the water pressure is sufficient will prevent any issues with low water flow.
By carefully considering these factors, you can identify an ideal location that meets your requirements and allows for hassle-free installation.
Ensuring Accessibility and Convenience
When installing an outside faucet, it’s essential to prioritize accessibility and convenience. This ensures that the faucet is easily reachable and allows for efficient usage. Consider the following guidelines:
- User Convenience: Install the faucet at a height that is comfortable for users. It should be easily reachable without requiring excessive bending or stretching. Consider the average height of users in the area.
- Clearance: Ensure there is sufficient clearance around the faucet to accommodate hoses, fittings, and any attachments. This will prevent any tangling or obstructions when using the faucet.
- Protection From Damage: Locate the faucet in an area that is less prone to accidental damage. Avoid placing it in high-traffic areas, where it could be potentially bumped or hit by vehicles or equipment.
By focusing on accessibility and convenience, you can create an installation that is user-friendly and enhances the overall functionality of the outside faucet.
Avoiding Areas Prone to Freezing
One critical consideration when choosing a location for your outside faucet is to avoid areas prone to freezing. Freezing temperatures can cause the pipes to burst, leading to costly repairs and water damage. Keep the following points in mind:
- Sheltered Locations: Select a spot that is well-sheltered from extreme weather conditions, such as strong winds or direct exposure to the elements. Opting for an area shielded by a wall or building can provide additional protection.
- Drainage: Ensure the chosen location allows for proper drainage. Avoid spots where water tends to accumulate or collect, as this can increase the chances of freezing.
- Above-Ground Installation: If possible, consider installing the faucet in an above-ground configuration. This minimizes the length of the pipe buried underground, which is typically more susceptible to freezing.
By avoiding areas prone to freezing and taking necessary precautions, you can safeguard your outside faucet from winter-related damage and extend its lifespan.
How To Shut Off The Water Supply And Drain The Existing Pipes?
Before installing an outside faucet with Pex, it’s crucial to shut off the water supply and drain any remaining water from the existing pipes. This ensures a smooth and hassle-free installation process. To do so, follow these steps:
Locating the main water shut-off valve
The main water shut-off valve is the point where you can control the flow of water to your entire house. It’s important to know its location to shut off the water supply effectively. The valve is usually located:
- In the basement or crawl space
- Near the water heater
- Near the water meter
Check these areas to find the valve. Once located, proceed to the next step.
Turning off the water supply
With the main water shut-off valve identified, it’s time to turn off the water supply. Follow these instructions:
- Using a wrench, turn the valve clockwise to shut off the water flow
- Make sure to turn it completely to prevent any water from entering the pipes
Remember that shutting off the water supply will cut off the water to your entire house, so plan accordingly to minimize any inconvenience.
Opening faucets to drain any remaining water
After the water supply is shut off, it’s essential to drain any remaining water from the pipes to avoid leaks or water damage during the installation process. Follow these steps:
- Start by opening all the faucets in your house, including both hot and cold water taps
- Flush each toilet to empty the water tanks
- Let the water drain until it stops flowing from the faucets
Draining the water from the pipes will help maintain the integrity of the installation and minimize the risk of leaks or water damage.
By performing these steps to shut off the water supply and drain the existing pipes, you are well-prepared to install an outside faucet with Pex. Taking the time to complete this essential preparation ensures a successful and trouble-free installation, providing you with a reliable outdoor water supply.
How To Connect The Pex Tubing To The Existing Water Supply?
Connecting Pex tubing to the main water supply line is a crucial step when installing an outside faucet with Pex. It ensures a secure and reliable water flow, preventing any leaks or disruptions in water supply. In this section, we will guide you through the process, step by step. From measuring and cutting the Pex tubing to the required length to using Pex fittings and connectors to create a secure connection, we will cover it all.
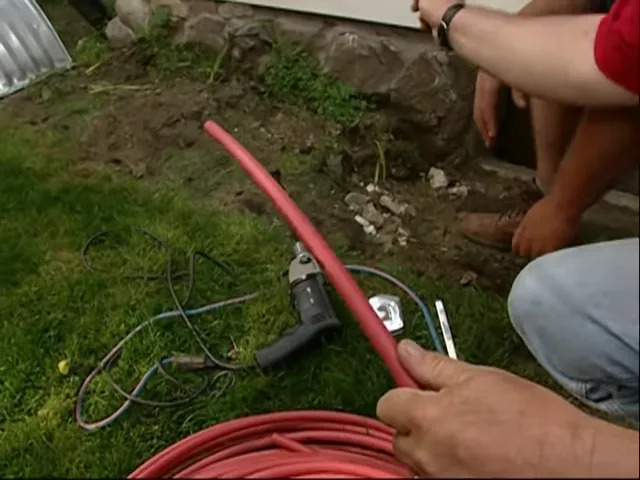
Measuring and cutting the Pex tubing to the required length
The first step in connecting Pex tubing to the main water supply line is to measure and cut the tubing to the correct length. This ensures a proper fit and allows for an efficient water flow. To do this:
- Use a measuring tape to determine the length of Pex tubing needed. Make sure to measure accurately from the point of connection to the main water supply line.
- Mark the measured length on the tubing using a pen or marker.
- Using a Pex tubing cutter or a fine-toothed saw, carefully cut the tubing at the marked point.
- Ensure the cut is clean and free from any burrs or rough edges that could affect the connection.
- Repeat this process for any additional Pex tubing that needs to be connected.
Connecting the Pex tubing to the main water supply line
Once you have the Pex tubing cut to the required length, it’s time to connect it to the main water supply line. Here’s how to do it:
- Locate the main water supply line and ensure it is turned off.
- Prepare the end of the Pex tubing for connection by inserting a Pex stiffener or support sleeve.
- Slide a Pex fitting onto the Pex tubing, ensuring it is the correct size for the tubing.
- Insert the end of the Pex tubing into the main water supply line, pushing it firmly until it reaches the stop point on the fitting.
- Use a crimping tool to secure the Pex fitting by crimping the metal ring around the tubing and the fitting.
- Repeat the above steps for any additional connections to the main water supply line.
Using Pex fittings and connectors to create a secure connection
To ensure a secure connection and prevent any leaks or disruptions in the water supply, it is essential to use Pex fittings and connectors. These components are designed specifically for Pex tubing and provide a tight and reliable seal. Here are some tips for using Pex fittings and connectors:
- Select Pex fittings and connectors that match the size and type of Pex tubing being used.
- Make sure to use the appropriate tool, such as a crimping tool or a clamp tool, to secure the fittings and connectors in place.
- Check for any visible leaks after connecting the Pex tubing and fittings. Retighten or adjust as necessary.
- Consider using a Pex sleeve to provide extra support and stability for the connection.
By following these steps and using the right Pex fittings and connectors, you can ensure a secure and successful connection between the Pex tubing and the existing water supply. This will result in a reliable and efficient outside faucet installation.
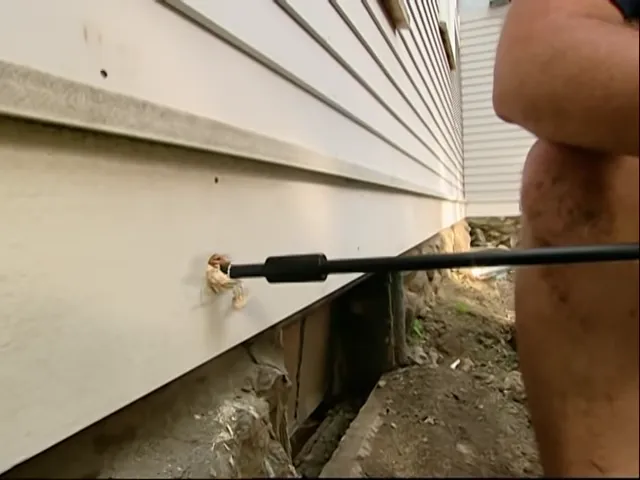
How To Secure The Pex Tubing To The Exterior Wall?
When installing an outside faucet with Pex tubing, it’s crucial to secure the tubing properly to the exterior wall. In this section, we will explore the various methods and steps involved in ensuring the Pex tubing is securely fastened.
Choosing the Appropriate Fastening Method for the Surface
Before securing the Pex tubing to the exterior wall, it’s essential to assess the surface and choose the appropriate fastening method. The choice of fastening method largely depends on the wall material, whether it’s wood, concrete, or another surface type. Let’s take a look at different fastening methods based on common surface types:
| Surface Type | Fastening Method |
|---|---|
| Wood | Use corrosion-resistant screws or nails to attach pipe clamps directly to the wall studs. |
| Concrete | Use concrete anchors and special clips designed for concrete surfaces to secure the Pex tubing. |
| Composite or Vinyl Siding | Utilize siding clips or hooks specifically designed for these surfaces, ensuring a secure attachment without causing damage. |
| Brick or Stone | Drill holes into the brick or stone and use anchors and clips suitable for this surface for optimal support. |
Using Straps or Clips to Secure the Pex Tubing
Once you have identified the appropriate fastening method, the next step is to use straps or clips to secure the Pex tubing to the exterior wall. Straps and clips provide stability and prevent the tubing from shifting or vibrating due to water pressure. Here’s how you can properly use straps or clips:
- Position the Pex tubing against the wall, ensuring it is straight and aligned.
- Securely attach the straps or clips around the tubing, making sure they are tightly fastened.
- Space the straps or clips evenly along the length of the Pex tubing to provide consistent support.
- Check the tightness of the straps or clips periodically to ensure they are securely holding the tubing in place.
Ensuring Proper Spacing and Support along the Wall
In addition to using straps or clips, it’s crucial to ensure proper spacing and support along the wall when securing Pex tubing. This helps distribute the weight and pressure evenly, reducing the chances of any sagging or damage. Here are some guidelines to follow:
- Space the straps or clips approximately 3 to 6 feet apart, depending on the length of the tubing and the water pressure it will endure.
- Ensure that the straps or clips are securely attached to the wall surface and provide sufficient support.
- Avoid extending the Pex tubing too far away from the wall to prevent excessive strain.
- Consider adding additional support, such as attaching the tubing to nearby structures or using support brackets, for longer lengths or high-pressure systems.
By following these steps and guidelines, you can securely fasten the Pex tubing to the exterior wall, ensuring a reliable and long-lasting installation for your outside faucet.
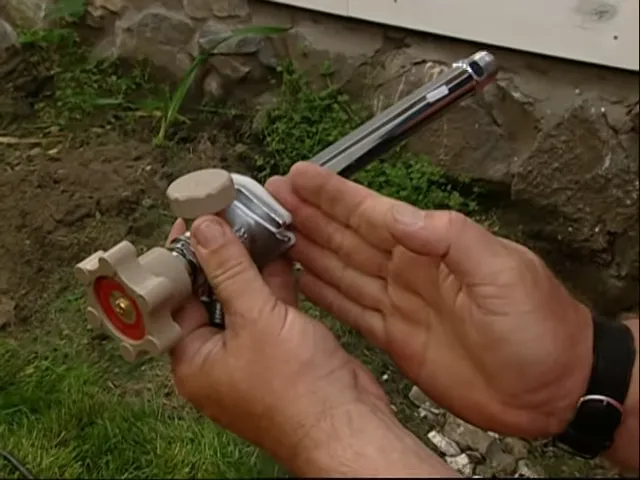
How To Install The Outside Faucet?
Installing an outside faucet can be a valuable addition to your home, providing easy access to water for various outdoor activities. While there are different methods to install an outside faucet, using Pex tubing is a popular choice due to its durability and flexibility. In this guide, we will walk you through the process of installing an outside faucet with Pex tubing, ensuring a secure and leak-free connection for all your outdoor water needs.
Attaching the Pex tubing to the faucet inlet
The first step in installing the outside faucet is to attach the Pex tubing to the faucet inlet. To do this, you will need a Pex crimp fitting that matches the size of your faucet inlet. Start by cutting the Pex tubing to the desired length, ensuring it reaches the faucet location. Use a sharp Pex tubing cutter for a clean and accurate cut.
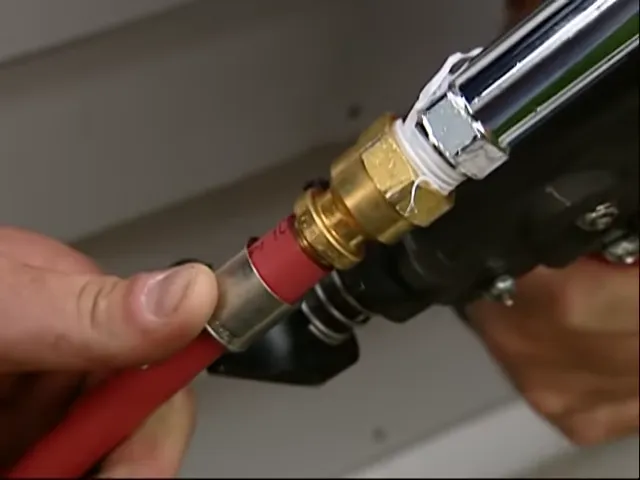
Once you have the correct length of Pex tubing, slide the Pex nut onto one end of the tubing, followed by the compression ring. Insert the end of the tubing into the faucet inlet, ensuring it goes all the way in. Slide the compression ring up to the faucet inlet and thread the Pex nut onto the inlet, hand-tightening it.
Securing the connection with a Pex crimp ring
After attaching the Pex tubing to the faucet inlet, the next step is to secure the connection with a Pex crimp ring. This ensures a tight and reliable connection that will prevent leaks. To do this, slide the Pex crimp ring over the Pex tubing, making sure it is centered over the crimp fitting.
Using a Pex crimp tool, position the jaws of the tool over the crimp ring and squeeze the handles tightly. This will compress the crimp ring onto the Pex tubing and create a secure connection. Make sure the crimp ring is well-secured without any gaps or deformations.
Testing the connection for leaks
Once you have secured the connection with a Pex crimp ring, it is essential to test for any leaks. Fill a bucket with water and turn on the outside faucet. Check the connection for any signs of water leakage, paying close attention to the Pex tubing, crimp fitting, and inlet.
If you notice any leaks, adjust the Pex nut or crimp ring to achieve a tighter connection. Re-test the connection to ensure it is completely leak-free. If the connection remains leak-free, you can proceed to bury the Pex tubing and install the outside faucet in its final location.
By following these steps, you can successfully install an outside faucet with Pex tubing, providing a convenient and reliable water source for all your outdoor activities. Remember to carefully secure the connection and test for leaks to ensure a trouble-free experience with your newly installed faucet.
How To Protect The Pex Tubing And Faucet From Freeze Damage?
Applying insulation foam or sleeves around the Pex tubing
One of the most effective ways to protect the Pex tubing from freeze damage is by applying insulation foam or sleeves around it. Insulation is crucial because it helps to retain the heat within the tubing and prevents freezing during the colder months. You can easily purchase insulation foam tubes that are specifically designed for Pex tubing from your local hardware store. These foam tubes come in various sizes and are easy to install. Simply slide the foam tube over the Pex tubing, making sure it covers the entire length. This will provide a protective barrier and help keep the Pex tubing safe from freezing temperatures.
Using a faucet cover or insulating cap for the outside faucet
In addition to protecting the Pex tubing, it is equally important to safeguard the outside faucet from freeze damage. One effective method is to use a faucet cover or insulating cap. These covers are designed to fit securely over the outside faucet, providing an extra layer of protection against freezing temperatures. Faucet covers typically come in different sizes and are easily available at hardware stores. To use a faucet cover, simply slide it over the faucet and secure it in place. This will help prevent any water trapped within the faucet from freezing and causing damage to the faucet or the Pex tubing connected to it.
Regularly checking for any signs of damage or wear
To ensure that your Pex tubing and outside faucet remain protected from freeze damage, it is essential to regularly check for any signs of damage or wear. Inspect the tubing and the faucet for any cracks, leaks, or signs of deterioration. If you notice any issues, it is crucial to address them promptly to avoid potential damage during freezing temperatures. Make sure to examine the connections between the tubing and the faucet as well, as these are vulnerable areas. By regularly inspecting for damage or wear, you can take necessary precautions and prevent any potential freeze damage before it becomes a bigger problem.
In conclusion, protecting your Pex tubing and outside faucet from freeze damage is crucial to ensure their longevity and functionality. By applying insulation foam or sleeves around the Pex tubing, using a faucet cover or insulating cap for the outside faucet, and regularly checking for any signs of damage or wear, you can safeguard them from freezing temperatures and avoid costly repairs in the future. Remember, prevention is always better than cure when it comes to freeze damage. So, take the necessary steps to protect your Pex tubing and outside faucet today.
How To Prevent Backflow And Ensure Proper Drainage?
When it comes to installing an outside faucet with Pex tubing, it is essential to understand how to prevent backflow and ensure proper drainage. These two factors play a crucial role in the functionality and longevity of your faucet system. In this section, we will discuss the steps you need to take to install a backflow preventer device, ensure the proper drainage slope for the Pex tubing, and clear any debris or obstructions from the drain outlet.
Installing a backflow preventer device
To prevent backflow and protect your water supply from contamination, it is necessary to install a backflow preventer device. This device allows water to flow in one direction while preventing it from flowing back into the supply lines. Follow these steps to install a backflow preventer device:
- Locate the main water supply line and shut off the water.
- Identify the appropriate location for the backflow preventer device, preferably close to the outside faucet.
- Connect the backflow preventer device to the water supply line using Teflon tape or pipe joint compound to ensure a watertight seal.
- Tighten the connections using a wrench, being careful not to overtighten.
- Open the main water supply valve to restore water flow.
- Check for any leaks and make adjustments if necessary.
Ensuring proper drainage slope for the Pex tubing
Proper drainage slope is essential to prevent water from pooling and causing damage to your faucet system. Follow these steps to ensure the proper drainage slope for the Pex tubing:
- Determine the length of the Pex tubing that needs to be installed.
- Calculate the required slope based on the distance and the recommended slope per foot.
- Use a level or a slope calculator to determine the correct angle for the Pex tubing.
- Secure the Pex tubing in place, ensuring it follows the calculated slope.
- Check the alignment and make any necessary adjustments before securing the tubing.
Clearing debris and obstructions from the drain outlet
In addition to backflow prevention and proper drainage slope, it is crucial to clear any debris or obstructions from the drain outlet. This ensures that water can flow freely without any blockages. Follow these steps to clear debris and obstructions from the drain outlet:
- Inspect the drain outlet for any visible obstructions such as leaves, dirt, or other debris.
- Use a garden hose or a small plumbing snake to remove any visible obstructions.
- If the drain outlet is still clogged, remove the cover and clean the drain pipe using a pipe brush or a garden hose.
- Inspect the drain outlet again to ensure it is clear of any debris.
By following these steps to prevent backflow and ensure proper drainage, you can install an outside faucet with Pex tubing confidently. Remember to always prioritize the safety and functionality of your faucet system to enjoy uninterrupted water supply outdoors.
How To Test The Installed Outside Faucet For Functionality?
Once you have successfully installed an outside faucet with Pex, it is essential to test it for functionality to ensure it operates smoothly and without any issues. Testing the installed outside faucet involves three important steps: opening the main water supply valve, checking for proper water flow and pressure, and testing for any leaks or drips.
Opening the main water supply valve
The first step in testing the installed outside faucet is opening the main water supply valve. This valve controls the flow of water to your entire house and is typically located near the water meter or where the water line enters your home. To open the valve, turn it clockwise until it is fully open. This will allow water to flow freely through your plumbing system and to the outside faucet.
Checking for proper water flow and pressure
After opening the main water supply valve, it is important to check for proper water flow and pressure at the outside faucet. This will ensure that the faucet is receiving adequate water supply. To do this, simply turn on the outside faucet and let the water run for a few minutes. Observe the water flow and pressure to make sure it is steady and strong.
Testing for any leaks or drips
The final step in testing the installed outside faucet is checking for any leaks or drips. Even a small leak can waste a significant amount of water over time and lead to expensive repairs. To test for leaks, visually inspect the outside faucet and its connections for any signs of water leakage. Look for dripping water, wet spots, or water stains around the faucet and its connections. Additionally, listen for any hissing or dripping sounds that could indicate a leak. If you notice any leaks or drips, they must be addressed promptly to prevent further damage.
Testing the installed outside faucet for functionality is crucial to ensure its proper operation and prevent water wastage. By following these three steps – opening the main water supply valve, checking for proper water flow and pressure, and testing for any leaks or drips – you can have peace of mind knowing that your outside faucet is functioning correctly.
How To Maintain And Care For The Outside Faucet With Pex?
Regularly inspecting for signs of damage or wear
One crucial aspect of maintaining and caring for an outside faucet with Pex is to regularly inspect it for signs of damage or wear. By conducting routine inspections, you can identify any potential issues early on and prevent costly repairs or replacements down the line.
Begin by visually examining the faucet for any visible cracks, leaks, or loose connections. Check the handles and valves for smooth operation and ensure there are no unusual sounds or vibrations when turning on or off the faucet. If you notice any signs of damage, it’s important to address them promptly to avoid further complications.
Clearing any debris or sediment from the faucet
Over time, debris, dirt, and sediment can accumulate in the outside faucet, hindering its performance and potentially causing damage. To ensure optimal functioning, it’s essential to clear any debris from the faucet regularly.
Start by turning off the water supply to the faucet. Then, remove the hose or any attachments connected to it. Use a soft brush or cloth to gently scrub away any dirt or grime from the faucet. Pay special attention to the nozzle and any crevices where debris may be lodged.
For more thorough cleaning, you can use a mixture of mild soap and water. Apply the solution to the faucet and scrub gently. Rinse the faucet with clean water afterward to remove any residue. Once the faucet is clean and free from debris, reattach the hose or attachments.
Properly winterizing the faucet before freezing temperatures
Before the onset of freezing temperatures, it’s crucial to properly winterize the outside faucet to prevent frozen pipes and potential damage. Winterizing the faucet will involve draining any remaining water from the pipes to eliminate the risk of freezing and bursting.
Here’s a step-by-step guide to winterizing your outside faucet:
- Start by turning off the water supply to the faucet.
- Next, open the faucet to release any remaining water.
- Detach and store any hoses or attachments.
- If your faucet has a shut-off valve inside the house, close it to prevent the flow of water to the pipe leading to the outside faucet.
- Consider insulating the faucet using foam insulation sleeves or wrapping it with towels or burlap.
- Ensure any exposed pipes leading to the faucet are also insulated.
By properly winterizing your outside faucet with Pex, you can protect it from freezing temperatures, avoid potential damage, and ensure its longevity.
Frequently Asked Questions
Can You Use Pex For An Outside Spigot?
Yes, you can use PEX for an outside spigot. PEX is a flexible and durable pipe material that can handle outdoor conditions, including freezing temperatures. It is a popular choice for plumbing projects, including outdoor faucets or spigots.
How Do You Replace A Hose Bib With Pex?
To replace a hose bib with PEX, follow these steps: 1. Turn off the water supply. 2. Remove the old hose bib. 3. Measure and cut the PEX pipe to the desired length. 4. Insert the PEX fitting into the pipe end.
5. Connect the PEX fitting to the new hose bib. 6. Tighten the connections. 7. Turn on the water supply to test for leaks. 8. Done! You have successfully replaced the hose bib with PEX.
How Does Pex Connect To Faucet?
PEX connects to a faucet by using a PEX compression fitting. The fitting is placed onto the end of the PEX pipe and then tightened onto the faucet using a wrench. This provides a secure and leak-free connection between the PEX pipe and the faucet.
What Is The Best Pipe For An Outdoor Faucet?
The best pipe for an outdoor faucet is one made of durable materials like brass or stainless steel. These pipes are resistant to rust and can withstand harsh weather conditions. Their sturdy construction ensures long-lasting performance and reliable water flow for your outdoor needs.
Conclusion
Installing an outside faucet with Pex can be a straightforward and cost-effective solution for your outdoor water needs. By understanding the necessary steps, from materials selection to installation techniques, you can successfully complete this home improvement project. Keep in mind the importance of safety precautions and familiarity with local plumbing codes.
By following our guide, you’ll be able to enjoy a reliable and convenient outdoor faucet for years to come. Happy DIY-ing!