To install an exhaust fan in the kitchen, mount the fan on the ceiling or wall and connect it to a power source and an external vent. Adequate ventilation is essential for removing smoke, odors, and excess moisture from the kitchen.
Introduction Proper kitchen ventilation is crucial for maintaining a clean and healthy living environment. An exhaust fan helps to remove smoke, cooking smells, and excess moisture from cooking activities. Whether you are remodeling your kitchen or building a new one, installing an exhaust fan can be a straightforward and cost-effective solution.
In this guide, we will provide you with step-by-step instructions on how to install an exhaust fan in your kitchen. By following these simple guidelines, you can ensure adequate ventilation, improving air quality and creating a more comfortable cooking space. So, let’s get started on the installation process.
Planning For Kitchen Exhaust Fan Installation
In order to effectively keep your kitchen well-ventilated and odor-free, installing an exhaust fan is a wise decision. Planning this installation process thoroughly can save you time, money, and effort in the long run. In this guide, we will break down the crucial steps involved in planning for kitchen exhaust fan installation.
Assessing the need for an exhaust fan in the kitchen
The first step in planning for the installation of a kitchen exhaust fan is to assess whether you really need one. Consider the following factors:
- Cooking Habits: Do you frequently cook foods that produce excess smoke, steam, or grease? If so, an exhaust fan can help remove these pollutants from your kitchen.
- Kitchen Layout: Evaluate the layout of your kitchen, as well as its proximity to windows and doors. Poor ventilation and confined spaces can increase the need for an exhaust fan.
- Health Concerns: If you or your family members suffer from respiratory conditions or allergies, a kitchen exhaust fan can help improve the air quality and reduce the risk of triggering symptoms.
Determining the suitable location for installation
Once you have determined the need for an exhaust fan in your kitchen, the next step is to find the right location for installation. Consider the following factors:
- Proximity to Cooking Area: Ideally, the exhaust fan should be installed as close to the cooking area as possible to effectively capture smoke, steam, and odors.
- Accessible Ductwork: Check for accessible ductwork in your kitchen. If existing ductwork is not available, you may need to plan for running new ducts to ensure proper venting.
- Avoid Structural Obstacles: Ensure that there are no structural obstacles such as beams or plumbing that may hinder the installation process.
Calculating the required fan capacity
After determining the suitable location for installation, it is important to calculate the required fan capacity to ensure efficient ventilation. The fan capacity is measured in cubic feet per minute (CFM) and depends on factors such as kitchen size, cooking habits, and heat sources. Use the following formula to calculate the required CFM:
CFM = Kitchen Volume (in cubic feet) x Air Changes per Hour
Generally, it is recommended to have at least 8 air changes per hour for standard kitchens. However, for kitchens with heavy cooking or commercial use, it may be necessary to increase the number of air changes per hour.
By thoroughly assessing the need for an exhaust fan, determining the suitable location, and calculating the required fan capacity, you are well-prepared to move forward with the installation process. In the next part of this guide, we will explore the steps involved in installing the exhaust fan in your kitchen.
Gathering The Necessary Tools And Materials
Before you begin the installation process, it is essential to gather all the necessary tools and materials. Having everything on hand will save you time and ensure a smooth installation. Below is a list of tools and materials you will need for installing an exhaust fan in your kitchen.
List of tools required for installation:
- A screwdriver
- A drill
- Measuring tape
- Pencil
- Hacksaw
- Stud finder
- Caulk gun
- Wire strippers
- Adjustable wrench
- Utility knife
These tools will help you with various aspects of the installation process, whether it’s measuring the area, cutting materials, or securing components.
List of materials required for installation:
| Materials | Quantity |
|---|---|
| Exhaust fan | 1 |
| Ductwork | As required |
| Screws | As required |
| Mounting brackets | As required |
| Electrical wire | As required |
| Cable connectors | As required |
| Caulk | As required |
Make sure to check the specific requirements of your exhaust fan and kitchen layout before purchasing the materials. This will ensure you have everything you need for a successful installation.
Gathering the necessary tools and materials is the first step towards installing an exhaust fan in your kitchen. Once you have everything in place, you are ready to move on to the next steps.
Preparing The Workspace And Safety Measures
Before you begin the installation process of an exhaust fan in your kitchen, it is crucial to prepare your workspace and take necessary safety measures. This step ensures a smooth and safe installation, allowing you to enjoy the benefits of a well-ventilated kitchen. In this section, we will discuss how to clear the workspace of clutter and obstacles, ensure proper ventilation during installation, and take necessary safety precautions.
Clearing the Workspace of Clutter and Obstacles
To begin with, it is important to clear the area where you intend to install the exhaust fan. Remove any clutter, including utensils, appliances, and other items that may obstruct your work. By doing so, you create a clean and organized space, making the installation process easier and safer. Keep in mind that a clutter-free workspace not only enhances safety but also allows you to focus on the task at hand.
Ensuring Proper Ventilation During Installation
Ventilation is a key consideration during the installation of an exhaust fan. Proper ventilation ensures a healthy and comfortable environment while you work. It is important to open windows or doors in the kitchen to allow fresh air circulation, minimizing the accumulation of dust and potential fumes. Additionally, if possible, use a portable fan or air purifier to further enhance the ventilation in the area.
Taking Necessary Safety Precautions
When it comes to installing an exhaust fan, safety should always be a top priority. Before starting the installation process, it is important to take the necessary safety precautions to prevent any accidents or injuries.
Here are a few safety measures to keep in mind:
- Ensure the power is turned off to the area where you will be working. This helps prevent any accidental electrical shocks and keeps you safe during the installation.
- Wear appropriate safety gear, such as goggles and gloves, to protect your eyes and hands from potential hazards.
- Follow the manufacturer’s instructions carefully and use the correct tools and equipment for the installation. Using improper tools can lead to accidents and damage to the fan or surrounding areas.
- If you are not confident in your abilities, consider consulting a professional or seeking assistance from someone knowledgeable in electrical work.
By following these safety measures, you can ensure a secure and successful installation of an exhaust fan in your kitchen.
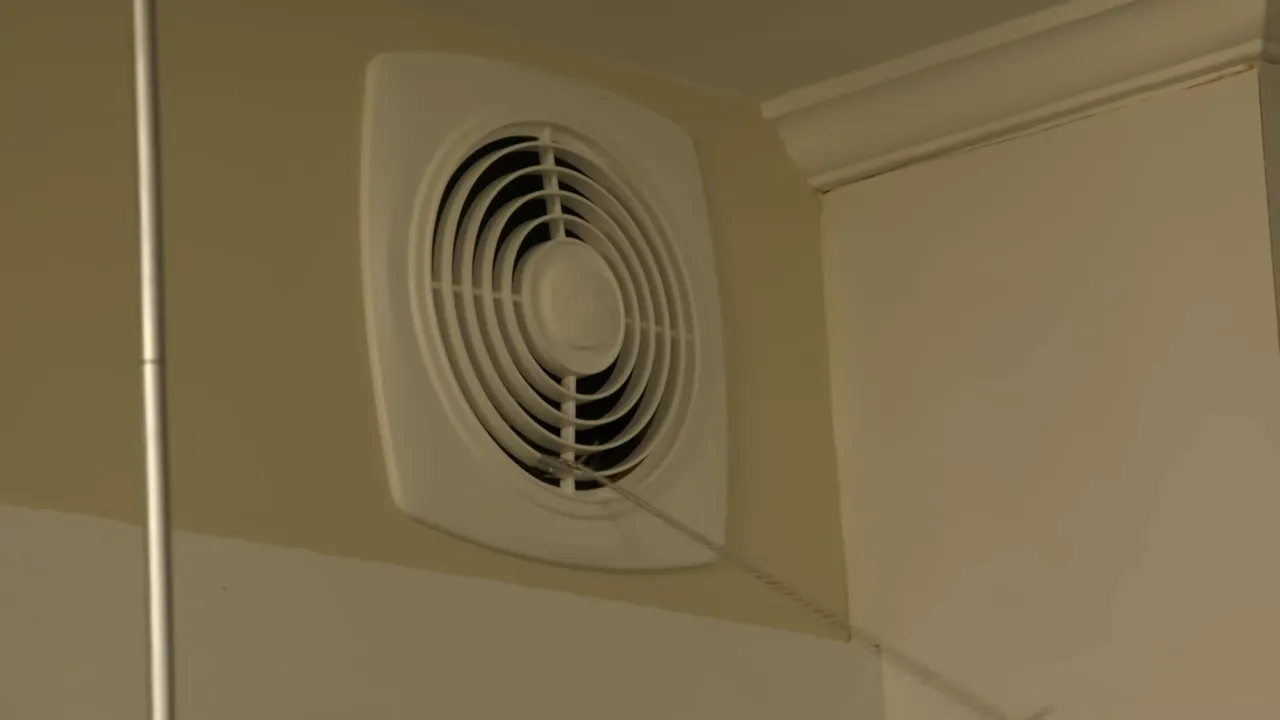
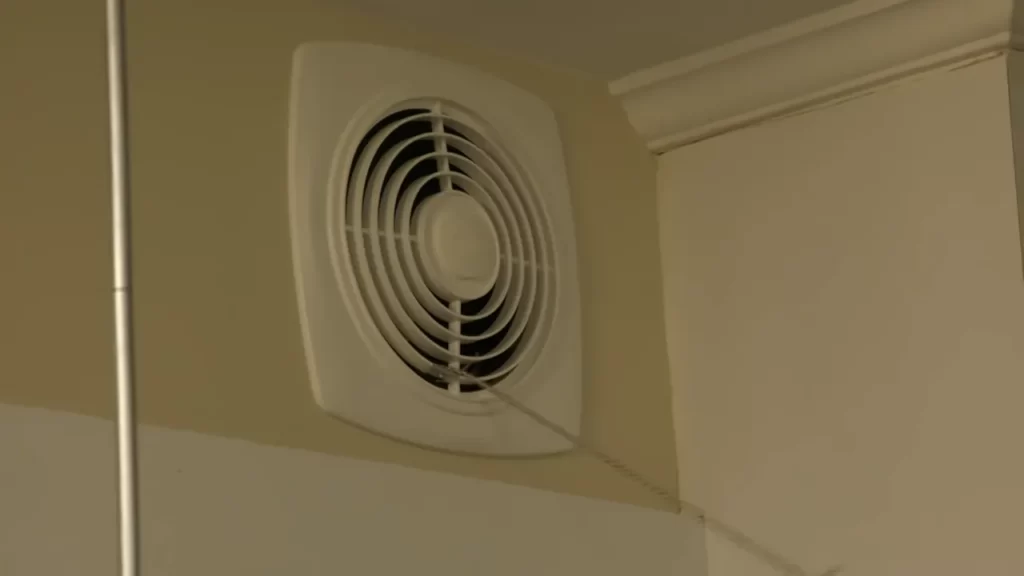
Installing The Exhaust Fan
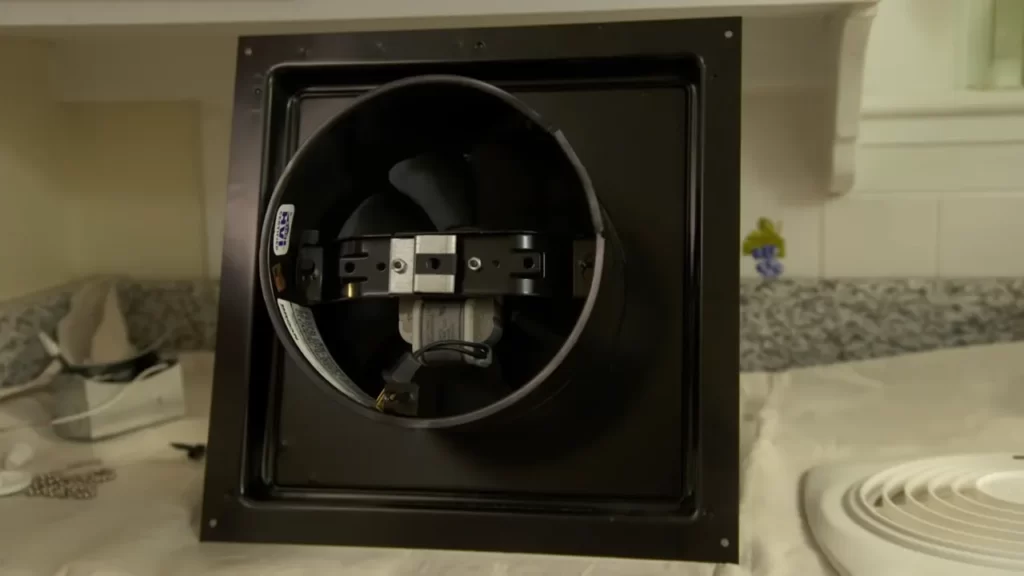
Mounting the fan housing
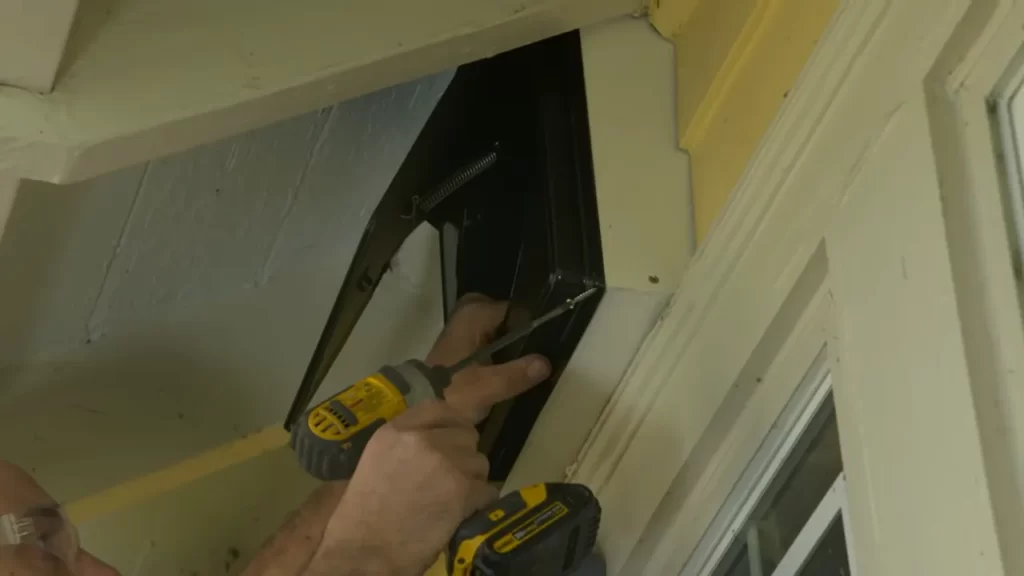
Mounting the fan housing is the first step in installing an exhaust fan in the kitchen. The fan housing is responsible for protecting the motor and blades, while also providing stability to the fan. To mount the fan housing:
- Ensure that the wall where the fan housing will be mounted is strong enough to support the weight of the fan. Use a stud finder to locate studs in the wall for added support.
- Mark the desired location for the fan housing on the wall, taking into consideration the recommended distance from the stovetop or cooking area.
- Using the appropriate screws, attach the fan housing to the wall, ensuring it is level and secure. Be sure to refer to the manufacturer’s instructions for the specific model you are installing.
Connecting the electrical wiring
Connecting the electrical wiring is a crucial step in installing an exhaust fan in the kitchen. It is important to follow proper electrical safety guidelines and consult a professional if you are unsure. To connect the electrical wiring:
- Turn off the power to the kitchen at the circuit breaker.
- Remove the electrical box cover on the fan housing.
- Connect the wires from the fan to the corresponding wires in the electrical box, ensuring that the connections are secure.
- The black wire from the fan should be connected to the black wire in the electrical box.
- The white wire from the fan should be connected to the white wire in the electrical box.
- The green or bare copper wire from the fan should be connected to the ground wire in the electrical box.
- Carefully tuck the connected wires into the electrical box and replace the cover.
- Turn the power back on at the circuit breaker and test the fan to ensure it is working properly.
Securing the fan in place
Securing the fan in place is the final step in installing an exhaust fan in the kitchen. This ensures that the fan is stable and safe for operation. To secure the fan in place:
- Ensure that the fan housing is securely mounted to the wall, as described in the previous section.
- Double-check that all electrical connections are secure and properly insulated.
- Attach any additional brackets or supports provided by the manufacturer to further secure the fan.
- Test the fan to ensure it is securely attached and does not wobble or vibrate excessively.
By following these steps, you can successfully install an exhaust fan in your kitchen. Proper installation ensures effective ventilation, which helps to remove cooking odors, heat, and excess moisture from your kitchen, improving indoor air quality and creating a more comfortable cooking environment.
Ductwork And Ventilation
When installing an exhaust fan in your kitchen, proper ductwork and ventilation are crucial for effective and efficient operation. The ductwork is responsible for channeling the stale air and cooking odors outside of your home, while proper ventilation ensures adequate airflow and prevents the buildup of moisture and harmful pollutants. In this section, we will discuss the key considerations for choosing the appropriate duct size, installing the ductwork, and ensuring proper ventilation and airflow.
Choosing the appropriate duct size
Choosing the right duct size is essential to ensure proper airflow and efficient ventilation in your kitchen. The size of the duct will depend on the output capacity of your exhaust fan and the layout of your kitchen space. A duct that is too small can restrict airflow, reducing the fan’s effectiveness, while a duct that is too large can result in energy wastage.
To determine the appropriate duct size for your kitchen exhaust fan, you need to consider the fan’s CFM (cubic feet per minute) rating and the equivalent length of the ductwork. The CFM rating indicates the volume of air the fan can move in one minute. It’s recommended to consult the manufacturer’s guidelines or seek professional advice for proper sizing.
Installing the ductwork
Once you have determined the appropriate duct size, it’s time to install the ductwork. The ductwork should follow the shortest and most direct route to the outside of your home, avoiding sharp turns and obstructions. This helps to minimize the resistance for air movement and maximizes the efficiency of the exhaust fan.
To install the ductwork, you will need to cut a hole in the exterior wall or ceiling for the exhaust fan vent. Ensure that the hole is slightly larger than the duct size to accommodate proper airflow. Securely attach the duct to the vent using screws or appropriate connectors, making sure there are no gaps or leaks that could compromise the ventilation system’s effectiveness.
Ensuring proper ventilation and airflow
Proper ventilation and airflow go hand in hand with the effectiveness of your kitchen exhaust fan. In addition to installing the ductwork correctly, there are a few key considerations you should keep in mind:
- Location: Place the exhaust fan in a central location in your kitchen to ensure it can effectively capture and remove cooking odors and airborne grease.
- Distance: Ensure that the distance between the stove or cooking area and the exhaust fan is as short as possible. The shorter the distance, the more efficient the ventilation.
- Cleanliness: Regularly clean and maintain your exhaust fan and ductwork to prevent the accumulation of grease, dust, and other particles that can hinder airflow. This will also help prolong the lifespan of your ventilation system.
By carefully considering the appropriate duct size, installing the ductwork correctly, and ensuring proper ventilation and airflow, you can create a healthy and comfortable kitchen environment free from unwanted odors and pollutants. Remember to consult professionals or refer to manufacturer guidelines for specific recommendations based on your kitchen exhaust fan model.
Wiring And Power Supply
When it comes to installing an exhaust fan in your kitchen, one of the most important steps is to ensure a proper wiring and power supply. This will allow the fan to function efficiently and provide effective ventilation. In this section, we will guide you through determining the power source for the exhaust fan, connecting the fan to the power supply, and testing the wiring and electrical connections to ensure a safe and reliable installation.
Determining the power source for the exhaust fan
Before you begin the installation process, you need to determine the power source for your exhaust fan. This will depend on the existing electrical setup in your kitchen, as well as the location of the fan. Here are the steps to follow:
- Turn off the power: Start by switching off the power supply to the area where you will be installing the exhaust fan. This is crucial for your safety and to avoid any electrical mishaps.
- Locate an existing power supply: Look for an existing power source near the intended location of the exhaust fan, such as a nearby electrical outlet or light fixture. This will help minimize the amount of wiring needed and make the installation process smoother.
- Check the electrical rating: Ensure that the power source you have chosen can handle the electrical load of the exhaust fan. Refer to the manufacturer’s instructions or the fan’s specifications to determine the power requirements, including the voltage and amperage.
Connecting the fan to the power supply
Once you have determined the power source for your exhaust fan, it’s time to connect the fan to the power supply. Here’s how to do it:
- Prepare the wiring: Strip the insulation from the end of the fan’s electrical cable and connect it to the power supply wires using wire connectors.
- Secure the connections: Use electrical tape to secure the wire connectors and prevent any exposed wire or loose connection. This will ensure a safe and reliable electrical connection.
- Mount the fan: Install the fan in the designated location, following the manufacturer’s instructions. Ensure that it is securely fixed to the wall or ceiling using the appropriate mounting brackets.
Testing the wiring and electrical connections
After connecting the fan to the power supply, it’s important to test the wiring and electrical connections before completing the installation. This will ensure that the fan is working properly and that there are no potential hazards. Follow these steps to test the wiring:
- Turn on the power: Switch on the power supply to the exhaust fan.
- Check the fan’s operation: Test the fan by turning it on and off, making sure it functions smoothly and without any unusual noises or vibrations.
- Verify the electrical connections: Inspect the wiring and connections to ensure they are secure and properly insulated. Look for any signs of damage or loose connections and rectify them if necessary.
By following these steps, you can ensure a safe and effective installation of an exhaust fan in your kitchen. Remember to always refer to the manufacturer’s instructions and consult a professional if you have any doubts or concerns. With a properly wired and powered exhaust fan, you can enjoy a well-ventilated and odor-free kitchen.
Insulation And Soundproofing
When installing an exhaust fan in the kitchen, insulation and soundproofing are two crucial factors to consider. Proper insulation around the exhaust fan and ductwork helps to prevent air leakage, improve energy efficiency, and reduce condensation. Soundproofing methods, on the other hand, help to minimize noise, ensuring a quieter and more enjoyable cooking experience. This section will guide you through applying insulation and implementing soundproofing techniques for your kitchen exhaust fan.
Applying insulation around the exhaust fan and ductwork
Insulating the exhaust fan and ductwork not only helps maintain a consistent temperature in your kitchen but also prevents the escape of cooking odors and grease particles. To effectively insulate your kitchen exhaust system, follow these steps:
- Choose the right insulation material: Opt for insulation that is specifically designed for use in ventilation systems to ensure fire safety and adherence to local building codes. Flexible duct insulation with a high R-value is often recommended.
- Measure and cut the insulation: Take accurate measurements of your exhaust fan and ductwork to determine the amount of insulation required. Remember to account for any bends or turns along the ductwork. Cut the insulation material accordingly.
- Wrap the insulation around the ductwork: Carefully wrap the insulation around the ductwork, ensuring a tight fit without any gaps or overlaps. Use adhesive tape or insulation fasteners to secure the insulation in place.
- Insulate the exhaust fan housing: Apply insulation around the exhaust fan housing, taking care to cover all exposed areas. This helps prevent heat loss or gain and minimizes noise transmission.
Soundproofing methods to minimize noise
Noise from a kitchen exhaust fan can be highly disruptive, especially if your kitchen is open to other living areas. Fortunately, there are several soundproofing techniques you can employ to reduce noise levels:
- Use a sound-isolating fan housing: Consider investing in a fan housing that is specifically designed to minimize noise transmission. These housings are usually made of acoustically insulated materials that absorb sound and vibrations.
- Install sound baffles: Sound baffles are highly effective in reducing noise from the exhaust fan. These devices are placed inline with the ductwork and work by absorbing sound waves. They come in various sizes and shapes to fit different duct sizes.
- Seal gaps and leaks: Inspect your exhaust fan system for any gaps or leaks that may contribute to noise leakage. Use weatherstripping or caulking to seal these gaps and reduce noise transmission.
- Add mass-loaded vinyl: Mass-loaded vinyl is an excellent soundproofing material that can be installed around the exhaust fan housing or within the ductwork. Its heavy composition helps to block noise transmission effectively.
- Consider a remote fan location: If possible, installing the exhaust fan away from the kitchen area can significantly reduce noise levels. This can be achieved by using remote fan kits, which move the main unit away from the kitchen space.
Incorporating insulation and soundproofing techniques when installing an exhaust fan in your kitchen will not only improve its efficiency but also create a quieter and more peaceful cooking environment. Make sure to apply these methods to enjoy the benefits of a well-ventilated and noise-controlled kitchen.
Finishing Touches And Testing
After successfully installing an exhaust fan in your kitchen, it’s time to focus on the final steps of the process. This includes sealing any gaps or openings, testing the functionality of the exhaust fan, and making any necessary adjustments or repairs to ensure optimal performance.
Sealing any gaps or openings
Sealing any gaps or openings around the exhaust fan is crucial to preventing air leakage. Air leakage can diminish the effectiveness of the fan and allow unwanted odors or moisture to escape into your kitchen. To seal any gaps or openings, follow these steps:
- Inspect the area around the exhaust fan for any visible gaps or openings.
- Use a high-quality silicone caulk to seal any gaps or openings. Apply the caulk generously and ensure it covers the entire gap.
- Smooth out the caulk with a caulk smoothing tool or your finger to create a seamless seal.
- Allow the caulk to dry completely before testing the exhaust fan.
Testing the functionality of the exhaust fan
Once you have sealed any gaps or openings, it’s essential to test the functionality of the exhaust fan. Testing the exhaust fan will ensure that it is properly installed and functioning as expected. To test the functionality of the exhaust fan, follow these steps:
- Turn on the exhaust fan at the highest setting.
- Check if the exhaust fan is effectively removing smoke, steam, and cooking odors from the kitchen.
- Listen for any unusual noises or vibrations that may indicate a problem with the fan.
- Observe the airflow by holding a small piece of paper near the exhaust fan. The paper should be drawn towards the fan, indicating proper airflow.
Making any necessary adjustments or repairs
If during the testing process you notice any issues with the exhaust fan, such as inadequate airflow or unusual noises, it may be necessary to make adjustments or repairs. Here are some common adjustments or repairs you can make:
- Check the electrical connections to ensure they are secure and not loose.
- Inspect the fan blades for any dirt or debris that may be obstructing proper airflow. Clean the blades if necessary.
- If the airflow is weak, check the ductwork for any blockages or restrictions. Clear any obstructions to improve airflow.
- If you are unable to resolve the issue on your own, it is recommended to contact a professional for further assistance.
By following these steps for finishing touches and testing, you can ensure that your newly installed exhaust fan is operating at its best, keeping your kitchen well-ventilated and free from unwanted odors and moisture.
Maintenance And Cleaning Tips
Maintenance and Cleaning Tips
Proper maintenance and regular cleaning of your kitchen exhaust fan are essential for its efficient performance and longevity. By following a few simple tips, you can ensure that your exhaust fan functions optimally and effectively eliminates fumes, odors, and smoke from your kitchen.
Regular cleaning and maintenance of the exhaust fan
To keep your exhaust fan in top condition, it’s important to establish a regular cleaning routine. Here are some steps to follow:
- Turn off the Power: Always remember to turn off the power supply to the exhaust fan before performing any maintenance or cleaning tasks.
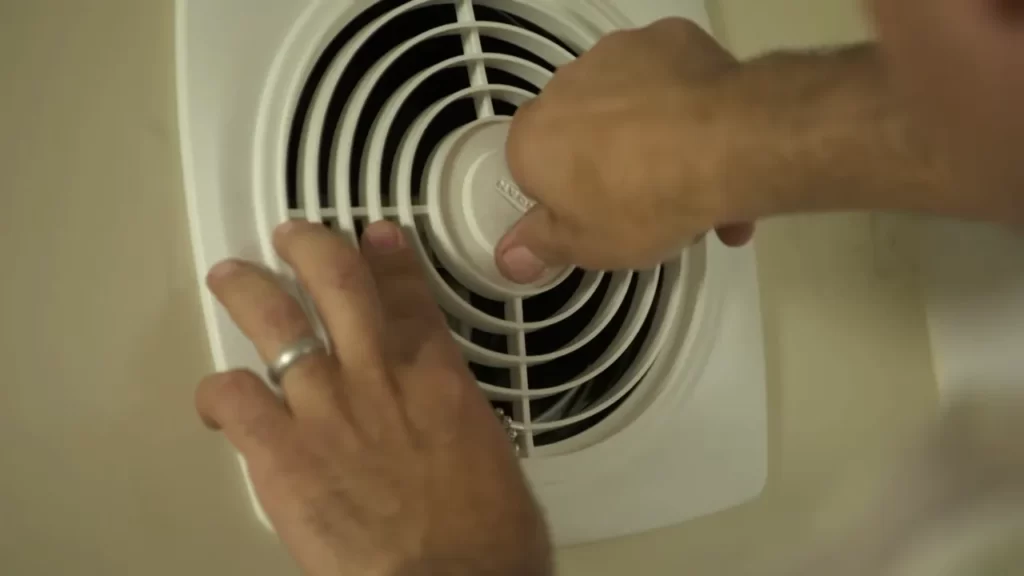
- Remove the Cover: Start by carefully removing the fan cover. Most covers can be easily removed by unscrewing the fasteners or releasing the clips.
- Clear Dust and Debris: Use a soft brush or vacuum cleaner attachment to remove dust and debris from the fan blades, motor, and housing. Pay close attention to the areas around the fan blades where grease and grime tend to accumulate.
- Wash the Parts: For metal or plastic parts, you can clean them by wiping them down with a damp cloth or sponge using a mild dish soap. Avoid using abrasive cleaners that can damage the surfaces.
- Check for Proper Functioning: After cleaning, make sure all parts are dry and reassemble the fan. Turn on the power supply and ensure that the fan is functioning properly.
Troubleshooting common issues
If you notice any issues with your kitchen exhaust fan, here are some common problems and their possible solutions:
- Inadequate Ventilation: If you find that your exhaust fan is not effectively removing fumes or odors, check if the vent hood and ducts are clean and properly connected.
- Noise or Vibration: Excessive noise or vibration can indicate loose or worn-out parts. Check and tighten any loose screws or bolts. If the noise persists, it may be necessary to replace the fan motor or blades.
- Electrical Issues: If your exhaust fan is not turning on or off, check the power supply and ensure that the wiring connections are secure. If necessary, consult a professional electrician to fix any electrical problems.
Replacing filters or parts as needed
To maintain the efficiency of your exhaust fan, it is important to replace filters or damaged parts as needed. Here are some steps to follow:
- Identify the Filters or Parts: Determine which filters need replacement or which parts are damaged or worn out.
- Order the Correct Replacement: Order the appropriate replacement filters or parts from the manufacturer or an authorized dealer to ensure compatibility.
- Follow the Manufacturer’s Instructions: Refer to the manufacturer’s instructions provided with the replacement filters or parts to correctly install them in your exhaust fan.
- Dispose of Old Filters or Parts: Properly dispose of the old filters or parts in accordance with local regulations.
Helpful Resources And Recommendations
When it comes to installing an exhaust fan in your kitchen, it’s always helpful to have some resources and recommendations at hand. From suggested brands and models to online tutorials and safety guidelines, having these references will make the installation process smoother and more straightforward.
Recommended Brands and Models for Kitchen Exhaust Fans
If you’re unsure about which brand or model to choose for your kitchen exhaust fan, here are a few recommendations that have garnered positive reviews:
| Brand | Model | Features |
|---|---|---|
| Panasonic | FV-08VQ5 | Quiet operation, energy-efficient, customizable fan speed options |
| Broan-NuTone | QP130SS | Powerful ventilation, stylish design, easy to install and maintain |
| KitchenAid | KXU2830YSS | High-performance motor, multiple speed settings, dishwasher-safe filters |
Keep in mind that the choice of brand and model ultimately depends on your specific requirements and budget. It’s always a good idea to read customer reviews and compare features before making a final decision.
Online Tutorials and Guides for Further Reference
If you’re looking for more detailed instructions on how to install an exhaust fan in your kitchen, there are plenty of online tutorials and guides available. Here are a few reliable sources where you can find step-by-step instructions:
- YouTube: Many DIY enthusiasts and experts share video tutorials on installing kitchen exhaust fans. Look for channels specializing in home improvement or kitchen renovations.
- Blogs and Websites: Numerous home improvement blogs and websites provide comprehensive guides with detailed explanations and accompanying images or diagrams. Examples include This Old House and Family Handyman.
By following these tutorials and guides, you can gain a better understanding of the installation process and perform it with confidence.
Safety Guidelines and Regulations for Exhaust Fan Installation
Before beginning the installation, it’s crucial to familiarize yourself with the safety guidelines and regulations associated with exhaust fan installation. Adhering to these guidelines will ensure a safe and efficient operation of your kitchen exhaust fan. Here are a few key points to keep in mind:
- Turn off the power: Before starting any electrical work, always turn off the power to the kitchen circuit at the main electrical panel.
- Check local building codes: Consult your local building codes or regulations to ensure compliance with any specific requirements for exhaust fan installation.
- Proper ventilation: Ensure that the exhaust fan is vented outside the house, preferably through the roof or side wall, to prevent the accumulation of moisture and odors.
- Secure mounting: Ensure the exhaust fan is securely mounted and properly sealed to the wall or ceiling to prevent any vibrations or leaks.
- Follow manufacturer’s instructions: Always refer to the manufacturer’s instructions for proper installation and maintenance guidelines.
By adhering to these safety guidelines and regulations, you can confidently install your kitchen exhaust fan, promoting a healthier and odor-free environment in your kitchen.
Frequently Asked Questions
Do Kitchen Exhaust Fans Need To Be Vented Outside?
Yes, kitchen exhaust fans need to be vented outside.
How Much Does It Cost To Install An Exhaust Fan In A Kitchen?
The cost of installing an exhaust fan in a kitchen can vary depending on factors such as the size of the fan and the complexity of the installation. Generally, you can expect to spend between $200 and $500 for the installation process.
Can I Install An Exhaust Fan In Kitchen?
Yes, you can install an exhaust fan in your kitchen. It helps remove odors, smoke, and excess heat, maintaining a clean and comfortable cooking environment. Proper ventilation is essential for a healthy and safe kitchen.
What Do I Do If My Kitchen Doesn’T Have An Exhaust Fan?
If your kitchen doesn’t have an exhaust fan, you can consider using alternative options such as opening windows, using a portable fan, or investing in a recirculating range hood. These can help circulate air and remove odors while cooking.
Conclusion
Installing an exhaust fan in the kitchen is a simple yet crucial step in maintaining proper air circulation and keeping the space free from unwanted odors and moisture. By following the step-by-step guide provided in this blog post, you can ensure the efficient and effective installation of an exhaust fan in your kitchen.
Remember, a well-ventilated kitchen is essential for a healthy and comfortable cooking environment. So, don’t hesitate to take action and improve your kitchen’s air quality today!