To install an American Standard toilet seat, first, remove the old seat by loosening the bolts and lifting it off. Then, align the new seat with the holes on the toilet bowl and secure it in place by tightening the bolts.
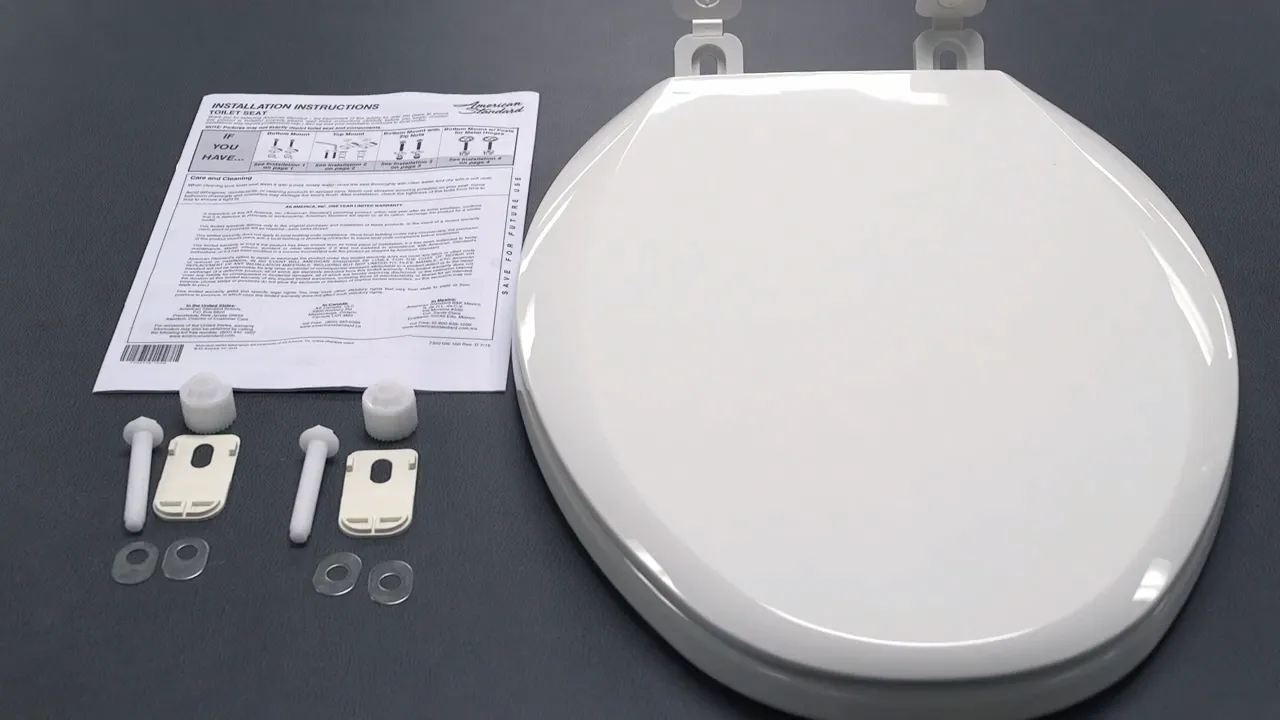
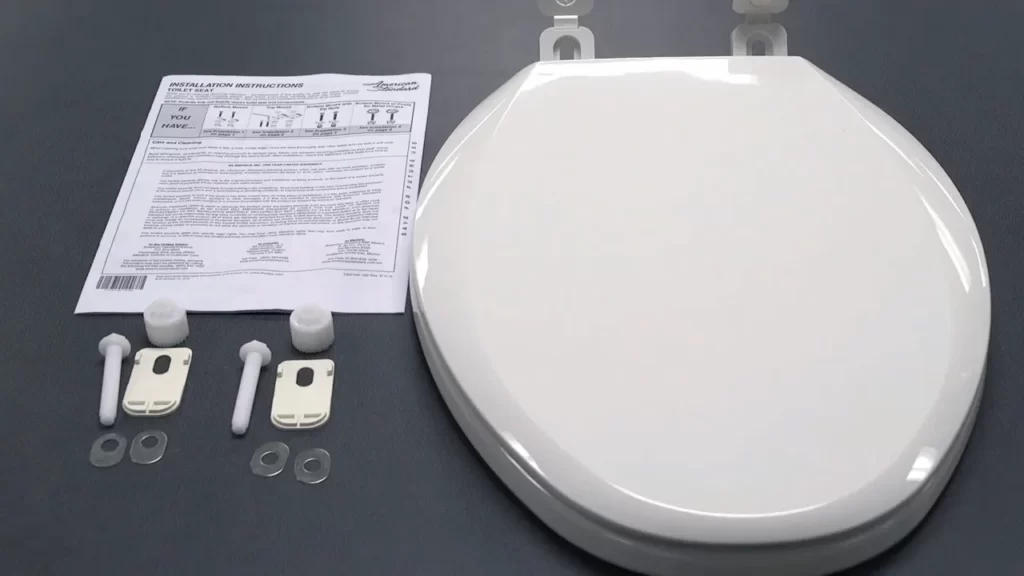
Materials Required For Installing An American Standard Toilet Seat
When it comes to installing an American Standard toilet seat, having the right materials is essential to ensure a hassle-free process. By gathering the following items, you’ll have everything you need to complete the installation with ease:
Standard toilet seat
Of course, the most important item you will need is the American Standard toilet seat itself. Ensure that you have purchased the correct size and model that fits your toilet bowl perfectly, as this will provide the foundation for a comfortable and secure seat.
Screwdriver
To attach the new toilet seat to your bowl, you will need a screwdriver. A flat-head or Phillips-head screwdriver will work best, depending on the type of screws used in your toilet seat kit. This tool allows you to easily tighten and secure the seat onto the bowl.
Adjustable wrench
In addition to a screwdriver, an adjustable wrench is required to tighten the bolts that secure the seat to the toilet bowl. This handy tool allows you to adjust the size of the wrench opening to fit different bolt sizes, making it easier to secure the seat firmly in place.
Measuring tape
Before installing the new toilet seat, it’s important to measure the distance between the bolt holes on the toilet bowl. This is where the seat attaches to the bowl, and having the correct measurements ensures a proper fit. A measuring tape will allow you to accurately determine the distance between these holes, ensuring a seamless installation.
By having these materials on hand, you’ll be well-prepared to install your American Standard toilet seat efficiently and effectively. With the right tools at your disposal, you can enjoy a comfortable and secure seat that enhances your bathroom experience.
Step-By-Step Guide On How To Install An American Standard Toilet Seat
Are you ready to upgrade your bathroom with a new American Standard toilet seat? Installing a toilet seat may seem like a daunting task, but with this step-by-step guide, you’ll have it done in no time. Whether you’re replacing an old seat or installing a brand new one, follow these simple instructions to ensure a secure and comfortable fit.
Locate the seat screws at the back of the toilet bowl
First, locate the seat screws at the back of your toilet bowl. These screws fasten the toilet seat to the bowl and may be covered by small plastic caps. Use your fingers or a flathead screwdriver to remove these caps and reveal the screws beneath.
Use the screwdriver to loosen and remove the screws
Once you’ve exposed the seat screws, use a screwdriver to loosen and remove them. Turn the screw counterclockwise to release the seat from the toilet bowl. Set the screws aside as you will need them later.
Lift off the old toilet seat and set it aside
With the screws removed, lift off the old toilet seat and set it aside. Take this opportunity to clean the surface of the toilet bowl using a mild cleaner or disinfectant. Make sure to remove any residue or debris that may have accumulated over time.
Measure the distance between the mounting holes on the toilet bowl
Before installing your new American Standard toilet seat, measure the distance between the mounting holes on the toilet bowl. This measurement will help you select the correct size seat for a proper fit.
Use the measurements to determine the correct size of the toilet seat
Using the measurements you obtained, determine the correct size of the toilet seat. American Standard provides a convenient sizing guide that you can refer to if needed, ensuring you choose the right seat for your toilet.
| Measurements (in inches) | Toilet Seat Size |
|---|---|
| 4-5/8 to 5-1/4 | Round |
| 5-1/4 to 6-7/8 | Elongated |
| 6 to 6-3/4 | Square |
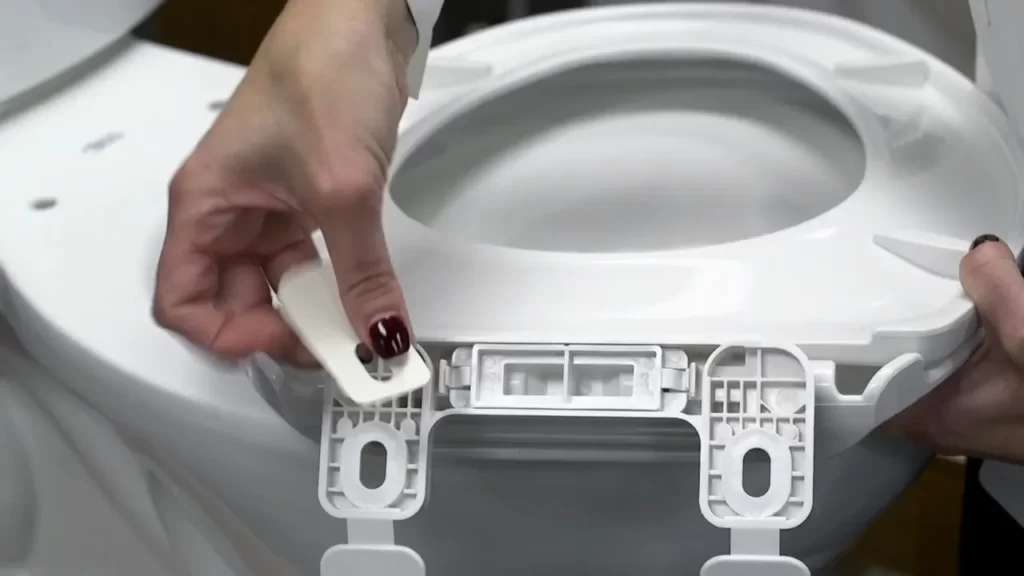
Align the mounting holes on the toilet seat with the holes on the toilet bowl
Once you have the correct size toilet seat, align the mounting holes on the seat with the corresponding holes on the toilet bowl. Make sure the seat is centered and level before proceeding to the next step.
Insert the bolts through the holes and tighten them securely
Insert the bolts through the holes, with the threaded ends facing downward. Use your fingers to initially tighten the bolts, and then use an adjustable wrench to firmly secure them. Be careful not to overtighten, as this can damage the toilet bowl.
Ensure that the seat is aligned properly with the toilet bowl
Double-check that the seat is aligned properly with the toilet bowl. Make any necessary adjustments to ensure a snug fit and optimal comfort.
Use the screwdriver and adjustable wrench to tighten the mounting hardware
Using a screwdriver and an adjustable wrench, tighten the mounting hardware on both sides of the toilet seat. This will help ensure that the seat remains securely attached to the toilet bowl.
Make sure the seat is securely attached to the toilet bowl
Gently test the stability and alignment of the seat. Apply slight pressure from different angles to ensure it is securely attached to the toilet bowl. If you notice any wobbling or movement, recheck the installation steps and make necessary adjustments.
Sit on the seat and ensure it is comfortable and secure
Once you have completed the installation, sit on the seat to test its comfort and stability. Spend a few minutes ensuring that it feels secure and properly aligned with the toilet bowl.
Maintain cleanliness by regularly cleaning the toilet seat
To maintain cleanliness and hygiene, it is important to regularly clean your American Standard toilet seat. Follow the manufacturer’s instructions for cleaning and maintenance, which may include using mild soap or disinfectants. Regular cleaning will help keep your toilet seat looking good and free from germs.
That’s it! You’ve successfully installed an American Standard toilet seat by following these easy steps. Now you can enjoy a comfortable and stylish addition to your bathroom.
Tips And Precautions For Installing An American Standard Toilet Seat
Installing a new toilet seat is a simple task that can give your bathroom a fresh and updated look. However, there are a few important tips and precautions to keep in mind to ensure a smooth and successful installation of your American Standard toilet seat. By following these guidelines, you can avoid potential issues and ensure your new toilet seat fits perfectly and functions properly.
Ensure the toilet seat is compatible with your toilet bowl model
Before you proceed with the installation, it is crucial to ensure that the American Standard toilet seat you have purchased is compatible with your specific toilet bowl model. Different toilets have different dimensions and designs, and a seat that doesn’t fit properly can result in discomfort and instability.
To determine compatibility, check the packaging or product description for information on the toilet bowl models the seat is designed to fit. Alternatively, you can visit the American Standard website or contact their customer support for assistance. Double-checking compatibility will save you time and the frustration of having to return an ill-fitting seat.
Double-check the measurements to ensure the seat fits properly
Once you have confirmed compatibility, it is essential to double-check the measurements to ensure a proper fit. Take accurate measurements of the distance between the mounting holes on your toilet bowl.
Using a tape measure, measure the length and width of the seat and compare them to the dimensions provided by the manufacturer. Additionally, consider the shape of your toilet bowl – whether it is round or elongated – as this will affect the fit as well. Taking these precautions will help you avoid any disappointment or inconvenience caused by an incorrectly sized toilet seat.
Avoid over-tightening the mounting hardware to prevent damage to the toilet bowl
When attaching the new toilet seat, it is important to exercise caution and avoid over-tightening the mounting hardware. Tightening the screws too much can result in damage to the toilet bowl, such as cracks or chips.
To ensure a secure fit without causing harm, use a screwdriver or wrench to tighten the screws until they are snug, but not excessively tight. It is important to follow the manufacturer’s instructions regarding the recommended torque or tightness for the mounting hardware. Taking this precaution will help extend the lifespan of your toilet bowl and prevent the need for costly repairs.
Follow the manufacturer’s instructions for any specific installation requirements
Every toilet seat manufacturer may have specific installation requirements or recommendations. These instructions may include steps to follow, tools to use, or additional precautions to take.
Before beginning the installation process, carefully read the manufacturer’s instructions provided with your American Standard toilet seat. Following these instructions will ensure that the seat is properly installed and that you have a clear understanding of any unique requirements. Skipping or disregarding these guidelines may lead to improper installation or void the warranty, so it’s essential to be thorough.
If unsure, consult a professional plumber for assistance
If you are uncertain about any aspect of installing your American Standard toilet seat or if you encounter any difficulties during the process, it is recommended to seek assistance from a professional plumber.
Professional plumbers have the expertise and experience to handle toilet seat installations quickly and efficiently. They can help you avoid potential mistakes and ensure that your new seat is installed correctly for optimal comfort and functionality. Investing in professional help can save you time, effort, and potential headaches in the long run.
By following these tips and precautions for installing an American Standard toilet seat, you can enjoy a hassle-free installation process and confidently enhance your bathroom’s appearance and functionality. Remember to prioritize compatibility, double-check measurements, avoid over-tightening, follow manufacturer’s instructions, and seek professional assistance when needed for a successful and long-lasting installation.
Frequently Asked Questions
How Do You Replace The Seat On An American Standard Toilet?
To replace the seat on an American Standard toilet, follow these steps: 1. Lift the seat and locate the mounting bolts. 2. Unscrew the nuts securing the bolts underneath. 3. Remove the old seat from the toilet. 4. Position the new seat over the mounting holes.
5. Attach the nuts and tighten them to secure the seat in place.
How Do You Tighten American Standard Toilet Seat With Hidden Bolts?
To tighten an American Standard toilet seat with hidden bolts, follow these steps: 1. Locate the plastic covers on the back of the seat and remove them. 2. Use a screwdriver to turn the nuts counterclockwise to loosen them. 3.
Adjust the seat to your desired position and retighten the nuts by turning them clockwise with the screwdriver. 4. Replace the plastic covers. Done!
How To Install American Standard Quick Release Toilet Seat?
To install an American Standard quick release toilet seat, follow these steps: 1. Lift the old seat straight up to remove it. 2. Place the new seat on the toilet bowl, aligning the holes with the mounting posts. 3. Slide the quick-release mechanism onto the posts.
4. Tighten the nuts underneath the bowl until secure. 5. To remove the seat for cleaning, simply press the buttons on the quick-release mechanism and lift the seat off.
How Do You Install An American Standard One Piece Toilet?
To install an American Standard one piece toilet, follow these steps: 1. Prepare the area and remove the old toilet. 2. Position the new toilet over the flange and secure it with bolts. 3. Connect the water supply to the tank and ensure a tight seal.
4. Attach the toilet seat and lid according to the manufacturer’s instructions. 5. Test the flush and check for any leaks. Enjoy your new toilet!
Conclusion
Installing an American Standard toilet seat may seem like a daunting task, but with the right guidance, it can become a simple and effortless process. By following the step-by-step instructions mentioned in this blog post, you can easily replace your old toilet seat and enjoy enhanced comfort and functionality.
Remember to gather all the necessary tools and take proper safety precautions. Now, you can confidently tackle this DIY project and embark on a hassle-free toilet seat installation journey!