To install an alcove tub, first, measure the space to ensure it will fit properly. Then, remove any existing fixtures and prepare the area before inserting the tub into the alcove and securing it in place.
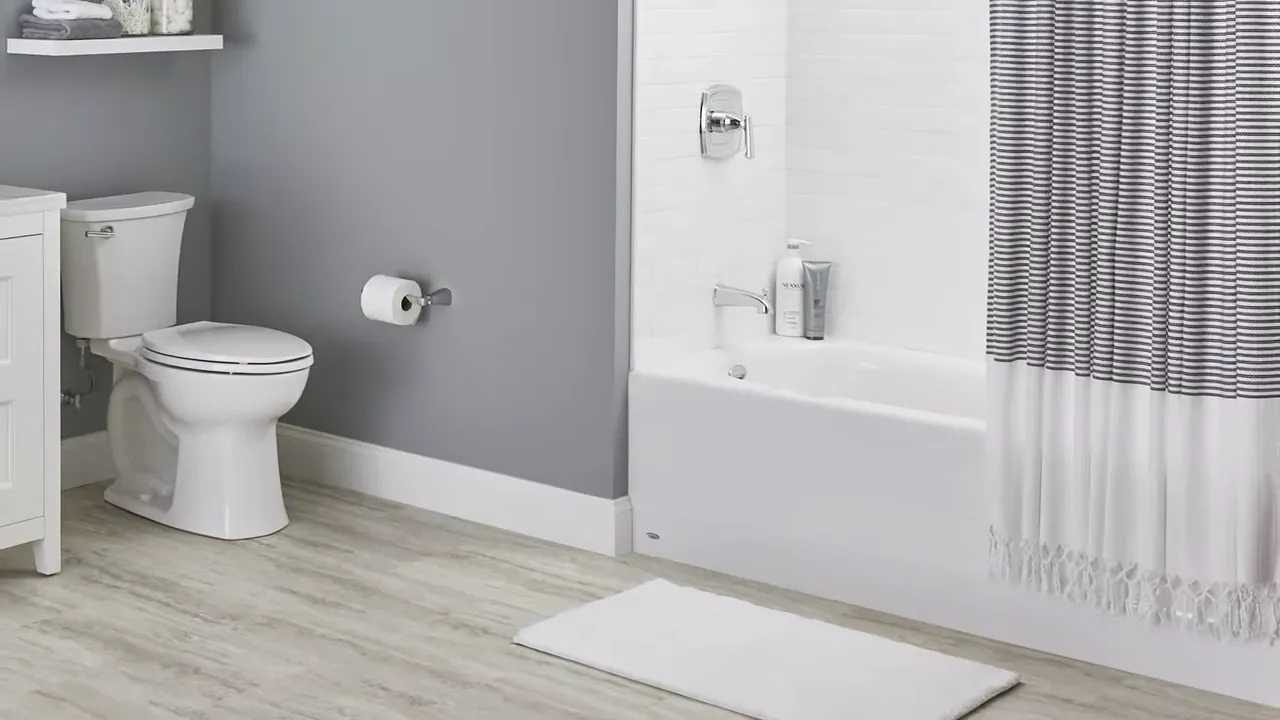
Are you planning to renovate your bathroom and install an alcove tub? It’s important to know the proper installation process to ensure a smooth and hassle-free project. In this guide, we will walk you through the steps to install an alcove tub.
Before you begin, make sure to accurately measure the space to ensure the tub will fit properly. Additionally, don’t forget to remove any existing fixtures and prepare the area before inserting and securing the tub in the alcove. By following these steps, you’ll be able to enjoy a luxurious and functional alcove tub in your bathroom.
Step 1: Preparing Your Bathroom
Before you can embark on the exciting journey of installing an alcove tub, it’s essential to ensure that your bathroom is properly prepared. This initial step will lay the foundation for a successful installation process. Let’s delve into the details.
Clearing the Space
Begin by clearing the area where you plan to install the alcove tub. Remove any existing fixtures or furniture, such as vanities or cabinets, that might hinder the installation process. Giving yourself ample space to work will make the job much easier. Remember to disconnect and cap off any water or electrical connections that are present in the area using the appropriate tools and techniques.
Measuring the Area
Accurate measurements are crucial when it comes to installing an alcove tub. To begin, use a measuring tape to determine the dimensions of the space where the tub will be placed. Measure the length, width, and height of the available area. This information will help you select the right sized alcove tub that fits perfectly in your bathroom. It’s advisable to measure multiple times to ensure the accuracy of your measurements.
Checking Plumbing and Electrical Connections
Prior to installing the alcove tub, it’s essential to check the plumbing and electrical connections in your bathroom. Confirm that the plumbing pipes are in good condition and are properly aligned for connecting the tub’s water supply and drainage systems. Similarly, check the electrical connections to ensure they are compatible with any built-in features of the alcove tub, such as jets or lights.
If you’re uncertain about any aspect of the plumbing or electrical connections, it’s always wise to consult a professional plumber or electrician to ensure everything is up to code and in compliance with safety standards.
By following these steps in preparing your bathroom, you are setting yourself up for a smooth and successful alcove tub installation. Once the space is cleared, measurements are taken, and the plumbing and electrical connections are verified, you can confidently move on to the next step in the installation process.
Step 2: Gathering The Necessary Tools And Materials
Before you begin installing your alcove tub, it’s important to gather all the necessary tools and materials. This will help ensure a smooth installation process and prevent any delays or setbacks. In this step, we will provide you with a list of the tools and materials you will need, as well as some safety precautions to keep in mind.
List of tools required
To complete the installation of your alcove tub, make sure you have the following tools on hand:
- Adjustable wrench
- Tape measure
- Hacksaw
- Drill
- Screwdriver (both flathead and Phillips head)
- Level
- Tile cutter or wet saw (if necessary)
- Plumber’s putty or silicone sealant
List of materials required
In addition to the tools mentioned above, you will also need the following materials:
- Alcove tub
- Waterproof membrane
- Tub filler
- Drain assembly
- Plumbing connectors (if needed)
- Tile adhesive
- Grout
Safety precautions
While installing an alcove tub, it is important to prioritize your safety. Follow these safety precautions to ensure a secure and accident-free installation:
- Always wear protective goggles and gloves when handling tools or materials.
- Ensure the work area is well-lit and ventilated.
- Double-check the power supply for any electrical tools before use.
- Use caution when working with sharp tools, such as the hacksaw or tile cutter.
- If you are unsure about any step of the installation process, consult a professional plumber or contractor.
By gathering the necessary tools and materials and adhering to the safety precautions, you are now ready to move on to the next step of installing your alcove tub.

Step 3: Removing The Old Tub
Removing the old tub is an essential step when installing an alcove tub. This process can be quite involved, but with proper guidance, you’ll be able to tackle it like a pro. In this step, we will cover draining the water, disconnecting plumbing connections, and removing the tub surround, ensuring a seamless removal.
Draining the Water
To begin the process, you must first drain the water from the old tub. Start by locating the tub’s drain, usually located at the bottom, and unplug it. If there is any standing water in the tub, use a bucket or a siphon to remove it. Ensuring that the tub is completely drained will make the removal process easier and prevent unnecessary water leakage.
Disconnecting Plumbing Connections
Once the tub is drained, the next step is to disconnect the plumbing connections attached to it. Start by turning off the water supply to the tub. This can usually be done by closing the water valves located under the tub or in the adjacent bathroom. Once the water supply is shut off, use a wrench to loosen and remove the connections from the faucet, showerhead, and any other plumbing fixtures that may be connected to the tub.
Note: It’s essential to have a container ready to catch any excess water that may come out during this process.
Removing the Tub Surround
Now that the plumbing connections are disconnected, it’s time to remove the tub surround. The tub surround is the enclosure that surrounds the tub, typically made of tiles or other waterproof materials. Begin by inspecting the surround to determine if it’s attached with adhesive or screws.
If adhesive is used, carefully pry the surround away from the wall using a putty knife or similar tool. Start at the corners and work your way around, being cautious not to damage the surrounding walls or tiles.
If screws are used, locate and remove them using a screwdriver or power drill. Once the screws are removed, gently pull the tub surround away from the wall, ensuring that it doesn’t cause any damage to the surrounding area.
Remember to dispose of the old tub and surround responsibly, following any local regulations or guidelines.
With the old tub successfully removed, you’re now one step closer to installing your new alcove tub. In the next step, we will cover preparing the alcove and installing the new tub, bringing you even closer to your dream bathroom renovation.
Step 4: Ensuring Proper Drainage And Ventilation
Checking the existing drain and vent system
Before installing a new alcove tub, it is important to check the condition of the existing drain and vent system. This step ensures that the water will flow properly and prevent any future issues.
Start by inspecting the drain and vent pipes for any signs of damage or blockage. Look for leaks, cracks, or rust that may hinder the proper functioning of the system. Additionally, check the vent pipe for any obstructions that could restrict airflow.
If you notice any issues with the existing drain and vent system, it is recommended to consult a professional plumber for proper assessment and repairs.
Installing a new drain and overflow
Once you have ensured that the existing drain and vent system is in good condition, it’s time to install a new drain and overflow specifically designed for your alcove tub. This ensures proper water drainage and prevents any potential overflow.
Here are the steps to install a new drain and overflow:
- Apply plumber’s putty to the drain flange and insert it into the drain hole of the tub.
- Tighten the drain flange from underneath the tub using a drain wrench.
- Attach the overflow assembly to the overflow hole of the tub, making sure it is aligned properly.
- Connect the drain and overflow pipes to the corresponding plumbing lines, ensuring a secure and watertight connection.
- Double-check all connections and test the drain and overflow system by filling the tub with water and checking for any leaks or drainage issues.
By following these steps and ensuring proper drainage and ventilation, you can enjoy a fully functional alcove tub that adds style and comfort to your bathroom.
Step 5: Installing The Alcove Tub
By now, you should have prepared the space, removed the old tub, and made all necessary plumbing connections. Now it’s time for the exciting part: installing the alcove tub. In this step, we will guide you through the process of positioning the tub, leveling and securing it, and connecting the plumbing.
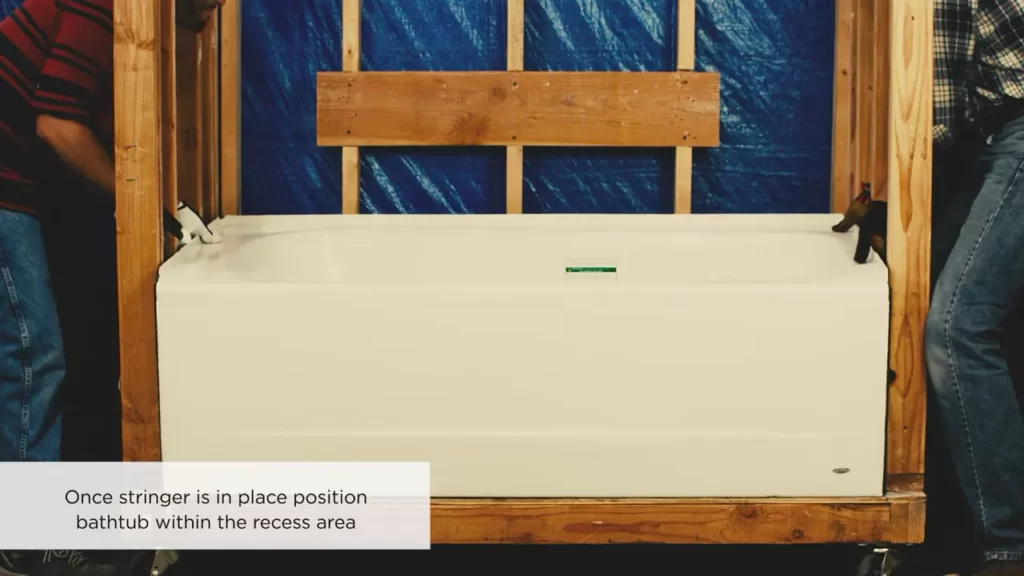
Positioning the Tub
The first step in installing the alcove tub is to position it correctly within the designated alcove space. To ensure a proper fit, carefully measure the width and depth of the alcove and compare it to the dimensions of the tub. Place the tub in the alcove, ensuring it is centered and aligned with the surrounding walls. This can be done by measuring the distance between the tub and each wall to verify they are equal. Adjust the tub’s position as needed until it is aligned correctly.
Leveling and Securing the Tub
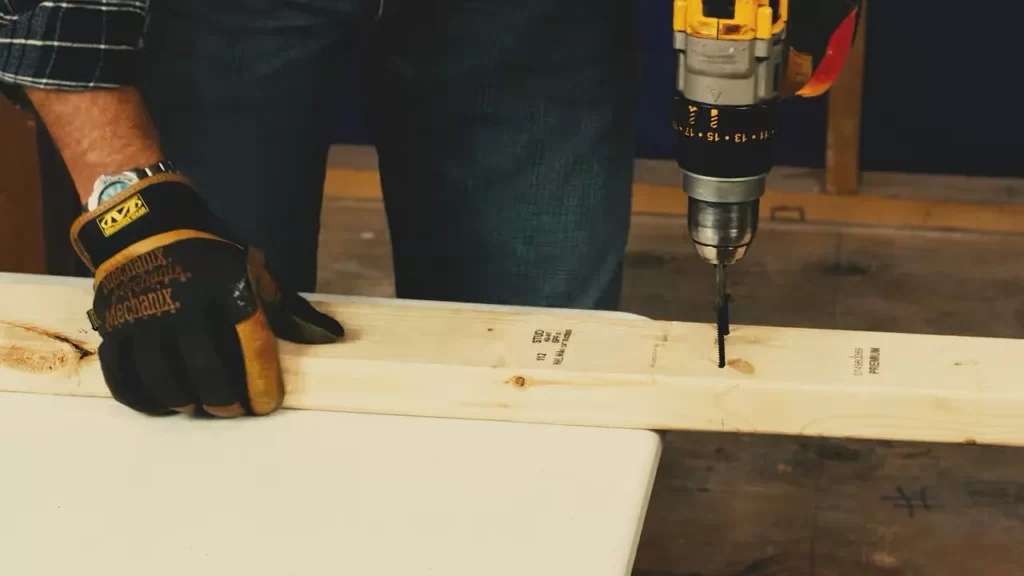
Once the tub is positioned correctly, the next step is to level and secure it. Use a level to check if the tub is level both lengthwise and crosswise. If the tub is not level, adjust its position by adding shims underneath the tub legs until it is perfectly level. This is crucial for proper water drainage and overall stability.
After leveling the tub, secure it in place using the manufacturer’s recommended method. This usually involves attaching support braces to the framing studs behind the walls, ensuring the tub is securely anchored. The support braces are typically included with the alcove tub or can be purchased separately from the manufacturer.
Connecting the Plumbing
Now that the tub is properly positioned and secured, it’s time to connect the plumbing. Start by attaching the drain assembly to the bottom of the tub, following the manufacturer’s instructions. Apply plumber’s putty or silicone sealant around the drain flange to create a watertight seal.
Next, connect the hot and cold water supply lines to the tub. Use Teflon tape to secure the threaded connections and prevent leaks. Ensure that the connections are tight but be careful not to overtighten and risk damaging the fittings or causing leaks.
Finally, test the bathtub’s plumbing connections by turning on the water supply and checking for any leaks. If you find any leaks, tighten the connections further or replace faulty parts as needed. Once the connections are secure and leak-free, carefully observe the water flow and ensure that it is filling and draining properly.
Congratulations! You have successfully installed your alcove tub. Now you can enjoy relaxing baths or invigorating showers in your newly installed tub.
Step 6: Sealing And Waterproofing
Once you have successfully installed your alcove tub in the bathroom, it is crucial to seal and waterproof the area to prevent any potential water damage. This step plays a vital role in ensuring the longevity and durability of your tub installation. In this section, we will cover two important tasks: applying caulk and sealant around the edges and installing a waterproof backer board.
Applying caulk and sealant around the edges
One of the key steps in sealing your alcove tub is applying a high-quality caulk and sealant around the edges. This helps create a watertight barrier and prevents any moisture from seeping into the surrounding walls or floors. Follow these simple steps to ensure proper application:
- Start by thoroughly cleaning the surface area around the tub. Remove any dirt, dust, or debris using a mild detergent and water solution.
- Using a caulk gun, apply the caulk to the gap between the tub and the adjacent walls. Make sure to apply an even bead of caulk to ensure a proper seal.
- Smooth the caulk using a caulk smoothing tool or a moistened finger. This helps create a clean and neat finish.
- Allow the caulk to dry according to the manufacturer’s instructions. This usually takes around 24 hours before the tub can be used again.
Installing a waterproof backer board
In addition to sealing the edges, it is also important to install a waterproof backer board behind the tub to provide extra protection against water damage. Here’s how you can install a waterproof backer board:
- Measure the dimensions of the space behind the tub and cut the waterproof backer board to fit accordingly.
- Apply construction adhesive to the back of the waterproof backer board.
- Press the backer board firmly against the wall, ensuring it is level and plumb. Use screws or nails to secure the backer board in place.
- Repeat this process for all the sides of the tub, making sure to overlap the backer board edges for maximum protection.
- Once the backer board is securely in place, seal the joints and seams using a waterproof sealant. This further enhances the waterproofing of the alcove tub area.
By following these steps and properly sealing and waterproofing your alcove tub, you can enjoy your bathing experience without any worries of water damage or leakage. Remember, taking the necessary precautions during the installation process will save you from potential headaches down the line.
Step 7: Finishing Touches
After successfully installing your alcove tub, it’s time for the finishing touches that will complete the installation process. This step involves a few important tasks that will add the final touches to your alcove tub and make it ready for use. In this section, we will cover two essential tasks: installing the tub surround or tile and connecting faucets and accessories.
Installing the Tub Surround or Tile
One of the most visually appealing aspects of an alcove tub is the tub surround or tile. This not only enhances the overall look of the bathroom but also serves as a protective barrier against moisture. To install the tub surround or tile, follow these steps:
- Clean the alcove walls thoroughly to ensure a clean and smooth surface for installation.
- Measure the dimensions of the wall area that needs to be covered.
- If you’re using a tub surround, cut it to the required size using a utility knife or a suitable cutting tool.
- Apply an adhesive or mortar to the backside of the tub surround or tile and press it firmly against the alcove walls.
- Use a level to ensure the tub surround or tile is installed straight and level.
- If you’re using tiles, apply grout between them and wipe off any excess to create a clean and finished look.
- Allow the adhesive, mortar, or grout to dry completely as per the manufacturer’s instructions.
By following these steps carefully, you can install a tub surround or tile that not only protects your alcove walls but also adds a stylish touch to your bathroom.
Connecting Faucets and Accessories
Once the tub surround or tile is in place, the next step is to connect the faucets and accessories. This step ensures that your alcove tub is not only visually appealing but also fully functional. Here’s how you can connect faucets and accessories:
- Refer to the manufacturer’s instructions to determine the appropriate placement and installation method for your faucets and accessories.
- Position the faucets and accessories in their designated spots and secure them tightly using the provided hardware.
- Apply plumber’s tape to the threads of the faucet connections to prevent leaks.
- Connect the water supply lines to the faucets, ensuring they are tightly secured.
- Check for any potential leaks by turning on the water supply and observing the connections.
By following these steps, you can ensure that your alcove tub is equipped with properly connected faucets and accessories, providing a seamless and enjoyable bathing experience.
With the tub surround or tile installed and the faucets and accessories connected, your alcove tub is now ready for use. Take a moment to appreciate the successful completion of your installation and enjoy the comfort and relaxation your alcove tub will provide.
Step 8: Cleaning Up And Maintenance Tips
Once you have successfully installed your alcove tub, it’s important to clean up any construction debris and learn how to properly maintain and care for your new fixture. Follow these tips to ensure your tub remains in great condition for years to come.
Removing Construction Debris
Before enjoying your new alcove tub, it’s essential to remove any construction debris that may have accumulated during the installation process. This will not only help keep your tub clean, but also prevent any potential damage or clogging of the drain. Follow these steps to effectively remove construction debris:
- Start by removing any leftover construction materials such as wood, nails, or screws from the surrounding area.
- If there is excess dust or dirt, use a vacuum cleaner or a broom to sweep it away. Be sure to pay attention to the corners and edges.
- Wipe down the tub and the surrounding area with a damp cloth or sponge to remove any remaining dirt or debris.
- Dispose of the debris properly according to your local waste management regulations. This will help keep your environment clean and prevent any potential hazards.
Cleaning the Tub
Maintaining a clean and hygienic alcove tub is crucial for your overall well-being. Follow these steps to properly clean your tub:
- Start by filling the tub with warm water.
- Add a small amount of mild liquid cleaner or a non-abrasive cleaning agent specifically designed for tubs.
- Using a soft cloth or sponge, gently scrub the surface of the tub, paying special attention to any stains or discoloration.
- Rinse the tub thoroughly with warm water to remove any cleaning residue.
- Dry the tub with a clean towel to prevent water spots or mold growth.
Regular cleaning will not only keep your alcove tub looking sparkling clean but also prevent the buildup of soap scum, mildew, and other potential contaminants.
Tips for Proper Maintenance and Care
Proper maintenance and care are essential to prolonging the lifespan of your alcove tub and ensuring its optimal functionality. Consider the following tips:
- Avoid using abrasive cleaners or scrub brushes, as they can damage the tub’s surface.
- Periodically check and clean the drain to prevent clogs and ensure proper water drainage.
- Keep the area around the tub dry to prevent the growth of mold or mildew.
- Consider applying a protective wax or sealant to the tub’s surface to maintain its shine and protect against scratches.
By following these maintenance and care tips, you can enjoy a clean and well-maintained alcove tub for many years to come.
Frequently Asked Questions
How Do You Install An Alcove Soaking Tub?
To install an alcove soaking tub, follow these steps: 1. Measure the space and ensure it fits the tub’s dimensions. 2. Prepare the area by removing any existing fixtures or materials. 3. Install the drain and water supply lines according to manufacturer instructions.
4. Place the tub in the alcove, ensuring it is level and secure. 5. Connect the drain and water supply lines, and test for leaks. Enjoy your new alcove soaking tub!
Do Alcove Tubs Need Mortar?
No, alcove tubs do not need mortar. They are installed directly onto a level subfloor or cement board using the appropriate adhesive. This ensures stability and prevents any movement or shifting during use.
What Do You Put Under A Bathtub For Support?
The bathtub needs support, which usually includes a mortar bed or a foam base, against the floor. This helps to distribute the weight evenly and prevents sagging or cracking over time.
Do You Screw A Bathtub To The Wall?
Yes, bathtubs are typically screwed to the wall for stability and safety.
Conclusion
Installing an alcove tub may seem like a complex task, but with the right steps and tools, you can do it yourself. By following this guide, you’ve gained the necessary knowledge and confidence to successfully install an alcove tub in your bathroom.
Remember to thoroughly review the instructions, gather all the required materials, and take your time during the installation process. With careful planning and execution, you’ll be enjoying a relaxing soak in your new alcove tub in no time. Happy tub installation!