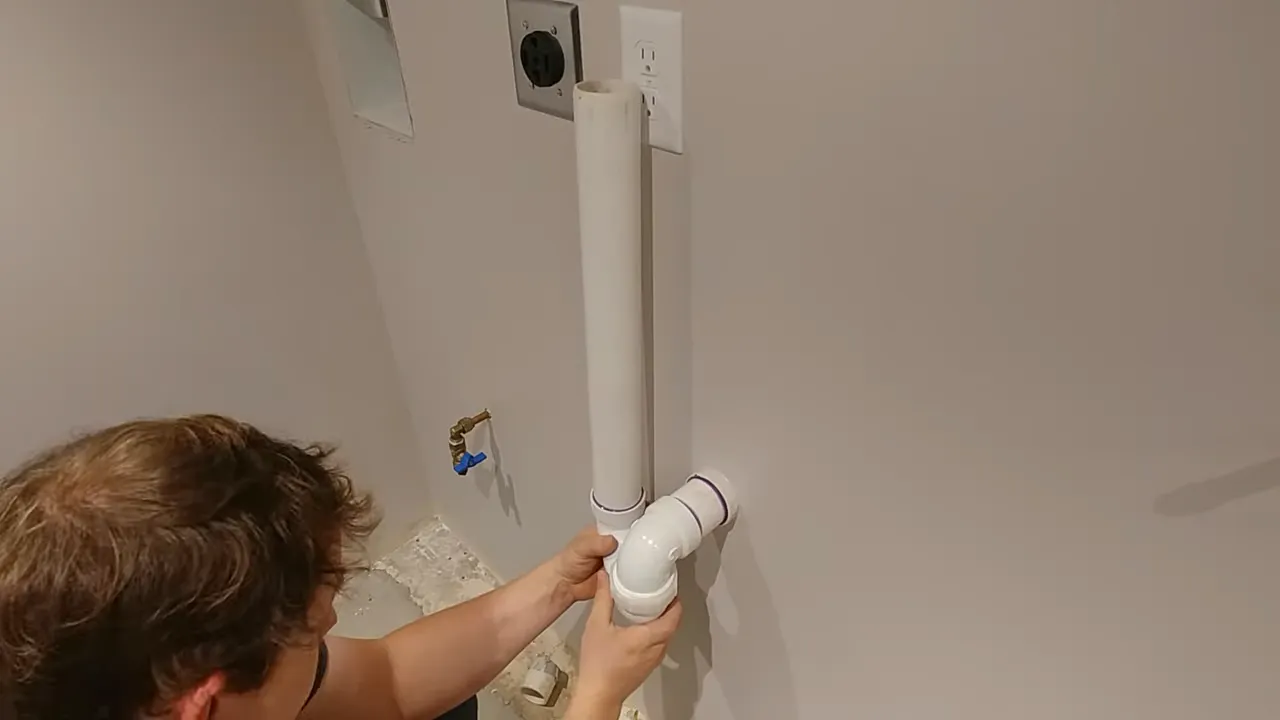
To install a washing machine drain pipe, you need to secure the drain hose to a standpipe or a laundry sink drain.
Why Proper Installation Matters
Avoiding potential flooding and water damage
Proper installation of a washing machine drain pipe is crucial for several reasons. One of the most important reasons is that it helps to avoid potential flooding and water damage in your laundry area.
When a washing machine is not properly connected to a drain pipe, it can lead to leaks and water overflow. This can result in water seeping into your flooring, walls, and other areas of your home, causing extensive damage and costly repairs.
By ensuring that your washing machine drain pipe is correctly installed, you can prevent these issues and enjoy peace of mind knowing that your laundry area is safe from potential flooding and water damage.
Ensuring efficient drainage for optimal machine performance
In addition to protecting your home from flooding and water damage, proper installation of a washing machine drain pipe also plays a key role in ensuring efficient drainage for optimal machine performance.
When a drain pipe is not properly connected or has improper slope, it can lead to slow or incomplete drainage. This can result in standing water in the drum of your washing machine, which can lead to mold, mildew, and unpleasant odors.
Furthermore, incomplete drainage can affect the overall efficiency of your washing machine, as it may need to work harder and use more energy to complete a cycle. By installing the drain pipe correctly, you can promote proper drainage and enhance the performance and longevity of your washing machine.
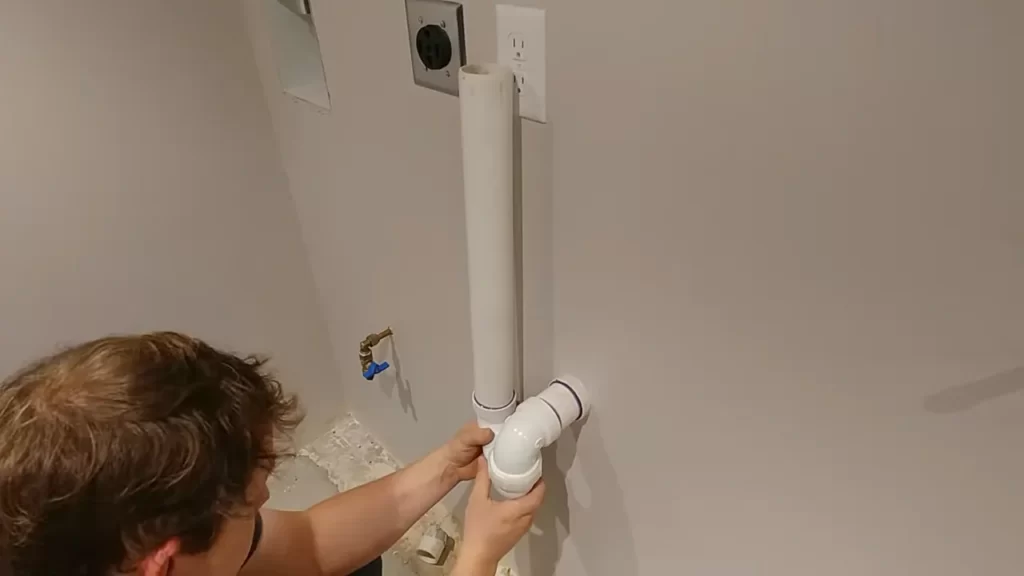
Tools And Materials Needed
In order to install a washing machine drain pipe, you will need a few essential tools and materials. These will ensure that the installation process goes smoothly and efficiently. Below is a list of the tools and materials you will need:
Pipe wrench
A pipe wrench is a handy tool that you’ll use to tighten and loosen the various fittings and connections needed for the drain pipe installation. It provides a strong grip and allows you to apply the necessary force to secure the pipe in place.
Screwdriver
A screwdriver, specifically a flathead screwdriver, will be necessary to connect and tighten any screws or clamps that are part of the drain pipe assembly. It is important to have a good screwdriver on hand to ensure that the connections are secure and leak-free.
PVC pipe and fittings
PVC pipe and fittings are the primary components of the drain pipe system. PVC is a durable, lightweight material that is resistant to corrosion and can handle the water flow from your washing machine. Make sure to choose the appropriate size and length of PVC pipe and fittings that fit your specific installation requirements.
P-trap
The P-trap is an essential component of the drain pipe system. It is designed to create a water seal, preventing sewer gases from entering your home. The P-trap also allows for easy access to any potential clogs or blockages in the pipe. When selecting a P-trap, ensure that it is compatible with your washing machine and meets local plumbing codes.
Drain hose extension
A drain hose extension may be necessary if your washing machine is not located near a suitable drain outlet. This extension allows you to connect the washing machine to the main drain pipe system. It is important to measure the distance between the washing machine and the drain outlet to ensure that you purchase the correct length of extension.
By having these tools and materials ready, you will be well-prepared to install a washing machine drain pipe. Remember to measure and plan the installation carefully to ensure a proper fit, and always follow local plumbing codes and manufacturer instructions for a safe and efficient installation.
Step 1: Preparing For Installation
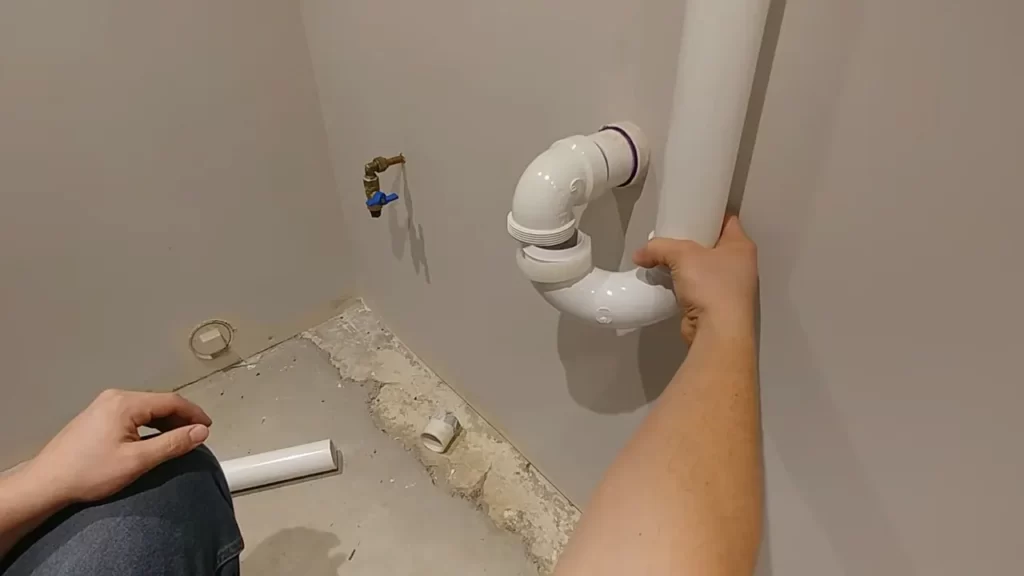
Before installing a washing machine drain pipe, it’s important to properly prepare to ensure a seamless installation process. This step involves measuring and marking the drain location, gathering the necessary tools and materials, as well as turning off the water supply and unplugging the washing machine. Let’s dive into each of these tasks in detail:
Measuring and Marking the Drain Location
The first task in preparing for the installation is to measure and mark the drain location where the washing machine drain pipe will be connected. To do this, follow these steps:
- Identify a nearby drainage point or an existing drain line where you wish to connect the washing machine drain pipe.
- Using a measuring tape, measure the distance from the floor to the desired height for the drain connection.
- Mark the measured height on the wall using a pencil or any suitable marker. This mark will serve as a reference point when installing the drain pipe.
| Tools and Materials Needed | |
|---|---|
| Measuring tape | To measure and mark the drain location accurately. |
| Pencil or marker | To mark the measured height on the wall. |
Gathering Necessary Tools and Materials
Next, gather the tools and materials required for installing the washing machine drain pipe. Having everything ready beforehand will make the process smoother and more efficient. Here are the essential tools and materials needed:
| Tools and Materials Needed | |
|---|---|
| Adjustable wrench | To tighten and secure connections. |
| Hacksaw or PVC pipe cutter | To cut the drain pipe to the desired length. |
| Tape measure | To measure the length of the drain pipe accurately. |
| PVC glue or plumber’s tape | To ensure leak-proof connections. |
Turning off Water Supply and Unplugging the Washing Machine
Before proceeding with the installation, it’s crucial to turn off the water supply and unplug the washing machine to avoid any water leakage or electrical hazards. Follow these steps to ensure a safe environment:
- Locate the water shut-off valves connected to the washing machine’s water supply lines.
- Turn the valves clockwise to shut off the water flow.
- Unplug the washing machine from the electrical outlet.
By following these steps, you are now well-prepared to install a washing machine drain pipe. In the next step, we will cover the process of connecting the drain pipe to the existing plumbing system. Stay tuned!
Step 2: Removing The Old Drain Pipe
Loosening and removing the existing pipe connections
When it comes to installing a washing machine drain pipe, the second step is removing the old drain pipe. To begin, you’ll need to loosen and remove the existing pipe connections. This is an essential part of the process, as it allows you to disconnect the old pipe from the plumbing system.
Start by identifying the connections that hold the old drain pipe in place. Typically, there will be a series of nuts and bolts securing the pipe to the wall or floor. Use a wrench or pliers to loosen these connections, making sure to turn them counterclockwise.
| Tools needed: | |
|---|---|
| Wrench | To loosen and remove the existing pipe connections |
| Pliers | To loosen and remove the existing pipe connections |
Once the connections are loose, carefully remove the nuts and bolts, setting them aside for later use. Be cautious not to damage any surrounding fixtures or surfaces during this process. You may need to apply some force to fully disconnect the pipe.
Clearing any debris or obstructions from the drain line
After successfully removing the old drain pipe, the next step is to clear any debris or obstructions from the drain line. Over time, the drain line can accumulate dirt, lint, and other materials that hinder proper functionality.
Begin by visually inspecting the drain line for any visible obstructions, such as clogs or buildup. Depending on the severity of the blockage, you may be able to remove it manually using gloves or a plumbing snake. However, for more stubborn obstructions, you might need to resort to using a drain cleaner specifically designed for washing machine drains.
Following the instructions provided by the drain cleaner manufacturer, pour the appropriate amount of cleaner into the drain line and let it sit for the recommended duration. This will help dissolve any remaining debris within the pipe. Afterward, flush the drain with hot water to ensure the line is clear.
Disconnecting the drain hose from the old pipe
Once the drain line is clear of obstructions, it’s time to disconnect the drain hose from the old pipe. This step is crucial for a successful washing machine drain pipe installation.
Locate the connection point between the drain hose and the old pipe. Depending on the setup, there may be a clamp, clip, or simply a tight fit holding them together. Carefully loosen and remove any fasteners or attachments that secure the drain hose in place, allowing you to disconnect it from the old pipe.
Be cautious when removing the drain hose, as it may contain residual water or detergent. Have a bucket or towel ready to catch any drips or spills. Once the hose is detached, set it aside for now, as it will be reconnected in a later step of the installation process.
By following these steps carefully, you will be able to remove the old drain pipe effectively, ensuring a smooth transition to the installation of a new washing machine drain pipe.
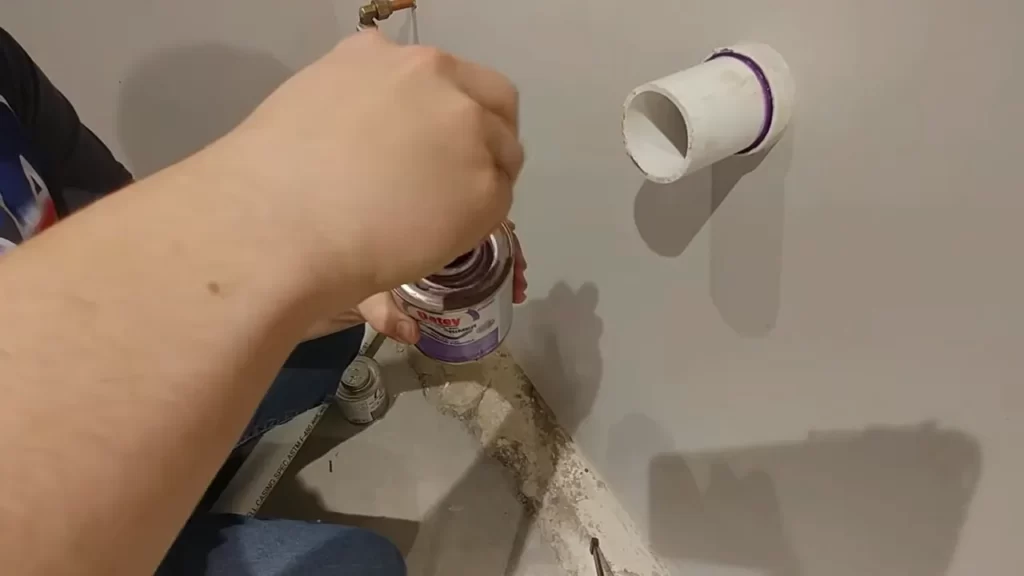
Step 3: Installing The New Drain Pipe
Step 3: Installing the New Drain Pipe
Now that you have determined the appropriate location for your washing machine drain pipe and gathered the necessary tools, it’s time to move on to the next step: installing the new drain pipe. This step involves selecting the appropriate PVC pipe and fittings, cutting the pipe to the required length, and dry fitting the components before gluing them together. Let’s dive into the specifics of each subtask to ensure a successful installation.
Selecting the appropriate PVC pipe and fittings
The first and most crucial aspect of installing the new drain pipe is selecting the appropriate PVC pipe and fittings for the job. PVC pipes come in different sizes, so it’s essential to choose one that matches the requirements of your washing machine. Depending on the size of your washing machine drain hose, you may need either a 1.5-inch or 2-inch PVC pipe. Consult the manufacturer’s instructions or measure the diameter of the hose to ensure you have the correct size.
Once you’ve determined the appropriate size, make sure you also have the necessary fittings to connect the PVC pipe to the existing plumbing system. Common fittings include elbows, couplings, and adapters. These fittings come in different angles and configurations, so select the ones that suit your specific installation needs. Remember that a tight and secure connection between the PVC pipe and fittings is crucial to prevent any leaks.
Cutting the pipe to the required length
After selecting the appropriate PVC pipe and fittings, the next step is to cut the pipe to the required length. It’s imperative to measure carefully and accurately before making any cuts. Remember the old saying, “Measure twice, cut once.” Use a tape measure or ruler to mark the desired length on the PVC pipe. Make sure to account for any additional length needed for fittings or connections.
To achieve a clean and accurate cut, consider using a PVC pipe cutter or a hacksaw. These tools provide precise cuts and minimize the risk of damaging the pipe. Align the cutting tool with the marked line and make a smooth, steady cut through the pipe. Take your time to ensure a straight cut, as any irregularities can affect the fitting and sealing of the pipe.
Dry fitting the components before gluing them together
Before permanently attaching the PVC pipe and fittings, it’s crucial to dry fit them together. This step allows you to check the alignment and make any necessary adjustments before gluing the components together. It also ensures that you have all the necessary parts and everything fits correctly.
Start by connecting all the fittings loosely, without applying any glue. Slide the fittings onto the PVC pipe, making sure they are aligned properly. Check for any obstructions or misalignments that might affect the proper function of the drain pipe. Additionally, verify that the pipe and fittings are in the correct position and angle for optimal water flow.
By dry fitting the components, you can troubleshoot any issues and make adjustments as needed. Once you are satisfied with the alignment and fit, you can proceed to glue the PVC pipe and fittings together for a secure and leak-free connection. Properly following these installation steps will help ensure your washing machine’s drain pipe functions efficiently and effectively.
Step 4: Connecting The P-Trap
Connecting the P-trap is a crucial step in installing a washing machine drain pipe. The P-trap is a curved piece of pipe that prevents sewer gases from entering your home while allowing wastewater to flow out. Here’s how to attach the P-trap to the drain pipe and wall outlet, ensuring proper alignment and tight connections, and testing for leaks before finalizing the installation.
Attaching the P-trap to the drain pipe and wall outlet
To attach the P-trap, follow these steps:
- Place the P-trap against the drain pipe and wall outlet.
- Ensure that the P-trap’s inlet aligns with the drain pipe’s outlet and its outlet aligns with the wall outlet.
- Insert the P-trap’s inlet onto the drain pipe’s outlet.
- Slide the P-trap’s outlet into the wall outlet.
Ensuring proper alignment and tight connections
Proper alignment and tight connections are essential to prevent leaks. Here’s how to ensure a secure connection:
- Inspect the alignment of the P-trap and both the drain pipe and wall outlet.
- Adjust the position of the P-trap, if necessary, to achieve perfect alignment.
- Tighten the connection between the P-trap and the drain pipe by hand.
- Use a wrench to further secure the connection, turning it clockwise until it’s tight.
- Repeat the tightening process for the connection between the P-trap and the wall outlet.
Testing for leaks before finalizing the installation
Before finalizing the installation, take the time to test for leaks. Follow these steps to ensure everything is watertight:
- Fill the washing machine with water.
- Start the washing machine cycle.
- Observe the connections between the P-trap, drain pipe, and wall outlet for any signs of leaking.
- If you notice any leaks, tighten the connections further or consider using plumber’s tape or thread sealant to create a better seal.
- Run another cycle and recheck for leaks until everything is secure and leak-free.
By following these steps, you’ll be able to connect the P-trap in your washing machine drain pipe confidently. This proper installation will ensure the smooth flow of wastewater while preventing any unwanted odors from entering your home. Remember to regularly check the connections for any signs of leakage and address them promptly.
Step 5: Securing The Drain Hose
Ensuring proper installation of the drain hose is crucial for the efficient functioning of your washing machine. In this step, we will discuss how to securely fasten the drain hose, extend it if necessary, and check for any kinks or bends that might restrict water flow.
Extending the drain hose if necessary
If the existing drain hose is not long enough to reach the drain pipe, you may need to extend it. Here’s how:
- Measure the distance between the washing machine drain outlet and the drain pipe.
- Purchase a drain hose extension kit that is compatible with your washing machine model. Ensure that it is the appropriate length and diameter.
- Disconnect the existing drain hose from the washing machine and connect the extension hose to it.
- Secure the connection tightly using hose clamps to prevent any leaks.
Fastening the hose securely to the drain pipe
Now that you have extended the drain hose or if the existing one is long enough, it’s time to fasten it securely to the drain pipe. Follow these steps:
- Locate the drain pipe, usually located behind the washing machine.
- Position the end of the hose over the drain pipe, ensuring a proper fit.
- Use a hose clamp or a similar fastening device to secure the hose to the drain pipe tightly.
- Double-check the connection to ensure it is secure and leak-free.
Checking for any kinks or bends that could restrict water flow
Before completing the installation process, it’s essential to inspect the drain hose for any kinks or bends that could restrict water flow. Here’s what you need to do:
- Trace the entire length of the drain hose, checking for any visible kinks or bends.
- If you notice any kinks or bends, carefully straighten the hose to eliminate blockages.
- Ensure that the hose is not positioned in a way that could cause it to become bent or twisted during the operation of the washing machine.
By extending the drain hose if necessary, fastening it securely to the drain pipe, and checking for any kinks or bends, you can ensure a smooth and hassle-free draining process during every laundry cycle.
Step 6: Testing The Drainage System
Once you have successfully installed the washing machine drain pipe, it’s crucial to test the drainage system to ensure it is working optimally. This step involves turning on the water supply, running a test cycle on the washing machine, and adjusting the drain pipe if necessary.
Turning on the water supply and observing for any leaks
To begin, turn on the water supply to the washing machine by fully opening the shut-off valve. Take a moment to carefully inspect the area around the drain pipe and connections for any signs of water leakage. Look closely at the joints and fittings to ensure they are secure and watertight.
If you notice any leaks, immediately turn off the water supply and address the issue before proceeding. It’s crucial to fix any leaks right away to prevent water damage and ensure the proper functioning of the drainage system.
Running a test cycle on the washing machine to ensure proper drainage
Next, it’s time to run a test cycle on the washing machine to ensure that the drain pipe is effectively removing the water. Follow the manufacturer’s instructions to initiate a regular wash or rinse cycle, and pay close attention to how the water is draining from the machine.
During the test cycle, listen for any unusual sounds or gurgling noises, as these may indicate a problem with the drainage system. Additionally, observe the speed at which the water drains out of the washing machine. It should flow smoothly and steadily, without any backups or slow drainage.
Adjusting the drain pipe as needed for optimal performance
If you encounter any issues with the drainage system during the test cycle, adjustments may be necessary. Start by checking if the drain pipe has any kinks or obstructions that could be impeding the water flow. Straighten out any kinks and clear any blockages to ensure optimal performance.
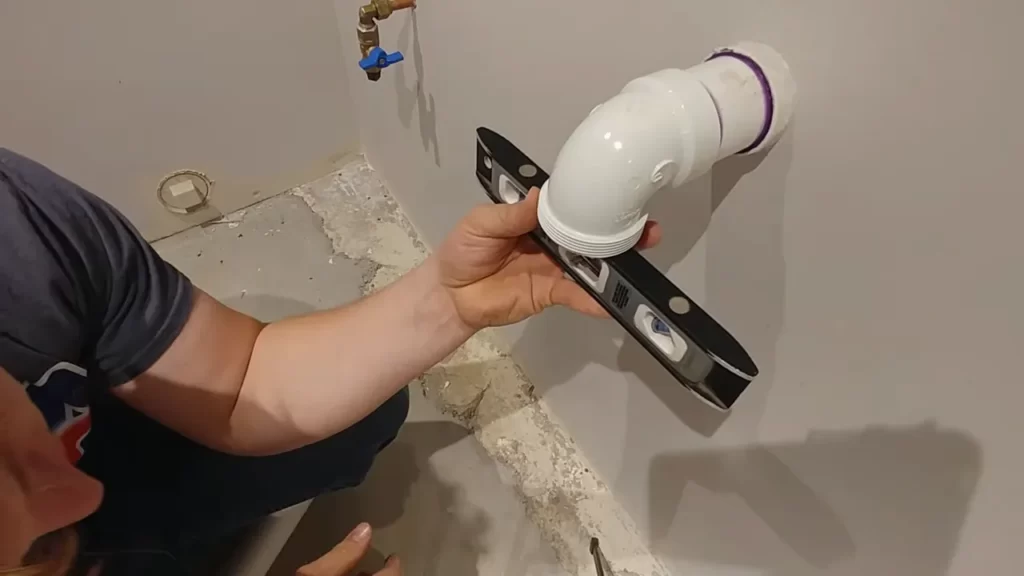
It’s also essential to ensure that the drain pipe has an adequate slope to promote proper drainage. Ideally, the pipe should slope downward at a rate of 1/4 inch per foot to facilitate the smooth flow of water. Use a level to verify that the drain pipe has the necessary slope.
Once any necessary adjustments have been made, repeat the test cycle to confirm that the drainage system is now functioning optimally. If everything is operating correctly, then congratulations! You have successfully installed a washing machine drain pipe.
Remember, regular maintenance and periodic checks are essential to keep the drainage system in good condition. Keep an eye out for any potential leaks or other issues, and address them promptly to avoid any future complications.
Troubleshooting Common Issues
Installing a washing machine drain pipe is a crucial step in setting up your laundry room. However, like any plumbing system, it may encounter some common issues down the line. To ensure the smooth functioning of your washing machine, it’s important to address these issues promptly. In this section, we will explore three common problems that you may come across while installing or using a washing machine drain pipe: dealing with clogs or blockages, addressing leaks or loose connections, and consulting a professional plumber for complex problems.
Dealing with clogs or blockages in the drain pipe
One of the most common problems with washing machine drain pipes is the occurrence of clogs or blockages. These obstructions can disrupt the flow of wastewater, leading to drainage issues and potential flooding. Fortunately, there are a few steps you can take to deal with these clogs effectively:
- Inspect the drain pipe: Start by examining the drain pipe for any visible obstructions such as lint, debris, or foreign objects. If you see any, carefully remove them using a pair of pliers or gloved hands.
- Use a drain snake: If the clog persists, you can try using a drain snake or auger. Insert the snake into the drain pipe until you encounter resistance. Rotate the snake clockwise while pushing it further into the pipe. This action will help break up the clog and restore proper water flow.
- Flush the drain pipe: After removing the clog, it’s essential to flush the drain pipe with hot water to ensure any residual debris is washed away. Run hot water for a few minutes to clear the pipe.
Addressing leaks or loose connections
Another issue that may arise with your washing machine drain pipe is the occurrence of leaks or loose connections. These issues can lead to water damage, mold growth, and other complications. To address leaks or loose connections, follow these steps:
- Check the connections: Inspect all the connections between the drain pipe, the washing machine, and any additional components such as a standpipe or trap. Make sure they are properly tightened and securely in place.
- Replace faulty components: If you identify a damaged or worn-out component, such as a gasket or a washer, it’s crucial to replace it promptly. This will help prevent further leakage.
If you have addressed the above steps and the issue still persists, it is advisable to consult a professional plumber to diagnose and resolve the problem.
Consulting a professional plumber for complex problems
While troubleshooting common issues with a washing machine drain pipe, it’s essential to recognize when a problem may be too complex to handle on your own. In such cases, seeking the expertise of a professional plumber is highly recommended. They have the knowledge, experience, and tools necessary to diagnose and fix more intricate problems. By consulting a professional, you can ensure a proper resolution to any complex issues with your washing machine drain pipe and prevent further damage.
Remember, addressing common issues promptly and effectively is key to maintaining the optimal performance of your washing machine and avoiding potential disruptions in your daily chores. By following the steps outlined above and seeking professional assistance when needed, you can keep your laundry room running smoothly.
Frequently Asked Questions
How Should Washing Machine Drain Pipe Be Installed?
To install a washing machine drain pipe, follow these guidelines: 1. Choose a location near a drain and ensure it has proper slope. 2. Connect the hose to the drain outlet and secure it tightly. 3. Use a standpipe if necessary, ensuring it’s installed at the appropriate height.
4. Avoid kinks or bends in the pipe for efficient drainage. 5. Test the setup by running a cycle to check for leaks or blockages.
Does A Washing Machine Drain Pipe Need A Trap?
Yes, a washing machine drain pipe needs a trap. The trap prevents sewer gases from entering your home, ensuring a sanitary and odor-free environment. It also helps to prevent clogs by trapping debris before it enters the main drain line.
What Is The Code For Washing Machine Drain Pipe?
The code for a washing machine drain pipe is typically determined by local building codes. It’s important to follow your specific area’s guidelines for proper installation and connection to the plumbing system. Check with your local authorities or consult a professional plumber for the correct code requirements.
How High Does A Washing Machine Drain Pipe Need To Be?
The washing machine drain pipe needs to be at least 30 inches above the floor level to ensure proper drainage.
Conclusion
To sum up, installing a washing machine drain pipe may seem like a daunting task, but with the right tools and guidance, it can be a manageable DIY project. Remember to plan your layout, follow safety precautions, and properly connect the drain pipe to a suitable outlet.
By taking the necessary steps and being mindful of potential challenges, you can ensure an efficient and effective plumbing solution for your washing machine.
