
To install a wall hung toilet, start by locating the mounting brackets on the back of the toilet bowl. Then, measure and mark the desired height for the toilet on the wall.
With the help of a level, secure the mounting brackets to the wall using screws and anchors. Finally, hang the toilet bowl on the brackets and connect the water supply and drainage pipes. Installing a wall hung toilet can be a great space-saving solution for your bathroom.
Not only does it create a sleek and modern look, but it also allows for easy cleaning underneath the toilet. In this guide, we will walk you through the step-by-step process of installing a wall hung toilet. By following these instructions, you can successfully complete the installation and enjoy the benefits of this stylish bathroom fixture. So, let’s get started!
Preparing For Installation
Before you start installing a wall hung toilet, it’s crucial to properly prepare the installation area. This ensures a smooth and successful installation process. In this section, we will explore three key aspects of preparation: choosing the right wall for installation, assessing the existing plumbing system, and gathering the necessary tools and materials.
Choosing the right wall for installation
Not all walls are suitable for installing a wall hung toilet. It’s important to choose a wall that is sturdy enough to support the weight of the toilet and can accommodate the necessary plumbing connections. When selecting a wall, consider factors such as its load-bearing capacity, material strength, and proximity to the existing plumbing system.
Assessing the existing plumbing system
Before proceeding with the installation, it’s essential to assess the condition of the existing plumbing system. Check for any leaks, cracks, or damages in the pipes and fittings. Ensure that the plumbing system can handle the additional load of a wall hung toilet. It may be necessary to make some repairs or modifications to the plumbing setup before installing the toilet.
Gathering necessary tools and materials
To install a wall hung toilet, you will need a set of specific tools and materials. Before you begin the installation, gather the following items:
| Tools | Materials |
|---|---|
|
|
Ensure that you have all the necessary tools and materials readily available before starting the installation process. This will help prevent any delays or interruptions during the installation.
Preparing The Bathroom
Preparing the bathroom is the first step to install a wall hung toilet. This involves removing the existing toilet, measuring and marking the installation area, and ensuring proper support for the toilet. By following these steps, you can create a solid foundation for your new wall hung toilet and ensure a successful installation.
Including HTML Syntax Example for each H3 Headings:
Removing the existing toilet
The first task in preparing your bathroom for a wall hung toilet is to remove the existing toilet. This may seem like a daunting task, but with the right tools and a little know-how, it can be done efficiently. Follow these steps to remove the old toilet:
- Turn off the water supply to the toilet using the shut-off valve located near the base of the toilet. This will prevent any water from flowing when the toilet is disconnected.
- Flush the toilet to empty the tank and bowl.
- Using a wrench, loosen the nuts that secure the toilet to the floor bolts.
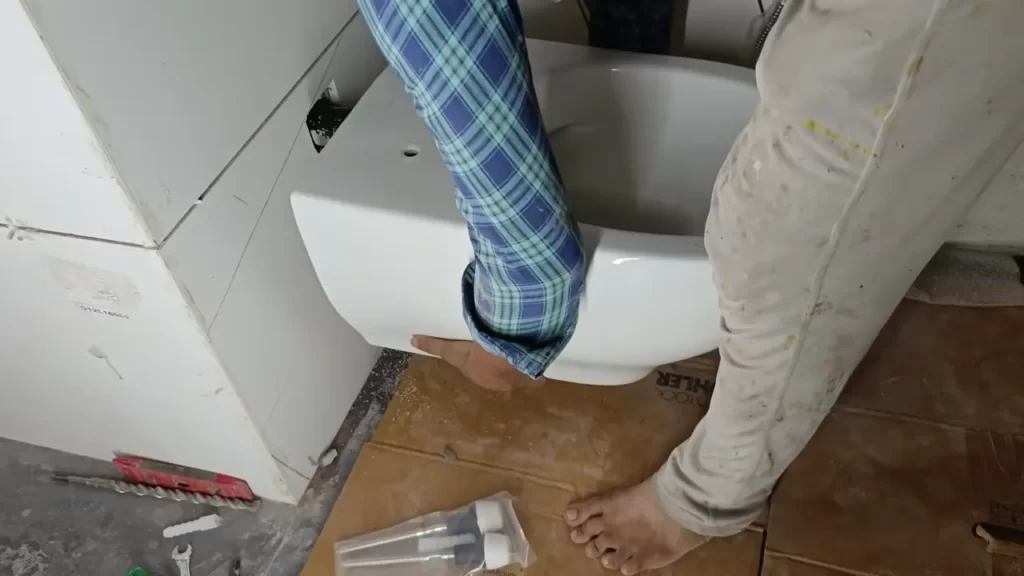
- Lift the toilet straight up to detach it from the floor and carefully place it aside. Be cautious, as the toilet can be heavy.
- Remove the wax ring from the flange and clean any residue or debris left behind.
Measuring and marking the installation area
Once the old toilet is removed, the next step is to measure and mark the installation area for the wall hung toilet. This will ensure that the toilet is installed at the correct height and distance from other fixtures in the bathroom. Follow these steps to measure and mark the installation area:
- Measure the distance from the floor to the desired height of the toilet. This will depend on your preference and any specific installation requirements.
- Using a pencil, mark the measurement on the wall at the desired height.
- Measure and mark the horizontal distance from the centerline of the drainpipe to the centerline of the toilet.
- Double-check your measurements and adjust as needed to ensure proper alignment and clearance.
Ensuring proper support for the toilet
Proper support is crucial for a wall hung toilet to ensure its stability and longevity. Without proper support, the toilet may become loose or even fall off the wall. Follow these steps to ensure proper support for your wall hung toilet:
- Locate the wall studs using a stud finder and mark their positions on the wall. Wall studs provide a secure anchor point for the toilet.
- Attach a support bracket or frame to the wall studs using screws. This will provide a solid foundation for the toilet to be mounted on.
- Ensure that the support bracket is level and securely attached to the wall.
- Follow the manufacturer’s instructions to mount the wall hung toilet onto the support bracket or frame. Make sure to securely fasten it according to the provided guidelines.
- Double-check the stability of the toilet by gently applying pressure and verifying that it is firmly anchored to the support bracket.
By properly preparing your bathroom for a wall hung toilet, including removing the existing toilet, measuring and marking the installation area, and ensuring proper support, you can set the stage for a successful installation. Taking the time to prepare the bathroom will help ensure that your wall hung toilet is securely and properly installed, providing you with a functional and aesthetically pleasing addition to your bathroom.
Installing The Wall Mount
Once you’ve chosen the perfect wall hung toilet for your bathroom, it’s time to tackle the installation process. One of the most important steps in this process is installing the wall mount. Properly securing the wall mount is essential to ensure the toilet is stable and securely attached to the wall. Here’s a step-by-step guide on how to install the wall mount for your wall hung toilet.
Attaching the mounting bracket to the wall
The first step in installing the wall mount is attaching the mounting bracket to the wall. To do this, follow these simple steps:
- Start by determining the desired height for your wall hung toilet. Use a measuring tape to mark the appropriate height on the wall.
- Next, locate the studs in the wall using a stud finder. It is important to attach the mounting bracket to the studs for maximum stability.
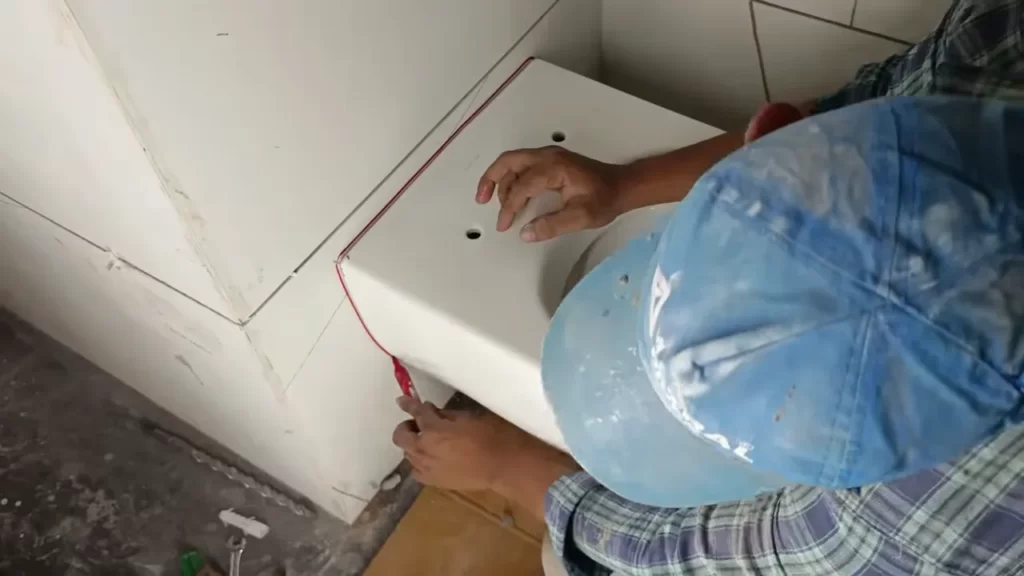
- Hold the mounting bracket against the wall at the desired height and use a pencil to mark the screw hole locations on the wall.
- Using a drill with a suitable drill bit, create pilot holes at the marked locations. These pilot holes will make it easier to screw in the anchors and screws.
- Secure the mounting bracket to the wall by aligning the screw holes with the pilot holes and using a screwdriver or a drill to insert the screws.
Securing the bracket with anchors and screws
Securing the mounting bracket with anchors and screws is crucial to ensure the wall hung toilet is securely fastened to the wall. Follow these steps to secure the bracket:
- Insert the anchors into the pilot holes in the wall. Make sure the anchors are flush with the wall surface.
- Place the mounting bracket over the anchors and align the screw holes with the anchors.
- Tighten the screws into the anchors using a screwdriver or a drill until the bracket is securely fastened to the wall.
Checking the stability of the mount
After securing the bracket to the wall, it’s essential to check the stability of the mount to ensure it can support the weight of the wall hung toilet. Follow these steps to check the stability:
- Apply pressure to the bracket and check for any movement or instability. If the mount feels loose, tighten the screws further.
- Gently shake the bracket to check for any wobbling or shifting. If the mount is not stable, make sure the anchors are properly inserted and tighten the screws if necessary.
By following these steps, you can ensure that your wall hung toilet is securely attached to the wall. It is always important to double-check the stability of the mount before proceeding with the installation of the actual toilet. Once you are satisfied with the stability, you can move on to the next steps of the installation process, such as connecting the water supply and attaching the toilet bowl.
Connecting The Plumbing
Once you have successfully mounted your wall hung toilet, the next step is to connect the plumbing. This involves connecting the water supply line and installing the drain pipe. It is crucial to ensure proper connections and testing for any leaks or blockages to ensure a smooth functioning toilet. In this section, we will go over the steps you need to follow to connect the plumbing of your wall hung toilet.
Connecting the water supply line
To connect the water supply line to your wall hung toilet, you will need a flexible hose. Follow these steps:
- Locate the water supply valve, usually located near the base of the toilet. Turn it off to avoid any water leakage.
- Attach one end of the flexible hose to the water supply valve and tighten it firmly with a wrench.
- Connect the other end of the flexible hose to the fill valve on the back of the toilet tank. Again, ensure it is securely connected.
- Once connected, turn on the water supply valve and check for any leaks around the connections. If you notice any leaks, tighten the connections or replace the hose if necessary.
Installing the drain pipe
The drain pipe is an essential component of the wall hung toilet system. Follow these steps to install the drain pipe:
- Measure the distance from the drain hole on the back of the toilet to the main drain pipe in the wall. Use a hacksaw to cut the drain pipe to the appropriate length.
- Apply PVC primer to the ends of the drain pipe and the toilet’s drain hole.
- Apply PVC cement to both primed areas and quickly join the pipe to the toilet’s drain hole. Hold it in place for a few seconds to allow the glue to set.
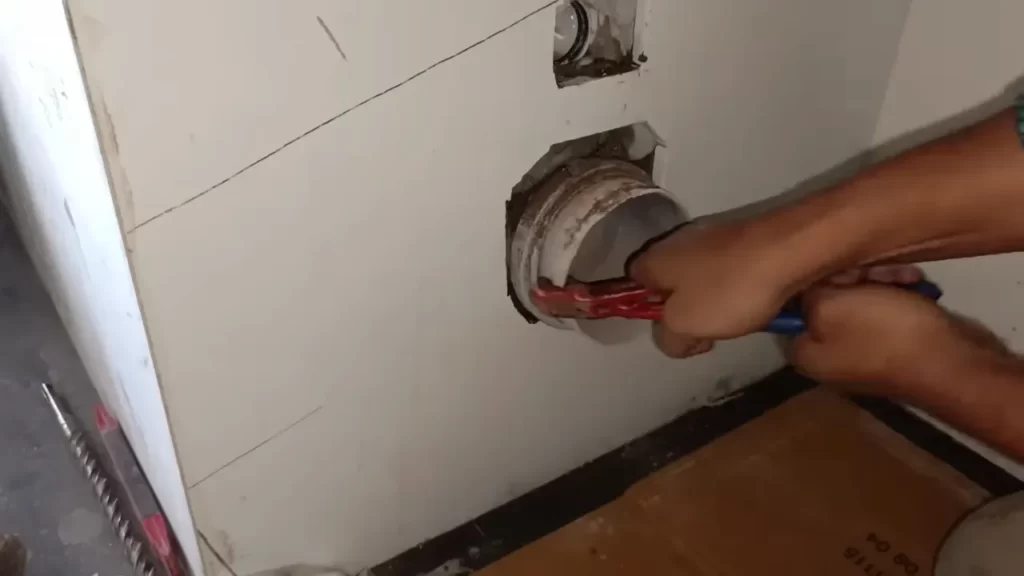
- Connect the other end of the drain pipe to the main drain pipe in the wall. Use a rubber coupling or PVC cement, depending on the type of pipes you have, to secure the connection.
- Double-check all connections and ensure they are tight and secure.
Testing for any leaks or blockages
Now that you have connected the water supply line and installed the drain pipe, it’s time to test for any leaks or blockages. Follow these steps to ensure the plumbing of your wall hung toilet is functioning properly:
- Turn on the water supply valve and allow the tank to fill.
- Flush the toilet and observe if there are any leaks in the water supply line or drain pipe connections.
- If you notice any leaks, tighten the connections or replace any faulty parts.
- Test the flush mechanism to ensure there are no blockages or irregularities in the drainage system.
- If everything seems to be functioning correctly, you have successfully connected the plumbing of your wall hung toilet.
By following these steps and conducting thorough testing, you can ensure your wall hung toilet’s plumbing is properly connected and functioning smoothly. Enjoy your new space-saving toilet!
Mounting The Toilet Bowl
Mounting the toilet bowl is a crucial step when installing a wall hung toilet. Proper installation ensures stability and prevents any potential issues in the future. Here are the steps to follow:
Attaching the bowl to the mounting bracket
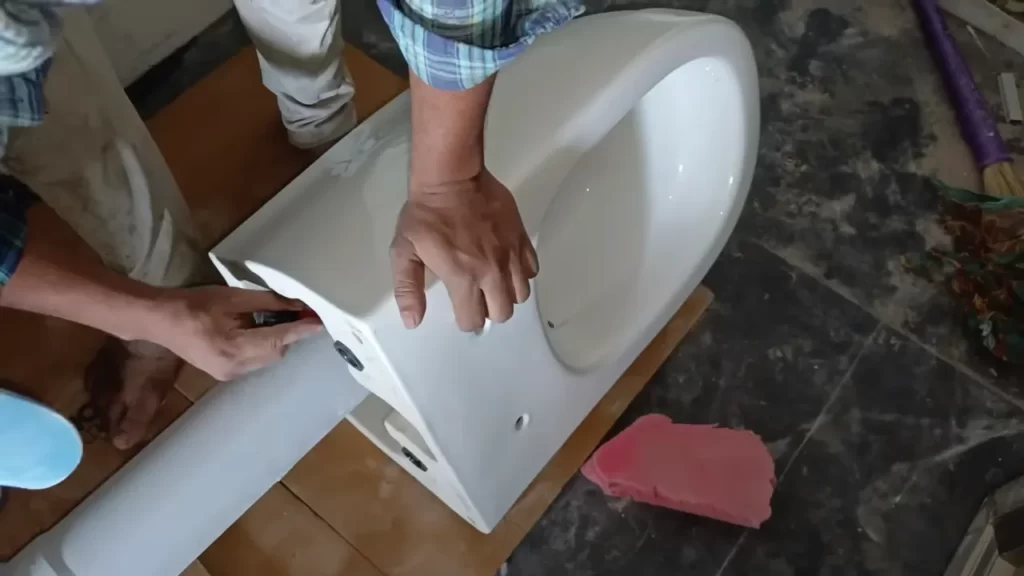
To start, you’ll need to attach the toilet bowl to the mounting bracket. Begin by locating the mounting holes on the back of the bowl. These holes will align with the corresponding holes on the bracket. Take note of the bolts included in the toilet kit, as they will be used for this step.
- Place the mounting bracket against the wall, making sure it is level and at the correct height.
- With the help of an assistant, carefully position the toilet bowl onto the bracket, aligning the mounting holes. Make sure the bowl sits securely on the bracket.
- Insert the bolts into the mounting holes and tighten them with a wrench. Be careful not to overtighten, as this could damage the bowl or the bracket.
Ensuring proper alignment and leveling
Once the bowl is attached to the mounting bracket, it’s important to ensure proper alignment and leveling. A crooked or uneven toilet bowl can not only be visually unappealing but also cause potential leaks or discomfort. Follow these steps to ensure proper alignment:
- Use a level to check if the toilet bowl is perfectly horizontal. Adjust the position if necessary.
- Check the alignment of the bowl with the wall and the surrounding space. Ensure it’s centered and adequately spaced from any walls or cabinets.
- Make any necessary adjustments to achieve the desired alignment and leveling.
Tightening the bolts securely
Once the bowl is properly aligned, the next step is to tighten the bolts securely. This will ensure that the toilet bowl remains stable and doesn’t become loose over time. Follow these guidelines to tighten the bolts securely:
- Using a wrench, start tightening the bolts evenly on each side. Alternate between both sides to maintain balanced pressure.
- Continue tightening until you feel resistance. Be cautious not to overtighten, as this may cause damage.
- Check the stability of the bowl by applying slight pressure. If it feels firm and doesn’t move, the bolts are securely tightened.
By following these simple steps, you can successfully mount the toilet bowl during the installation process. Remember to check the manufacturer’s instructions for any specific guidelines particular to your toilet model. Taking the time to properly mount the toilet bowl will result in a sturdy and reliable wall hung toilet.
Installing The Flush Plate
One important step in installing a wall hung toilet is attaching the flush plate. The flush plate not only serves as a decorative element, but it also controls the flushing mechanism of the toilet. In this section, we will guide you through the process of installing the flush plate.
Choosing the Appropriate Flush Plate Design
Before attaching the flush plate, it’s crucial to choose the appropriate design that matches your bathroom decor. Flush plates come in a variety of styles and finishes, allowing you to select one that seamlessly blends with your overall aesthetic. Whether you prefer a minimalist look or a bold statement piece, there is a flush plate design to suit your taste.
When choosing a flush plate, consider other elements in your bathroom such as faucets, showerheads, and towel bars. Opting for a flush plate that complements these elements will create a cohesive and visually appealing space.
Attaching the Flush Plate to the Wall
To attach the flush plate to the wall, follow these simple steps:
- Locate the pre-determined mounting position on the wall. This is typically indicated in the installation manual.
- Hold the flush plate against the wall at the desired height.
- Using a pencil, mark the position of the screw holes on the wall.
- Drill the necessary holes into the wall at the marked positions.
- Insert wall anchors into the drilled holes to provide additional strength and stability.
- Align the flush plate with the drilled holes and secure it to the wall using screws.
Ensure that the flush plate is securely attached to the wall to prevent any wobbling or loosening over time.
Connecting the Plate to the Flushing Mechanism
Once the flush plate is attached to the wall, the next step is to connect it to the flushing mechanism. Follow these steps:
- Locate the flushing mechanism, usually located behind the wall adjacent to the toilet.
- Identify the connection points on the flushing mechanism where the flush plate will be attached.
- Connect the flush plate to the flushing mechanism using the provided screws or bolts.
- Tighten the screws or bolts securely, ensuring that the flush plate is firmly connected to the flushing mechanism.
Completing this step accurately is vital, as it ensures that the flush plate functions properly and efficiently.
By following these steps, you can easily install a wall hung toilet flush plate. Remember to select a design that complements your bathroom, attach the plate securely to the wall, and connect it to the flushing mechanism. With a properly installed flush plate, you’ll have both functionality and style in your bathroom.
Testing And Finishing Up
After successfully installing a wall hung toilet, it’s important to test its functionality before considering the job complete. This involves checking for any potential issues, making necessary adjustments, and ensuring a neat and tidy finish. By following these steps, you can ensure that your wall hung toilet is not only properly installed, but also fully functional and visually appealing.
Testing the toilet’s functionality
To ensure that your wall hung toilet is functioning correctly, it’s essential to run a few tests. First, check for any leaks by flushing the toilet and inspecting the connections for any signs of water leakage. Additionally, test the flushing mechanism to confirm that it flushes and refills properly. Make sure the toilet is stable on the wall and doesn’t move or wobble excessively. This will provide peace of mind that the toilet is securely installed. If you encounter any issues during the testing process, proceed to the next step for making necessary adjustments.
Making any necessary adjustments
If you come across any problems during the testing phase, don’t worry. It’s common to encounter minor issues when installing a wall hung toilet. Most adjustments can be easily resolved without calling a professional. If there are any leaks, tighten the connections carefully until the leak stops. If the toilet wobbles, adjust the mounting bolts and make sure they’re secure against the wall. Taking the time to make these adjustments will ensure a well-functioning toilet that is safe and reliable.
Cleaning up and ensuring a neat finish
Once the toilet’s functionality has been tested and any necessary adjustments have been made, it’s time to clean up and put the finishing touches on the installation. Begin by wiping down the toilet and its surrounding areas to remove any dust, debris, or fingerprints. Use a mild cleaning solution to ensure a thorough cleaning without causing any damage. Next, carefully inspect the toilet for any visible blemishes or imperfections. If necessary, touch up the paint or make appropriate repairs to achieve a flawless finish. Take a step back and appreciate your work – a wall hung toilet that not only works well but also looks great.
In conclusion, testing and finishing up are crucial to the installation process of a wall hung toilet. By testing the functionality, making necessary adjustments, and ensuring a neat finish, you can ensure that your toilet is working correctly and visually appealing. Follow these steps to achieve a successful installation and enjoy the convenience and aesthetics that come with a wall hung toilet.
Maintaining And Troubleshooting
Once you have successfully installed your wall hung toilet, it’s important to understand how to properly maintain and troubleshoot any issues that may arise. Regular cleaning and maintenance will help keep your toilet in great condition, while having knowledge of common issues and troubleshooting solutions can save you time and frustration. In some cases, calling a professional may be necessary, especially for complex problems. Let’s explore these areas in more detail.
Regular cleaning and maintenance tips
Maintaining cleanliness is crucial for not only keeping your wall hung toilet looking its best but also for preventing any potential issues. Here are some helpful tips for regular cleaning and maintenance:
- Use a non-abrasive cleaner or mild soap to clean the toilet bowl and seat.
- Regularly wipe down the exterior of the toilet using a damp cloth.
- Inspect the mounting bolts regularly to ensure they remain secure.
- Check for any leaks around the base of the toilet and promptly address them.
- Periodically clean the flush valve and inlet holes to maintain proper flushing.
Following these cleaning and maintenance tips will not only extend the lifespan of your wall hung toilet but also ensure optimal performance.
Common issues and troubleshooting solutions
Even with proper maintenance, you may encounter some common issues with your wall hung toilet. Here are a few issues you might face and their troubleshooting solutions:
| Issue | Troubleshooting Solution |
|---|---|
| Clogging | Use a plunger to attempt to unclog the toilet. If the clog persists, try using a toilet auger or consult a professional plumber. |
| Weak flush | Check the water level in the tank. Adjust it if necessary. If the issue persists, inspect the flush valve and the fill valve for any blockages. |
| Running water | Inspect the flapper or flush valve seal for any damage or misalignment. Adjust or replace it if necessary. If the problem continues, consult a professional. |
Remember, proper troubleshooting requires careful assessment and attention to detail. Follow the suggested solutions, and if the problem persists or worsens, it’s best to seek professional assistance.
Calling a professional for complex problems
If you encounter complex problems with your wall hung toilet that cannot be resolved with basic troubleshooting, it’s essential to hire a professional plumber. Complex issues may involve critical components of the toilet or plumbing system that require expert knowledge and tools. By consulting a professional, you can ensure the problem is accurately diagnosed and effectively resolved.
To summarize, regular cleaning and maintenance play a vital role in keeping your wall hung toilet in optimal condition. By following the recommended tips and troubleshooting common issues, you can resolve most problems on your own. However, for complex problems, it’s always best to rely on the expertise of a professional plumber.
Frequently Asked Questions
Are Wall Hung Toilets Easy To Install?
Yes, wall hung toilets are easy to install. They require a sturdy wall and a proper mounting bracket for support. With basic plumbing skills, you can install them easily. Just make sure to follow the manufacturer’s instructions for a hassle-free installation process.
How Do You Install A Wall Mount Toilet?
To install a wall mount toilet, follow these steps: 1. Locate the wall studs. 2. Mark the height and position for the toilet. 3. Install a support bracket to hold the toilet. 4. Connect the toilet tank to the water supply.
5. Hang the toilet onto the bracket and secure it.
What Are The Disadvantages Of Wall-Mounted Toilet?
Wall-mounted toilets have a few drawbacks. They require specialized installation and can be expensive. Repairing or replacing them may also be challenging as the cistern is hidden within the wall. Additionally, they may not be suitable for older or weaker construction, and their maintenance can be more difficult compared to regular toilets.
What Are The Wall Requirements For A Wall Hung Toilet?
Wall requirements for a wall hung toilet include a sturdy, load-bearing wall with proper structural support, such as a plywood or cement board backing. The wall should be able to withstand the weight of the toilet and provide a secure mounting surface.
Conclusion
Installing a wall hung toilet may seem like a daunting task, but with the right instructions, it can be a straightforward process. By following the step-by-step guide outlined in this blog post, you can successfully install your own wall hung toilet and enjoy the benefits it offers, such as saving space and enhancing the aesthetic appeal of your bathroom.
Remember to gather all the necessary tools and materials beforehand, and take your time to ensure a secure and properly functioning installation. Happy DIY-ing!