
To install a walk-in shower glass panel, you need to measure the space accurately and choose a suitable panel size. Then, secure the panel using wall anchors and silicone adhesive, and finally, make sure to clean and seal the glass for a finished look.
A walk-in shower glass panel adds a modern touch to any bathroom while creating an open and spacious feel. With the right tools and steps, you can easily install this stylish and functional element in your shower. In the following guide, we will provide you with a concise and precise explanation of how to install a walk-in shower glass panel, ensuring a successful and professional result.
Choosing The Right Walk-In Shower Glass Panel
Choosing the right walk-in shower glass panel is crucial to creating the perfect shower experience in your bathroom. Not only does it provide a sleek and modern look, but it also serves as a functional barrier to keep water from splashing out onto your bathroom floor. With a plethora of options available on the market, it can be overwhelming to choose the right one. In this section, we will delve into the factors you should consider, the measurements and sizing you need to take into account, as well as the materials and tools required for a seamless walk-in shower glass panel installation.
Factors to Consider When Selecting a Walk-in Shower Glass Panel
Before you dive into the installation process, it’s imperative to consider a few factors that will influence your choice of walk-in shower glass panel:
- The style and design of your bathroom. Consider the overall aesthetic of your bathroom and choose a glass panel that complements the existing decor. Are you aiming for a sleek modern look or a more traditional feel?
- The level of privacy you desire. Depending on your preference, you can choose a clear glass panel for a more open and spacious feel, or opt for frosted or textured glass for added privacy.
- The thickness of the glass. Thicker glass panels tend to provide better durability and resistance to breakage.
- The type of hardware available. Consider the hardware options such as hinges, handles, and towel bars that are compatible with your chosen glass panel to ensure a cohesive look.
Measurements and Sizing for the Glass Panel Installation
Accurate measurements are crucial when it comes to selecting and installing a walk-in shower glass panel. Here are the steps you need to follow:
- Measure the width of your shower opening from wall to wall. Ensure you measure at the top, middle, and bottom as walls can be uneven.
- Measure the height of your shower opening from the top of the shower base or floor to the top edge of the wall.
- Consider the space required for the door swings, as this will affect the width of the glass panel.
- Take note of any irregularities in your shower opening, such as sloped walls or uneven floors, as these may require custom glass panels.
- Consult with a professional or refer to the manufacturer’s guidelines to determine the appropriate glass panel size based on your measurements.
Materials and Tools Needed for the Installation
Now that you have chosen the perfect walk-in shower glass panel and have accurate measurements, it’s time to gather the materials and tools needed for installation:
| Materials | Tools |
|---|---|
|
|
By considering the factors mentioned above, taking accurate measurements, and gathering the necessary materials and tools, you are well on your way to achieving a successful walk-in shower glass panel installation. In the next section, we will walk you through the step-by-step installation process to ensure a seamless and stunning final result.
Preparing The Shower Area For Glass Panel Installation
Before you can install a walk-in shower glass panel, you need to prepare the shower area. This involves clearing the space, removing any existing shower enclosure, evaluating the wall condition, and preparing the wall surface for mounting the glass panel. By following a few simple steps, you can ensure a smooth and successful installation process.
Clearing the Shower Area and Removing Existing Shower Enclosure
The first step in preparing the shower area for glass panel installation is to clear out the space and remove any existing shower enclosure. This includes removing the shower doors, frames, and any other components that are in the way. Here are a few key steps to follow during this process:
- Start by removing the shower doors. Inspect the doors for any screws or bolts attaching them to the frame, and carefully unscrew or unbolt them. Once the doors are detached, set them aside in a safe and secure location.
- Next, remove the shower frame. Depending on the type of enclosure you have, this may involve unscrewing or prying the frame away from the walls. Take your time and be gentle to avoid damaging the walls or tiles.
- Once the frame is removed, check for any remaining hardware or adhesive. Use a putty knife or scraper to remove any leftover caulk or adhesive from the walls and floor of the shower area.
Evaluating the Wall Condition for Proper Glass Panel Installation
After clearing the shower area and removing the existing enclosure, it’s important to evaluate the condition of the walls. This is crucial to ensure a proper and secure installation of the glass panel. Follow these steps to evaluate the wall condition:
- Inspect the walls for any signs of damage, such as cracks or moisture. If you notice any issues, it’s essential to repair them before proceeding with the glass panel installation.
- Check the wall material. Glass panels are typically installed on solid walls made of materials like tile, stone, or acrylic. Ensure that the walls are stable, sturdy, and suitable for supporting the weight of the glass panel.
- If necessary, reinforce the walls. Depending on the condition of the walls and the type of glass panel you’re installing, you may need to add support, such as studs or blocking, to ensure proper installation and stability.
Preparing the Wall Surface for Mounting the Glass Panel
Once you’ve evaluated the wall condition, it’s time to prepare the wall surface for mounting the glass panel. This step involves cleaning, leveling, and ensuring a secure base for the panel. Here’s what you need to do:
- Start by cleaning the walls thoroughly. Use a mild cleaner and a sponge or cloth to remove any dirt, grime, or residue. Make sure the walls are dry before proceeding.
- Check for any unevenness or bumps on the wall surface. If you find any, use a leveling compound or filler to smoothen them out. This will help ensure a flush and stable installation of the glass panel.
- Identify the mounting points for the glass panel. These are usually marked on the wall, but if not, carefully measure and mark the desired position for the panel. Take into account the dimensions of the panel and any specific manufacturer’s guidelines.
By following these steps to prepare the shower area for glass panel installation, you’ll be well on your way to transforming your bathroom with a sleek and modern walk-in shower. Take your time, pay attention to detail, and make sure the walls are in the best possible condition to ensure a safe and secure installation.
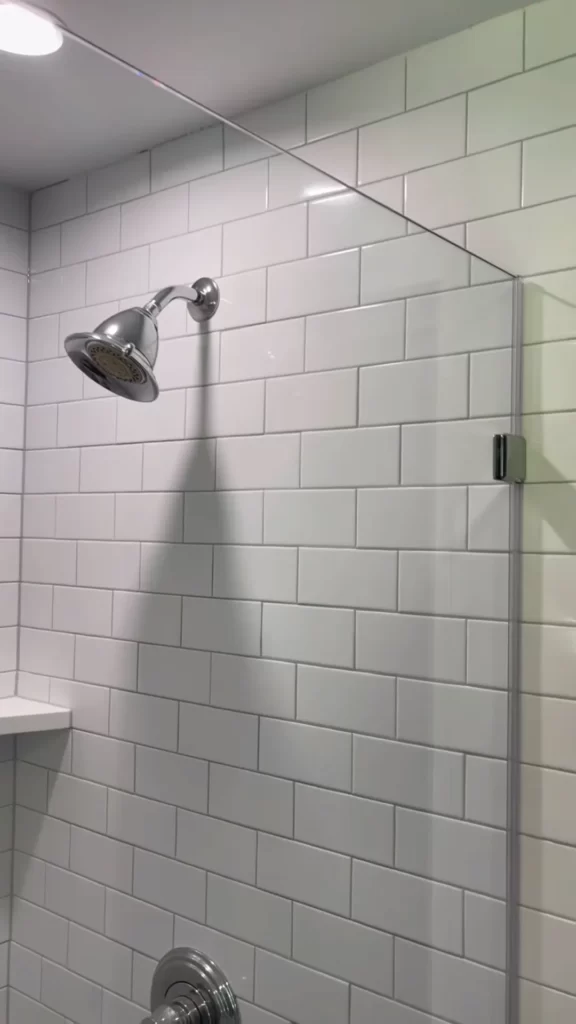
Installing The Walk-In Shower Glass Panel
Installing a walk-in shower glass panel can be a great way to enhance the aesthetic appeal of your bathroom. Not only does it create a sleek and modern look, but it also helps to keep water inside the shower area, preventing any potential water damage to your bathroom floor. In this guide, we will provide you with step-by-step instructions on how to install a walk-in shower glass panel, ensuring a secure and stylish addition to your shower.
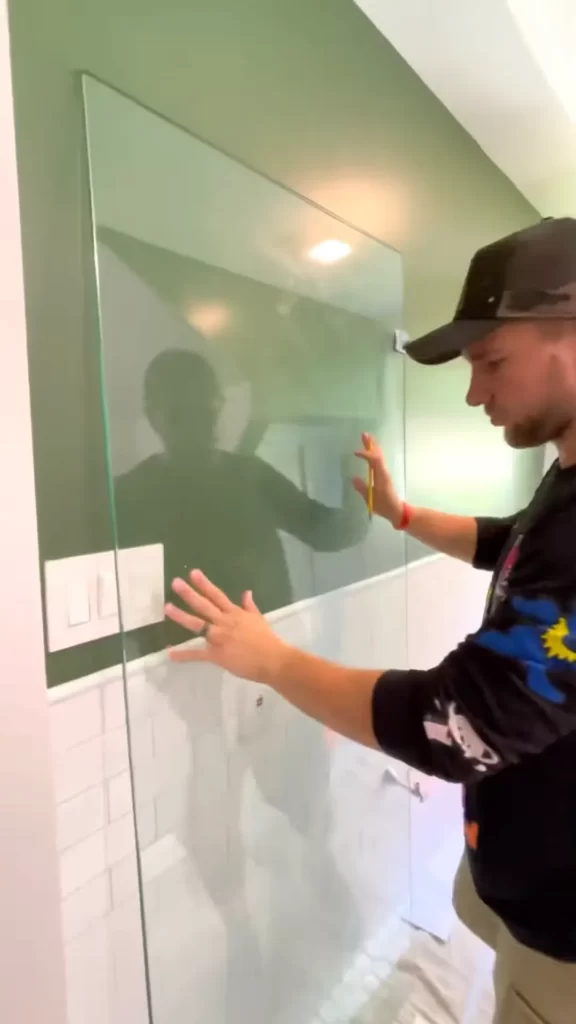
Before you begin, it is important to mark the position for mounting the glass panel on the wall. To do this, you will need a measuring tape, a pencil, and a level. Follow these steps:
- Measure the height and width of the glass panel.
- Using the measuring tape and pencil, mark the desired position of the glass panel on the wall, ensuring it is level.
- Double-check your measurements and adjust if necessary to ensure accuracy.
Once you have marked the position for the glass panel, it is time to drill holes and secure the glass panel mounts. Here’s how:
- Select the appropriate drill bit size for the type of screws you will be using.
- Place the glass panel mounts against the marked positions on the wall.
- Using an electric drill, carefully drill holes through the mounts into the wall.
- Insert wall anchors into the drilled holes, if necessary.
- Secure the glass panel mounts to the wall using screws.
- Ensure that the mounts are firmly attached and level.
With the mounts securely in place, it is time to attach the glass panel and secure it in place. Follow these steps:
- Carefully lift the glass panel and align it with the mounts.
- Slide the glass panel onto the mounts, ensuring a snug fit.
- Using the appropriate screws, attach the glass panel to the mounts.
- Tighten the screws until the glass panel is securely held in place.
- Check that the glass panel is level and adjust if needed.
Congratulations! You have successfully installed your walk-in shower glass panel. Now, take a step back and admire the sleek and modern addition to your bathroom. Please remember to handle the glass with care at all times to prevent any accidents or damage.
Sealing And Finishing Touches
When it comes to installing a walk-in shower glass panel, sealing and finishing touches are crucial to ensure the longevity and functionality of your new addition. Proper sealing not only keeps water from leaking out of the shower area, but it also adds a polished and professional look to your bathroom. In this section, we will guide you through the essential steps to seal and finish your walk-in shower glass panel.
Applying Silicone Sealant to Ensure Waterproofing
One of the most crucial steps in sealing your walk-in shower glass panel is applying silicone sealant. This waterproof material acts as a barrier, preventing water from seeping through the gaps between the glass panel and the walls or floor. Follow these steps to apply silicone sealant:
- Start by thoroughly cleaning the areas where the silicone sealant will be applied. Remove any dirt, debris, or old sealant using a scraper or a silicone removal tool.
- Take a caulking gun and insert the silicone sealant tube into it. Cut the tip of the tube at a 45-degree angle.
- Apply a continuous and even bead of silicone sealant along the edges of the glass panel where it meets the walls and floor. Use a smooth, steady motion to ensure a neat finish.
- Once the silicone sealant is applied, use a wet finger or a caulking tool to smooth and shape the sealant. This step helps to achieve a more professional look and ensures a tighter seal.
- Allow the silicone sealant to dry completely according to the manufacturer’s instructions before using the shower.
Installing Glass Panel Support Brackets for Added Stability
To enhance the stability and structural integrity of your walk-in shower glass panel, installing support brackets is essential. These brackets provide additional support by securing the glass panel firmly in place. Follow these steps to install the glass panel support brackets:
- Before proceeding with the installation, ensure that the wall surface is clean and free from any obstructions.
- Measure and mark the positions for the support brackets on the wall, considering the desired height and spacing.
- Using a power drill and the appropriate drill bit, create pilot holes at the marked positions.
- Secure the support brackets onto the wall by aligning them with the pilot holes and using screws or wall anchors. Be careful not to overtighten the screws to avoid damaging the glass panel or the wall.
- Double-check the stability of the support brackets by gently applying pressure to the glass panel. If any movement is detected, tighten the screws or make necessary adjustments until the panel feels secure.
Cleaning and Polishing the Glass Panel for a Perfect Finish
After sealing and ensuring the stability of your walk-in shower glass panel, the final step is to clean and polish the glass for a flawless finish. Follow these simple tips to achieve a sparkling and pristine glass panel:
- Start by removing any dirt, water spots, or fingerprints from the glass using a glass cleaner or a mixture of vinegar and water.
- Use a microfiber cloth or a squeegee to wipe the glass in horizontal or vertical strokes, ensuring thorough coverage.
- For any stubborn stains or residue, gently scrub the glass with a non-abrasive sponge or a soft brush.
- Rinse the glass with clean water and wipe it dry with a lint-free cloth to avoid water spots.
- Finally, apply a glass polish or a glass cleaner specifically designed for shower panels to add shine and protect the glass surface.
By following these steps, you can seal and finish your walk-in shower glass panel properly, ensuring both functionality and a visually appealing result. Take the time to pay attention to these sealing and finishing touches, as they are crucial for a successful installation.
Maintaining And Caring For Your Walk-In Shower Glass Panel
Installing a walk-in shower glass panel is a great way to add elegance and functionality to your bathroom. However, like any other element in your home, it requires regular maintenance and care to ensure its longevity and pristine appearance. In this section, we will discuss some essential tips and tricks to help you maintain and care for your walk-in shower glass panel, keeping it clean, free from damage, and extending its lifespan. By following these guidelines, you can enjoy a beautiful and functional walk-in shower for years to come.
Regular Cleaning and Inspection to Prevent Hard Water Stains and Damage
One of the most common issues faced with walk-in shower glass panels is the buildup of hard water stains. These stains not only make the glass look dirty and dull, but they can also lead to long-term damage if not addressed promptly. To prevent hard water stains and ensure the longevity of your glass panel, regular cleaning and inspection are crucial. Here are a few tips:
- Use a non-abrasive glass cleaner or a mixture of vinegar and water to clean your glass panel. Avoid using harsh chemicals or abrasive materials, as they may scratch the surface.
- Wipe the glass dry after each use to prevent water spots and mineral deposits from forming.
- Inspect the glass panel regularly for any signs of damage, such as cracks or chips. If you notice any issues, address them promptly to prevent further damage and potential hazards.
Repairing Chips or Cracks in the Glass Panel
Even with regular care, accidents may happen, and your walk-in shower glass panel may suffer from chips or cracks. It is essential to address these issues as soon as possible to prevent further damage and potential safety hazards. Here’s what you can do:
- If the chip or crack is small, you may be able to repair it using a glass repair kit available in the market. Follow the instructions provided with the kit carefully.
- For more significant damage, it is advisable to seek professional help. Contact a glass repair specialist who can assess the extent of the damage and provide the best solutions.
Tips for Extending the Lifespan of Your Walk-in Shower Glass Panel
To maximize the lifespan of your walk-in shower glass panel, keep the following tips in mind:
- Avoid using abrasive materials or harsh chemicals for cleaning, as they can cause scratches and damage the glass surface.
- Regularly clean and dry the glass to prevent the buildup of hard water stains and mineral deposits.
- Be mindful of any significant temperature changes in your bathroom, as sudden shifts can cause stress on the glass and potential cracks.
- If you have children or pets, consider using a protective film on the glass panel to prevent accidental damage.
- Finally, remember to handle the glass panel with care and avoid slamming or forcefully closing the shower door.
By following these suggestions, you can ensure that your walk-in shower glass panel remains in excellent condition, providing a stunning and functional addition to your bathroom for years to come.
Enhanced Features And Customization Options For Walk-In Shower Glass Panels
Enhanced Features and Customization Options for Walk-in Shower Glass Panels
Walk-in shower glass panels offer a range of enhanced features and customization options that can transform any bathroom into a stylish and functional oasis. From adding privacy and style with frosted or patterned glass to incorporating a sleek and modern look with a frameless design, there are numerous ways to customize your walk-in shower to suit your personal taste and needs. In this article, we will explore some of the popular customization options for walk-in shower glass panels, including incorporating frosted or patterned glass, choosing a frameless design, and adding glass shelves and hooks for storage within the shower area.
Adding Frosted or Patterned Glass for Privacy and Style
For those who value their privacy while still wanting to maintain a sense of style in their bathroom, adding frosted or patterned glass to the walk-in shower is an excellent choice. Frosted glass not only obscures the view inside the shower, but it also diffuses light, creating a soft and serene ambiance. Patterned glass, on the other hand, adds a touch of visual interest to the shower area, making it a focal point of the bathroom. Whether you prefer a subtle frosted effect or a bold pattern, there are a variety of options to choose from that can complement your bathroom’s overall design.
Incorporating Frameless Design for a Sleek and Modern Look
To achieve a sleek and modern look, consider incorporating a frameless design for your walk-in shower glass panel. The absence of any visible frames or hardware creates a seamless and minimalist appearance, allowing the beauty of the glass to take center stage. This design choice also enhances the sense of spaciousness in the bathroom, making it ideal for smaller or more compact spaces. With a frameless design, you can create a clean and contemporary aesthetic that exudes sophistication and elegance.
Installing Glass Shelves and Hooks for Storage within the Shower Area
Utilizing the available space in your walk-in shower is essential for a clutter-free and organized bathroom. Installing glass shelves and hooks within the shower area provides convenient storage solutions for toiletries, shampoo bottles, and other essentials. Glass shelves not only offer a sleek and stylish storage option, but they are also easy to clean and maintain. Additionally, hooks can be used to hang loofahs, washcloths, or even towels, keeping them within reach while keeping the shower area tidy and well-organized.
In conclusion, walk-in shower glass panels offer a range of enhanced features and customization options that can elevate the functionality and aesthetics of any bathroom. By incorporating frosted or patterned glass, a frameless design, and glass shelves and hooks for storage, you can create a personalized and luxurious shower experience that reflects your unique style and preferences.
Troubleshooting Common Issues With Walk-In Shower Glass Panels
Dealing with Leaks or Water Seepage around the Glass Panel
One common issue that homeowners face with walk-in shower glass panels is leaks or water seepage around the panel. This can be caused by various factors such as improper installation, worn-out seals or gaskets, or even cracks in the glass panel itself. To troubleshoot and resolve this issue, you can follow these steps:
- Inspect the caulking around the glass panel to ensure it is intact and free from any cracks or gaps.
- If you notice any damaged caulking, carefully remove it using a scraper or utility knife.
- Thoroughly clean the area around the glass panel to remove any debris or residue.
- Apply a fresh bead of silicone caulk along the edges of the glass panel, ensuring it creates a tight seal.
By properly sealing the glass panel, you can prevent water from seeping through and causing any damage to your bathroom.
Handling Loose or Misaligned Glass Panel Mounts
Another common issue that can arise with walk-in shower glass panels is loose or misaligned glass panel mounts. When the mounts are not properly secured, it can lead to instability and potentially dangerous situations. To fix this problem, you can follow these steps:
- Identify the loose or misaligned glass panel mount.
- Using an appropriate tool such as a screwdriver or Allen wrench, tighten the screws or bolts holding the mount in place.
- Check the alignment of the glass panel to ensure it is level and flush with the surrounding walls.
- If necessary, adjust the position of the mount to achieve the desired alignment.
By properly securing and aligning the glass panel mounts, you can ensure the stability and safety of your walk-in shower.
Fixing Scratches or Etching on the Glass Surface
Sometimes, walk-in shower glass panels can acquire scratches or etching over time, which can affect the overall appearance of your bathroom. To address this issue and restore the glass surface to its original luster, here are some steps you can take:
- Start by cleaning the glass surface with a gentle glass cleaner and a soft cloth. This will help remove any dirt or debris.
- If the scratches are minor, you can try using a glass polishing compound specifically designed for removing scratches.
- Apply the polishing compound to the scratched area and gently rub it in a circular motion with a soft cloth.
- Continue rubbing until the scratches become less noticeable or disappear completely.
For more severe scratches or etching, it may be best to consult a professional glass repair specialist who can assess the damage and recommend appropriate solutions.
By following these troubleshooting tips, you can effectively address common issues that may arise with walk-in shower glass panels and ensure the longevity and functionality of your bathroom fixture.
Conclusion And Final Thoughts
Recap of the Installation Process for Walk-in Shower Glass Panels
Installing a walk-in shower glass panel can be a great way to add elegance and functionality to your bathroom. Throughout this blog post, we have covered the step-by-step process of installing a walk-in shower glass panel. From measuring the space and selecting the right panel to preparing the area and securing the glass, we have provided a comprehensive guide to help you successfully install your own walk-in shower glass panel.
Benefits of Having a Walk-in Shower with a Glass Panel
A walk-in shower with a glass panel offers several advantages that make it a popular choice among homeowners. Firstly, the glass panel creates an open, spacious feel in the bathroom, making it appear larger and more inviting. Additionally, the transparency of the glass allows for better natural light distribution, brightening up the space. Furthermore, a glass panel is easier to clean and maintain compared to traditional shower curtains or doors, reducing the hassle of weekly cleaning and preventing the build-up of mold and mildew. Lastly, a walk-in shower with a glass panel adds a touch of modernity and sophistication to any bathroom decor, enhancing the overall aesthetic appeal.
Final Tips and Recommendations for Successful Glass Panel Installation
To ensure a successful installation of your walk-in shower glass panel, there are a few final tips and recommendations that you should keep in mind.
1. Before starting the installation, thoroughly read the manufacturer’s instructions and guidelines specific to your glass panel.
2. Take accurate measurements to ensure a precise fit of the glass panel. Double-check the measurements before placing your order.
3. When installing the glass panel, make sure to wear safety goggles and gloves to protect yourself from any potential injuries.
4. Use a high-quality silicone sealant to secure the glass panel and prevent any water leakage.
5. Clean the glass panel regularly using a non-abrasive cleaner to maintain its clarity and shine.
6. To prevent the glass panel from getting stained or scratched, avoid using harsh cleaning products or abrasive materials.
7. If you are unsure about the installation process or lack the necessary tools and skills, it is recommended to seek professional help to ensure a flawless and secure installation.
In conclusion, installing a walk-in shower glass panel can transform your bathroom into a stylish and luxurious space. By following the step-by-step installation process, taking advantage of the benefits it offers, and adhering to the final tips and recommendations, you can enjoy a beautiful and functional walk-in shower with a glass panel for years to come. So, what are you waiting for? Get started on your walk-in shower glass panel installation journey today and upgrade your bathroom experience.
Frequently Asked Questions
How Do You Install A Walk-In Shower Panel?
To install a walk-in shower panel, follow these steps: Place the panel against the wall and mark its position. Measure and drill holes for the mounting brackets. Secure the brackets into the wall. Attach the panel to the brackets. Connect the plumbing fixtures and test for leaks.
Enjoy your new walk-in shower panel!
What Holds Shower Glass In Place?
Metal brackets and silicone adhesive are commonly used to hold shower glass in place.
How Wide Should A Glass Panel Be In A Walk-In Shower?
A glass panel in a walk-in shower should be wide enough to provide ample space for movement and minimize water splashing. The ideal width is 36 to 48 inches, ensuring convenience and ensuring the shower area remains enclosed.
How Do You Seal Frameless Glass Shower Panels?
Sealing frameless glass shower panels involves using a high-quality silicone sealant. Apply it along the edges and seams to prevent water leakage. Make sure to clean and dry the panels before applying the sealant. Regular maintenance and reapplication may be needed to maintain the seal.
Conclusion
Installing a walk-in shower glass panel does not have to be a daunting task. By following these step-by-step instructions, you can transform your bathroom into a stylish and modern space. With careful planning, proper tools, and patience, you can achieve professional-looking results.
Remember to take accurate measurements, secure the panel firmly, and seal all joints to prevent leaks. Enjoy the beauty and functionality of your new walk-in shower!