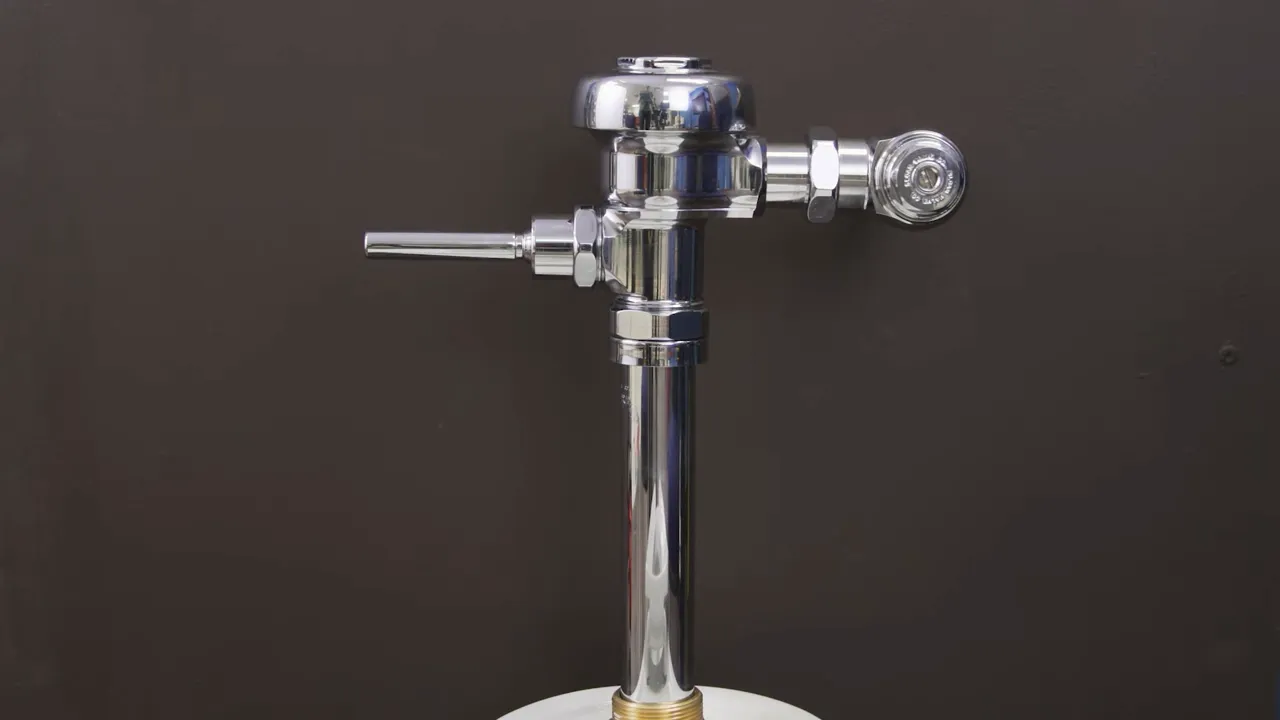
To install a urinal flush valve, start by turning off the water supply and draining the urinal. Then, remove the existing flush valve by unscrewing the bolts and disconnecting the water inlet pipe.
Next, place the new flush valve on the urinal and secure it with bolts. Finally, reconnect the water inlet pipe, turn on the water supply, and test the flush valve for proper functioning.
Factors To Consider When Selecting A Urinal Flush Valve
Factors to Consider When Selecting a Urinal Flush Valve
When it comes to installing a urinal flush valve, there are several factors to consider to ensure you choose the right one for your needs. From water efficiency to durability and compatibility with existing plumbing, each aspect plays a crucial role in the overall performance and longevity of your flush valve. Let’s delve into these factors further:
Water Efficiency
One of the most important factors to consider when selecting a urinal flush valve is its water efficiency. Water conservation is not only environmentally friendly, but it can also help you save on your monthly water bills. Look for a flush valve that is designed to minimize water usage while still providing effective flushing power. Opting for a valve with adjustable flush settings can further enhance water-saving capabilities. Remember, every drop counts!
Flush Volume Options
Different urinal flush valves offer varying flush volume options, providing flexibility to meet your specific requirements. It is crucial to select a valve that allows you to control the flush volume, as this can help maintain optimal hygiene levels and prevent water wastage. The flush volume should be adequate enough to clear the urinal effectively without excessive water usage. Consider your usage patterns and preferences when deciding on the flush volume options that best suit your needs.
Durability and Lifespan
Investing in a durable and long-lasting urinal flush valve is essential to avoid frequent replacements and repairs. Look for materials such as brass or stainless steel that offer superior strength and resistance to corrosion. A high-quality valve will endure the constant flow of water and withstand everyday wear and tear. Additionally, check the warranty provided by the manufacturer, as it can serve as an indicator of the valve’s expected lifespan.
Compatibility with Existing Plumbing
Before purchasing a urinal flush valve, ensure it is compatible with your existing plumbing system. Determine the connection type required and check for any specific dimensions or specifications that need to be met. Proper compatibility ensures seamless installation and optimal performance. It’s also crucial to consider any potential adjustments or modifications to the plumbing system that may be required to accommodate the new flush valve.
In conclusion, when selecting a urinal flush valve, it is essential to consider factors such as water efficiency, flush volume options, durability and lifespan, and compatibility with existing plumbing. By carefully evaluating these aspects, you can choose a flush valve that not only meets your immediate needs but also provides long-term reliability and sustainability for your restroom facilities. Remember, finding the right fit now can save you time, money, and resources in the future.

Essential Tools For Installing A Urinal Flush Valve
When it comes to installing a urinal flush valve, having the right tools is essential. These tools will enable you to effectively and efficiently complete the installation process. In this section, we will discuss the essential tools for installing a urinal flush valve and their importance in the installation process.
Adjustable wrench
An adjustable wrench is a versatile tool that is crucial for installing a urinal flush valve. It allows you to easily tighten or loosen nuts and bolts of various sizes. When installing a urinal flush valve, you will need an adjustable wrench to securely fasten the valve to the water supply line. This tool provides a tight and leak-free connection, ensuring the proper functioning of the flush valve.
Screwdriver
A screwdriver is another vital tool for installing a urinal flush valve. It is used to remove and install screws that hold the flush valve in place. This tool allows you to safely secure the valve to the urinal, ensuring stability and proper operation. Make sure to choose the right type and size of screwdriver according to the screws used in your urinal flush valve.
Pipe cutter
A pipe cutter is an indispensable tool when it comes to installing a urinal flush valve. This tool allows you to accurately cut pipes to the desired length. When installing a flush valve, you may need to modify the existing pipe to ensure a proper fit. A pipe cutter ensures clean and precise cuts, enabling a seamless connection between the valve and the pipe.
Pliers
Pliers are essential for installing a urinal flush valve as they provide a strong grip and allow you to manipulate various components. They come in handy when tightening or loosening nuts, adjusting parts, or making minor adjustments during the installation process. Pliers offer excellent leverage and control, ensuring a secure and reliable installation of the flush valve.
Plumber’s tape
Plumber’s tape, also known as Teflon tape, is a must-have tool for installing a urinal flush valve. This tape helps create a watertight seal between threaded connections, preventing leaks and ensuring a tight fit. Applying plumber’s tape to the threads of the valve and the pipe helps to prevent water from seeping out, allowing for a hassle-free installation.
Shutting Off The Water Supply
Locating and Turning off the Shut-Off Valve
Before you start installing a urinal flush valve, it is crucial to shut off the water supply. This ensures that there is no water flowing through the pipes and prevents any water leakage during the installation process. Locating and turning off the shut-off valve is a relatively easy task.
To find the shut-off valve, start by looking beneath the urinal. You’ll typically find it attached to the water supply pipe. It might be a small metal lever or a knob that you can turn clockwise to shut off the water supply.
Here’s a step-by-step guide to locating and turning off the shut-off valve:
- Position yourself beneath the urinal and look for the water supply pipe.
- Identify the shut-off valve attached to the pipe.
- Turn the shut-off valve clockwise until it is fully closed.
- Check the urinal to ensure that the water supply has been successfully shut off.
Flushing the Urinal to Drain Any Remaining Water
After shutting off the water supply, it is essential to flush the urinal to drain any remaining water. This step ensures that you won’t encounter any water overflow or splashes during the installation process.
Here’s the recommended method to flush the urinal:
- Position yourself in front of the urinal.
- Locate the flush valve typically located at the top or side of the urinal.
- Depress the flush valve’s handle or button to initiate the flushing process.
- Allow the water in the urinal to drain completely.
- Give it a few seconds to ensure that there is no residual water.
By following these steps, you can successfully shut off the water supply and flush the urinal, preparing it for the installation of a new flush valve. Remember to take your time and follow the instructions carefully to ensure a smooth installation process.
Detaching The Water Supply Line
Detaching the water supply line is an essential step when installing a urinal flush valve. This allows you to disconnect the existing connection and make way for the new flush valve. In this section, we will explore the steps required to successfully detach the water supply line. By following these steps, you’ll be one step closer to installing your new urinal flush valve.
Unscrewing the nut connecting the water supply line to the flush valve
To detach the water supply line, you will first need to locate the nut that connects it to the flush valve. This nut is typically located at the bottom of the flush valve. Using an adjustable wrench, you can slowly unscrew the nut in a counterclockwise direction. It’s important to be gentle during this process to avoid causing any damage to the water supply line or the flush valve. Once the nut is loose, you can proceed to the next step.
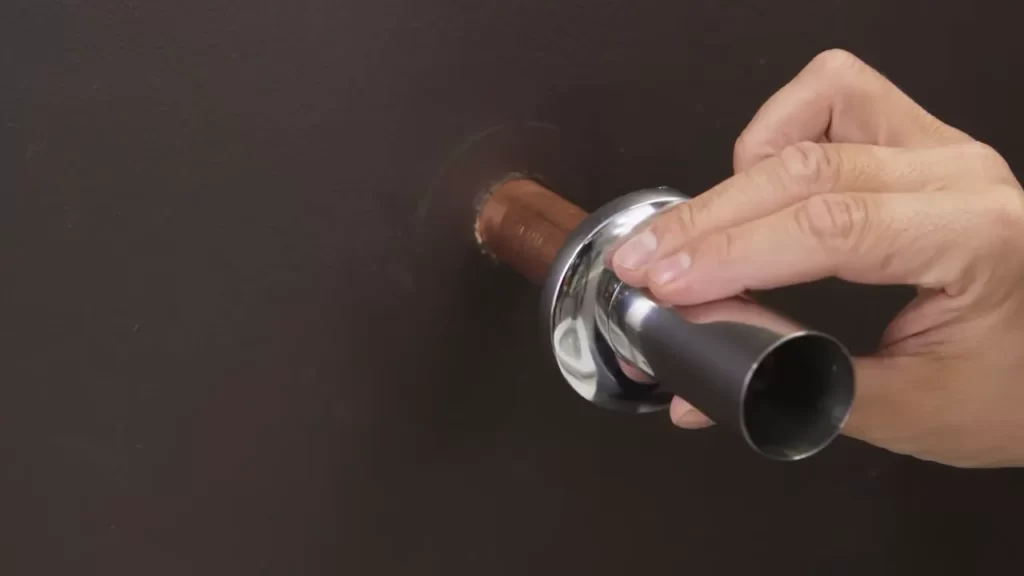
Removing the water supply line from the flush valve
Now that the nut is unscrewed, you can proceed to remove the water supply line from the flush valve. Carefully pull the supply line away from the valve, taking note of any excess water that may drip out. This step may require a bit of force, especially if the supply line has been connected for a long time. If needed, you can use a pair of pliers to grip the connector and provide some additional leverage.
Once the water supply line is completely detached from the flush valve, take a moment to inspect the line for any signs of damage or wear. This is a good opportunity to replace the water supply line if necessary, ensuring optimal performance of your urinal flush valve.
By successfully detaching the water supply line, you have completed a vital step in the installation process of your urinal flush valve. With the water supply line removed, you can now move forward and install the new flush valve, bringing you closer to a fully functional and efficient urinal system.
Disconnecting The Flush Valve From The Urinal
Loosening the nut connecting the flush valve to the urinal
When it comes to installing a new urinal flush valve, the first crucial step is disconnecting the old one from the urinal. This process involves loosening the nut that connects the flush valve to the urinal.
To begin, locate the nut at the base of the flush valve where it is connected to the urinal. This nut is typically made of metal and secures the flush valve in place. You may need to use a pair of pliers or a wrench to loosen the nut.
Important Note: Before you start loosening the nut, it is recommended to turn off the water supply to the urinal. This will prevent any water from leaking out and causing a mess during the disconnection process.
Once you have the necessary tool in hand, firmly grip the nut and turn it counterclockwise to loosen it. Apply steady pressure to break the initial resistance. It may be helpful to use a cloth or gloves to improve your grip and protect your hands.
Keep turning the nut until it is loose enough to be easily removed by hand. Be cautious not to use excessive force to avoid damaging the surrounding parts or causing any leaks.
Now that the nut is loose, it’s time to remove the flush valve from the urinal.
Removing the flush valve from the urinal
After successfully loosening the nut, the next step is to remove the flush valve from the urinal. This is necessary to make way for the new flush valve installation.
Start by gently pulling the flush valve away from the urinal. Apply even pressure and be mindful not to jerk or tug on the valve, as it may still be connected to the water supply pipe.
If you notice any resistance, check for any additional screws or bolts that may still be securing the valve. These are often located at the back or sides of the flush valve. Unscrew or remove them using the appropriate tools.
Pro Tip: Before disconnecting any pipes or fittings from the flush valve, it’s a good idea to place a bucket or towel beneath the area to catch any excess water that may spill out. This will help keep the workspace clean and prevent any potential water damage.
Once all the screws and fittings are removed, carefully lift the flush valve away from the urinal. You may need to wiggle it slightly to detach it completely.
Caution: Take extra care when handling the old flush valve, as it may still have some water remaining in it. Tip the valve over a bucket or sink to drain any residual water before safely disposing of it.
With the old flush valve successfully removed, you are now ready to proceed with installing the new flush valve.
Preparing The New Flush Valve
Installing a urinal flush valve is a simple task that can help improve the functionality and efficiency of your restroom. Before you begin the installation process, it is important to properly prepare the new flush valve. This involves checking the compatibility and dimensions of the new flush valve and assembling any components or attachments. By following these steps, you can ensure a successful installation and enjoy the benefits of a properly functioning urinal flush valve.
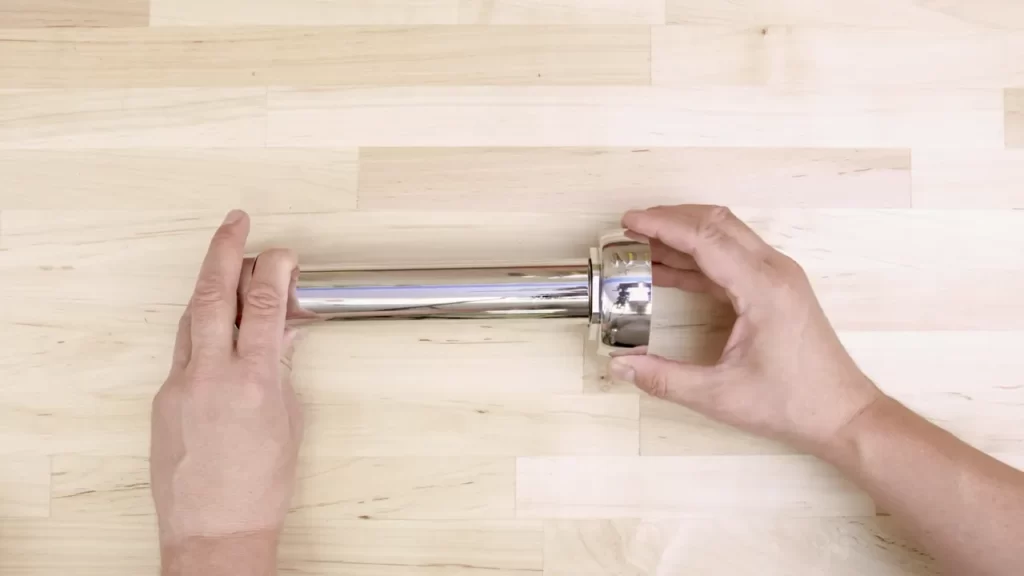
Checking the Compatibility and Dimensions of the New Flush Valve
Before purchasing a new flush valve, it is crucial to check its compatibility with your existing urinal. Not all flush valves are universal, so it’s important to make sure that the new valve is designed to fit your specific urinal model. Check the manufacturer’s specifications and compare them with your urinal to ensure a proper fit.
Additionally, it’s essential to consider the dimensions of the new flush valve. Measure the distance between the water supply pipe and the urinal and make sure the flush valve has the appropriate length and height to accommodate this distance. This will ensure that the flush valve connects correctly with the water supply and functions optimally.
Assembling Any Components or Attachments
Once you have determined the compatibility and dimensions of the new flush valve, it’s time to assemble any additional components or attachments that may be required. This could include items such as gaskets, bolts, or overflow tubes. Refer to the manufacturer’s instructions provided with the flush valve to identify the necessary components and ensure proper installation.
If there are multiple components, start by attaching them together according to the manufacturer’s guidelines. This may involve using screws or bolts to secure the components in place. Take care to tighten the screws or bolts adequately, but be cautious not to overtighten them, as this could lead to damage.
Additionally, ensure that any gaskets or seals are correctly positioned to prevent leaks. Apply a small amount of plumber’s tape or pipe sealant to the threads of any connections for added protection against leaks.
By thoroughly preparing the new flush valve before installation, you can avoid compatibility issues, ensure proper dimensions and connections, and set the stage for a successful installation process. Taking the time to properly prepare the new flush valve will result in an effective and reliable urinal flush system that will benefit both your restroom’s functionality and water efficiency.
Attaching The New Flush Valve To The Urinal
Now that you’ve prepared your urinal and removed the old flush valve, it’s time to install the new one. Attaching the new flush valve to the urinal is a crucial step in ensuring the proper functioning of your plumbing system. Follow these steps to position and secure the flush valve correctly:
Positioning the new flush valve in the correct location on the urinal
The first step is to position the new flush valve in the correct location on the urinal. Refer to the manufacturer’s instructions to determine the appropriate placement. Make sure it aligns with the existing holes in the urinal for easy installation. Placing the flush valve in the right position is essential to ensure smooth and efficient flushing.
Securing the flush valve with a nut and tightening it
Once you have positioned the new flush valve, it’s time to secure it in place. The flush valve typically comes with a nut that needs to be tightened to hold it firmly against the urinal. Here are the steps to secure the flush valve:
- Insert the threaded end of the flush valve through the hole in the urinal.
- From the underside of the urinal, thread the nut onto the flush valve.
- Using a wrench or pliers, tighten the nut securely to ensure a watertight connection.
Ensuring a tight and secure connection is crucial to prevent water leaks and ensure efficient flushing. Take care not to overtighten the nut as it may cause damage to the flush valve or the urinal.
With the new flush valve securely attached to the urinal, you are one step closer to completing the installation process. In the next section, we will cover how to connect the water supply line to the flush valve, allowing water to flow and properly flush the urinal.
Connecting The Water Supply Line
Connecting the water supply line is an essential step in installing a urinal flush valve. Properly connecting the supply line ensures that water flows smoothly into the flush valve, allowing it to function efficiently. Follow these steps to connect the water supply line and ensure a leak-free installation.
Applying plumber’s tape to the threaded end of the water supply line
Before attaching the water supply line to the flush valve, it is important to apply some plumber’s tape to the threaded end of the supply line. Plumber’s tape helps create a watertight seal and prevents leakage. To apply the tape, simply wrap it around the threaded end of the supply line in a clockwise direction. Ensure that the tape covers the threads completely but does not overlap onto the non-threaded portion of the supply line. This simple step can save you from potential future headaches caused by leaks.
Attaching the water supply line to the flush valve and tightening the nut
Once you have applied plumber’s tape, it is time to attach the water supply line to the urinal flush valve. Begin by inserting the threaded end of the supply line into the corresponding opening on the flush valve. Ensure that the threads on both the supply line and flush valve are aligned for a proper fit.
After inserting the supply line, gently tighten the nut onto the flush valve by turning it clockwise. Use an adjustable wrench or pliers to ensure a secure connection. Be careful not to overtighten, as this could damage the threads or cause leaks. Instead, tighten the nut firmly but with caution.
Once the nut is tightened, double-check the connection to ensure there are no visible gaps or loose fittings. A properly connected water supply line should appear snug and secure.
With the water supply line properly connected and the nut tightened, you are one step closer to completing the installation of your urinal flush valve. Remember to turn on the water supply and check for any leaks before finalizing the installation process.
Adjusting The Flush Settings
Adjusting the Flush Volume
Once you have successfully installed the urinal flush valve, the next step is to adjust the flush settings according to the manufacturer’s instructions. One of the essential settings you need to adjust is the flush volume.
Adjusting the flush volume allows you to control the amount of water used with each flush. This not only helps in water conservation but also ensures the efficient functioning of the urinal flush valve.
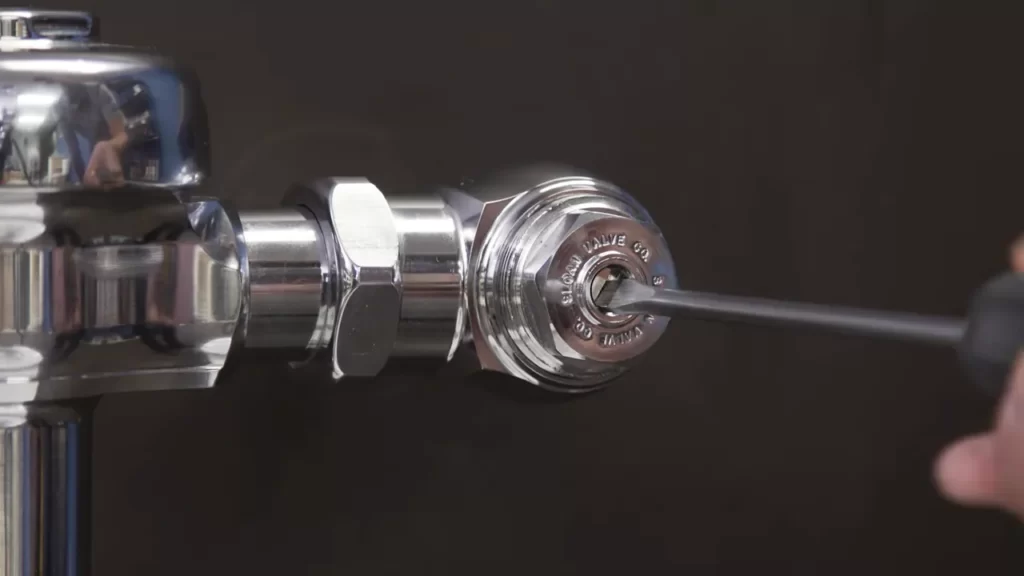
To adjust the flush volume, locate the volume adjustment screw on the valve. This screw is usually located on the top or side of the valve and can be easily identified by the markings indicating “volume.”
Using a screwdriver, turn the volume adjustment screw clockwise to increase the flush volume or counterclockwise to decrease it. It is recommended to start with a lower volume setting and gradually increase it to find the optimal flush volume for your specific needs.
Adjusting the Flush Timing Settings
In addition to adjusting the flush volume, you may also need to adjust the flush timing settings. The flush timing settings determine how long the flush valve keeps the water flowing after activation. This adjustment is crucial to ensure thorough flushing while preventing unnecessary water wastage.
To adjust the flush timing settings, refer to the manufacturer’s instructions as different models may have different methods for doing so. In general, the timing adjustment mechanism is located inside the valve or on the back, accessible by removing the valve cover.
Once you have located the flush timing adjustment mechanism, use the instructions provided by the manufacturer to set the desired flush duration. This could be in the form of a dial, knob, or any other mechanism specified by the manufacturer.
Make minor adjustments to the timing while flushing and observe the flow of water to ensure it is adequate for an effective flush. You may need to repeat the process a few times to achieve the best timing settings for your specific requirements.
Testing the Flush Functionality
After adjusting the flush volume and timing settings, it is essential to test the flush functionality to ensure everything is working correctly. Testing the flush will help identify any potential issues and make any necessary adjustments before the urinal is put into regular use.
To test the flush functionality, simply activate the flush valve by pressing the lever or button. Observe the flow of water and ensure it adequately covers the urinal bowl. If the flush is too weak, increase the flush volume or adjust the timing settings accordingly. On the other hand, if the flush is too strong, decrease the flush volume or adjust the timing settings as needed.
Perform these tests multiple times, ensuring that each flush is consistent and effective. This will help avoid any future problems and provide a comfortable user experience for anyone using the urinal.
Inspecting For Leaks
Running water and checking for any visible leaks around the connections
Inspecting for leaks is an essential step when installing a urinal flush valve. This crucial task ensures that the valve is firmly in place and functioning properly, preventing any unwanted water leakage. It is important to conduct a thorough inspection to catch any potential leaks early on. One of the first things you need to do is to run water and check for any visible leaks around the connections.
To begin, turn on the water supply to allow water to flow into the flush valve. Listen carefully for any hissing or gushing sounds, as these could indicate a leak. Take a close look at the connections between the flush valve and the pipes. Examine every joint and union for signs of water leakage, such as drips or puddles forming beneath the valve.
If you spot any visible leaks, it is crucial to address them immediately to prevent further damage. A leaky connection could lead to water wastage and potentially cause long-term issues. To resolve the problem, tighten any loose connections that may be causing the leakage.
Tightening any loose connections if necessary
When inspecting the flush valve for leaks, it is essential to check for loose connections. Over time, vibrations and general use can cause fittings to become loose, leading to water leakage. Tightening these connections is vital to ensure a proper seal and prevent any potential leaks.
Start by identifying the loose connections. Use your hand or a wrench to tighten them, ensuring they are secure but without over-tightening and risking damage to the fittings. It is important to pay close attention to each joint and union and make sure they are all securely tightened to form a leak-free seal.
If you encounter stubborn connections that refuse to tighten or continue to leak, you may need to replace the faulty parts. It’s always better to address any loose connections or leaks as soon as they are discovered to avoid more extensive repairs later on.
By inspecting for leaks and tightening any loose connections, you can ensure that your urinal flush valve operates smoothly and efficiently, without wasting water or causing unnecessary damage. Regular maintenance and inspection are key to preserving the longevity of your plumbing system and avoiding costly repairs down the line.
Troubleshooting Common Issues
When it comes to installing a urinal flush valve, it’s important to know how to troubleshoot common issues that may arise. These issues can include low water pressure or inconsistent flushing, as well as clogs or blockages in the flush valve or supply line. In this section, we will dive into each of these problems and provide you with step-by-step solutions to resolve them.
Investigating Low Water Pressure or Inconsistent Flushing
If you’re experiencing low water pressure or inconsistent flushing with your urinal flush valve, there are a few potential causes you should investigate:
- Check the water supply: Start by ensuring that the water supply to the urinal is fully turned on and providing an adequate flow of water. Sometimes, the supply valve may be partially closed or blocked, resulting in reduced water pressure.
- Inspect the flush valve: Examine the flush valve for any signs of damage or wear that could be affecting its performance. Look for leaks, cracks, or debris that may be obstructing the flow of water.
- Adjust the water pressure: If the water pressure is consistently low, you may need to adjust the pressure regulator on the supply line. Consult the manufacturer’s instructions or a professional plumber for guidance on how to make this adjustment.
Checking for Clogs or Blockages in the Flush Valve or Supply Line
A common issue with urinal flush valves is clogs or blockages that can impede the flow of water. To check for these problems, follow these steps:
- Turn off the water supply: Before inspecting the flush valve or supply line, make sure to turn off the water supply to prevent any potential leaks or accidents.
- Inspect the flush valve: Carefully remove the flush valve cover and visually inspect the valve for any visible clogs or blockages. If you notice any debris or buildup, gently clean the valve using a soft brush or cloth.
- Check the supply line: Next, check the supply line for any obstructions or blockages. Remove the line and flush it with water to remove any accumulated debris or sediment.
- Reassemble and test: Once you have cleaned the flush valve and supply line, reassemble everything and turn on the water supply. Test the flushing mechanism to ensure that the issue has been resolved.
By following these troubleshooting steps, you can effectively address common issues that may occur when installing a urinal flush valve. Remember to always refer to the manufacturer’s instructions and consult a professional if you encounter any difficulties or are uncertain about making any adjustments or repairs.
Enjoying The Benefits Of A Properly Installed Urinal Flush Valve
Installing a urinal flush valve is a simple yet effective way to improve the functionality and efficiency of your restroom. A properly installed urinal flush valve offers several benefits that go beyond just saving water and reducing cost. Let’s explore the advantages of having a properly installed urinal flush valve and how it can enhance your restroom experience.
Water and Cost Savings
One of the significant benefits of a properly installed urinal flush valve is the water and cost savings it brings. These flush valves are designed to use minimal water while still providing an effective flush. By replacing outdated manual flush valves or older plumbing systems, you can significantly reduce your water consumption and save on water bills.
Key benefits:
- Saves water by using minimal water per flush
- Reduces water bills, resulting in long-term cost savings
- Environmentally friendly by conserving water resources
Improved Cleanliness and Hygiene
A properly installed urinal flush valve contributes to improved cleanliness and hygiene in your restroom. These flush valves provide a powerful flush, effectively removing waste and minimizing the chances of clogs or backups. With each flush, the urinal is thoroughly cleaned, leaving behind a fresh and sanitary environment.
Key benefits:
- Powerful flush removes waste efficiently
- Prevents clogs and backups
- Contributes to a clean and fresh restroom environment
Reduced Maintenance Needs
Another advantage of a properly installed urinal flush valve is the reduced maintenance needs it brings. These flush valves are designed for durability and reliability, minimizing the chances of leaks, malfunctions, or other issues. By investing in a high-quality flush valve and ensuring proper installation, you can enjoy a hassle-free experience with minimal maintenance requirements.
Key benefits:
- Durable and reliable, reducing the need for repairs
- Minimizes leaks and malfunctions
- Lower maintenance costs and time investment
Installing a urinal flush valve not only offers water and cost savings but also improved cleanliness, hygiene, and reduced maintenance needs. By enjoying these benefits, you can enhance the overall restroom experience for your visitors and create a more efficient and sustainable environment.
Frequently Asked Questions
How Do You Install A Urinal Flush?
To install a urinal flush, follow these steps: 1. Turn off the water supply to the urinal. 2. Remove the existing flush handle or button. 3. Attach the new flush valve to the urinal. 4. Connect the water supply to the flush valve.
5. Test the flush by turning on the water supply and flushing the urinal.
Are Urinal Flush Valves Interchangeable?
Yes, urinal flush valves are interchangeable. They can be easily replaced with other valves of the same type without any compatibility issues.
How Do You Replace A Flush Valve?
To replace a flush valve, follow these steps: 1. Turn off the water supply to the toilet. 2. Flush the toilet to drain the tank. 3. Disconnect the water supply line. 4. Remove the old flush valve. 5. Install the new flush valve and reattach the water supply line.
What Is The Difference Between A Urinal Flush Valve And A Toilet Flush Valve?
A urinal flush valve is designed for flushing urinals, while a toilet flush valve is used for toilets.
Conclusion
Installing a urinal flush valve may seem like a daunting task, but with the right tools and a little guidance, it becomes a straightforward process. By following the step-by-step instructions provided in this blog, you can confidently replace or install a new flush valve for your urinal.
Remember to turn off the water supply, remove the old valve, and securely attach the new one. With a properly functioning flush valve, you can ensure efficient water usage and maintain a clean and hygienic restroom environment.