To install a two-handle shower valve, turn off the water supply, remove the old valve, install the new valve following the manufacturer’s instructions, and connect the water supply lines. This article will guide you through the process of installing a two-handle shower valve in a clear and concise manner, allowing you to complete the task with ease and confidence.
Whether you are a DIY enthusiast or a professional plumber, this step-by-step guide will help you successfully replace your old shower valve with a new one. With the right tools and a little patience, you can have your new two-handle shower valve installed and functioning properly in no time.
So, let’s get started!
Understanding The Two Handle Shower Valve System
When it comes to upgrading or replacing your shower valve, understanding the two handle shower valve system is essential. This system is commonly used in many bathrooms and understanding its components, types, and benefits can help you make an informed decision. In this article, we will delve into the key aspects of the two handle shower valve system, including its components, types, and the benefits it provides.
Components of a Two Handle Shower Valve
A two handle shower valve system consists of several important components that work together to control the water flow and temperature in your shower. These components include:
- Valve Body: This is the main part of the valve that controls the water flow.
- Hot and Cold Handles: These handles allow you to adjust the water temperature to your preference.
- Cartridges: Cartridges are responsible for regulating the water flow and temperature. They can be easily replaced if necessary.
- Trim Kit: The trim kit includes the escutcheon plate, showerhead, and other aesthetic components that complete the look of your shower.
- Connecting Pipes: These pipes connect the valve body to the showerhead and other water outlets in your bathroom.
Understanding the different components of a two handle shower valve system can help you identify any issues that may arise and make the installation process easier.
Types of Two Handle Shower Valve Systems
There are various types of two handle shower valve systems available, depending on your specific needs and preferences. Some of the most common types include:
| Type | Description |
|---|---|
| Compression Valve System | This traditional system uses rubber washers to control the water flow and temperature. |
| Thermostatic Valve System | This system allows you to set and maintain a precise water temperature, providing you with a consistent shower experience. |
| Pressure-Balancing Valve System | This system helps maintain a constant water pressure, even if someone else in your household uses water elsewhere. |
Choosing the right type of two handle shower valve system depends on your specific needs, budget, and the level of control you desire over water flow and temperature.
Benefits of Two Handle Shower Valves
Two handle shower valves offer several benefits that make them a popular choice among homeowners. Some of these benefits include:
- Separate Temperature Control: With two separate handles, you can easily adjust the water temperature to your liking without affecting the water flow.
- Reliability: Two handle shower valves are known for their durability and reliability, ensuring long-term functionality.
- Easy Maintenance: If any component of the valve system needs repair or replacement, it can be easily done without disrupting the entire shower system.
- Flexibility: The availability of different types of two handle shower valves allows you to choose a system that best suits your preferences and needs.
- Aesthetic Appeal: Two handle shower valves come in a variety of designs and finishes, allowing you to enhance the overall look of your bathroom.
Understanding the benefits of two handle shower valves can help you make a well-informed decision when installing or upgrading your shower system.

Tools And Materials You’Ll Need
When it comes to installing a two handle shower valve, having the right tools and materials is essential. This ensures that the installation process goes smoothly and efficiently. In this section, we will discuss the essential tools you’ll need, the required materials for the installation process, and the safety precautions to keep in mind.
Essential Tools for Installing a Two Handle Shower Valve
Before you start the installation process, make sure you have the following tools on hand:
- Adjustable wrench
- Plumber’s tape
- Plumber’s wrench
- Screwdriver (flathead and Phillips head)
- Pipe cutter or hacksaw
- Tubing cutter
- Plunger
- Bucket or basin
- Rags or towels
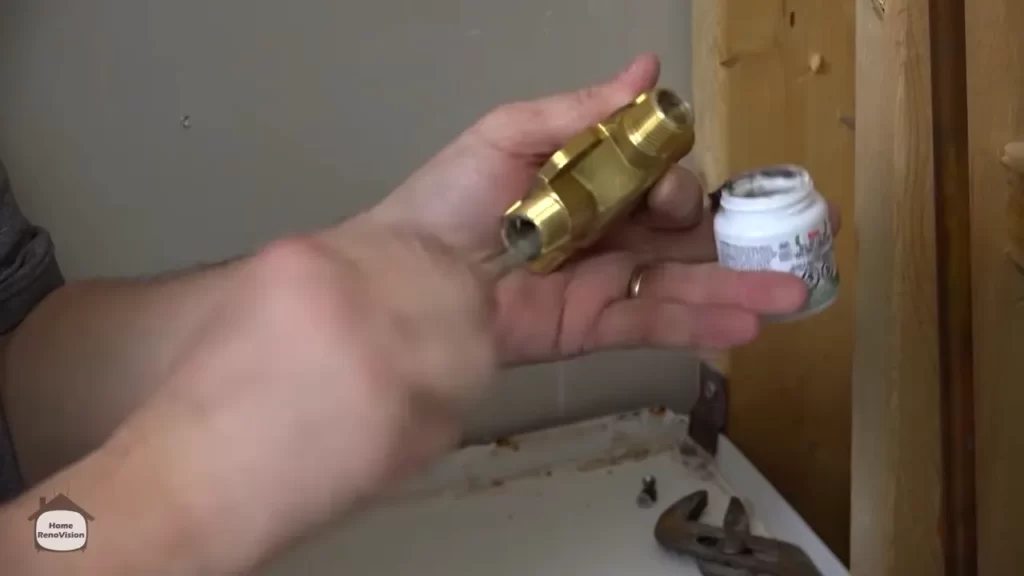
Required Materials for the Installation Process
In addition to the tools, you’ll also need the following materials:
- Two handle shower valve kit
- Pipe fittings
- Pipe connectors or unions
- Teflon tape
- Plumber’s putty
- Silicone caulk
- Plumbing sealant
- Plastic or metal plates (if required)
Safety Precautions to Keep in Mind
Before you start the installation process, it’s important to keep the following safety precautions in mind:
- Turn off the water supply to the shower before you begin any work.
- Use caution when working with sharp tools like pipe cutters or hacksaws.
- Wear appropriate safety gear, such as gloves and protective eyewear.
- Follow the manufacturer’s instructions and guidelines for the specific valve and materials you are using.
- Check for any leaks or drips after the installation process is complete.
Preparing For The Installation Process
Before installing a two handle shower valve, it’s essential to properly prepare for the installation process. This involves taking a few crucial steps to ensure a smooth and successful project. This section will guide you through the necessary preparations, starting with shutting off the water supply.
Shutting off the Water Supply
To begin the installation process, the first step is to shut off the water supply to the shower. This is crucial to prevent any water damage and to ensure your safety during the installation. Follow these simple steps:
- Locate the main water shut-off valve in your home. It is typically found near the water meter or in the basement.
- Turn the valve clockwise until it is completely closed. This will prevent any water from running through the pipes.
- Once the valve is closed, open the shower faucet to drain any water that may still be in the pipes. This will help reduce the pressure and make the installation process easier.
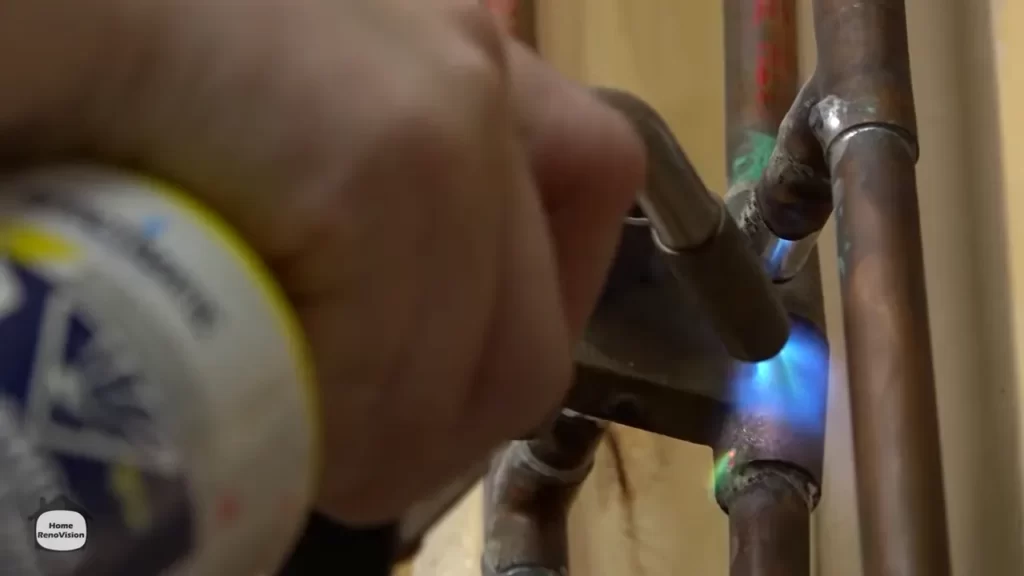
Removing the Existing Shower Valve
After shutting off the water supply, the next step is to remove the existing shower valve. Follow these steps to ensure a proper removal:
- Use a screwdriver or a wrench (depending on the valve type) to remove the screws or nuts that are securing the valve to the wall.
- Gently pull the valve away from the wall, taking care not to damage any surrounding tiles or plumbing.
- Inspect the removed valve for any signs of damage or wear. This will help you determine if it needs to be replaced or if it can be reused.
Inspecting and Cleaning the Pipes
Before installing the new shower valve, it’s important to inspect and clean the pipes to ensure optimal performance. Follow these steps:
- Visually inspect the pipes for any signs of corrosion, leaks, or damage. If any issues are found, it’s recommended to address them before proceeding with the installation.
- Use a pipe cleaner or a wire brush to remove any dirt, debris, or mineral buildup from the pipes. This will ensure a clean and smooth connection for the new valve.
- Check the pipe ends for any rough edges or burrs. If present, use a file or sandpaper to smooth them out.
By following these preparation steps, you will be ready to install your new two handle shower valve with confidence. Remember to always prioritize safety and take necessary precautions throughout the process.
Installing The Two Handle Shower Valve
Installing a two-handle shower valve is a crucial step in your bathroom renovation or repair. This process ensures that you have control over both the hot and cold water temperatures, allowing for a comfortable and customized shower experience. In this section, we will guide you through the installation process of a two-handle shower valve, covering the evaluation of placement and alignment, connecting to the water supply lines, securing the valve in place, and testing for leaks.
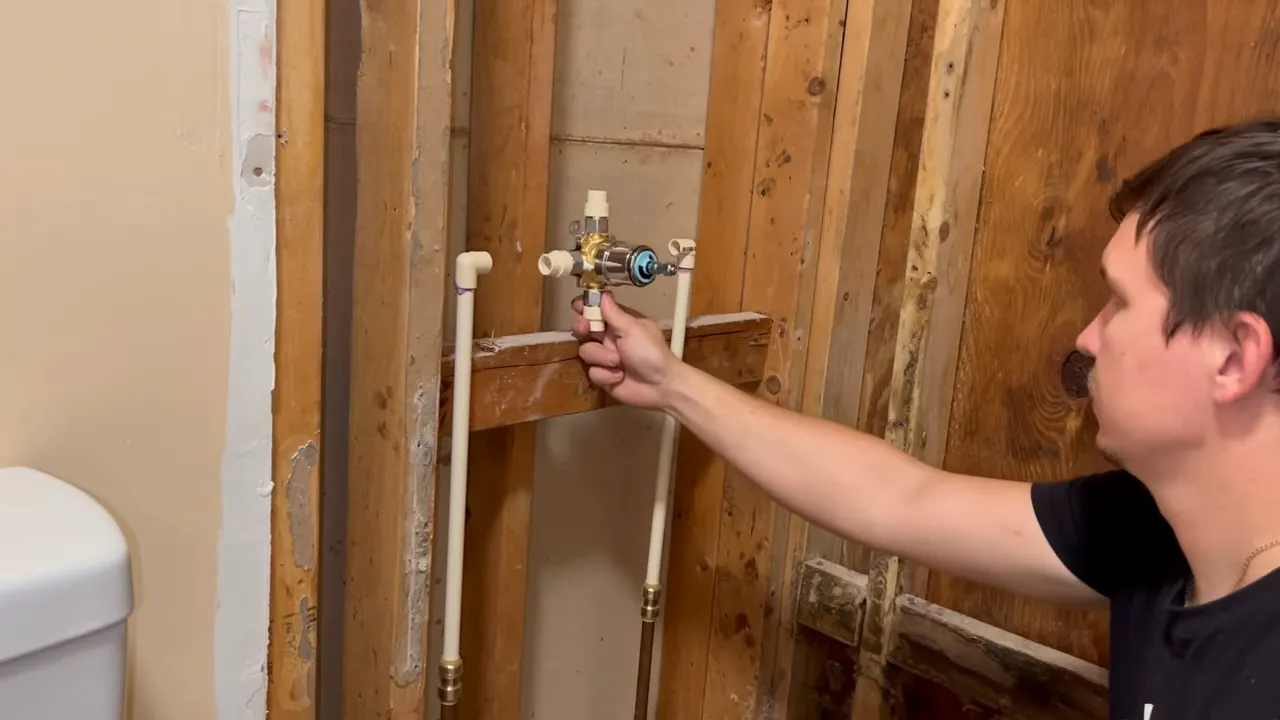
Evaluating the Placement and Alignment of the Valve
The first step in installing a two-handle shower valve is to evaluate the placement and alignment of the valve. Proper placement ensures easy access while showering and a visually appealing aesthetic. Here’s how you can do it:
- Start by determining the ideal height at which you would like the valve handles to be placed. This will vary depending on personal preference and accessibility considerations.
- Using a measuring tape, mark the desired height on the shower wall, ensuring that the marks are level.
- Next, evaluate the horizontal alignment of the valve. Place a level on top of the valve and adjust it until it is perfectly vertical.
- Make any necessary adjustments to the placement and alignment before proceeding with the installation.
Connecting the Valve to the Water Supply Lines
Once you have evaluated the placement and alignment, it’s time to connect the valve to the water supply lines. Follow these steps for a seamless connection:
- Attach the water supply lines to the back of the valve, ensuring that hot and cold lines are connected to their respective sides.
- Use a wrench to tighten the connections, making sure they are secure but not excessively tight to avoid damaging the valve or the supply lines.
- If necessary, trim any excess length from the supply lines to ensure a clean installation.
Securing the Valve in Place
Now that the valve is connected to the water supply lines, you need to secure it in place to prevent any movement or leaks. Follow these steps:
- Apply plumber’s tape or thread sealant to the threads of the valve’s mounting plate to ensure a watertight seal.
- Position the mounting plate against the shower wall, aligning it with the marks you made during the evaluation stage.
- Secure the mounting plate to the wall using screws or other appropriate fasteners, ensuring it is firmly in place.
- Check the stability of the valve by gently pulling and pushing on it. If there is any movement, tighten the mounting screws further.
Testing for Leaks
Once the valve is securely in place, the final step is to test for leaks and ensure a properly functioning shower system. Here’s how you can do it:
- Turn on the water supply to the shower valve.
- Inspect all connections for any signs of leaks, such as water drips or puddles.
- Use a dry cloth or tissue to wipe each connection and check for any moisture.
- If you notice any leaks, tighten the connections further or apply plumber’s tape to the affected areas.
- Continue testing by turning on the hot and cold water handles, ensuring a consistent flow and proper mixing of temperatures.
- If there are no leaks and the water flow is satisfactory, congratulations! Your two-handle shower valve installation is complete.
Installing a two-handle shower valve requires careful attention to placement, alignment, and connection to ensure a functional and leak-free shower system. By following these steps, you can confidently install a two-handle shower valve and enjoy a comfortable shower experience tailored to your preferences.

Adjusting And Fine-Tuning The Shower Valve
Once you have successfully installed your two-handle shower valve, the next step is to adjust and fine-tune the valve to ensure optimal water flow and temperature control. This step is crucial in achieving a comfortable and enjoyable shower experience. In this section, we will guide you through the process of balancing the hot and cold water flow, checking for the optimal water temperature, and calibrating the handle controls.
Balancing Hot and Cold Water Flow
Balancing the hot and cold water flow is essential to achieve the desired water temperature. This can be done by adjusting the valve’s cartridge or stem assemblies. Here are the steps you can follow:
- Turn off the water supply to the shower valve.
- Remove the handles and trim plates to access the valve cartridge or stem assemblies.
- Identify the hot and cold water inlets on the valve.
- Using a wrench or pliers, turn the hot water stem clockwise to decrease the flow or counterclockwise to increase the flow.
- Repeat the previous step for the cold water stem.
- Turn on the water supply and test the water flow. Adjust as necessary until the hot and cold water flows are balanced.
Checking for Optimal Water Temperature
Once you have balanced the hot and cold water flow, it’s important to check for the optimal water temperature. To do this, follow these steps:
- Turn on only the hot water handle and wait for a few minutes for the water to heat up.
- Check the water temperature by placing your hand under the water flow.
- If the temperature is too hot or too cold, make small adjustments to the hot water stem until you achieve the desired temperature.
- Repeat the previous step for the cold water handle.
- Test the water temperature by turning on both handles and ensuring the water is comfortably warm.
Calibrating the Handle Controls
Finally, it’s crucial to calibrate the handle controls to ensure they are easy to operate and provide accurate temperature control. Follow these steps to calibrate the handle controls:
- Ensure the water supply to the shower valve is turned off.
- Remove the handles and trim plates to access the valve cartridge or stem assemblies.
- Check the handle stops to determine if they are correctly aligned with the water on/off positions.
- If needed, adjust the handle stops by turning them counterclockwise or clockwise.
- Reassemble the handles and trim plates.
- Turn on the water supply and test the handle controls for smooth operation and accurate temperature adjustment.
By following these steps, you can adjust and fine-tune your two-handle shower valve to ensure the perfect balance of hot and cold water flow, optimal water temperature, and smooth handle controls. Taking the time to properly adjust your shower valve will result in a satisfying shower experience every time.
Troubleshooting Common Issues
In the process of installing a two-handle shower valve, you may encounter a few common issues that can hinder the optimal functioning of your shower. These issues can include leaks and drips, inconsistent water temperature, and valve malfunctions. In this section, we will address each of these issues in detail and provide you with effective solutions to troubleshoot and resolve them.
Addressing Leaks and Drips
One of the most frustrating problems you may encounter with your two-handle shower valve is leaks and drips. Not only can they waste water, but they can also lead to water damage if left unresolved. Here are some steps you can take to address this issue:
- Check the cartridge: Leaks and drips often occur due to a faulty or worn-out cartridge. Carefully remove the handle and escutcheon to access the cartridge. Inspect it for any signs of damage or deterioration. If needed, replace the cartridge with a new one to stop the leak.
- Tighten the connections: Sometimes, leaks can be caused by loose connections. Ensure that all the connections, including the cartridge, valve body, and spout, are properly tightened. Use a wrench or pliers to securely tighten any loose fittings.
- Inspect the seals and O-rings: Leaks can also occur if the seals or O-rings on the valve components are damaged or worn. Inspect these parts and replace them if necessary to create a proper seal and prevent leaks.
Fixing Inconsistent Water Temperature
Inconsistent water temperature can make your shower experience unpleasant and frustrating. Here are some steps you can take to fix this issue:
- Check the scald guard feature: Some two-handle shower valves have a scald guard mechanism that regulates the water temperature to prevent scalding. Make sure this feature is properly adjusted to maintain a constant and comfortable temperature.
- Clean the valve components: Accumulated mineral deposits or debris can affect the functionality of the valve and result in inconsistent water temperature. Clean the valve components, such as the cartridge and valve body, using a suitable descaling solution to remove any obstructions.
- Balance the hot and cold water flow: In some cases, the inconsistent water temperature may be caused by an imbalance in the hot and cold water flow. Adjust the water flow regulators or valves to achieve a balanced mix of hot and cold water.
Dealing with Valve Malfunctions
If your two-handle shower valve is not working as intended, it may be experiencing a valve malfunction. Here are some troubleshooting steps you can take:
| Issue | Possible Solution |
|---|---|
| Valve does not turn on/off | Check if the valve stem is properly aligned and functioning. Clean or replace the stem if needed. |
| Valve is stiff or hard to turn | Lubricate the valve stem with a silicone-based lubricant to reduce friction and make it easier to turn. |
| Valve produces squeaking or grinding noise | Inspect the valve components for any signs of wear or damage. Replace any worn-out parts that may be causing the noise. |
By troubleshooting and addressing these common issues, you can ensure that your two-handle shower valve functions properly, allowing you to enjoy a comfortable and hassle-free shower experience.
Maintenance And Care Tips
Maintenance and Care Tips
Proper maintenance and care of your two-handle shower valve are essential to ensure its longevity and optimal functionality. By following a few simple steps, you can keep your valve clean, perform regular inspections and maintenance, and extend its lifespan.
Keeping the Two Handle Shower Valve Clean
To maintain a clean and hygienic two-handle shower valve, make sure to:
- Regularly clean the valve handles and trim with a mild soap and warm water solution. Avoid using harsh chemicals or abrasive cleaners that may damage the finish.
- Wipe off any soap scum or residues from the valve after each use to prevent build-up.
- Use a soft brush or toothbrush to clean hard-to-reach areas, such as the crevices between the handles or the valve body.
- Ensure that the valve is dry before storing or closing the shower area to prevent the growth of mold and mildew.
Regular Inspection and Maintenance
Performing regular inspections and maintenance helps identify any potential issues and allows for timely repairs. Consider the following:
- Check for leaks or dripping from the handles or showerhead. Any leakage can indicate a problem with the valve and should be addressed promptly.
- Inspect the valve and exposed pipes for signs of corrosion or wear. If you notice any rust, flaking, or damage, consult a professional plumber for further evaluation.
- Ensure the valve handles are easy to turn and operate smoothly. If they feel stiff or loose, it may be necessary to lubricate or replace the valve cartridges or stems.
- Test the water temperature control by adjusting both the hot and cold handles. If the water does not reach the desired temperature or fluctuates significantly, there may be an issue with the valve’s balancing or thermostatic mechanism.
Extending the Lifespan of the Valve
Following these tips will help extend the lifespan of your two-handle shower valve:
- Use the valve handles with care, avoiding excessive force or twisting.
- Prevent mineral and sediment build-up by installing a suitable water softener or using a showerhead filter.
- Have your water supply tested regularly to ensure it meets the recommended quality standards. High levels of minerals or impurities can affect the valve’s performance.
- If you suspect any issues or require repairs, contact a professional plumber to address them promptly. Attempting to fix complex valve problems without proper knowledge may cause further damage.
Frequently Asked Questions
Are 2 Handle Shower Valves Illegal?
No, 2 handle shower valves are not illegal. They are a common choice for controlling water temperature and flow in showers. However, building codes may require certain safety measures, such as anti-scald features, to be installed on these valves. Consult local regulations for specific requirements.
How Do Two Handle Shower Valves Work?
Two handle shower valves work by allowing separate control of hot and cold water. One handle controls the water temperature, while the other handle controls the water pressure. Turning one handle adjusts the mix of hot and cold water, providing a customized showering experience.
Can You Replace A Single Lever Shower Faucet With Two Handles?
Yes, it is possible to replace a single lever shower faucet with two handles.
Can You Install A Shower Valve Yourself?
Yes, you can install a shower valve yourself. Just follow the instructions carefully and use the right tools. Ensure that the water supply is turned off before starting. If you’re unsure, it’s best to consult a professional for assistance.
Conclusion
To sum up, installing a two-handle shower valve may seem daunting at first, but with the right tools and steps, it can be a straightforward process. Remember to turn off the water supply, remove the old valve, and connect the new valve following the manufacturer’s instructions.
Take your time and double-check all connections for leaks before testing the shower. By following these guidelines, you can confidently complete the installation and enjoy a functional and efficient two-handle shower valve.