To install a toilet tank, first, carefully position the tank onto the bowl and secure it with bolts and washers. Gently tighten the nuts to ensure a leak-free connection.
Proper installation of a toilet tank is crucial for its efficient and long-lasting performance. By following the correct steps and using the necessary tools, you can easily install a toilet tank in your bathroom. This article will provide you with a step-by-step guide on how to install a toilet tank, ensuring that you complete the process correctly and achieve a secure and functional toilet system.
So, let’s delve into the details and learn how to install a toilet tank accurately.
Tools And Materials
When it comes to installing a toilet tank, having the right tools and materials is crucial. Without the proper equipment, you may find yourself facing unnecessary setbacks or even causing damage to your new toilet. In this section, we will outline the required tools and necessary materials you’ll need to successfully complete the installation process.
Required tools for the installation process
Before you begin installing your toilet tank, make sure you have the following tools within reach:
- Adjustable wrench: This tool will come in handy when tightening the nuts and bolts that secure the tank to the bowl.
- Screwdriver (flathead and Phillips-head): You’ll need both types of screwdrivers to remove or tighten any screws or bolts during the installation process.
- Plunger: While not directly used in the installation, having a plunger nearby is always a good idea in case of any future clogs.
- Cloth or towel: Have a cloth or towel nearby to wipe up any excess water or spills that may occur during the installation process.
- Bucket: A bucket will be useful for catching any excess water that may spill out during the removal of the old tank.
Necessary materials for setting up the toilet tank
In addition to the tools mentioned above, you will also need the following materials to set up your toilet tank:
- New toilet tank: Of course, you’ll need a brand new tank to replace the old one. Make sure it is the correct size and style for your toilet.
- Tank-to-bowl gasket and bolts: These components are essential for creating a watertight seal between the tank and the bowl.
- Wax ring: The wax ring acts as a seal between the toilet flange and the bottom of the toilet bowl, preventing leaks.
- Water supply line: This flexible tube connects the water supply valve to the bottom of the fill valve in the tank, allowing water to flow into the tank.
- Tank bolts, nuts, and washers: These hardware pieces will secure the tank to the bowl tightly.
- Toilet bowl cleaner and brush: Cleaning the toilet bowl thoroughly before installation is important to ensure a hygienic setup.
Remember, having all the necessary tools and materials on hand before starting the installation process will save you time and prevent any unnecessary trips to the hardware store. Now that we’ve covered what you need to get started, let’s dive into the step-by-step process of installing your toilet tank.

Preparing For Installation
Before you start installing a new toilet tank, it’s important to properly prepare for the task at hand. This involves shutting off the water supply and removing the old toilet tank. Follow the steps below to ensure a smooth and hassle-free installation process.
Shutting off the water supply
The first step in preparing to install a toilet tank is to shut off the water supply. This will prevent any water from flowing into the tank and make the removal process easier. Locate the water shut-off valve, typically located behind the toilet near the floor. Turn the valve clockwise until it stops to shut off the water supply. If you’re unsure which valve to turn, you can check your toilet’s installation manual or consult a professional plumber.
Removing the old toilet tank
Once you’ve shut off the water supply, it’s time to remove the old toilet tank. Start by emptying the tank of any remaining water. You can do this by flushing the toilet multiple times until the water level is significantly lower. Next, disconnect the water supply line that connects the tank to the water shut-off valve. Use an adjustable wrench or pliers to loosen and remove the nuts securing the supply line. Take care not to damage the line during this process.
With the water supply line disconnected, you can now focus on removing the tank from the toilet bowl. Locate the tank-to-bowl bolts, which secure the tank to the bowl. These bolts can usually be found on the bottom and sides of the tank. Use a wrench to loosen and remove the nuts from these bolts. Once the nuts are removed, carefully lift the tank away from the toilet bowl, taking care not to damage any surrounding plumbing.
Once the old toilet tank is removed, you’re ready to proceed with the installation of the new tank. Be sure to thoroughly clean the toilet bowl and surrounding area before proceeding to ensure a clean and sanitary installation.
Installing The New Toilet Tank
Installing a new toilet tank may seem like a daunting task, but with a little guidance, it can be a straightforward process. In this section, we will walk you through the key steps involved in installing a new toilet tank.
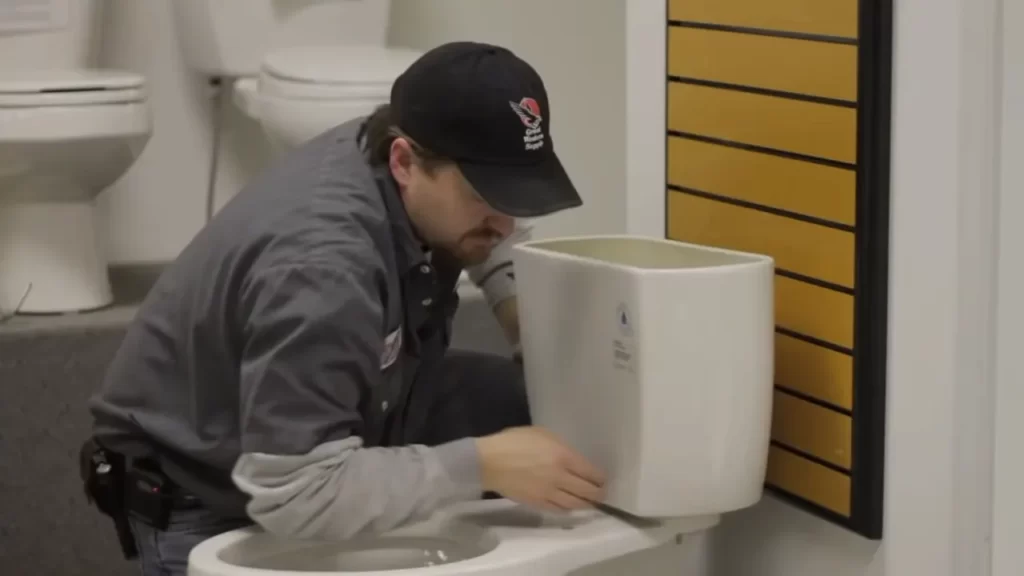
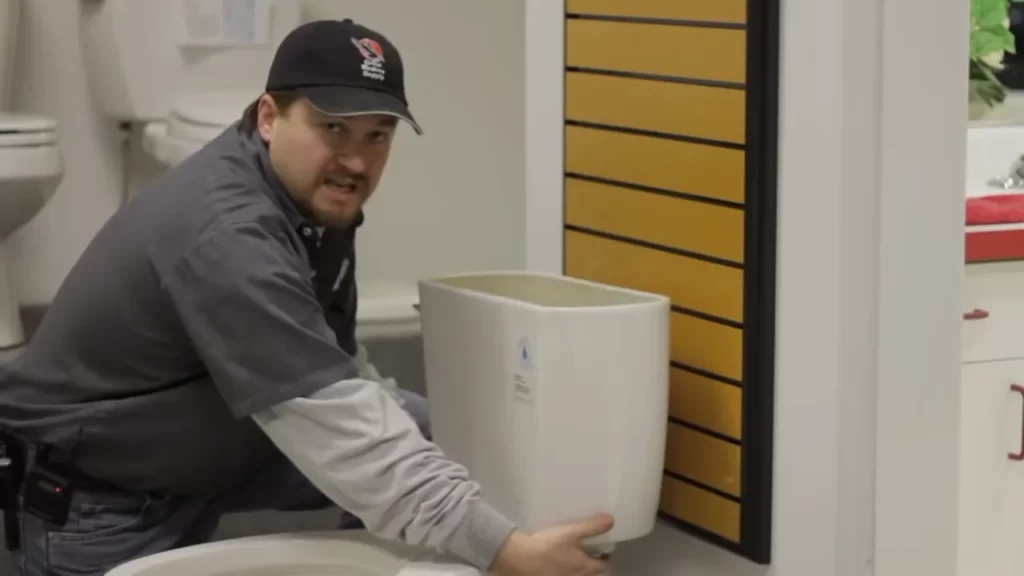
Placing the tank onto the bowl
The first step in installing the new toilet tank is to carefully place it onto the bowl. Ensure that the tank’s mounting holes align with the corresponding holes on the bowl. This alignment is crucial for a secure and leak-free installation.
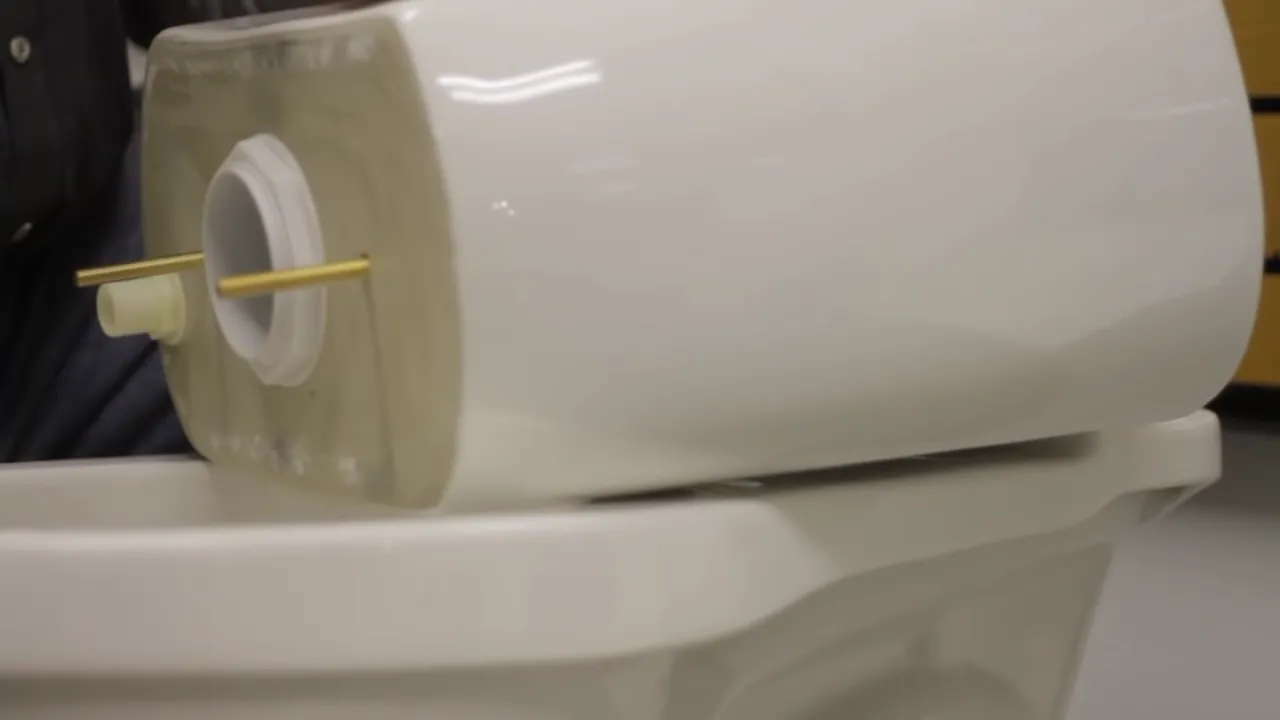
Attaching the tank bolts and gaskets
After placing the tank onto the bowl, the next step is to attach the tank bolts and gaskets. These bolts not only secure the tank onto the bowl but also create a watertight seal. Place the rubber gaskets onto the tank bolts and then insert them into the mounting holes on the bowl. Tighten the bolts with a wrench, ensuring they are snug but not overly tightened to avoid cracks or damage to the tank.
Connecting the water supply line
Once the tank is securely attached to the bowl, it’s time to connect the water supply line. Locate the fill valve on the bottom of the tank and connect one end of the supply line to it. The other end of the supply line should be connected to the water valve coming out of the wall. Use an adjustable wrench to tighten the connections, ensuring there are no leaks.
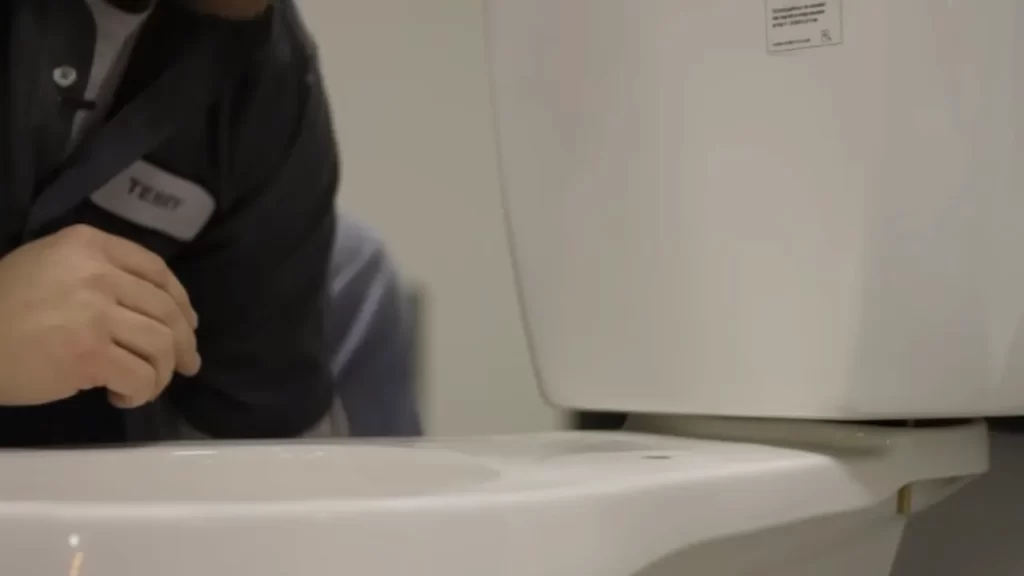
Adjusting the tank level and securing it
After connecting the water supply line, it’s essential to adjust the tank’s level and secure it properly. Use a level to ensure that the tank is perfectly horizontal. If it is not level, it can cause problems with the flush mechanism or lead to leaks. Adjust the tank’s position by loosening or tightening the tank bolts as needed. Once the tank is level, tighten the bolts firmly to secure it in place.
By following these steps, you can successfully install a new toilet tank. Remember to take your time and pay attention to detail for a smooth and reliable installation.
Testing And Finishing Up
Turning on the water supply
After successfully installing the toilet tank, the next step is to turn on the water supply. Before doing so, it is crucial to ensure that all the connections are properly tightened and secured. This will help prevent any leaks or water damage in the future. Once you have double-checked everything, carefully open the water supply valve by turning it counterclockwise. Gradually increase the water flow to avoid any sudden pressure surges that could damage the newly installed fixtures.
Checking for leaks
Once the water supply is turned on, it is essential to check for leaks. Carefully observe the area around the toilet tank, specifically the connections, joints, and supply line. Look for any signs of water dripping or pooling. Additionally, it is important to listen for any unusual sounds such as hissing or gurgling, as these could indicate a leak. If you notice any leaks or suspect a problem, promptly turn off the water supply and carefully inspect the connections for any loose or faulty parts.
Completing the installation and cleaning up
After ensuring that there are no leaks present, you can now complete the installation process. Tighten any loose connections if necessary and make sure all the fixtures are secure. It is also recommended to insulate the water supply line to prevent condensation and potential damage to surrounding materials. Once the installation is complete, it is important to clean up any mess or debris to maintain a tidy and organized bathroom space.
To effectively clean up, use a mild cleaning solution and a soft cloth to wipe down the toilet tank and surrounding areas. Remember to avoid using abrasive cleaners or scrub brushes that could potentially damage the surfaces. In addition to cleaning, it is also a good idea to check for any lingering odors and address them if necessary. This can be done using odor-neutralizing products or natural remedies such as vinegar or baking soda.
Installing a toilet tank may seem like a daunting task, but by following these steps and properly testing and finishing up the installation, you can ensure a successful and leak-free result. Remember to take your time and pay attention to details, as a well-installed toilet tank can provide years of reliable use and comfort.
Troubleshooting Tips
Dealing with common issues during installation
If you’re experiencing any hiccups during the installation process, don’t panic! It’s not uncommon to encounter a few obstacles along the way. Here are some common issues that you may encounter while installing a toilet tank, along with their solutions:
Solutions for leaks or other problems
Leaky toilet tanks can be a real nuisance. Fortunately, there are some simple solutions you can try if you notice any leaks or other problems:
- Check the connections: Start by inspecting all the connections between the tank and the bowl. Ensure that the bolts and nuts are tight and properly aligned. If you find any loose connections, simply tighten them using a wrench.
- Replace the rubber gasket: The rubber gasket is an essential component that seals the connection between the tank and the bowl. Over time, this gasket can wear out or become damaged, resulting in leaks. If you notice water seeping from this area, it’s time to replace the gasket. Simply remove the old gasket and install a new one in its place. This should effectively resolve any leaks.
- Use plumber’s tape: Sometimes, leaks can occur due to improper sealing between the tank and the water supply line. To fix this issue, apply plumber’s tape to the threaded connections. This tape helps create a tighter seal, preventing water from leaking out.
If you’re still experiencing leaks or other problems despite trying these solutions, it might be best to consult a professional plumber. They will have the expertise and knowledge to tackle more complex issues and ensure that your toilet tank is properly installed without any further problems.
Maintenance And Care
Proper maintenance and care are essential for ensuring the longevity and efficient operation of your toilet tank. By following a few simple practices, you can keep your tank in top shape and avoid any potential plumbing headaches. In this section, we will discuss regular maintenance practices for the toilet tank and provide tips for extending its lifespan.
Regular maintenance practices for the toilet tank
- Regularly check for leaks: Perform visual inspections around the base of the tank and listen for any unusual sounds. Leaks can lead to water damage and higher water bills if left untreated. Fix any leaks promptly to prevent further issues.
- Clean the tank regularly: Remove any mineral deposits or grime that may accumulate in the tank over time. Use non-abrasive cleaners and a soft brush to gently scrub the surfaces, ensuring that all parts are thoroughly cleaned. Make sure to turn off the water supply before cleaning.
- Inspect and replace faulty parts: Over time, certain components of the toilet tank, such as flappers and fill valves, may wear out and require replacement. Inspect these parts regularly and replace them as needed to maintain proper functioning.
- Adjust water level: Ensure that the water level in the tank is set to the recommended level. Too high or too low water levels can affect the toilet’s flushing efficiency. Adjust the float mechanism or valve to achieve the correct water level.
- Prevent clogging: To avoid clogs in the tank and associated plumbing, it is important to remember not to flush excessive toilet paper, sanitary products, or other non-flushable items. Educate household members about proper disposal practices to prevent blockages.
Tips for extending the lifespan of the tank
To prolong the lifespan of your toilet tank and maximize its efficiency, consider the following tips:
- Install a water softener: Hard water can contribute to mineral buildup in the tank and other plumbing fixtures. Installing a water softener can help prevent this issue and reduce the need for frequent cleaning.
- Use eco-friendly toilet cleaners: Harsh chemical cleaners can damage the tank components and cause corrosion. Opt for eco-friendly products or natural cleaning solutions to maintain a healthy and long-lasting tank.
- Regularly inspect the flush valve: The flush valve is a crucial component that triggers the flushing action. Over time, it may become worn or damaged. Inspect it periodically and replace it when necessary to avoid any disruptions in flushing performance.
- Provide proper ventilation: Ensure that the bathroom has adequate ventilation to minimize moisture buildup. Excessive moisture can promote the growth of mold and mildew, leading to potential damage to the tank and its surrounding areas.
- Avoid placing excessive weight on the tank lid: The lid of the toilet tank is designed to support its own weight. Placing heavy objects on top of it can cause damage and lead to cracks or leaks. Encourage family members to avoid using the tank lid for additional storage.
By following these regular maintenance practices and implementing tips to extend the lifespan of your toilet tank, you can ensure its optimal performance and avoid any costly repairs in the future. Remember, a well-maintained toilet tank not only saves you money but also contributes to a more sustainable environment.
Frequently Asked Questions
How Do You Install A Toilet Tank?
To install a toilet tank, follow these steps: 1. Turn off water supply to existing tank. 2. Disconnect supply line from fill valve. 3. Remove old tank by unscrewing bolts. 4. Position new tank on bowl and secure with bolts.
5. Attach supply line and turn on water. Done!
Can You Replace A Toilet Tank Yourself?
Yes, you can replace a toilet tank yourself. Make sure to follow proper instructions and safety precautions.
Do All Toilet Tanks Fit All Toilets?
Not all toilet tanks are universal; they do not fit all toilets. It is important to check the specifications and measurements of the toilet tank to ensure proper fitment for your particular toilet.
How Much Does It Cost To Install A Toilet Tank?
The cost of installing a toilet tank can vary depending on factors like location and the complexity of the installation. On average, homeowners can expect to pay around $150 to $200 for professional installation.
Conclusion
Installing a toilet tank may seem like a daunting task, but with the right guidance, it becomes a simple DIY endeavor. By following these step-by-step instructions, you’ll have your new toilet tank up and running in no time. Remember to gather all the necessary tools and materials beforehand, and take your time to ensure a proper and secure installation.
With these tips in mind, you’ll be able to confidently install a toilet tank and enjoy a fully functioning bathroom. So, get ready to tackle this project and make your bathroom more efficient and stylish!