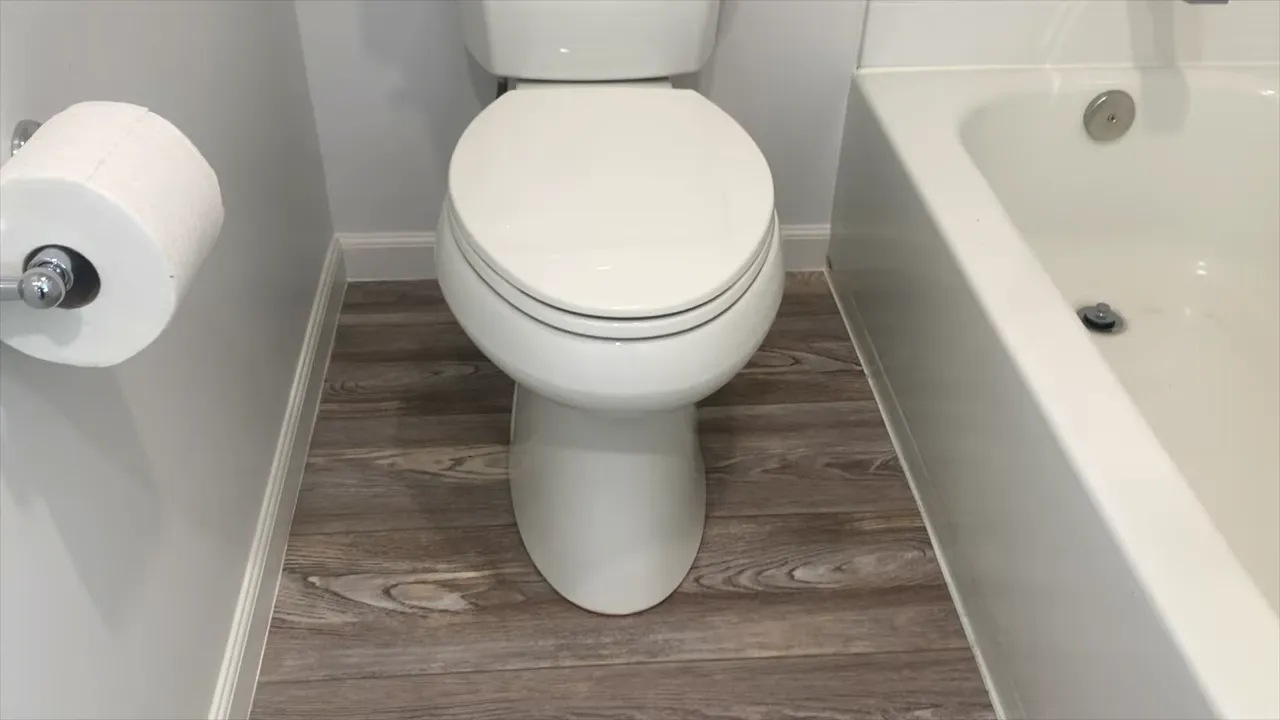
To install a toilet in the basement, start by locating the main sewer pipe and the nearest water supply line.
Choosing The Right Spot And Preparing The Area
When it comes to installing a toilet in the basement, choosing the right spot and preparing the area is crucial for a successful installation. This process involves assessing the basement layout, identifying the best location for the toilet, checking plumbing and drainage feasibility, clearing the area, and ensuring proper ventilation. In this article, we will guide you through each step in detail to help you complete this task effectively.
Assessing the Basement Layout and Identifying the Best Location for the Toilet
To start with, it’s important to assess the layout of your basement to determine the most suitable location for your toilet. Consider factors such as proximity to the existing plumbing lines and the structural integrity of the floor. Identify a spot that allows for easy access and sufficient space for toilet installation.
Checking Plumbing and Drainage Feasibility in the Chosen Spot
Once you’ve identified a potential location for the toilet, it’s time to check the plumbing and drainage feasibility. Ensure that the chosen spot is close to existing plumbing lines, as this will simplify the installation process. Examine the nearby drainpipes to determine if they can accommodate the additional wastewater from the toilet. If necessary, consult a professional plumber to evaluate the feasibility of the selected spot.
Clearing the Area and Ensuring Proper Ventilation
Before proceeding with the installation, clear the area where the toilet will be placed. Remove any obstacles, debris, or other items that may hinder the installation process. Additionally, proper ventilation is crucial in a basement setting to prevent odors and moisture buildup. Ensure there is adequate ventilation in the area by installing a ventilation fan or opening windows to promote air circulation.
In conclusion, choosing the right spot and preparing the area are essential steps in installing a toilet in the basement. By assessing the basement layout, identifying the best location for the toilet, checking plumbing and drainage feasibility, clearing the area, and ensuring proper ventilation, you can lay the foundation for a successful installation. Follow these steps carefully, and soon you’ll have a fully functional toilet in your basement.
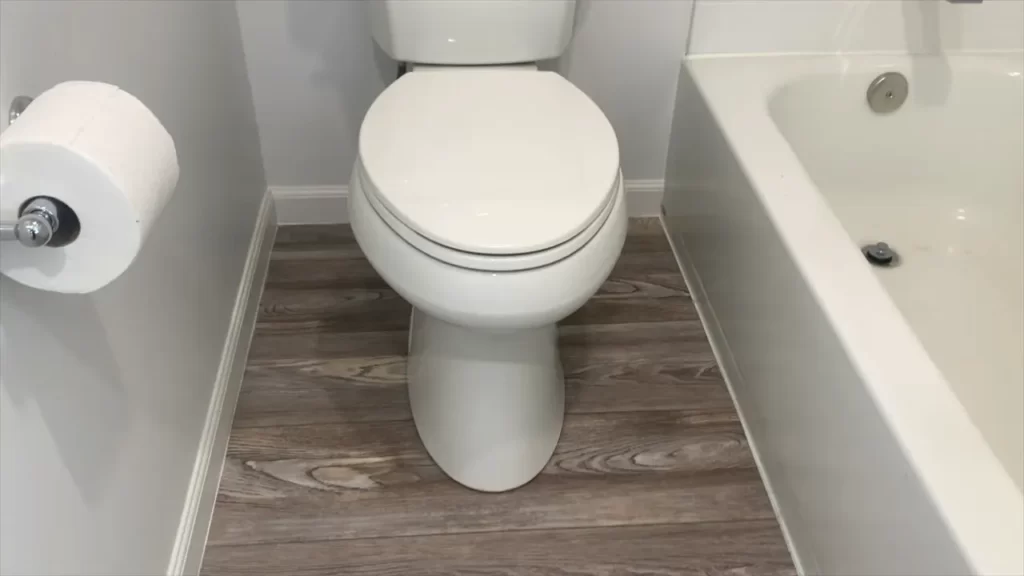
Gathering The Necessary Tools And Materials
Before you can start installing a toilet in your basement, you’ll need to gather the necessary tools and materials. Having everything you need on hand will help streamline the installation process and ensure a successful outcome. In this section, we’ll cover the tools required for the installation process, as well as the essential materials you’ll need, including the toilet, flange, wax ring, and water supply line. We’ll also touch on some additional items for safety and convenience. Let’s dive in!
Tools required for the installation process
Having the right tools is crucial when it comes to installing a toilet in your basement. Below is a list of the tools you’ll need:
| Tool | Purpose |
|---|---|
| Adjustable wrench | To tighten or loosen nuts and bolts |
| Putty knife | To remove old wax ring |
| Tape measure | To ensure proper positioning and measurements |
| Screwdriver | To remove and install screws |
| Plunger | To unclog the toilet if needed |
| Hacksaw | To cut pipes if necessary |
Essential materials including the toilet, flange, wax ring, and water supply line
The installation process requires certain essential materials to ensure a proper fit and functioning toilet. Here are the materials you’ll need:
- Toilet: Choose a toilet that fits your basement space and meets your preferences in terms of style and functionality.
- Flange: This connects the toilet to the drainage pipe and provides a secure seal.
- Wax ring: The wax ring creates a watertight seal between the toilet and the flange to prevent leaks.
- Water supply line: This connects the toilet to the water source and delivers water for flushing.
Additional items for safety and convenience
In addition to the tools and essential materials, there are a few extra items that can make the installation process easier and ensure your safety:
- Gloves: Protect your hands from dirt, grime, and sharp edges.
- Goggles: Safeguard your eyes from any debris or particles that may be released during the installation.
- Pipe dope or Teflon tape: Use these to create a watertight seal on threaded connections.
- Caulk: Seal the base of the toilet to the floor to prevent water damage.
By gathering all the necessary tools and materials, you’ll be well-prepared for the toilet installation process in your basement. In the next section, we’ll walk you through the step-by-step instructions on how to install the toilet.
Removing The Old Floor And Installing The Flange
When it comes to installing a toilet in the basement, one of the crucial steps is removing the old floor and installing the flange. This process ensures that your toilet is securely fastened to the floor, preventing any leaks or instability. In this section, we will guide you through each step, from removing the existing flooring to evaluating the condition of the existing flange, and finally, installing a new flange suitable for basement installations.
Removing the existing flooring in the selected area
The first step in this process is to remove the existing flooring in the area where you plan to install the toilet. This allows you to have a clean and level surface to work with when installing the flange. Follow the steps below to remove the old flooring:
- Start by clearing the area of any obstacles or furniture that may hinder your work.
- Use a pry bar or a crowbar to gently pry up the edges of the flooring, starting from a corner.
- Gradually work your way across the room, removing the flooring in small sections. Be careful not to damage the subfloor underneath.
- If you encounter any stubborn or glued-down flooring, you may need to use a heat gun or adhesive remover to loosen it before prying it up.
- Once all the flooring is removed, use a broom or a vacuum cleaner to clean up any debris or dust.
Evaluating the condition of the existing flange
After removing the flooring, it is essential to evaluate the condition of the existing flange. The flange is the piece that connects the toilet to the sewer line and keeps it secure in place. Follow these steps to evaluate the flange:
- Inspect the flange for any cracks, damages, or signs of wear. Pay close attention to the area around the bolt holes.
- Check if the flange is securely attached to the floor. If it feels loose or wobbles, it may need to be replaced.
- Ensure that the flange is level with the surface of the floor. If it is too low or too high, it can cause leakage or an unstable toilet.
- If the flange is in poor condition or not suitable for basement installations, it is recommended to replace it with a new flange.
Installing a new flange suitable for basement installations
If you have determined that the existing flange needs to be replaced or it is not suitable for basement installations, follow these steps to install a new flange:
- Measure the diameter of the existing drainpipe to ensure you purchase a flange that fits correctly.
- Choose a suitable type of flange for basement installations, such as a PVC flange or a stainless steel flange.
- Prepare the surface by cleaning any debris or old wax remnants from the previous flange.
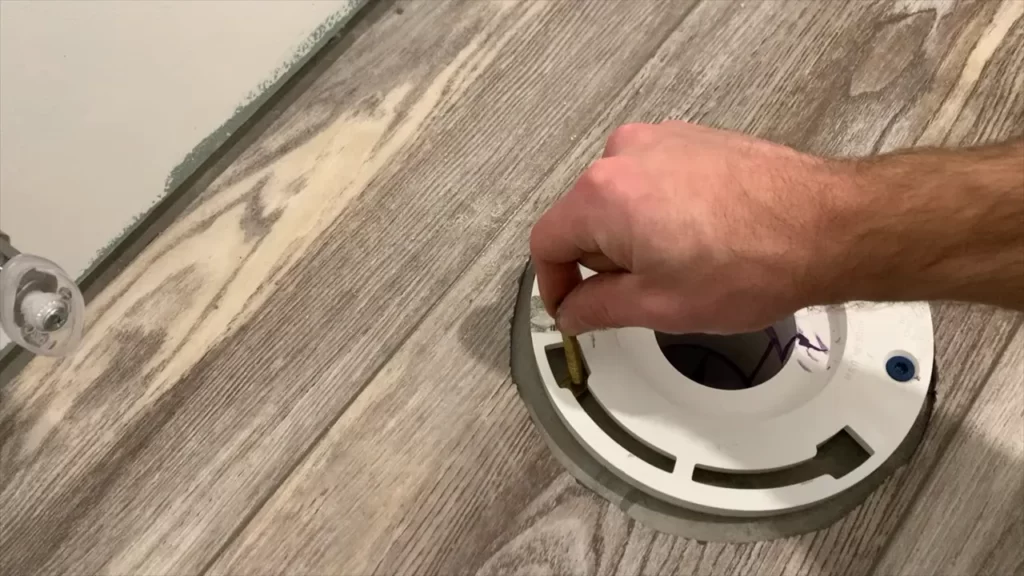
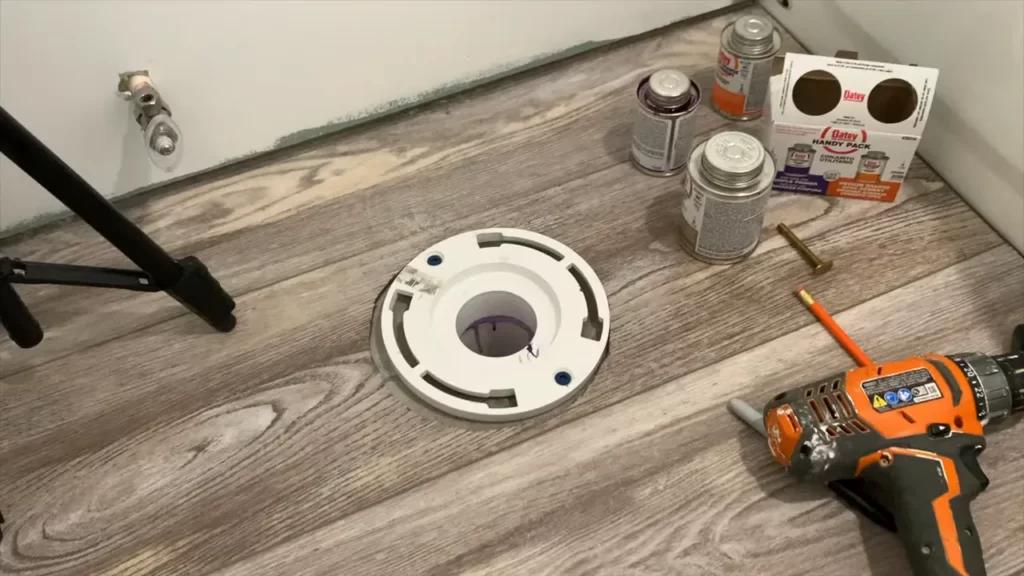
- Position the new flange over the drainpipe, aligning the bolt holes with the holes in the surrounding flange area.
- Secure the flange in place by tightening the bolts with a wrench, ensuring it is firmly attached to the floor.
Installing a new flange suitable for basement installations is essential to ensure a proper seal and stability for your toilet. With these steps, you can confidently move forward in the installation process.
Positioning And Securing The Toilet
Properly positioning and securing the toilet in your basement is a crucial step to ensure its functionality and longevity. In this section, we will guide you through the process step-by-step, from placing the wax ring on the flange to securing the toilet to the floor with bolts and nuts.
Placing the wax ring on the flange
The first step in positioning your toilet is to place the wax ring on the flange. The wax ring acts as a seal between the toilet and the waste pipe, preventing any leaks or odors from escaping. To do this, follow these simple steps:
- Start by removing the protective covering from the wax ring.
- Position the wax ring on the flange, ensuring that it is centered and aligned properly.
- Press down on the wax ring firmly to create a tight seal.
Remember, the wax ring should be the right size for your toilet flange to ensure a proper fit.
Positioning the toilet bowl and aligning it correctly
Once the wax ring is in place, it’s time to position the toilet bowl. Proper positioning and alignment are crucial for a comfortable and functional toilet installation. Here’s how you can do it:
- Carefully lift the toilet bowl and lower it onto the wax ring.
- Ensure that the toilet bowl is centered over the flange and aligned correctly with the wall behind it.
- Check that the toilet bowl is level using a spirit level. Adjust as necessary by shimming the base of the toilet.
Take your time during this step to ensure that the toilet bowl is positioned correctly, as any misalignment can lead to leaks or other issues.
Securing the toilet to the floor with bolts and nuts
With the toilet bowl in the right position, it’s time to secure it to the floor using bolts and nuts. This will ensure that the toilet remains stable and doesn’t move or wobble during use. Follow these steps to secure the toilet:
- Insert the bolts into the flange, making sure they align with the holes on the toilet base.
- Tighten the nuts onto the bolts, ensuring that they are secure but not over-tightened to avoid damaging the toilet or flange.
- Gently rock the toilet back and forth to ensure it is securely fastened.
Once the toilet is properly secured, you can attach the toilet tank and connect the water supply for a complete installation.
Remember to double-check all the connections, tighten any loose parts, and follow any additional instructions provided by the manufacturer to ensure a successful toilet installation.
Connecting The Water Supply Line
Now that you have successfully installed the toilet in your basement, it’s time to connect the water supply line to ensure a steady flow of water for flushing and proper functioning of your new fixture. This crucial step requires careful attention to detail and the use of the right tools and techniques. In this section, we will guide you through the process of connecting the water supply line, installing the necessary valve, testing for leaks, and adjusting the water level.
Installing the water supply line and valve
The first step in connecting the water supply line is to choose the right type of supply line for your toilet and basement’s plumbing system. Most commonly, a flexible stainless steel braided supply line is used for its durability and ease of installation. Before you start, ensure that the water supply to the basement is turned off.
Here are the step-by-step instructions to install the water supply line and valve:
- Measure the distance between the water supply outlet on the floor and the fill valve on the toilet tank. This will help you determine the required length of the supply line.
- Cut the supply line to the appropriate length, leaving some extra length for flexibility.
- Attach one end of the supply line to the water supply outlet on the floor, ensuring a tight connection.
- Connect the other end of the supply line to the fill valve on the toilet tank, again making sure the connection is secure.
- Next, install the shut-off valve between the supply line and the water supply outlet. This valve will allow you to easily turn off the water supply to the toilet if needed.
Testing for leaks and adjusting the water level
Once you have installed the water supply line and valve, it’s crucial to test for any leaks before proceeding further. Leaks can lead to water damage and costly repairs, so it’s important to address them promptly. Here’s how you can test for leaks and adjust the water level:
- Slowly turn on the water supply to the toilet and observe for any signs of leakage. Check the connections, supply line, and valve for any drips or water seepage.
- If you notice any leaks, tighten the connections or replace any faulty parts as necessary. Ensure that all connections are secure and watertight.
- After addressing any leaks, fill the toilet tank to its full capacity and let it flush. Observe the water level in the tank and make adjustments if needed.
- Adjust the fill valve to control the water level in the tank. Refer to the manufacturer’s instructions for your specific fill valve model for detailed guidance.
Securing the supply line and ensuring proper water flow
Now that you have successfully connected the water supply line and tested for leaks, it’s crucial to secure the supply line to prevent any accidental disconnections or damage. Here are the final steps to secure the supply line and ensure proper water flow:
- Use adjustable wrenches or pliers to tightly secure the supply line connections. Avoid over-tightening, as this can cause damage.
- Ensure that the supply line is not kinked, twisted, or bent, as this can restrict water flow.
- Finally, turn on the water supply and check for proper water flow and flushing functionality. If everything is working smoothly, congratulations, you have successfully connected the water supply line to your basement toilet!
By following these step-by-step instructions, you can confidently connect the water supply line in your basement and enjoy the convenience of a functional toilet. Remember to always turn off the water supply when working on plumbing projects and take necessary safety precautions.
Fixtures And Finishing Touches
Once you have successfully finished the challenging task of installing the toilet in your basement, it is time to move on to the fixtures and finishing touches. This includes attaching the toilet tank and connecting it to the bowl, testing the flush and checking for any leaks, as well as installing the toilet seat and other optional fixtures.
Attaching the Toilet Tank and Connecting it to the Bowl
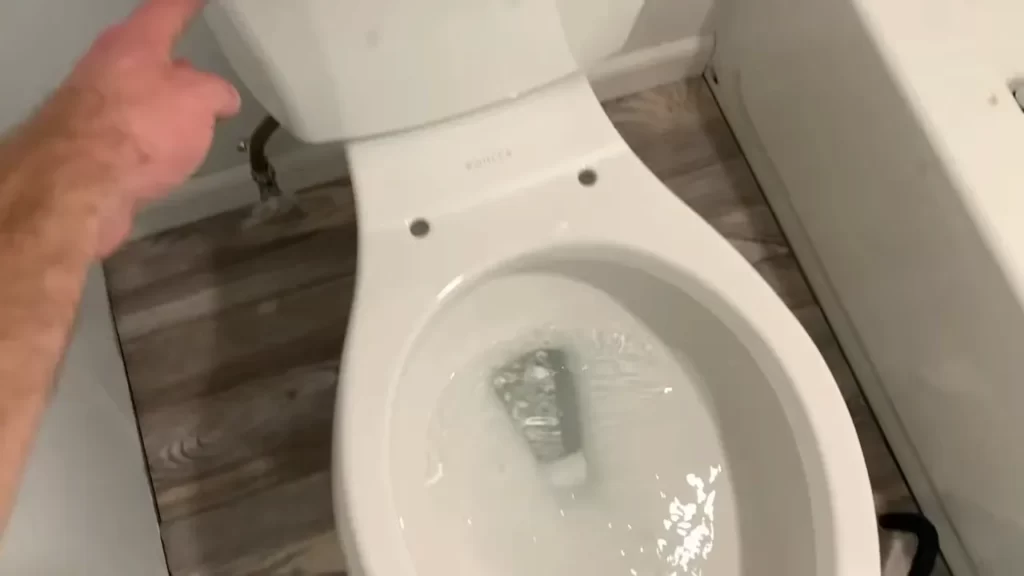
To ensure the proper functioning of the toilet, it is vital to attach the tank securely to the bowl. Begin by placing the rubber gasket onto the inlet hole at the bottom of the tank. Carefully lower the tank onto the bowl, aligning the mounting bolts with the holes in the bowl. Once aligned, firmly tighten the nuts onto the bolts using a wrench or pliers. Be cautious not to over-tighten, as it may lead to cracks in the porcelain.
Next, connect the water supply line to the fill valve located at the bottom of the tank. Ensure it is tightly secured by hand before using pliers to give it an extra quarter turn. Finally, turn on the water supply and carefully check for any leaks at the tank and bowl connection.
Testing the Flush and Checking for any Leaks
Now that the tank is securely attached, it’s time to test the flush and check for potential leaks. Carefully lift the toilet lid and press the handle to flush the toilet. Observe the flush mechanism, ensuring that the flapper opens fully and closes tightly after the flush. Listen for any unusual sounds or signs of water running continuously. If you notice any issues, refer to the manufacturer’s instructions to troubleshoot and resolve the problem.
While the tank is refilling, closely inspect all the connections, such as the fill valve, supply line, and flapper chain. Look for any signs of dripping water or moisture. If you detect a leak, tighten the connection or replace any faulty components accordingly.
Installing the Toilet Seat and Other Optional Fixtures
The final step in completing the installation process is installing the toilet seat and any other optional fixtures you may desire. Begin by placing the seat onto the bowl, aligning it with the mounting holes, and securing it tightly using the provided hardware. Ensure that the seat is aligned straight and leveled for maximum comfort.
Once the seat is installed, you can consider adding additional fixtures such as a bidet attachment or a child-sized seat for added convenience. Follow the manufacturer’s instructions for each fixture to ensure proper installation and functionality.
With the fixtures and finishing touches in place, your basement toilet installation is complete. Take a moment to appreciate your hard work and enjoy the newly added convenience and functionality to your basement space.
Checking For Proper Functionality
Once you have successfully installed a toilet in your basement, it is crucial to test its functionality to ensure that it is working as intended. In this section, we will discuss the steps to test the toilet’s flush and ensure proper drainage, conduct a final inspection for any leaks or issues, and troubleshoot common toilet installation problems.
Testing the toilet’s flush and ensuring proper drainage
After the installation, it is essential to test the toilet’s flush and verify if the drainage system is functioning correctly. Follow these steps:
- Close the toilet’s water supply valve by turning it clockwise.
- Remove the lid of the tank and carefully place it aside.
- Slowly turn the water supply valve counterclockwise to allow water to fill the tank.
- Once the tank is full, press the toilet handle to flush the toilet. Observe if the flush is strong and all the bowl’s contents are properly removed.
- If the flush is weak or inefficient, you may need to adjust the water level in the tank. Consult the manufacturer’s instructions on how to do this.
- Check the toilet’s drainage by pouring a bucket of water into the bowl. It should drain quickly without any blockages or backups. If you notice slow drainage or signs of clogging, it may indicate an issue with the installation or the drain itself.
Conducting a final inspection for any leaks or issues
After testing the toilet’s flush and drainage, it is important to conduct a final inspection to ensure there are no leaks or other issues. Follow these steps:
- Check around the base of the toilet for any signs of water leakage. Look for puddles, dampness, or discoloration on the floor or nearby walls.
- Inspect the connection between the toilet and the floor flange. Ensure that the wax ring or toilet gasket is properly sealed and there are no gaps or cracks.
- Examine the water supply line for any leaks or loose connections.
- Test the toilet again by flushing it multiple times to ensure there are no hidden issues with the flush or drainage.
Troubleshooting common toilet installation problems
If you encounter any problems during the installation or testing process, it is important to troubleshoot and resolve them promptly. Here are some common issues you may come across:
| Problem | Solution |
|---|---|
| The toilet rocks or feels unstable | Check if the toilet is properly secured to the floor. Tighten the bolts connecting the toilet to the floor flange or use shims to stabilize it. |
| Water leaks around the base or connections | Inspect the wax ring or toilet gasket and ensure it is properly sealed. Tighten any loose connections and replace any damaged parts. |
| Weird noises during flushing | This could indicate a problem with the fill valve or flush valve. Check if these components are properly installed and functioning. Consider replacing them if necessary. |
By troubleshooting these common problems, you can ensure that your basement toilet installation is successful and free from any issues.
Cleaning Up And Final Tips
Cleaning Up and Final Tips
Congratulations on successfully installing a toilet in your basement! Now that the hard work is done, it’s important to take a moment to clean up the workspace and implement some final tips for the ongoing maintenance and care of your new basement toilet. Additionally, we’ll touch upon potential future considerations or upgrades that you may want to keep in mind. Let’s get started!
Cleaning up the workspace and disposing of waste materials
Once you have completed the installation of your basement toilet, it’s crucial to clean up the workspace to ensure a tidy and safe environment. Here are some steps to follow:
- Start by removing any excess debris or packaging materials that may have accumulated during the installation process.
- Thoroughly clean the area around the toilet, including the floor and walls. Depending on the type of flooring you have in your basement, you may need to use specific cleaning products or techniques.
- Dispose of any waste materials, such as old pipes or fittings, in accordance with your local regulations. This may involve contacting your local waste management facility or arranging for a pickup service.
- Lastly, organize your tools and equipment in a safe and accessible manner. This will make future maintenance tasks easier and more efficient.
Providing tips for ongoing maintenance and care of the basement toilet
To keep your basement toilet in optimal condition and prevent any issues in the future, consider the following tips for ongoing maintenance:
- Regularly clean the toilet bowl, seat, and surrounding areas using mild cleaning products. Avoid using abrasive cleaners or brushes that can damage the surface.
- Check for any leaks or drips in the plumbing connections. If you notice any signs of leakage, such as water stains or dampness, it’s essential to address the issue promptly to avoid further damage.
- Inspect the flushing mechanism and components regularly. Look for any signs of wear and tear, such as loose handles or weak flushes, and replace any faulty parts as needed.
- Maintain proper ventilation in the basement to prevent excess moisture buildup, which can lead to mold and mildew growth. Consider installing an exhaust fan or dehumidifier if needed.
Highlighting potential future considerations or upgrades
While you may be satisfied with your newly installed basement toilet, it’s worth considering potential future upgrades or considerations that could enhance its functionality or efficiency. Here are a few ideas:
| Consideration/Upgrade | Description |
|---|---|
| Upgrading to a dual-flush toilet | A dual-flush toilet can help conserve water by providing two flushing options – one for liquid waste and another for solid waste. |
| Installing a bidet attachment | A bidet attachment offers hygienic benefits and can eliminate the need for excessive toilet paper usage. |
| Adding a toilet seat heater | A toilet seat heater can provide added comfort, especially during colder months. |
Remember, these upgrades are optional and depend on your personal preferences and budget. Take the time to research and evaluate which options best fit your needs.
In conclusion, ensuring a clean workspace, practicing ongoing maintenance, and considering potential upgrades are essential steps after installing a toilet in your basement. By following these tips and keeping an eye on your basement toilet’s condition, you’ll be able to enjoy its functionality and longevity for years to come.
Frequently Asked Questions
Is It Possible To Install Toilet In Basement?
Yes, it is possible to install a toilet in the basement.
Can You Install A Toilet In A Basement Without Breaking Concrete?
Yes, it is possible to install a toilet in a basement without breaking the concrete. One option is to use a macerating toilet system, which grinds waste and pumps it into existing plumbing lines. This allows for a toilet to be installed in a basement without the need for extensive construction.
Can You Install A Toilet In A Basement Without Rough In?
Yes, it is possible to install a toilet in a basement without a rough-in. However, this will require additional plumbing work and may be more challenging compared to installing a toilet in a pre-existing rough-in location. It is recommended to consult a professional plumber to determine the best approach for your specific basement.
Do Basements Need Special Toilets?
No, basements do not require special toilets. The same toilets used in other parts of the house can be installed in the basement without any issues.
Conclusion
To conclude, installing a toilet in the basement can be a daunting task, but with the right tools and techniques, it can be accomplished successfully. By following the step-by-step instructions outlined in this guide, you can ensure a smooth installation process.
Remember to consider the important factors like plumbing, ventilation, and safety precautions. With careful planning and attention to detail, you’ll have a functional and stylish basement toilet in no time. Happy plumbing!
