
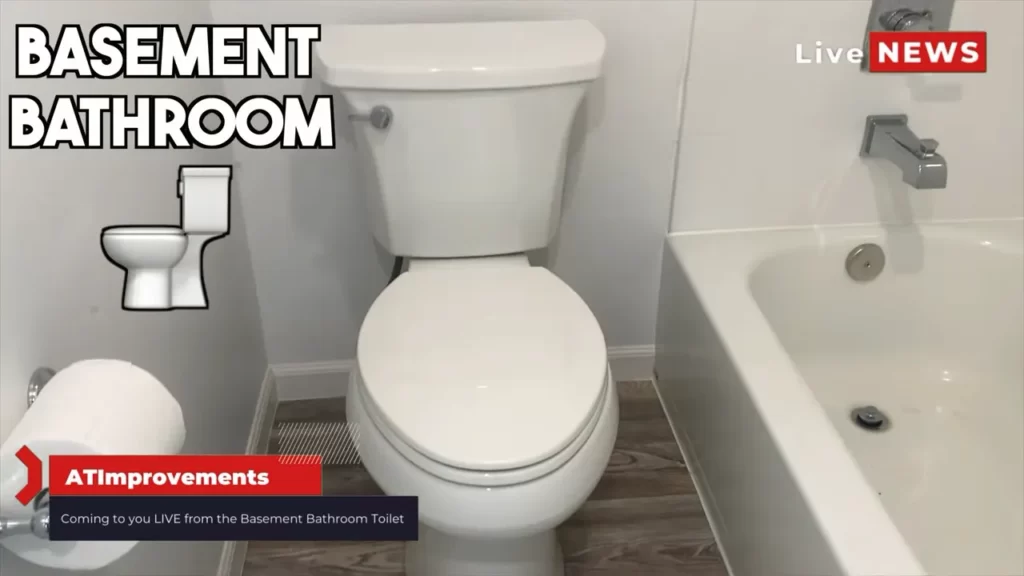
To install a toilet in a basement, first, ensure that the necessary plumbing and drainage connections are in place. Then, set the toilet flange and wax ring on top of a leveled surface and secure it tightly.
Factors To Consider When Selecting A Toilet For Basement
When it comes to installing a toilet in your basement, there are several factors to consider in order to ensure a successful and functional installation. From measuring the space to evaluating the flushing mechanism options, each decision is crucial. In this section, we will discuss three important considerations to keep in mind when selecting a toilet for your basement.
Measuring the Space for Basement Toilet Installation
Before you begin the installation process, it is important to measure the available space in your basement. This will help you determine the size and style of toilet that will fit best. Measure the width, height, and depth of the area where you plan to install the toilet. Take note of any obstructions such as pipes or walls that may impact the placement of the toilet. Having accurate measurements will ensure that you choose a toilet that fits perfectly into your basement.
Considering the Rough-In Measurement
Another crucial factor to consider when selecting a toilet for your basement is the rough-in measurement. The rough-in measurement refers to the distance between the center of the toilet’s flange and the finished wall. It is important to ensure that the toilet you choose matches the rough-in measurement of your basement. Common rough-in measurements include 10 inches, 12 inches, and 14 inches. Choosing a toilet with the correct rough-in measurement will ensure that it aligns properly with your plumbing and prevents leaks or other installation issues.
Evaluating the Flushing Mechanism Options
The flushing mechanism is an important aspect to consider when selecting a toilet for your basement. There are several options available, each with its own benefits and drawbacks. Some common flushing mechanisms include gravity-fed, pressure-assisted, and dual-flush. Gravity-fed toilets are the most common type and rely on the force of gravity to flush waste. Pressure-assisted toilets use compressed air to provide a more powerful flush, making them a great option for basements that may have low water pressure. Dual-flush toilets offer both a partial flush option for liquid waste and a full flush option for solid waste, providing water efficiency. Evaluate the flushing mechanism options carefully to choose the one that best suits your basement’s needs.
In conclusion, when selecting a toilet for your basement installation, measuring the space, considering the rough-in measurement, and evaluating the flushing mechanism options are crucial factors to keep in mind. Taking the time to make informed decisions in these areas will ensure a smooth and successful toilet installation in your basement.
Assessing The Plumbing System In The Basement
Assessing the plumbing system in the basement is an important step when installing a toilet. This will help you determine if the existing drainage connections, ventilation system, and water supply lines are suitable for the installation. By thoroughly evaluating these components, you can ensure a smooth and successful installation process.
Checking for Existing Drainage Connections
One of the crucial aspects to assess is the existing drainage connections in your basement. This includes the presence of a floor drain and any existing plumbing lines. This information will help you determine the appropriate location for the toilet and if you need to make any adjustments to the existing plumbing. To check for existing drainage connections:
- Inspect the floor for any signs of a floor drain. This could be a grated area or a capped pipe sticking out of the floor.
- If you find a floor drain, measure its distance from the intended location of the toilet. Ensure that it’s within the required proximity for proper drainage.
- Check for any existing plumbing lines and ensure they are properly connected and in good condition. Look for any signs of leaks or damage that may need to be addressed before proceeding with the toilet installation.
Evaluating the Ventilation System
An effective ventilation system is essential for a basement toilet to prevent unpleasant odors and maintain air quality. To evaluate the ventilation system:
- Check for an existing bathroom or utility ventilation system in the basement. Look for vents or fans that could be connected to the bathroom area.
- Ensure that the ventilation system is in good working condition and properly connected to the outside. A faulty or insufficient ventilation system may require additional measures to be taken during the toilet installation.
- If there is no existing ventilation system, consider installing one to ensure proper air circulation and odor control. Consult with a professional to determine the best ventilation solution for your basement.
Inspecting the Water Supply Lines
The water supply lines in the basement play a crucial role in the toilet installation. It’s important to inspect these lines to ensure they can provide sufficient water flow and pressure. Consider the following steps:
- Locate the main water supply line in the basement. This is usually found near the water meter or where the line enters the house.
- Check for any signs of leaks or damage along the water supply lines.
- Measure the water pressure using a pressure gauge at various locations in the basement. Ensure the pressure meets the required standards for toilet installation.
- If the water pressure is insufficient or there are any leaks or damage, consult with a professional plumber to address these issues before proceeding with the toilet installation.
By thoroughly assessing the plumbing system in the basement, including checking for existing drainage connections, evaluating the ventilation system, and inspecting the water supply lines, you can ensure a proper and functional toilet installation. Taking the time to evaluate these components will help prevent any potential issues and ensure a smooth installation process.
Creating The Required Bathroom Layout In The Basement
Determining the Ideal Location for Toilet Installation
When it comes to installing a toilet in a basement, determining the ideal location is crucial. You’ll want to consider factors such as convenience, accessibility, and the most efficient use of space. Here are some key points to keep in mind:
- Evaluate the proximity to existing plumbing lines: Before deciding on the location, consider the existing plumbing lines in your basement. The closer your chosen location is to these lines, the easier and less expensive the installation process will be.
- Ensure proper ventilation: Remember that a bathroom requires proper ventilation to prevent the buildup of moisture and odors. Consider locating the toilet near an existing vent or plan for the installation of a new vent system.
- Think about privacy: It’s important to create a private and comfortable space in your basement bathroom. Choose a location that offers seclusion and minimizes noise disruption.
- Consider accessibility: If the basement will be used frequently by elderly family members or individuals with mobility issues, ensure that the toilet location is easily accessible. Avoid stairs or narrow passageways that may pose difficulties.
Planning the Placement of Other Bathroom Fixtures
Once you have determined the ideal location for the toilet installation, it’s time to plan the placement of other bathroom fixtures. This step is crucial to ensure a functional and aesthetically pleasing bathroom layout. Consider the following points:
- Measure the available space: Take accurate measurements of the basement area where the bathroom will be installed. This will help you determine the appropriate size and placement of fixtures.
- Decide on the bathtub or shower location: Depending on the available space and your preferences, determine whether you want a bathtub or a shower in your basement bathroom. Choose a location that allows for comfortable use without compromising other fixtures.
- Allocate space for a sink and vanity: Consider the placement of the sink and vanity. Ensure there is enough space for comfortable use, as well as ample storage for toiletries and towels.
- Think about lighting: Don’t forget to plan for appropriate lighting fixtures in your basement bathroom. Consider natural light sources if possible or plan for overhead and vanity lighting options.
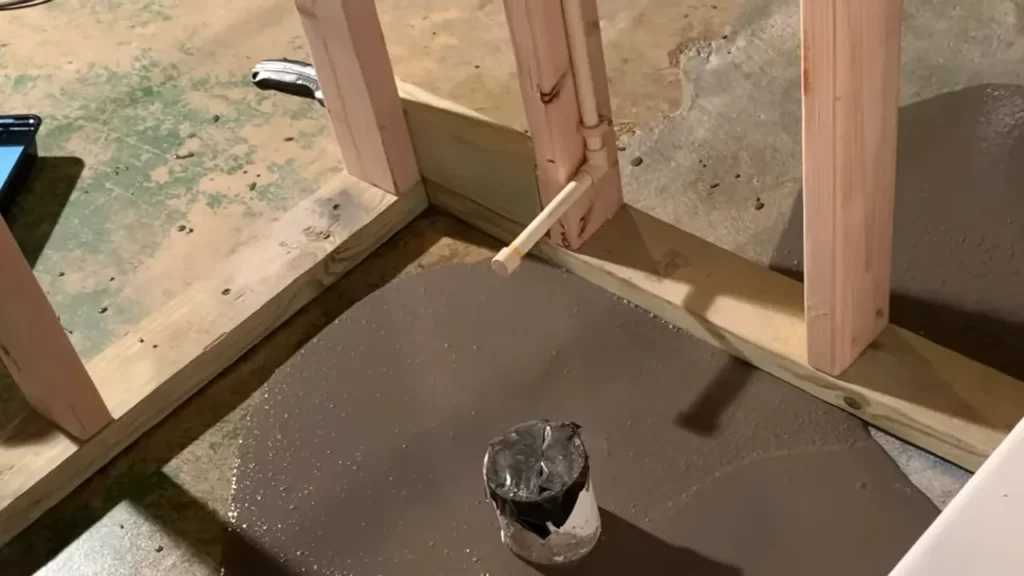
Allocating Space for Plumbing Connections
When installing a toilet in the basement, it’s essential to allocate sufficient space for the plumbing connections. Planning ahead will help you avoid costly modifications or adjustments later on. Here are some key steps to follow:
- Consult a professional plumber: If you are unsure about the specific requirements for plumbing connections, consult a professional plumber. They will be able to provide expert advice and guide you through the process.
- Create a plumbing layout diagram: Sketch out a plumbing layout diagram to visualize the placement of plumbing connections for all fixtures in the basement bathroom. This will help you ensure all necessary connections are considered and planned for.
- Allocate space for the toilet flange: The toilet flange connects the toilet to the plumbing system. Allow enough space for the flange, considering both its dimensions and the necessary clearance for installation.
- Plan for venting: Don’t forget to allocate space for venting pipes to ensure proper ventilation and prevent sewer gases from entering your basement. Consult local building codes for specific requirements.
Essential Tools For Installing A Basement Toilet
When it comes to installing a toilet in your basement, having the right tools is essential to ensure a seamless and successful installation. With the right set of tools, you can save time, avoid unnecessary complications, and make the process a lot easier. Here are the essential tools you will need:
Wrenches and Screwdrivers
Wrenches and screwdrivers are a must-have when it comes to installing a toilet in your basement. These tools will help you tighten connections, assemble parts, and secure the toilet in place. The two types of wrenches you’ll need are:
- An adjustable wrench: This versatile tool will allow you to tighten or loosen nuts and bolts of various sizes.
- A basin wrench: This specialized wrench is designed to reach cramped spaces and tighten the nuts that secure the toilet to the floor.
Complementing the wrenches, screwdrivers will come in handy when it’s time to assemble and install the toilet tank. Depending on the type of screws used in your toilet, you may need a flat-head or a Phillips screwdriver.
Plumber’s Putty
A crucial tool for any plumbing project, plumber’s putty helps create a watertight seal between the toilet base and the floor. This putty is moldable and easy to work with, making it ideal for filling gaps and preventing leaks. Apply it to the underside of the toilet base before placing the toilet onto the flange. Plumber’s putty ensures a snug fit that keeps water from seeping out.
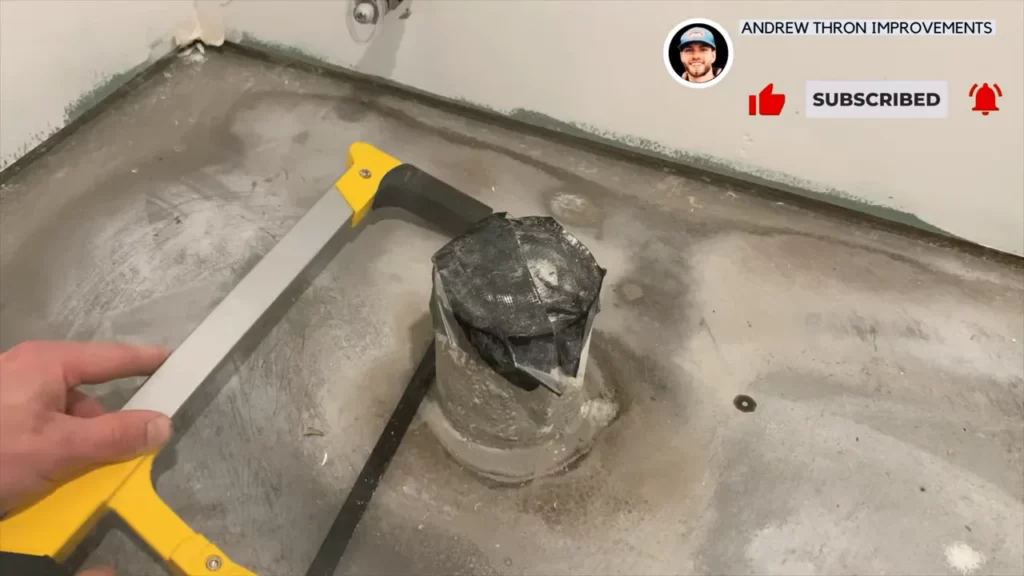
Pipe Cutters
Pipe cutters are an essential tool for any plumbing job, especially when it comes to installing a basement toilet. These tools allow you to cut pipes with precision and ease, ensuring a clean and accurate cut. They are vital for trimming the waste pipe to the required length and creating a seamless connection between the toilet and the sewer system. Pipe cutters come in various sizes, so make sure to choose one that is appropriate for the diameter of your pipes.
Teflon Tape
Teflon tape, also known as plumber’s tape, is a thread sealant that helps create a leak-free connection between threaded pipe fittings. It’s a thin, white tape that is wrapped around the threads of the pipe before connecting them. Teflon tape provides an additional layer of protection against leaks, ensuring a tight seal. Simply wrap the tape clockwise around the pipe threads, making sure to cover all the threads that will be joined together.
Required Materials For Basement Toilet Installation
Installing a toilet in a basement can be a challenging task, but with the right materials and a step-by-step approach, it can be a manageable project. Before you get started, make sure you have all the necessary materials on hand. The following are the essential materials you will need for the installation:
Toilet Bowl and Tank
The first and most crucial material you’ll need for your basement toilet installation is the toilet bowl and tank. Ensure that you choose a toilet that is suitable for a basement installation. Consider factors such as the bowl height, flushing power, and water efficiency to find the best fit for your needs. Make sure to select a toilet that fits within the dimensions of your basement space.
Wax Ring
The wax ring is a critical component that creates a watertight seal between the toilet flange and the drainpipe. It prevents any leaks and odors from escaping into your basement. Ensure you purchase a high-quality wax ring that is specifically designed for sealing toilets. Measure the size of the flange to ensure that you select the right wax ring that fits properly.
Closet Bolts
Closet bolts, also known as toilet flange bolts, are necessary for securing the toilet bowl to the floor. These bolts anchor the toilet securely in place, preventing any wobbling or movement. When purchasing closet bolts, make sure to choose ones that are the correct size and length for your specific toilet model. It’s always a good idea to have a few extra bolts on hand in case any are damaged during installation.
Flexible Water Supply Line
The water supply line connects your toilet’s tank to the water supply. In a basement installation, a flexible water supply line is the most convenient option. These lines can be easily maneuvered to fit around any obstacles that may be present in a basement environment. Ensure that the water supply line you choose matches the size and type of the water valve in your basement.
With these essential materials in hand, you’ll be well-equipped to begin the process of installing a toilet in your basement. Taking the time to gather the necessary supplies beforehand can help ensure a smooth and successful installation process.
Removing The Old Toilet If Applicable
Draining and Removing the Water from the Old Toilet
If you are installing a new toilet in your basement, one of the first steps you’ll need to take is to remove the old toilet if applicable. Before you can lift the old toilet off the floor, it’s important to drain the water and remove any remaining water in the tank and bowl. This will prevent any water damage or mess during the removal process. Here’s how you can drain and remove the water from the old toilet:
- Start by turning off the water supply valve located behind the toilet. This valve controls the flow of water to the toilet tank. Turn it clockwise until it is fully closed. This will stop the water from flowing into the toilet.
- Next, flush the toilet to remove as much water as possible from the tank and bowl. Hold down the handle until all the water is drained out. You may need to use a plunger to help force the water out if the toilet is not flushing properly.
- To remove any remaining water in the tank, use a sponge or towel to soak it up. Wring out the sponge or towel into a bucket to collect the water. Repeat this process until the tank is completely empty.
- Once the tank is empty, it’s time to remove the water from the bowl. Use a plunger to force the water out of the bowl and into the drain. Plunge vigorously a few times to ensure all the water is cleared.
By draining and removing the water from the old toilet, you’ll make the removal process much easier and cleaner. It’s important to ensure that the old toilet is completely dry before proceeding with the next steps.
Disconnecting the Water Supply Line and Removing the Closet Bolts
Once the water has been drained from the old toilet, the next step is to disconnect the water supply line and remove the closet bolts. These steps are necessary to detach the toilet from the floor and prepare it for removal. Here’s how you can disconnect the water supply line and remove the closet bolts:
- Locate the water supply line connected to the bottom of the toilet tank. Use an adjustable wrench to loosen the nut connecting the water supply line to the toilet tank. Once the nut is loose, use your hand to unscrew it fully. Place a bucket or towel underneath to catch any water that may drip out.
- With the water supply line disconnected, the next step is to remove the closet bolts that secure the toilet to the floor. These bolts are typically covered by plastic caps on either side of the toilet base. Pry off the caps using a flathead screwdriver or a putty knife.
- Once the caps are removed, use a wrench or pliers to loosen and remove the nuts securing the closet bolts. Be careful not to apply too much force, as this may damage the toilet or the floor. Once the nuts are fully removed, you should be able to lift the toilet off the floor.
By following these steps to disconnect the water supply line and remove the closet bolts, you’ll be one step closer to successfully removing the old toilet in your basement. Properly removing the old toilet is essential for a smooth installation process of your new toilet.
Preparing And Mounting The Toilet
Placing the Wax Ring on the Flange
Before installing a toilet in your basement, it’s crucial to ensure that the plumbing connections are properly sealed and secure. This starts with placing the wax ring on the flange. The wax ring acts as a watertight seal between the toilet and the floor, preventing leaks and odors from seeping out.
To place the wax ring, follow these steps:
- Remove the toilet bolts caps and set them aside for later.
- Position the wax ring on the flange with the tapered side facing up.
- Make sure the wax ring is centered on the flange and that it sits firmly.
- Press down on the wax ring with a slight twisting motion to ensure it adheres to the flange.
Once you have successfully placed the wax ring on the flange, you can move on to the next step.
Attaching the Closet Bolts to the Flange
The closet bolts are essential for securing the toilet to the flange. These bolts will hold the toilet in place and prevent it from wobbling or shifting over time.
Follow these steps to attach the closet bolts:
- Remove the plastic covering on the flange bolt slots, if present.
- Insert the bolts into the flange bolt slots.
- Tighten the bolts using a wrench, ensuring they are secure and in a vertical position.
Once the closet bolts are securely attached to the flange, you can proceed to the final step of preparing and mounting the toilet.
Placing and Securing the Toilet Bowl on the Wax Ring
The last step in preparing and mounting the toilet is to place the toilet bowl on the wax ring and secure it in place. This ensures a stable and leak-free connection between the toilet and the plumbing system.
To place and secure the toilet bowl, follow these steps:
- Position the toilet bowl over the wax ring, aligning it with the closet bolts.
- Press down firmly on the toilet bowl to compress the wax ring and create a tight seal.
- Ensure that the toilet bowl is level and straight.
- Place the plastic washers and nuts onto the closet bolts and tighten them using a wrench. Be careful not to overtighten, as this can crack the toilet bowl.
Once the toilet bowl is securely fastened to the flange, you can proceed with connecting the water supply line and completing the installation process.
Connecting The Water Supply
Once the toilet is securely in place and the drain pipe is connected, the next step is to connect the water supply. This is an essential part of the installation process, as it ensures that water can flow into the tank and be used for flushing. In this section, we will guide you through two important steps: attaching the flexible water supply line to the toilet tank and connecting the water supply line to the shut-off valve.
Attaching the Flexible Water Supply Line to the Toilet Tank
The first step in connecting the water supply is to attach the flexible water supply line to the toilet tank. The flexible water supply line is a durable and flexible tube that connects the water supply to the toilet tank. It comes in various lengths, so make sure to choose one that can reach from the shut-off valve to the toilet tank.
To attach the flexible water supply line to the toilet tank, follow these simple steps:
- Locate the water supply inlet on the bottom of the toilet tank. This is typically a threaded connection.
- Insert the threaded end of the flexible water supply line into the water supply inlet.
- Tighten the connection by turning the nut clockwise. Use a wrench to ensure a secure fit, but be careful not to overtighten, as it could damage the threads.
Once the flexible water supply line is securely attached to the toilet tank, you can move on to the next step: connecting the water supply line to the shut-off valve.
Connecting the Water Supply Line to the Shut-off Valve
Now that the flexible water supply line is attached to the toilet tank, it’s time to connect it to the shut-off valve. The shut-off valve is typically located on the wall behind the toilet or in the basement.
To connect the water supply line to the shut-off valve, follow these steps:
- Locate the shut-off valve. It is usually a small wheel or lever that can be turned to stop or allow the water flow.
- Turn off the water supply by turning the shut-off valve clockwise.
- Insert the threaded end of the flexible water supply line into the shut-off valve.
- Tighten the connection by turning the nut clockwise. Again, be cautious not to overtighten.
- Once the connection is secure, turn on the water supply by turning the shut-off valve counterclockwise. Check for any leaks around the connections and make sure the water flows into the toilet tank.
By following these steps, you can easily connect the water supply to your newly installed toilet in the basement. It’s important to double-check all the connections to ensure a leak-free installation. Now that you’ve completed this crucial step, you’re one step closer to enjoying a functional and convenient toilet in your basement!
Testing The Toilet Installation
Checking for Leaks
Once the toilet installation in your basement is complete, it’s crucial to test it thoroughly for any potential leaks. This step ensures that you catch any issues before they become a bigger problem. Here’s how you can check for leaks:
- Inspect the base of the toilet: Start by visually examining the area around the base of the toilet. Look for any signs of water pooling or wet spots.
- Check the supply line connection: Inspect the supply line connection at the bottom of the tank. Ensure it is tightly secured and there are no leaks.
- Flush the toilet: Flush the toilet and pay close attention to any water escaping from the base, or if you notice any water on the floor around the toilet.
- Use food coloring: Another effective technique is to add a few drops of food coloring into the tank. Wait for about 15 minutes without flushing, then check the bowl and the area around the base. If you notice any colored water, it indicates a leak.
- Inspect the wax ring: Lift the toilet slightly to inspect the wax ring. It should be evenly compressed and free of any gaps.
By thoroughly checking for leaks, you can prevent potential water damage and ensure a long-lasting toilet installation in your basement.
Flushing and Ensuring Proper Functioning
Once you have confirmed that there are no leaks, the next step is to test the flushing mechanism and ensure that the toilet is functioning properly. Here’s what you need to do:
- Flush multiple times: Flush the toilet multiple times to observe if it flushes smoothly and effectively. Pay attention to the water level in the bowl, making sure it reaches the desired level and then returns to its normal level.
- Check for clogs: Ensure that the toilet does not experience any clogs by flushing toilet paper or other flushable items. Observe if the water drains properly and the toilet does not back up.
- Listen for unusual sounds: While flushing, be attentive to any unusual sounds such as gurgling or hissing. These might indicate a problem with the water flow or the flushing mechanism.
Proper functioning is essential for a toilet in a basement, as it often experiences a higher amount of usage compared to other areas of the house. By testing the flushing and ensuring its proper functioning, you can ensure optimal performance.
Adjusting the Flapper and Water Level as Needed
After confirming the proper functioning of the toilet, you might need to make some adjustments for optimal performance. Here are the steps to follow:
- Checking the flapper: Lift the toilet tank lid and inspect the flapper. It should create a complete seal when the toilet is not in use. If there is any leakage, adjust or replace the flapper as necessary.
- Adjusting the water level: To ensure the right amount of water in the tank, locate the water level adjustment screw or knob. Turn it clockwise to raise the water level or counterclockwise to lower it. The water level should be adjusted to the marked level inside the tank.
- Test the adjustments: After making adjustments, flush the toilet and observe if everything is functioning correctly. Monitor for any leaks or irregularities.
By adjusting the flapper and the water level as needed, you can optimize the efficiency and performance of your basement toilet installation.
Frequently Asked Questions
Can A Toilet Be Installed In A Basement?
Yes, a toilet can be installed in a basement. It’s common to have bathrooms in basements for convenience. With proper plumbing and installation, toilets can function effectively in basements like any other part of the house.
Can You Install A Toilet In A Basement Without Breaking Concrete?
Yes, it is possible to install a toilet in a basement without breaking the concrete. You can use a macerating toilet system that grinds waste before pumping it to a drain line, eliminating the need for major construction.
Can You Install A Toilet In A Basement Without Rough In?
Yes, you can install a toilet in a basement without a rough-in. However, the process can be complex and may require hiring a professional plumber to ensure proper installation and connection to the existing plumbing system.
Can You Install A Toilet Where There Is No Plumbing?
Yes, you can install a toilet where there is no plumbing. However, you would need to have a plumbing system in place for the toilet to work properly and safely. Without proper plumbing, the toilet would not be able to flush waste away.
Conclusion
To wrap it up, installing a toilet in a basement is a manageable task if you follow these step-by-step instructions. By carefully considering the necessary tools, measuring the rough-in distance, and properly connecting the plumbing, you can ensure a successful installation.
Remember to always consult local building codes and regulations. With a little patience and attention to detail, you can have a functional and convenient bathroom in your basement in no time. Happy DIY-ing!