
To install a toilet flange on a wood floor, follow these steps: attach the flange to the floor using screws, make sure it is level, and then connect the flange to the toilet drain pipe with a wax ring. Once the flange is securely installed, you can proceed with installing the toilet.
Choosing A Toilet Flange For Wood Floors
When it comes to installing a toilet flange on a wood floor, choosing the right flange is crucial for a secure and durable installation. The toilet flange is an essential component that connects the toilet bowl to the sewer line, ensuring a watertight connection and preventing any leaks or odors.
Different types of toilet flanges suitable for wood floors
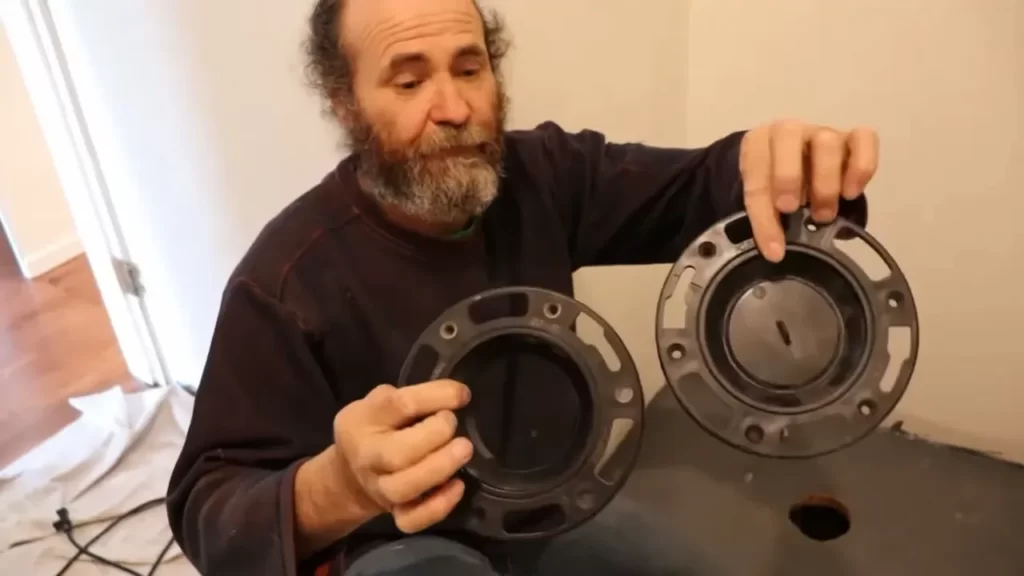
There are a few different types of toilet flanges available, each designed for specific flooring materials and installation scenarios. When it comes to wood floors, there are two main options to consider:
- Offset flange: This type of flange is designed for situations where the toilet drain pipe is not perfectly aligned with the hole in the floor. It allows for a slight offset to accommodate any misalignment, ensuring a proper fit. Offset flanges are commonly used in older homes where the plumbing may not be perfectly aligned with the floor.
- Toilet flange spacer: A toilet flange spacer is a versatile option that can be used for both wood and other types of flooring. It is essentially a plastic or metal ring that fits onto the existing flange, raising the flange’s height to match the level of the floor. This is especially useful when the wood floor is thicker than the original flange, preventing any gaps or instability.
Factors to consider when selecting a flange
When selecting a toilet flange for a wood floor, there are several factors that you should consider:
- Material: Make sure to choose a flange made from durable materials such as PVC or stainless steel. These materials can resist moisture and withstand the weight and pressure of the toilet for years.
- Height adjustment: Check if the flange offers height adjustment options to ensure a proper fit with your wood floor. This is particularly important if you have a thicker floor or if the original flange is not at the correct level.
- Compatibility: Ensure that the flange you choose is compatible with your toilet bowl’s mounting system. Check the specifications of both the flange and the toilet bowl to confirm compatibility.
- Seal quality: Look for a flange with a rubber gasket or wax ring included. This will create a watertight seal between the toilet and the sewer line, preventing any leaks or odors.
Importance of choosing the right flange for a secure installation
Selecting the right toilet flange for your wood floor is crucial for a secure and long-lasting installation. A secure flange ensures that the toilet bowl remains stable and properly aligned, preventing any rocking or movement. It also prevents leaks, which can lead to water damage and costly repairs.
By choosing the right flange, you can have peace of mind knowing that your toilet is securely installed on your wood floor. Taking the time to consider the different flange options and factors mentioned above will ensure a successful installation process and a functional toilet that stands the test of time.
Preparation And Tools Required
Preparation and Tools Required
Before installing a toilet flange on a wood floor, it is important to prepare the area and gather the necessary tools and materials. This ensures a smooth and successful installation process, minimizing the chances of any issues or complications down the line.
Necessary tools and materials for the installation process
Having the right tools and materials handy is essential for a hassle-free installation. Here’s a list of everything you’ll need:
- Measuring tape: To accurately measure and mark the position of the toilet flange.
- Pencil or marker: For marking guidelines on the wood floor.
- Hacksaw or reciprocating saw: If any modifications need to be made to the toilet flange or the existing drain pipe.
- Drill with hole saw: To create a pilot hole and cut a hole in the wood floor for the flange.
- Screwdriver: For securing the flange to the wood floor.
- Wrench: To tighten bolts and ensure a secure connection.
- Plumber’s putty: To create a water-tight seal between the toilet flange and the toilet.
- Flange bolts: To secure the toilet flange to the floor.
- Wax ring: To provide a tight seal between the toilet flange and the toilet.
- Toilet: The final piece of the puzzle, to be installed onto the flange.
Measuring and marking guidelines for accurate positioning
Accurate positioning of the toilet flange is crucial for a well-functioning and leak-free toilet installation. Follow these guidelines for precise measurements and markings:
- Locate the center: Identify the center of the toilet drain line by measuring the distance between the back wall and the center of the hole.
- Transfer measurements to the floor: Use a measuring tape to transfer the center measurement onto the wood floor. Mark the exact spot where the flange should be installed with a pencil or marker.
- Mark the bolt holes: Measure the distance between the bolt holes on the toilet flange and transfer those measurements onto the marked spot on the floor. Make sure the bolt hole positions are aligned with the toilet’s base.
Ensuring the wood floor is properly prepared before installation
Before proceeding with the installation, it is important to ensure that the wood floor is well-prepared to support the toilet flange. Follow these steps for a sturdy and stable installation:
- Clear the area: Remove any debris or obstructions from around the installation site. Clearing the area will give you a clean workspace and make the installation process easier.
- Inspect the wood floor: Check for any signs of damage or decay in the wood floor. Ensure that it is structurally sound and capable of supporting the toilet flange and the weight of the toilet.
- Reinforce weak areas: If there are any weak or deteriorated sections in the wood floor, reinforce them using additional support materials or by replacing the damaged sections altogether. This will provide a solid foundation for the flange.
- Secure the flange: Use screws or appropriate fasteners to securely attach the flange to the wood floor. Make sure it is level and flush with the floor surface.
Installing The Toilet Flange On Wood Floors
Installing a toilet flange on a wood floor is a crucial step in the bathroom renovation process. The toilet flange is a piece that connects the toilet to the waste pipe, ensuring a proper seal and secure installation. If you have a wood floor, the process may require a few additional steps to ensure stability and prevent any future issues. In this step-by-step guide, we will walk you through the process of installing the toilet flange on your wood floor, ensuring a seamless and durable connection.
Step-by-step guide for installing the flange
Installing a toilet flange on a wood floor requires careful planning and precise execution. Follow this step-by-step guide to ensure a successful installation:
- Begin by measuring the distance between the center of the toilet drain hole and the wall behind it.
- Using these measurements, mark the corresponding location on your wood floor where the flange will be installed.
- Next, use a pencil to outline the shape and size of the toilet flange on the marked spot.
- Take note of the size of the mounting holes on the flange and mark their positions on the wood floor as well.
- Now, carefully drill pilot holes on the marked positions to ensure a secure installation of the flange.
Drilling pilot holes for securing the flange
Drilling pilot holes is an essential step in securing the toilet flange to a wood floor. Here’s how to do it:
- Using an appropriate drill bit size, drill pilot holes on the marked positions of the flange.
- Make sure the pilot holes are slightly smaller than the screws or fasteners you will use to secure the flange.
- Be careful not to drill too deep or through the floor. The pilot holes should only penetrate the wood floor to a sufficient depth.
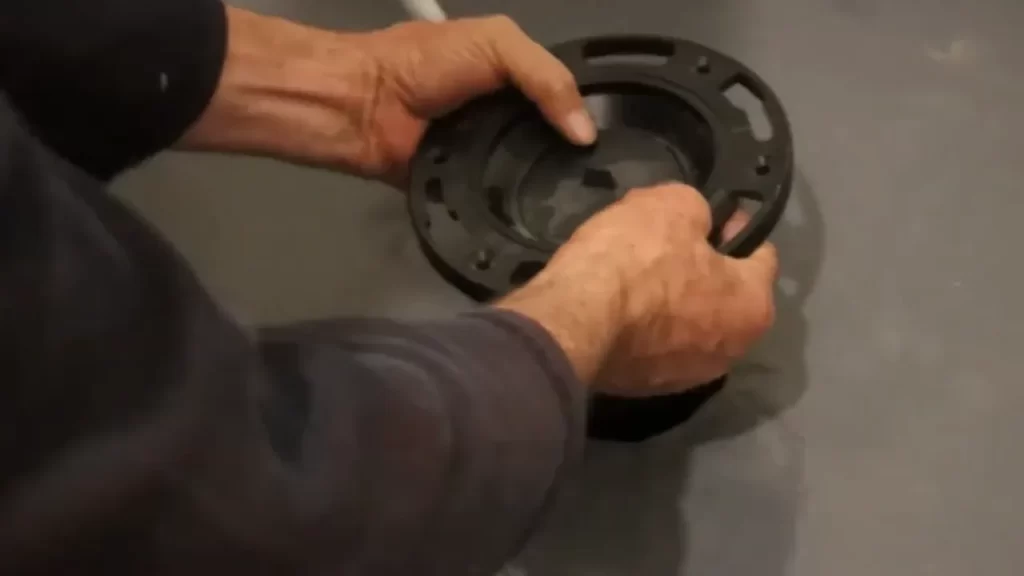
Inserting and aligning the flange on the floor
Once you have drilled the pilot holes, it’s time to insert and align the flange on the wood floor:
- Place the toilet flange over the drilled pilot holes, aligning it with the outlines previously marked on the wood floor.
- Ensure the flange is centered and properly positioned for optimal alignment with the toilet drain.
- Press down firmly on the flange to create an indent on the wood floor, indicating its final position.
Securing the flange with screws or other fasteners
Securing the toilet flange to the wood floor is crucial for stability and preventing leaks. Here’s how to do it:
- Remove the flange and apply a thin layer of adhesive or sealant to the bottom surface.
- Place the flange back over the pilot holes, aligning it with the indents on the wood floor.
- Secure the flange by screwing it into place using the appropriate screws or fasteners.
- Make sure to tighten the screws firmly, but be careful not to overtighten and damage the wood floor.
Testing the stability and evenness of the installed flange
After securing the flange, it’s crucial to test its stability and ensure it sits evenly on the wood floor:
- Apply gentle pressure to different areas of the flange to check for any wobbling or movement.
- If any instability is detected, tighten the screws further to secure the flange in place.
- Check the evenness of the flange using a level. Place the level across the top of the flange to verify that it sits perfectly level with the floor surface.
By following this step-by-step guide, you can successfully install a toilet flange on your wood floor. Ensure that the flange is securely attached and sits level with the floor surface to guarantee a stable and leak-free toilet installation.
Sealing And Waterproofing The Flange
The Importance of Sealing the Flange to Prevent Leaks
Sealing the toilet flange is crucial to prevent any potential leaks that can cause water damage to your wood floor. Without proper sealing, water can seep through gaps or cracks, leading to rotting and weakening of the surrounding wood. Moreover, leaks can foster the growth of mold and mildew, which can pose health risks and create unpleasant odors in your bathroom. By prioritizing the sealing of your flange, you can ensure a watertight connection and maintain the integrity of your wood floor.
Using Appropriate Sealants or Gaskets for a Watertight Connection
When installing a toilet flange on a wood floor, it is important to use the right sealant or gasket to ensure a watertight connection. There are a few options you can consider:
- Wax Gasket: This traditional and reliable option provides a tight seal between the flange and the toilet bowl, preventing any water leakage. It is easy to install and can be found in most hardware stores.
- Rubber Gasket: A rubber gasket offers a more flexible and secure seal. It is resistant to drying out and cracking, ensuring a long-lasting connection that is less prone to leaks.
- Sealant: Using a silicone or plumber’s putty sealant can also provide an additional layer of protection against leaks. Apply the sealant to the bottom of the flange before securing it to the wood floor, ensuring a tight and waterproof bond.
Depending on your preference and the specific requirements of your installation, choose the sealant or gasket that suits your needs best.
Tips for Waterproofing the Area Surrounding the Flange
In addition to sealing the flange itself, it is essential to take steps to waterproof the area surrounding the flange. This will further safeguard your wood floor against any potential water damage. Here are some tips to help you achieve a watertight environment:
- Apply a Waterproof Membrane: Before installing the flange, consider applying a layer of waterproof membrane on the wood floor around the perimeter of the flange area. This will create an extra barrier against any moisture penetration.
- Insulate the Floor: Insulating the area around the flange can provide additional protection against moisture. Use foam insulation or waterproofing tape to seal any gaps or cracks in the wood floor, preventing water from seeping through.
- Regular Maintenance: Finally, make it a habit to regularly inspect the toilet flange and the surrounding area for any signs of leaks or water damage. Address any issues promptly to prevent further damage.
By following these tips and incorporating proper sealing and waterproofing measures, you can ensure a leak-free and long-lasting installation of a toilet flange on your wood floor. Taking these precautions will not only protect your investment but also provide peace of mind knowing your bathroom is well-protected against any potential water damage.
Connecting The Toilet To The Flange
Once you have successfully installed the toilet flange on your wood floor, the next step is to connect the toilet to the flange. This important step ensures a secure and stable installation, as well as a proper seal to prevent any leaks. In this section, we will guide you through the process of attaching the wax ring, aligning and lowering the toilet onto the flange, and securing the toilet to the flange and floor for maximum stability.
Attaching the wax ring to ensure a proper seal
The wax ring is a crucial component that provides a watertight seal between the toilet and the flange. Here’s how to attach it:
- Place the wax ring onto the flange, ensuring that the tapered side is facing up.
- Apply firm pressure to the wax ring to create a secure bond between the toilet and the flange.
- Make sure the wax ring is centered on the flange and doesn’t extend beyond the edges.
Aligning and lowering the toilet onto the flange
Now that the wax ring is in place, it’s time to align and lower the toilet onto the flange. Follow these steps:
- Carefully lift the toilet bowl and align the bolt holes on the base of the toilet with the bolts on the flange.
- Gently lower the toilet onto the flange, making sure the wax ring seals tightly around the flange opening.
- Apply downward pressure on the toilet to compress the wax ring and create a secure seal. Make sure the toilet is level and straight before proceeding to the next step.
Securing the toilet to the flange and floor for stability
To ensure the toilet remains stable and firmly attached to the flange and floor, follow these steps:
- Tighten the nuts onto the bolts that extend from the flange, being careful not to over-tighten and risk damaging the toilet or flange.
- Trim the excess length of the bolts using a hack saw or bolt cutters, leaving enough thread exposed to secure the nuts but not protrude above the toilet base.
- Carefully test the stability of the toilet by gently rocking it back and forth. If it feels loose, tighten the nuts further.
- Apply a bead of silicone caulk around the base of the toilet to create a watertight seal and prevent any potential leaks.
By following these steps, you can ensure a proper and secure connection between the toilet and the flange on your wood floor. This will result in a reliable and leak-free toilet installation that will provide years of use and comfort.
Troubleshooting And Common Issues
In the process of installing a toilet flange on a wood floor, you may come across various common problems that need to be addressed. These issues can range from uneven or unstable flange placement to leaks or odors after installation. Additionally, if you are dealing with damaged or deteriorated wood floors, there are specific steps you can take to ensure a successful installation. In this section, we will explore these common issues and provide guidance on how to troubleshoot them effectively.
Identifying and addressing common problems during installation
During the installation of a toilet flange on a wood floor, it’s not uncommon to encounter certain problems that can hinder the process. Here are some common issues and the steps to address them:
- Flange misalignment: Sometimes, the toilet flange may not align correctly with the drain pipe. This can lead to leaking or an unstable toilet. To address this problem, you can use a flange spacer or an offset flange to achieve proper alignment.
- Inadequate subfloor support: If your wood floor lacks adequate support beneath the toilet flange, it can result in an unstable fixture. Adding additional support by reinforcing the subfloor with wooden shims or plywood can help stabilize the flange.
- Tightening bolts too much: Over-tightening the bolts that secure the toilet to the flange can cause damage to the flange or the toilet itself. It’s important to torque the bolts to the manufacturer’s recommended specifications to avoid any issues.
Uneven or unstable flange placement
One of the common issues that can arise during the installation of a toilet flange on a wood floor is uneven or unstable placement. This can lead to a wobbly toilet or potential leaks. Here are some steps to address this problem:
- Check for any obstructions or debris that may be preventing the flange from sitting flush on the floor.
- Use shims or wooden blocks to level the flange if it is uneven or sits above the floor surface.
- Ensure the flange is securely attached to the subfloor using screws or other appropriate fasteners.
Leaks or odors after installation
After installing the toilet flange on a wood floor, it’s important to address any leaks or odors that may occur. Here are some steps to tackle this problem:
- Inspect the wax ring for any signs of damage or misalignment. A faulty wax ring can lead to leaks or odors. Replace the wax ring if necessary.
- Check for any cracks or damage to the toilet bowl or the flange itself. A cracked toilet or a damaged flange can also result in leaks or odors. Replace any faulty components as needed.
- Ensure the toilet is properly sealed to the flange. Apply a thin bead of silicone caulk around the base of the toilet to create a water-tight seal.
Dealing with damaged or deteriorated wood floors
If you are installing a toilet flange on a wood floor that is damaged or deteriorated, it’s crucial to take the necessary steps to ensure a successful installation:
- Assess the extent of the damage to determine if the wood floor needs repair or replacement. If the damage is limited to a small area, you may be able to patch or fill it with wood filler.
- If the damage is severe or widespread, it may be necessary to replace the damaged sections of the wood floor. Cut out the damaged sections and install new plywood or subflooring.
- Once the wood floor has been repaired or replaced, continue with the installation of the toilet flange as described earlier in this guide.
By being aware of these common issues and following the troubleshooting steps provided above, you can successfully install a toilet flange on a wood floor and avoid any potential problems down the line.
Maintenance And Care Tips
Regular inspection and maintenance to prevent future issues
Properly maintaining and inspecting your toilet flange on a regular basis is crucial to prevent future issues. By taking proactive measures, you can extend the lifespan of your toilet flange and avoid potential problems down the line.
Here are a few important tips to keep in mind:
- Regularly inspect the toilet flange for any signs of wear, rust, or damage. Look for cracks or loose bolts that may indicate a need for repairs or replacement.
- Ensure that the toilet flange is securely fastened to the wood floor by checking the tightness of the screws or bolts. Loose fittings can lead to leaks or unstable installation.
- Pay attention to any clogging issues or slow draining. This may indicate a blockage in the toilet flange or the surrounding pipes. Use a plunger or a drain snake to clear any debris.
By conducting regular inspections and addressing any potential issues promptly, you can prevent further damage and ensure the long-term functionality of your toilet flange.
Cleaning and preserving the toilet flange and surrounding area
Maintaining cleanliness and preserving the toilet flange and its surrounding area not only improves the overall aesthetics but also helps to prevent potential issues.
Here’s how you can keep your toilet flange clean and well-preserved:
- Regularly clean the toilet flange and its surface using mild cleaning agents or specialized toilet cleaners. Avoid using harsh chemicals or abrasive scrubbers that may damage the flange.
- Wipe away any excess water or moisture that may accumulate around the base of the toilet. Moisture can lead to mildew or rotting of surrounding wood flooring.
- Inspect the seal around the toilet base and ensure it is well-maintained. Replace the wax ring if it appears worn out or damaged to prevent leaks.
By maintaining cleanliness and preserving the toilet flange and its surrounding area, you can minimize the risk of mold, mildew, and other potential issues that may compromise the overall functionality of your toilet system.
Signs and symptoms that indicate the need for repairs or replacement
It’s important to be aware of the signs and symptoms that indicate the need for repairs or replacement of the toilet flange. Ignoring these signals can lead to more serious problems down the line.
Keep an eye out for the following red flags:
| Signs and Symptoms | Possible Issues |
|---|---|
| Leaking around the base of the toilet | Worn-out wax ring or damaged toilet flange |
| Unstable toilet or rocking motion | Loose or improperly installed toilet flange |
| Frequent clogging or slow draining | Blockage in the toilet flange or the surrounding plumbing |
| Rust or corrosion on the toilet flange | Severe wear or water damage |
If you notice any of these signs, it’s crucial to address the problem promptly. Repairing or replacing the toilet flange in a timely manner can prevent further damage to your bathroom floor and the overall plumbing system.
By being proactive in maintaining and caring for your toilet flange, you can ensure its longevity and avoid costly repairs or replacements in the future.
Frequently Asked Questions
Should Toilet Flange Go On Floor Or Subfloor?
The toilet flange should go on the floor, not the subfloor. It provides stability and a solid connection between the toilet and the plumbing system. Placing it on the subfloor could lead to leaks and other problems. Keep the flange on the floor for optimal performance.
Are You Supposed To Glue A Toilet Flange?
No, you should not glue a toilet flange. Toilet flanges are typically bolted to the floor to provide stability. Gluing can cause problems during repairs or replacements. It’s important to follow proper installation guidelines for a secure and functional toilet.
Does A Toilet Flange Need To Be Screwed To The Floor?
Yes, a toilet flange needs to be screwed to the floor. It provides stability and prevents leaks.
How Do You Attach A Flange To Wood?
To attach a flange to wood, follow these steps: 1. Mark the location on the wood where the flange will be attached. 2. Drill pilot holes into the wood at the marked spots. 3. Place the flange over the pilot holes and align it properly.
4. Insert screws through the flange holes into the pilot holes. 5. Tighten the screws securely to attach the flange to the wood.
Conclusion
To conclude, installing a toilet flange on a wood floor may seem like a daunting task, but with the right knowledge and tools, it can be done easily. Remember to measure and mark the position of the flange accurately, use appropriate screws for securing it to the floor, and ensure a tight seal with the wax ring.
Taking these steps will ensure a stable and leak-free toilet installation, providing you with peace of mind and a properly functioning bathroom fixture.