Install a soaking tub by measuring the space, preparing the area, assembling the tub, and connecting the plumbing. A soaking tub is a luxurious addition to any bathroom that allows you to relax and unwind after a long day.
If you’re considering installing one in your own home, it’s important to carefully plan and execute the installation process. This guide will walk you through the steps required to install a soaking tub, including measuring the space, preparing the area, assembling the tub, and connecting the plumbing.
By following these steps, you’ll be able to enjoy the comforts of a soothing soak in your new tub in no time.
Factors To Consider When Selecting A Soaking Tub
When it comes to creating a luxurious and relaxing bathing experience, a soaking tub is a perfect addition to any bathroom. But with so many options available, selecting the right soaking tub can be an overwhelming task. To help you make an informed decision, here are the key factors to consider when choosing a soaking tub:
Size and Shape
The size and shape of the soaking tub play a crucial role in both the visual appeal and functionality of your bathroom. Consider the available space in your bathroom and the number of users who will be enjoying the tub. A larger tub may provide a more spacious and indulgent experience, ideal for those looking for a luxury retreat. On the other hand, a smaller tub can be a great space-saving option for those with limited bathroom space. Additionally, the shape of the tub will contribute to the overall aesthetic of your bathroom. Popular options include oval, rectangular, square, and asymmetrical designs.
Material Options
The material of the soaking tub not only affects its durability but also its visual appeal and maintenance requirements. Here are some popular material options to consider:
- Acrylic: Acrylic tubs are lightweight, affordable, and easy to clean. They also retain heat well, ensuring a warm and comfortable bathing experience.
- Cast Iron: Cast iron tubs are known for their durability and classic charm. They are heavier than other materials but provide excellent heat retention.
- Stone: For a truly luxurious and spa-like feel, stone tubs offer a natural and unique look. Keep in mind that they require regular sealing to maintain their beauty.
Freestanding or Built-in
Another decision to make when selecting a soaking tub is whether you want a freestanding or built-in option. Freestanding tubs are elegant and eye-catching, making them a focal point of the bathroom. They can be placed anywhere in the bathroom and offer more design flexibility. On the other hand, built-in tubs are integrated into the surrounding structure, providing a streamlined and seamless look. They are often more space-efficient, making them a great choice for smaller bathrooms.
By considering these factors, you can find the perfect soaking tub that meets your unique preferences and bathroom requirements. Whether you opt for a freestanding or built-in tub, and choose a material that suits your style, your soaking tub will undoubtedly elevate the ambiance and comfort of your bathing experience.
Measuring And Assessing Space
Before installing a soaking tub, it is crucial to measure and assess the available space in your bathroom. This step is essential to ensure that the tub fits perfectly and functions optimally in your space. In this section, we will discuss the key considerations for measuring and assessing space when installing a soaking tub.
Determining the Right Tub Size
The first step in measuring your space is to determine the right tub size. Consider the factors below to make an informed decision:
- Bathroom Dimensions: Measure the length, width, and height of your bathroom. This will give you an idea of the maximum tub size that can comfortably fit within the space.
- Layout and Configuration: Take note of the layout and configuration of your bathroom. Identify any obstacles, such as doors, windows, or fixtures, that may affect the tub installation process.
- User Needs and Preferences: Consider the number of people who will be using the tub and their preferences. If you enjoy a spacious bathing experience, a larger tub might be suitable. However, if space is limited, a smaller tub can still provide a comfortable soak.
By considering these factors, you can determine the right tub size that fits well within your bathroom space.
Checking Plumbing and Drainage
Once you have determined the tub size, it is important to check the plumbing and drainage in your bathroom. This step will ensure that your tub can be properly connected to the existing plumbing system. Consider the following:
- Water Supply: Assess the location of your water supply lines and ensure they are easily accessible for connecting to the tub.
- Drainage: Examine the existing drainage system and ensure that it can handle the additional water volume from the tub. If necessary, consult a professional plumber to make any necessary modifications.
- Ventilation: Adequate ventilation is essential to prevent moisture buildup in the bathroom. Confirm that your existing ventilation system is sufficient to handle the increased humidity that may result from the soaking tub installation.
By checking and addressing any plumbing and drainage considerations, you can avoid potential issues and ensure a smooth installation process for your soaking tub.
Assessing Structural Support
Lastly, it is important to assess the structural support in your bathroom to ensure it can accommodate the weight of the soaking tub. Follow these guidelines:
- Flooring: Determine the type and condition of your bathroom flooring. Make sure it is strong enough to support the weight of the tub when filled with water.
- Wall Strength: Assess the walls where the tub will be installed. Check for any signs of water damage, rot, or weak spots. Reinforce the walls if necessary to ensure they can support the tub’s weight.
- Professional Evaluation: If you are unsure about the structural integrity of your bathroom, consider consulting a professional contractor or structural engineer to assess the space and provide recommendations.
By assessing the structural support of your bathroom, you can ensure that the installation of your soaking tub is both safe and secure.
Tools Needed For Installation
Installing a soaking tub can be a great way to add a touch of luxury to your bathroom and create a relaxing oasis in your own home. While hiring a professional can be an option, installing a soaking tub yourself can be a rewarding DIY project. However, before you begin, it’s important to have the right tools to ensure a successful installation. Here are the essential tools you’ll need:
Wrench
A wrench is a must-have tool for any soaking tub installation. This versatile tool will come in handy for tightening and loosening various nuts and bolts throughout the installation process. It’s important to choose a wrench that matches the size of the fittings on your tub to ensure a secure and leak-free installation. A quality adjustable wrench is often the best choice, as it can be adjusted to fit different sizes, making it a versatile addition to your toolkit.
Screwdriver
A screwdriver is another essential tool that you’ll need for installing a soaking tub. From removing old fixtures to securing new ones, a screwdriver will be your go-to tool for all things related to screws. Make sure to have both a flathead and a Phillips head screwdriver in your toolkit, as different types of screws may require different tools.
Level
A level is an indispensable tool for ensuring that your soaking tub is installed perfectly level. Uneven installation not only affects the appearance of your tub but can also lead to water pooling and drainage issues. By placing a level on the rim of the tub, you can easily adjust it until it’s perfectly aligned. A bubble level is a popular choice, as it provides a visual indication of whether the tub is level or not.
Pipe Cutter
During the installation process, you may need to cut pipes to ensure a proper fit for your soaking tub. A pipe cutter is a handy tool that allows you to make clean, precise cuts on copper, steel, or plastic pipes. This tool makes it easy to create smooth edges, ensuring a tight and secure connection. When selecting a pipe cutter, look for one with a sharp cutting wheel and a sturdy construction to ensure longevity.
By having these essential tools ready, you’ll be well-equipped to install your soaking tub and create a relaxing oasis in your bathroom. Remember to take your time during the installation process, following the manufacturer’s instructions and using the right tools for the job. A well-installed soaking tub will not only enhance the aesthetic appeal of your bathroom but will also provide you with a luxurious and indulgent bathing experience for years to come.
Materials Required For Installation
When it comes to installing a soaking tub, having the right materials is essential for a smooth and successful installation process. Ensuring you have all the necessary materials on hand will not only save you time but also prevent any unnecessary delays or hassle. In this section, we will discuss the various materials required for installing a soaking tub, including the soaking tub itself, the drain and overflow assembly, plumbing pipes and fittings, and caulk and sealant.
Soaking Tub
The first and foremost material required for installation is, of course, the soaking tub itself. It is important to choose a soaking tub that suits your preferences and fits in the designated space. Soaking tubs come in various sizes, shapes, and materials, such as acrylic, cast iron, or fiberglass. Consider factors like the available space, comfort, and style before making your selection. Make sure to have the soaking tub ready before starting the installation process.
Drain and Overflow Assembly
The drain and overflow assembly are crucial for ensuring proper drainage and preventing any potential leaks. This assembly usually includes a drain, overflow pipe, and trim kit. It is important to choose a drain and overflow assembly that matches the specifications of your soaking tub. The trim kit adds a finishing touch to the installation, providing both functionality and aesthetic appeal.
Plumbing Pipes and Fittings
Plumbing pipes and fittings are essential for connecting the soaking tub to the existing plumbing system in your home. You will need pipes and fittings that are the correct size and meet the necessary building codes. Typically, you will require components such as PVC or PEX pipes, connectors, adapters, and valves. It is advisable to consult a professional plumber to ensure the appropriate selection and installation of plumbing pipes and fittings.
Caulk and Sealant
Lastly, caulking and sealant play a vital role in preventing water damage and maintaining a watertight seal. You will need a high-quality caulking gun, caulk, and sealant suitable for bathroom and wet environments. These materials are used to seal the gaps and joints between the soaking tub and the surrounding walls or floor. Proper and thorough caulking will reduce the risk of water leakage and protect against moisture-related issues such as mold or mildew.
Removing The Existing Tub Or Shower
Before installing a new soaking tub, you’ll need to remove the existing tub or shower enclosure. This process involves disconnecting the water supply, removing the old tub or shower enclosure, and preparing the area for the new tub.
Disconnecting Water Supply
The first step in removing the existing tub or shower is to disconnect the water supply. This may require shutting off the main water valve to the house or turning off the water supply valves specifically for the bathroom. Once the water supply is turned off, you will need to drain the remaining water from the pipes.
To drain the water, you can either open a faucet at a lower height to let the water flow out or use a bucket or container to catch the water and prevent any mess. This step is crucial to ensure a safe and dry work environment during the removal process.
Removing the Old Tub or Shower Enclosure
With the water supply disconnected and the area drained, you can now focus on removing the old tub or shower enclosure. The specific steps for removal will depend on the type of tub or shower you have.
If you have a tub, start by unscrewing or removing any screws or fasteners that secure the tub to the wall or floor. You may need to use a utility knife to cut through the caulking or adhesive that seals the tub in place. Once any attachments are removed, you can carefully lift and remove the tub from the area.
If you have a shower enclosure, the removal process may involve unscrewing or removing panels, doors, or tracks. Again, depending on the type of enclosure, you may need to use a utility knife to cut through any caulking or adhesive. Take care when removing these components to prevent any damage to the surrounding area.
Preparing the Area for the New Tub
After removing the old tub or shower enclosure, it’s important to prepare the area for the new soaking tub. This includes cleaning the space, repairing any damage or leaks, and making sure the area is level and ready for installation.
Start by thoroughly cleaning the area to remove any dirt, debris, or residue left behind from the old tub or shower. Inspect the plumbing connections and make any necessary repairs or replacements to ensure there are no leaks or issues before installing the new tub.
Next, check the floor for levelness. Use a level tool to ensure the floor is flat and even to provide a solid foundation for the new tub. If needed, make any adjustments or repairs to the floor before proceeding with the installation.
Lastly, measure the dimensions of the new soaking tub and compare them to the available space. This will help you determine if any modifications or adjustments need to be made to the existing plumbing or framing to accommodate the new tub properly.
By following these steps to remove the existing tub or shower enclosure and prepare the area for the new tub, you’ll be ready to proceed with the installation process. With a little bit of planning and preparation, you can enjoy the relaxing experience of a soaking tub in your bathroom.
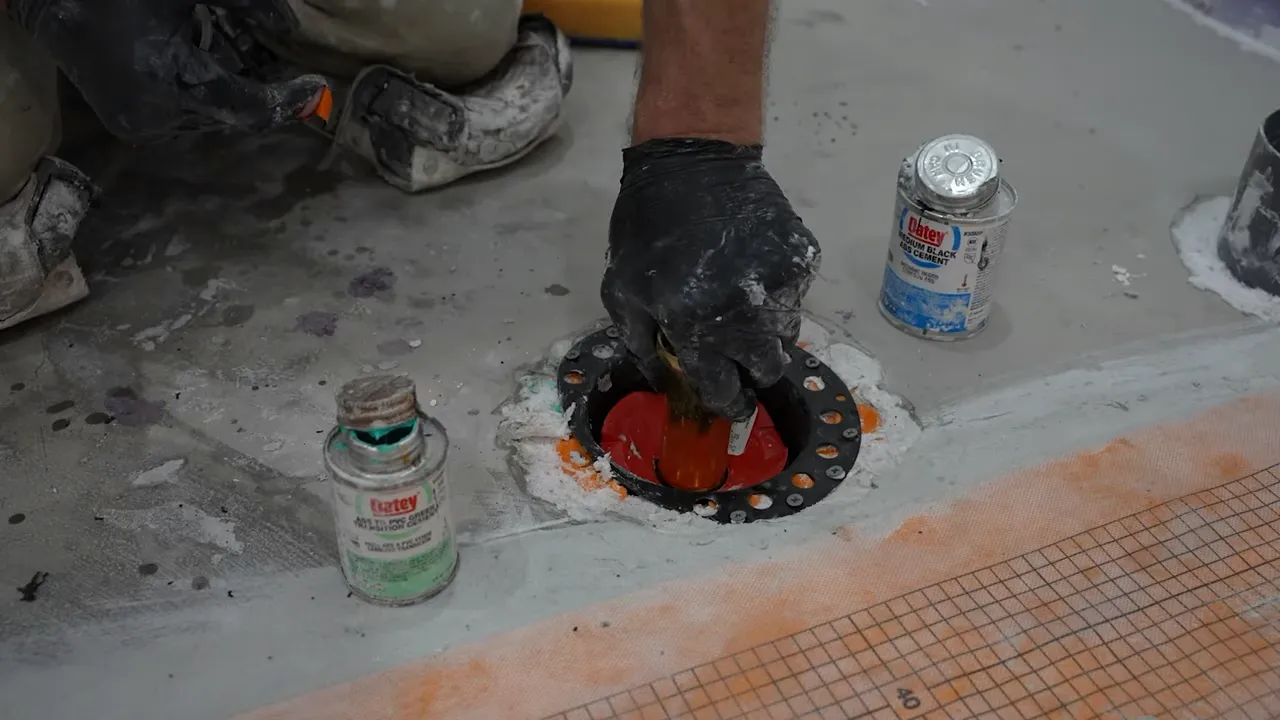
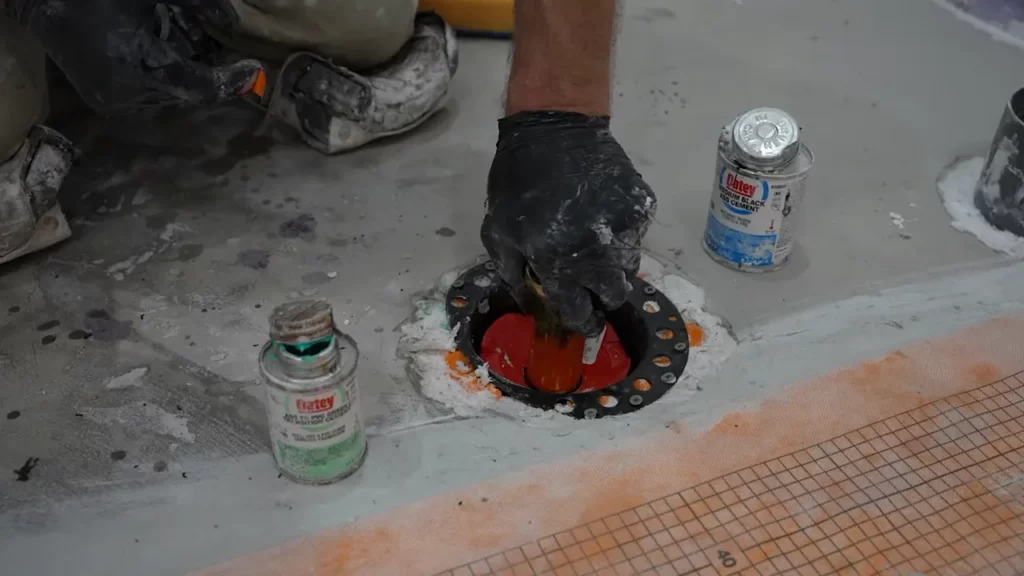
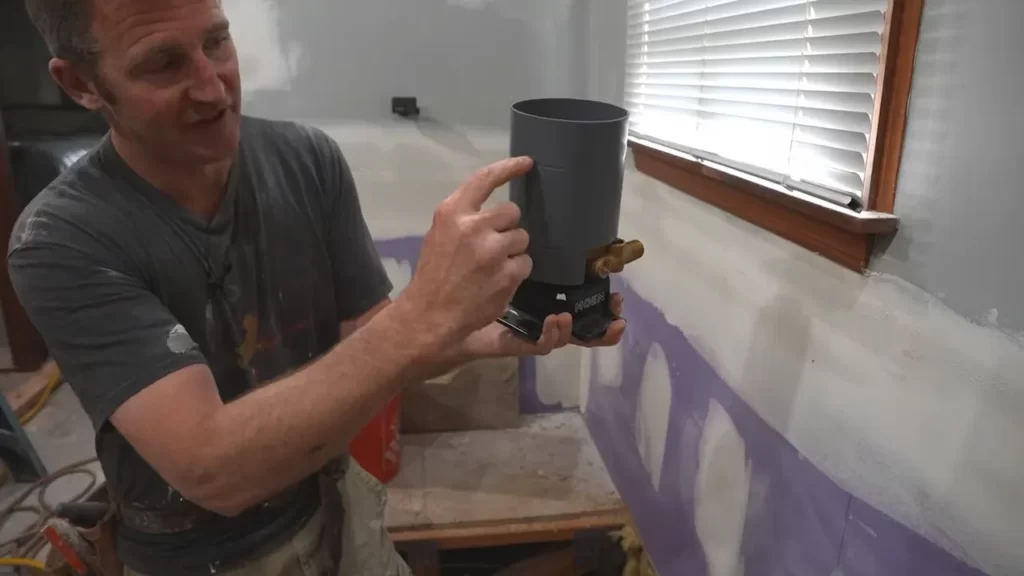
Installing The Drain And Overflow Assembly
Once you’ve chosen and prepared your soaking tub, it’s time to move on to the essential step of installing the drain and overflow assembly. This crucial part of the process ensures that water drains properly from the tub and prevents any potential overflow. In this section, we will guide you through the steps of configuring the drain and overflow pipes and connecting the assembly to the tub.
Configuring the Drain and Overflow Pipes
The first step in installing the drain and overflow assembly is to configure the drain and overflow pipes. These pipes should be measured and cut to the appropriate lengths, keeping in mind the specific dimensions of your soaking tub and the location of the existing plumbing.
Here’s how you can configure the drain and overflow pipes:
- Measure the distance between the drain opening on the tub and the existing drainpipe.
- Cut the drainpipe to the appropriate length, allowing for any necessary adjustments.
- Attach the drainpipe to the tub drain opening, ensuring a secure and watertight connection.
- Next, measure the distance between the overflow opening on the tub and the existing overflow pipe.
- Cut the overflow pipe to the appropriate length, making sure to account for any necessary adjustments.
- Attach the overflow pipe to the tub’s overflow opening, ensuring a tight and secure connection.
By following these steps, you will configure the drain and overflow pipes correctly and prepare them for the next stage of the installation process.
Connecting the Assembly to the Tub
With the drain and overflow pipes successfully configured, it’s time to connect the assembly to the soaking tub. This step involves connecting the pipes and ensuring that everything is properly aligned for optimal functionality.
Here’s a step-by-step guide to help you connect the assembly to the tub:
- Apply plumber’s putty or silicone caulk around the drain flange to create a watertight seal.
- Insert the drain flange into the drain opening of the tub, making sure it sits flush against the surface.
- Tighten the drain flange using a drain wrench or pliers, ensuring a secure and snug fit.
- Attach the drainpipe to the drain flange, using a suitable connector or trap adapter if needed.
- Apply plumber’s tape to the threads of the overflow pipe.
- Insert the overflow pipe into the overflow opening of the tub, aligning it properly.
- Secure the overflow pipe by tightening the locknut or collar.
- Connect the overflow pipe to the drainpipe, ensuring a secure and leak-free connection.
Once you’ve followed these steps and connected the assembly to the tub, you can proceed with the final stages of installing your soaking tub, such as sealing the tub to the floor and testing the drain and overflow for any potential leaks.
By configuring the drain and overflow pipes and connecting the assembly to the tub correctly, you are ensuring the efficient functionality of your soaking tub for years to come.+
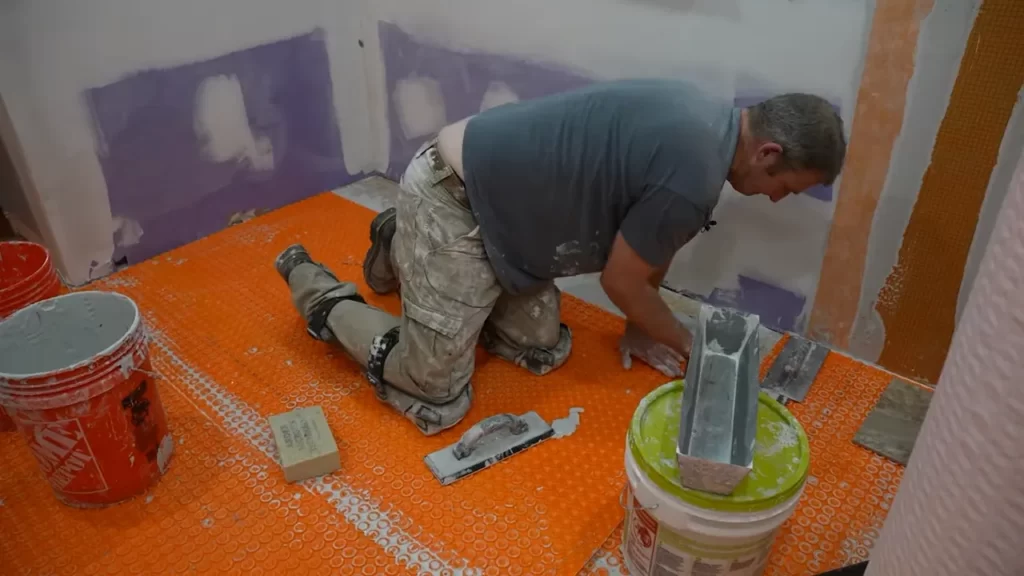
Fitting The Soaking Tub Into Place
Once you have chosen the perfect soaking tub for your bathroom, the next step is to fit it into place. Proper installation is crucial to ensure that your tub is secure, level, and functional. In this section, we will guide you through the process of fitting the soaking tub into place, covering important steps such as adjusting the tub position, securing it to the floor and wall, and checking for levelness.
Adjusting the Tub Position
Before securing the tub, it is important to adjust its position to ensure proper alignment and fit within your bathroom space. Start by measuring the area where the tub will be placed, making sure to account for any necessary clearances. Depending on your specific tub model, you may need to align it with existing plumbing fixtures such as drains and faucets.
Once you have determined the correct position, carefully maneuver the soaking tub into place. This may require the assistance of another person to ensure the tub is lifted and positioned safely. Take note of any adjustments or modifications that need to be made to the plumbing connections or surrounding structure as you fit the tub.
Securing the Tub to the Floor and Wall
After adjusting the tub position, the next step is to secure it to both the floor and wall. This is essential to prevent any movement or shifting of the tub, which can cause water leakage and structural damage. Begin by locating the mounting points on the underside of the tub and marking the corresponding positions on the floor and wall.
Using the appropriate tools, such as screws, anchors, or brackets, secure the tub to the floor and wall. Make sure to follow the manufacturer’s instructions and recommendations for the specific model of soaking tub you have chosen. Double-check the stability of the tub by applying gentle pressure in different directions. If there is any wobble, adjust the mounting points or reinforcements to ensure a secure fit.
Checking for Levelness
To ensure optimal comfort and functionality, it is crucial to check the levelness of your soaking tub. An uneven tub can lead to discomfort while bathing and potential drainage issues. Begin by using a level tool to determine if the tub is perfectly aligned horizontally and vertically.
If the tub is not level, adjust the supporting structure beneath the tub by adding shims or making necessary modifications. This will help level out the tub and create a stable base. Be sure to recheck the levelness before finalizing the installation.
Installation is a critical step in the process of adding a soaking tub to your bathroom. By carefully adjusting the tub’s position, securing it to the floor and wall, and checking for levelness, you can create a sturdy and comfortable bathing space. Enjoy the relaxation and serenity of your newly installed soaking tub!
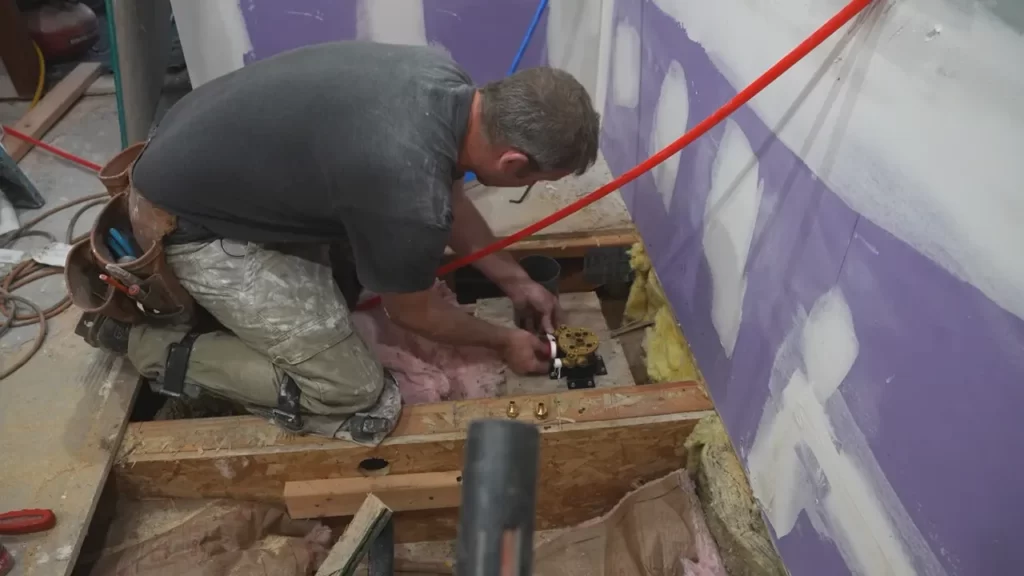
Connecting The Plumbing
Connecting the plumbing is a crucial step in the installation process of a soaking tub. It involves attaching the water supply pipes, connecting the drain pipes, and testing for leaks. By following these steps, you can ensure a properly functioning and leak-free soaking tub.
Attaching the Water Supply Pipes
The first step in connecting the plumbing is attaching the water supply pipes. To do this, follow these simple steps:
- Start by identifying the hot and cold water supply lines in your bathroom. These are usually located behind the walls or under the floor.
- Measure and cut the appropriate length of piping needed to reach the soaking tub.
- Connect one end of the pipes to the hot and cold water supply lines using pipe connectors or compression fittings.
- Tighten the connectors using a wrench to ensure a secure fit.
- Next, attach the other end of the pipes to the corresponding hot and cold water inlets on the soaking tub. Again, use pipe connectors or compression fittings and tighten them securely.
Connecting the Drain Pipes
After attaching the water supply pipes, the next step is connecting the drain pipes. This process involves the following steps:
- Locate the drain opening on the soaking tub. It is usually positioned at the bottom.
- Measure and cut the appropriate length of drainpipe needed to reach the main drain line.
- Attach one end of the drainpipe to the drain opening on the soaking tub, securing it tightly.
- Connect the other end of the drainpipe to the main drain line in your bathroom. Use a drain connector or a P-trap to ensure proper drainage.
- Ensure that all connections are secure and tight by using plumber’s tape or pipe fittings.
Testing for Leaks
Once you have connected the water supply and drain pipes, it is essential to test for leaks. By doing this, you can address any potential issues before finalizing the installation. Here’s how you can test for leaks:
- Fill the soaking tub with water.
- Observe the connections and pipes closely for any signs of leakage.
- If you notice any leaks, tighten the connections further or replace any faulty components.
- Repeat the process until no leaks are detected.
By following these steps and ensuring all connections are secure and leak-free, you can successfully connect the plumbing for your new soaking tub. This ensures a reliable and enjoyable bathing experience.
Caulking And Sealing
When it comes to installing a soaking tub, caulking and sealing play a crucial role in ensuring a long-lasting and leak-free installation. Properly sealing the edges of the tub not only prevents water damage but also adds an aesthetically pleasing finish to your bathroom. In this section, we will guide you through the process of applying caulk to the edges of the tub and ensuring a watertight seal, giving you confidence in your DIY installation.
Applying Caulk to the Edges of the Tub
Before applying caulk, ensure that the tub surface is clean and dry. Using a mild soap and water solution, clean the edges of the tub and remove any dirt or debris. Once the surface is clean, use a caulking gun to apply a thin, even bead of caulk along the joint between the tub and the surrounding tile or wall. Be sure to work in small sections, applying the caulk evenly and smoothly.
Ensuring a Watertight Seal
To ensure a watertight seal, it is important to choose the right type of caulk for your soaking tub installation. Look for a high-quality silicone-based caulk that is specifically designed for use in wet areas. This type of caulk is flexible, durable, and resistant to mold and mildew. It is also important to check the expiration date of the caulk before use, as expired caulk may not adhere properly.
When applying caulk, make sure to fill the entire gap between the tub and the surrounding surface. Use a caulk smoothing tool or your fingertip to smooth the caulk into the joint, ensuring it fills all the crevices. This will help create a seamless seal and prevent any water from seeping through.
Additional Tips for Caulking and Sealing
Here are a few additional tips to keep in mind when caulking and sealing your soaking tub:
- Ensure that the caulk is applied evenly and smoothly along the entire length of the joint.
- Allow the caulk to dry and cure according to the manufacturer’s instructions before using the tub.
- Regularly inspect the caulked areas for any signs of wear or damage and reapply caulk as needed.
- If you notice any leaks or water damage, address them immediately to prevent further damage.
Cleaning And Maintaining Your Soaking Tub
Cleaning and maintaining your soaking tub is essential to ensure its longevity and a hygienic bathing experience. Regular cleaning routines, prevention of mold and mildew, and troubleshooting common issues are crucial to keep your soaking tub in pristine condition. In this section, we will explore these aspects in detail.
Regular Cleaning Routine
To maintain your soaking tub’s cleanliness, it’s important to establish a regular cleaning routine. Here are some steps to follow:
- Start by wiping down the tub’s surface with a mild, non-abrasive cleaner. Avoid harsh chemicals or abrasive scrubbers that can damage the tub’s finish.
- Rinse the tub thoroughly with warm water to remove any residue from the cleaning solution.
- Pay special attention to the drain and overflow areas, using an old toothbrush or a small brush to remove any dirt or grime that may have accumulated.
- Dry the tub completely with a soft, absorbent cloth to prevent water spots or streaks.
Regular cleaning not only keeps your soaking tub looking great but also ensures a hygienic bathing environment.
Prevention of Mold and Mildew
Mold and mildew thrive in damp environments, making it important to take preventive measures to keep them at bay. Here’s what you can do:
- After each use, wipe the tub’s surface dry to remove any excess moisture that can promote mold and mildew growth.
- Ensure that the bathroom is well-ventilated. Open windows or use an exhaust fan to reduce humidity levels.
- Consider using a mold and mildew-resistant silicone caulking around the edges of the tub to prevent water seepage and potential mold growth.
- Regularly inspect the caulking and replace it if it shows signs of wear or damage.
Taking these preventive measures will help keep mold and mildew at bay, ensuring a clean and pleasant soaking experience every time.
Troubleshooting Common Issues
Even with regular maintenance, you might encounter some common issues with your soaking tub. Here are a few troubleshooting tips:
| Issue | Solution |
|---|---|
| Stains | Use a soft cloth and a mixture of mild detergent and water to gently clean the stained area. Avoid using abrasive cleaners, as they can damage the tub’s surface. |
| Drainage Problems | Check for any obstructions in the drain or overflow areas. Use a plunger or seek professional help if the problem persists. |
| Scratches | For minor scratches, try using a non-abrasive cleaner and a soft cloth to buff them out. Deeper scratches may require professional repair. |
By following these troubleshooting tips, you can address common issues promptly and ensure the longevity of your soaking tub.
Regular cleaning, mold prevention, and troubleshooting techniques are vital for maximizing the lifespan and hygiene of your soaking tub. Establishing a regular cleaning routine, adopting preventive measures, and addressing common issues promptly will contribute to a pristine soaking experience every time.
Frequently Asked Questions
How Hard Is It To Install A Soaking Tub?
Installing a soaking tub is not difficult. With basic plumbing skills, you can connect water supply and drain pipes. Place the tub in position, secure it, and seal joints with caulk. However, if you’re unsure, it’s recommended to hire a professional for proper installation.
How Do You Secure A Soaking Tub To The Floor?
To secure a soaking tub, follow these steps: 1. Locate the studs in the floor. 2. Drill holes in the tub’s flange. 3. Attach the tub to the floor using screws. 4. Ensure the tub is level before securing it.
5. Apply silicone caulk around the edges for added stability.
Do You Need To Tile Behind A Soaker Tub?
Yes, it is recommended to tile behind a soaker tub. Tiling provides a waterproof barrier, protecting the wall from potential water damage. It also adds a polished, finished look to the bathroom space.
What Do You Put Under A Bathtub For Support?
Bath tubs need proper support to prevent damage. Common options include wooden or metal frames, adjustable feet, or using a mortar bed to distribute weight evenly. It is important to consult a professional to determine the best support method for your specific bathtub.
Conclusion
Installing a soaking tub doesn’t have to be a daunting task. By following this step-by-step guide, you can transform your bathroom into a luxurious spa-like oasis. Remember to consider the location, measurements, and plumbing requirements before starting the installation process.
With proper planning and the right tools, you can enjoy the ultimate relaxation and unwind in your new soaking tub. Happy soaking!